How to fill in blanks in Excel with the cell above
To fill in the blanks in Excel with the cell above means to copy the value or text from the cell directly above the blank cell and paste it into the blank cell. Filling in the blanks with the cell above is an important technique for maintaining the accuracy and integrity of data in Excel, saving time, facilitating analysis, and enhancing data visualization.

Our dataset contains employee names and their working hours on various days. We need to fill the employee names in the cells below, and we have three methods to do so: using the fill option, using the address of the cell, and using drag. The following steps will explain how to use each of these methods.
Method 1: Fill using the Fill option
Step 1 – Select the range of data

- Select the range of cells that you want to fill (including the cell that contains data to be filled down)
Step 2 – Click on the Fill option
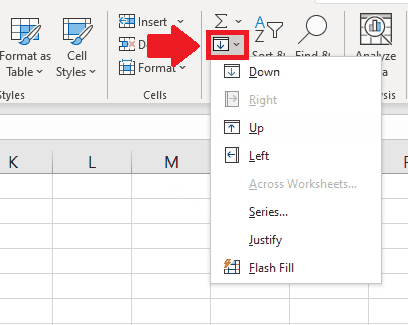
- After selecting the range of cells, click on the Fill option and a dropdown menu will appear
Step 3 – Click on the Down option
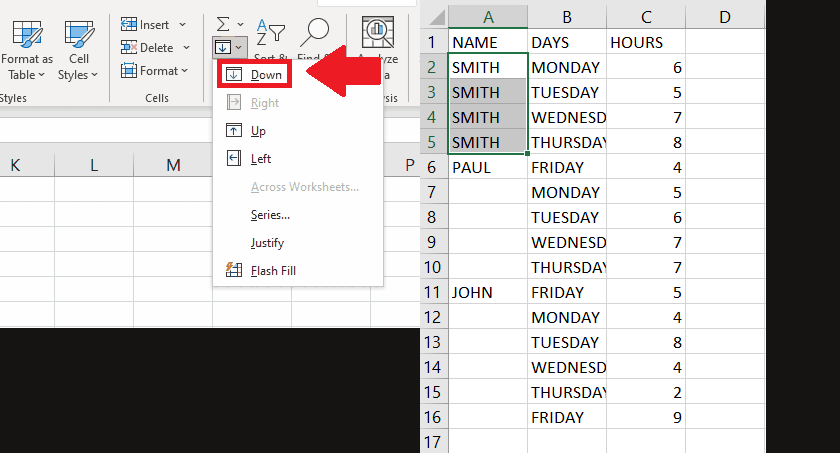
- In the dropdown menu, click on the Down option to get the required result
Method 2: Fill Using the Autofill option
Step 1 – Click on the Cell
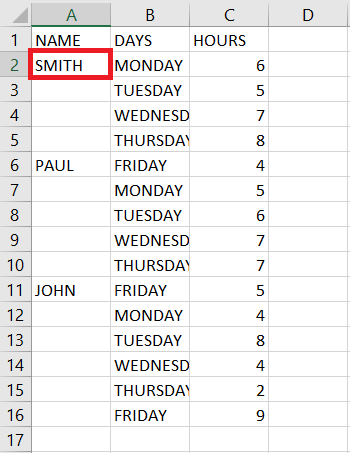
- Click on the cell that contains the data to be filled below
Step 2 – Drag and Drop
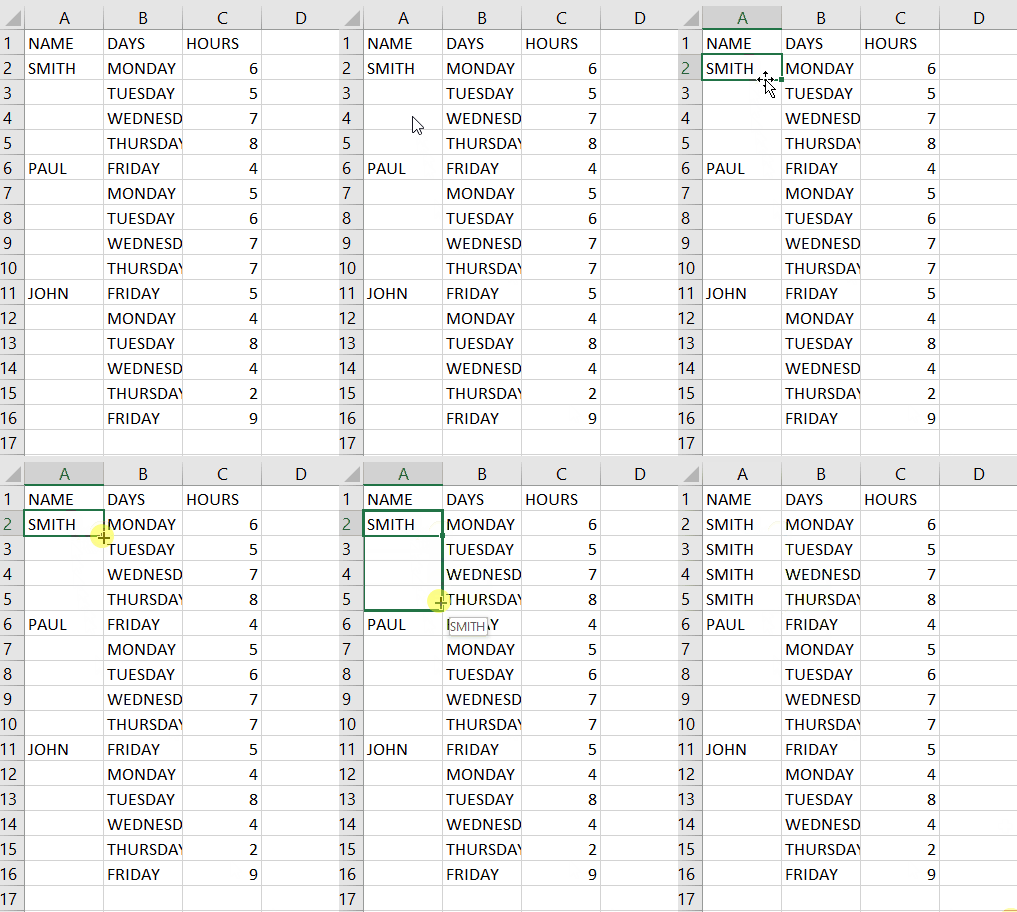
- After clicking on the cell, click on the right bottom of the cell and a + will be shown at the bottom of the cell then drag it to get the required result
Method 3: Fill in using the cell address
Step 1 – Select the range of data

- Select the range of cells you want to fill below with some specific data
Step 2 – Type the address
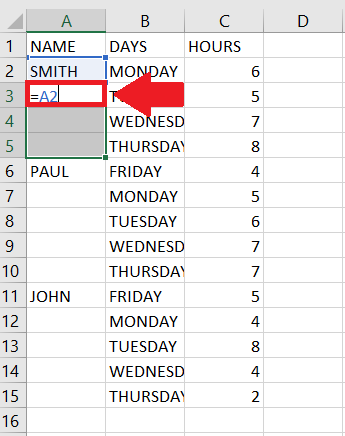
- In the first cell of the selected range, type the address of the cell that contains the data to be filled
Step 3 – Press the Ctrl+Enter key
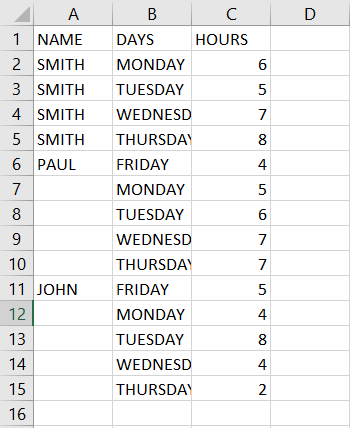
- After typing the address, Press the Ctrl+Enter key to get the required result


