How to fill in blank cells in Excel
In Excel, a blank cell refers to a cell that does not contain any data or value. To fill in blank cells, you can enter data or formulae into them manually, or you can use various built-in features and functions provided by Excel. Filling in blank cells in Excel is important for accurate data analysis, consistency, avoiding errors, and presentation.
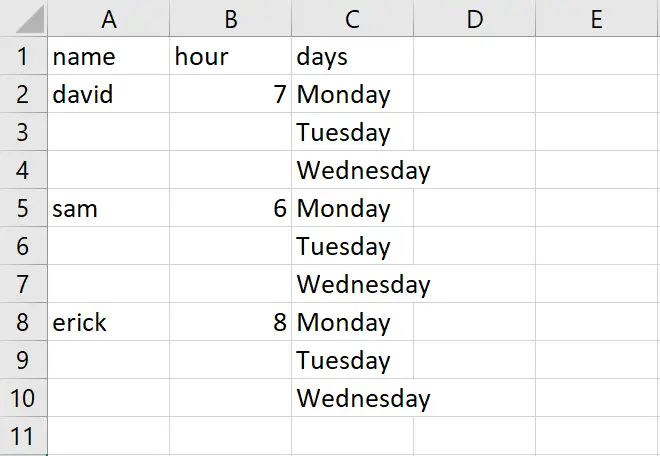
Our dataset displays the workers’ names and their working hours for three days of the week. Even though the working hours are identical, empty spaces were left, which does not appear professional. Consequently, we must fill the empty cells with data written in the cells above. Initially, we identified the blank cells and subsequently filled them. The following steps will assist you in selecting and filling in blank cells
Method 1: Fill the cell with the value of the above cell
Step 1 – Select the range of cell

- Select the range of cells that you want to fill
Step 2 – Press the Ctrl+G key
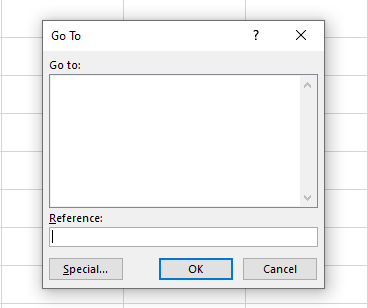
- After selecting the range of cells, press the Ctrl+G keys and a dialog box will appear
Step 3 – Click on Special
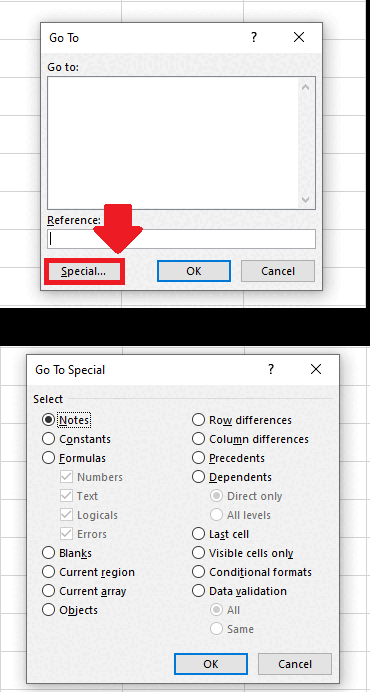
- In the dialog box, click on special and another dialog box will appear
Step 4 – Click on Blanks
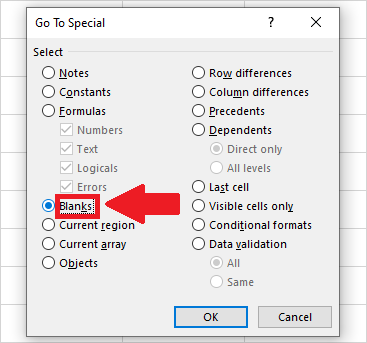
- In the dialog box, select blanks
Step 5 – Click on OK
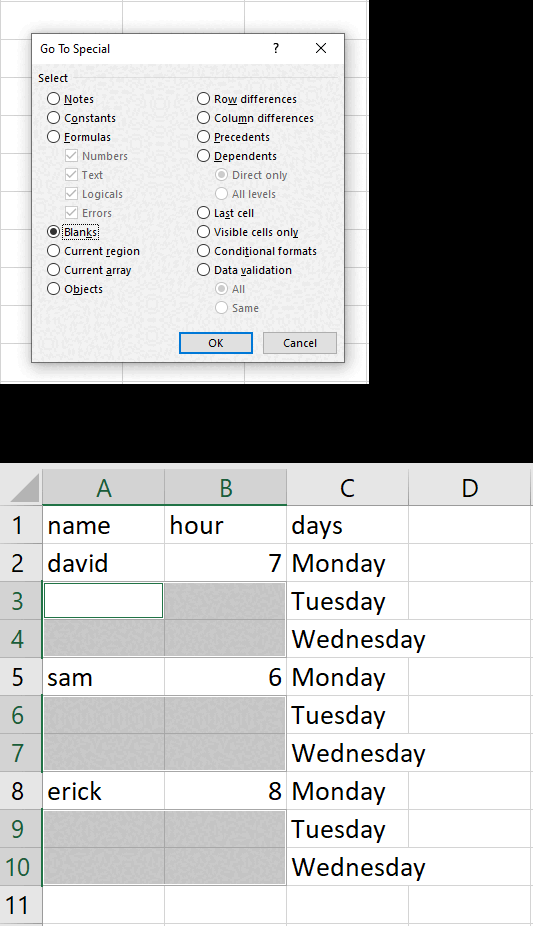
- Click on OK in the dialog box and all the blank cells will get selected
Step 6 – Type “=”
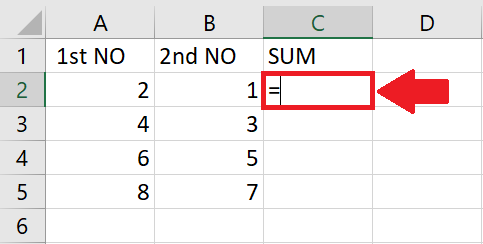
- Type “=” in the first cell to be filled
Step 7 – Click on the first cell
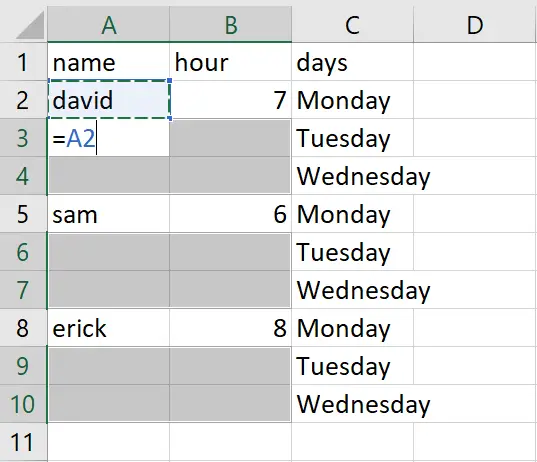
- Click on the first cell of range(whose data is to be filed in blank cells) and its address will be automatically written in the cell(to be filled first)
Step 8 – Press the Ctrl+Enter key
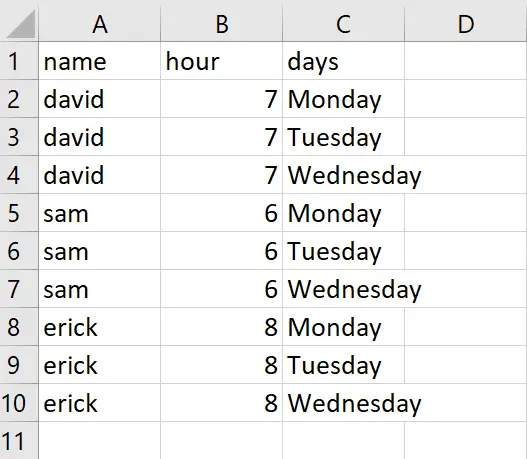
- Press “Ctrl+Enter” to get the required result
Method 2: Fill all cells with the same value
Step 1 – Select the Range of Cell
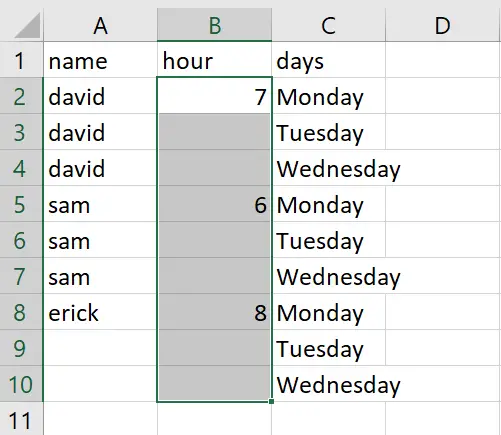
- Select the range of cells that you want to fill
Step 2 – Press the Ctrl+G key
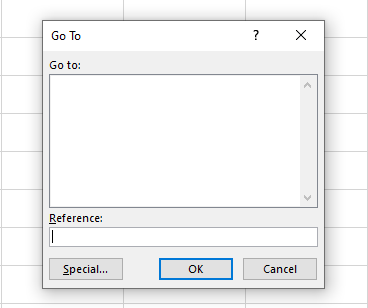
- After selecting the range of cells, press the Ctrl+G keys and a dialog box will appear
Step 3 – Click on Special
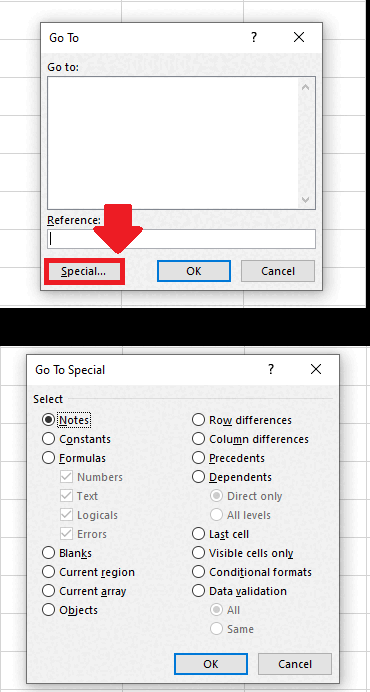
- In the dialog box, click on special and another dialog box will appear
Step 4 – Click on Blanks
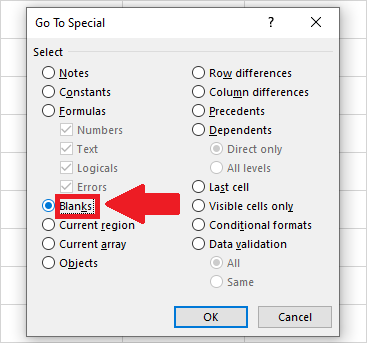
- In the dialog box, select blanks
Step 5 – Click on OK
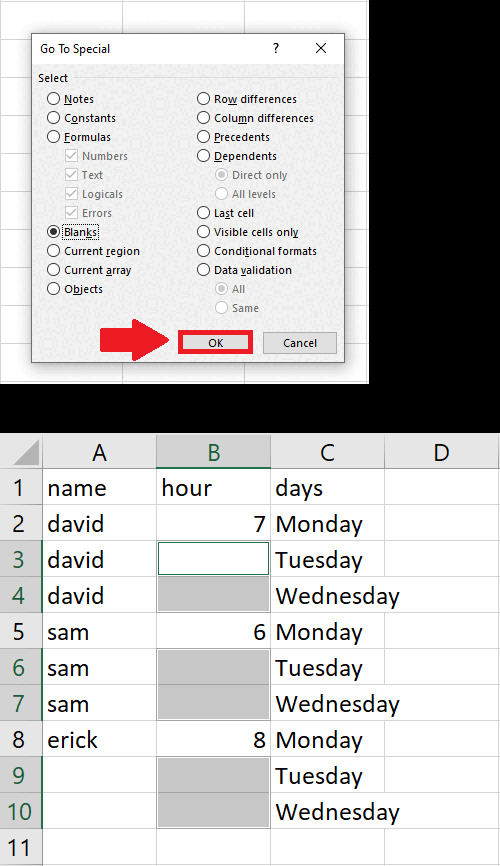
- Click on OK in the dialog box and all the blank cells will get selected
Step 6 – Type the data
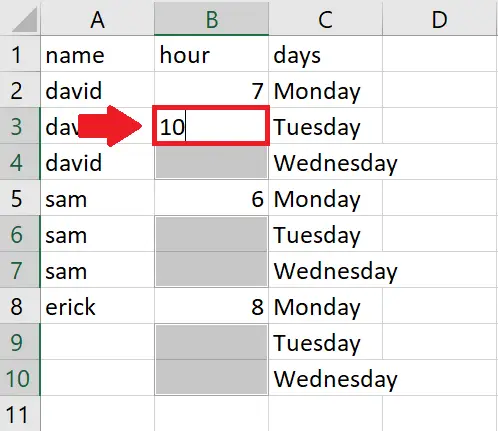
- After selecting the blank cells, type the data you want to show in the blank cells
Step 7 – Press the Ctrl+Enter key
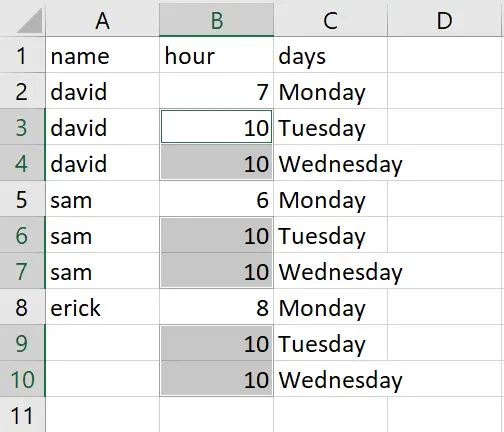
- Press “Ctrl+Enter” to get the required result
Method 3: Fill blank cells with the same Values using the Find and Replace option
Step 1 – Select the Range of Cell
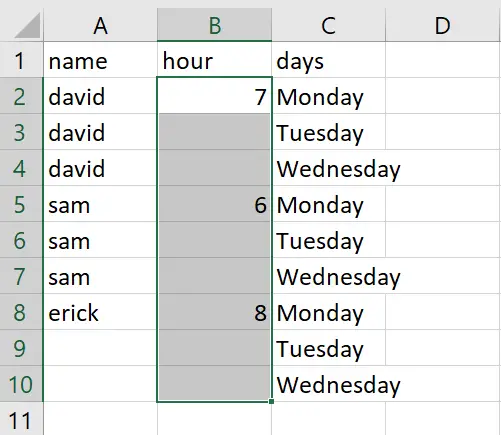
- Select the range of cells that you want to fill
Step 2 – Press the Ctrl+G key
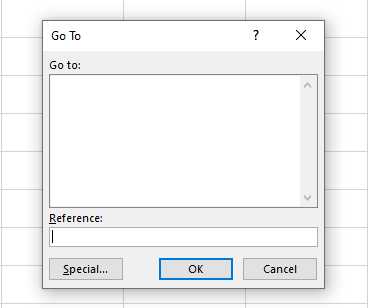
- After selecting the range of cells, press the Ctrl+G keys and a dialog box will appear
Step 3 – Click on Special
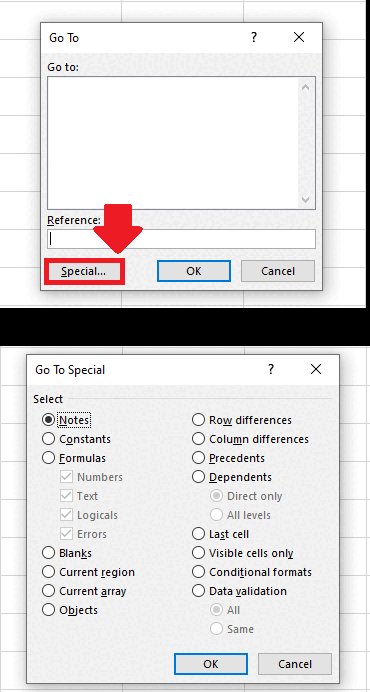
- In the dialog box, click on special and another dialog box will appear
Step 4 – Click on Blanks
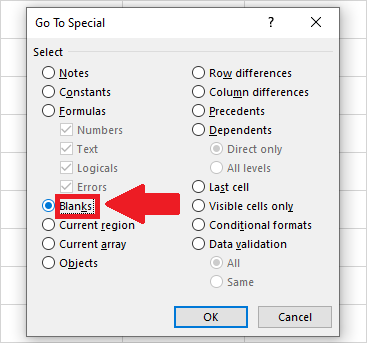
- In the dialog box, select blanks
Step 5 – Click on OK
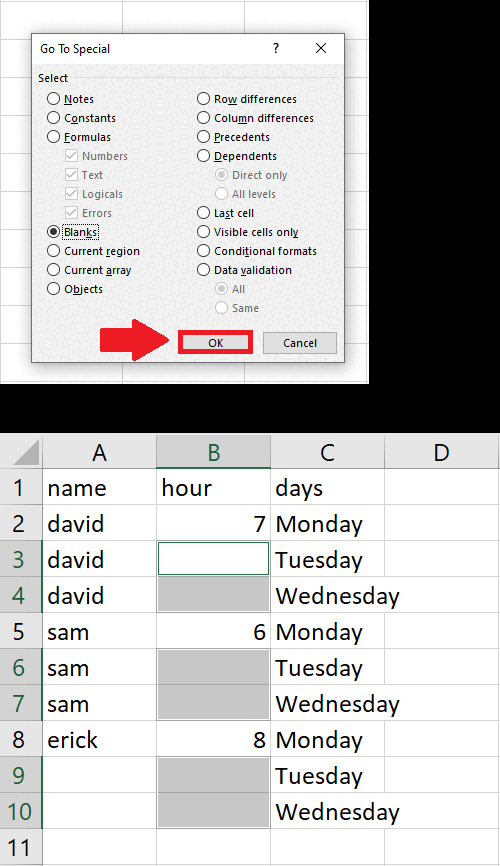
- Click on OK in the dialog box and all the blank cells will get selected
Step 6 – Press the Ctrl+H key
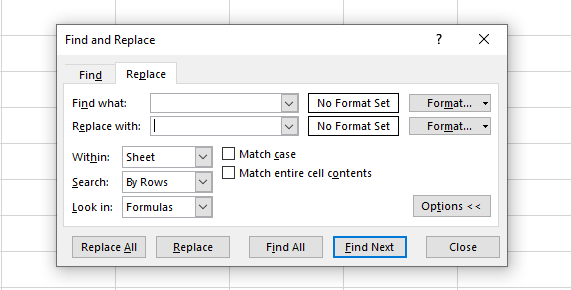
- Press the “Ctrl+H” key, and the Find and Replace dialog box will appear
Step 7 – Type the Data
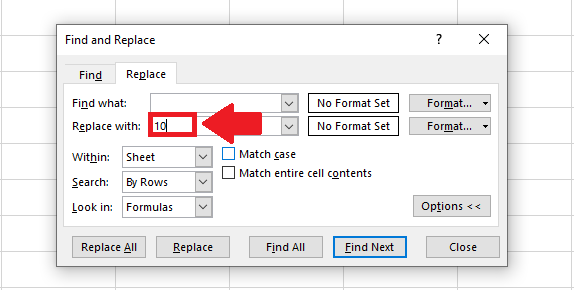
- In the dialog box, type the data you want to fill in the selected cells in the box next to Replace with the option
Step 8 – Click on Replace All option
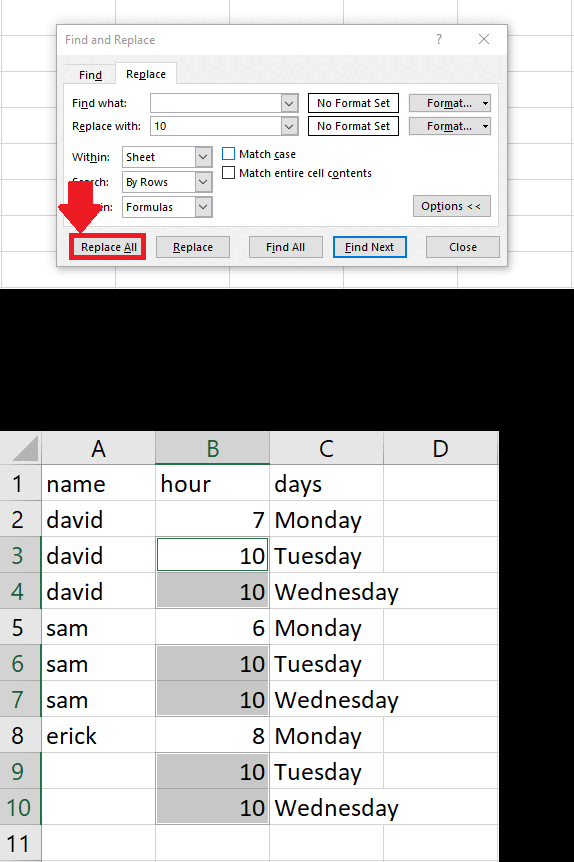
- After typing the data, click on the Replace All option to get the required result.


