
How to do nested if statements in Excel
 By
SpreadCheaters
By
SpreadCheaters
You can watch a video tutorial here.
Excel is widely used for calculations due to the several arithmetic operators and functions that it has. One of the most versatile functions is the IF() function. In its basic form, it evaluates a condition and returns one value if the condition is true and another if the condition is false.
- IF() function: this evaluates a condition and returns one value if true and another if false.
- Syntax: IF(logical test, value if true, value if false)
- logical test: this is any condition that will result in either a true or false value
- value if true: this can be any type of data that will be displayed if the logical test evaluates to true
- value if false: this can be any type of data that will be displayed if the logical test evaluates to false
- Syntax: IF(logical test, value if true, value if false)
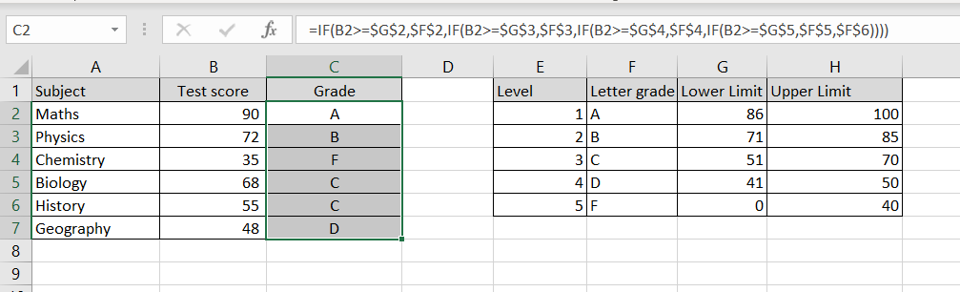
In this example, we will use nested IFs to assign a letter grade to a test score. To evaluate multiple conditions, you can string together multiple IF() functions and these are known as nested Ifs. A nested IF() function combines many IF() functions into one. Let’s break it up to see how it works:
IF(logical test1, value if logical test1 is true,
IF(logical test2, value if logical test2 is true,
IF(logical test3, value if logical test3 is true,
value if all logical tests are false)))
In each IF statement, instead of the value for the false result, another IF statement is inserted. It is like saying “In case this test fails, try this next test”. This continues until all the tests have been completed and then the final value for the false result is stated in case all tests evaluate to false.
Step 1 – Create the nested IF() formula
– Select the cell where the result is to appear
– Create the formula using cell references:
=IF(Test score >= Lower Limit1, Letter Grade1,
IF(Test score >= Lower Limit2, Letter Grade2,
IF(Test score >= Lower Limit3, Letter Grade3,
IF(Test score >= Lower Limit4, Letter Grade4,
Letter Grade5))))
– Press Enter
Note: The order in which the nested IFs are created is very important. If the lowest value is evaluated first i.e. the value for ‘F’, then the upper limit has to be used. This is because each subsequent IF condition is evaluated only if the previous one is false.
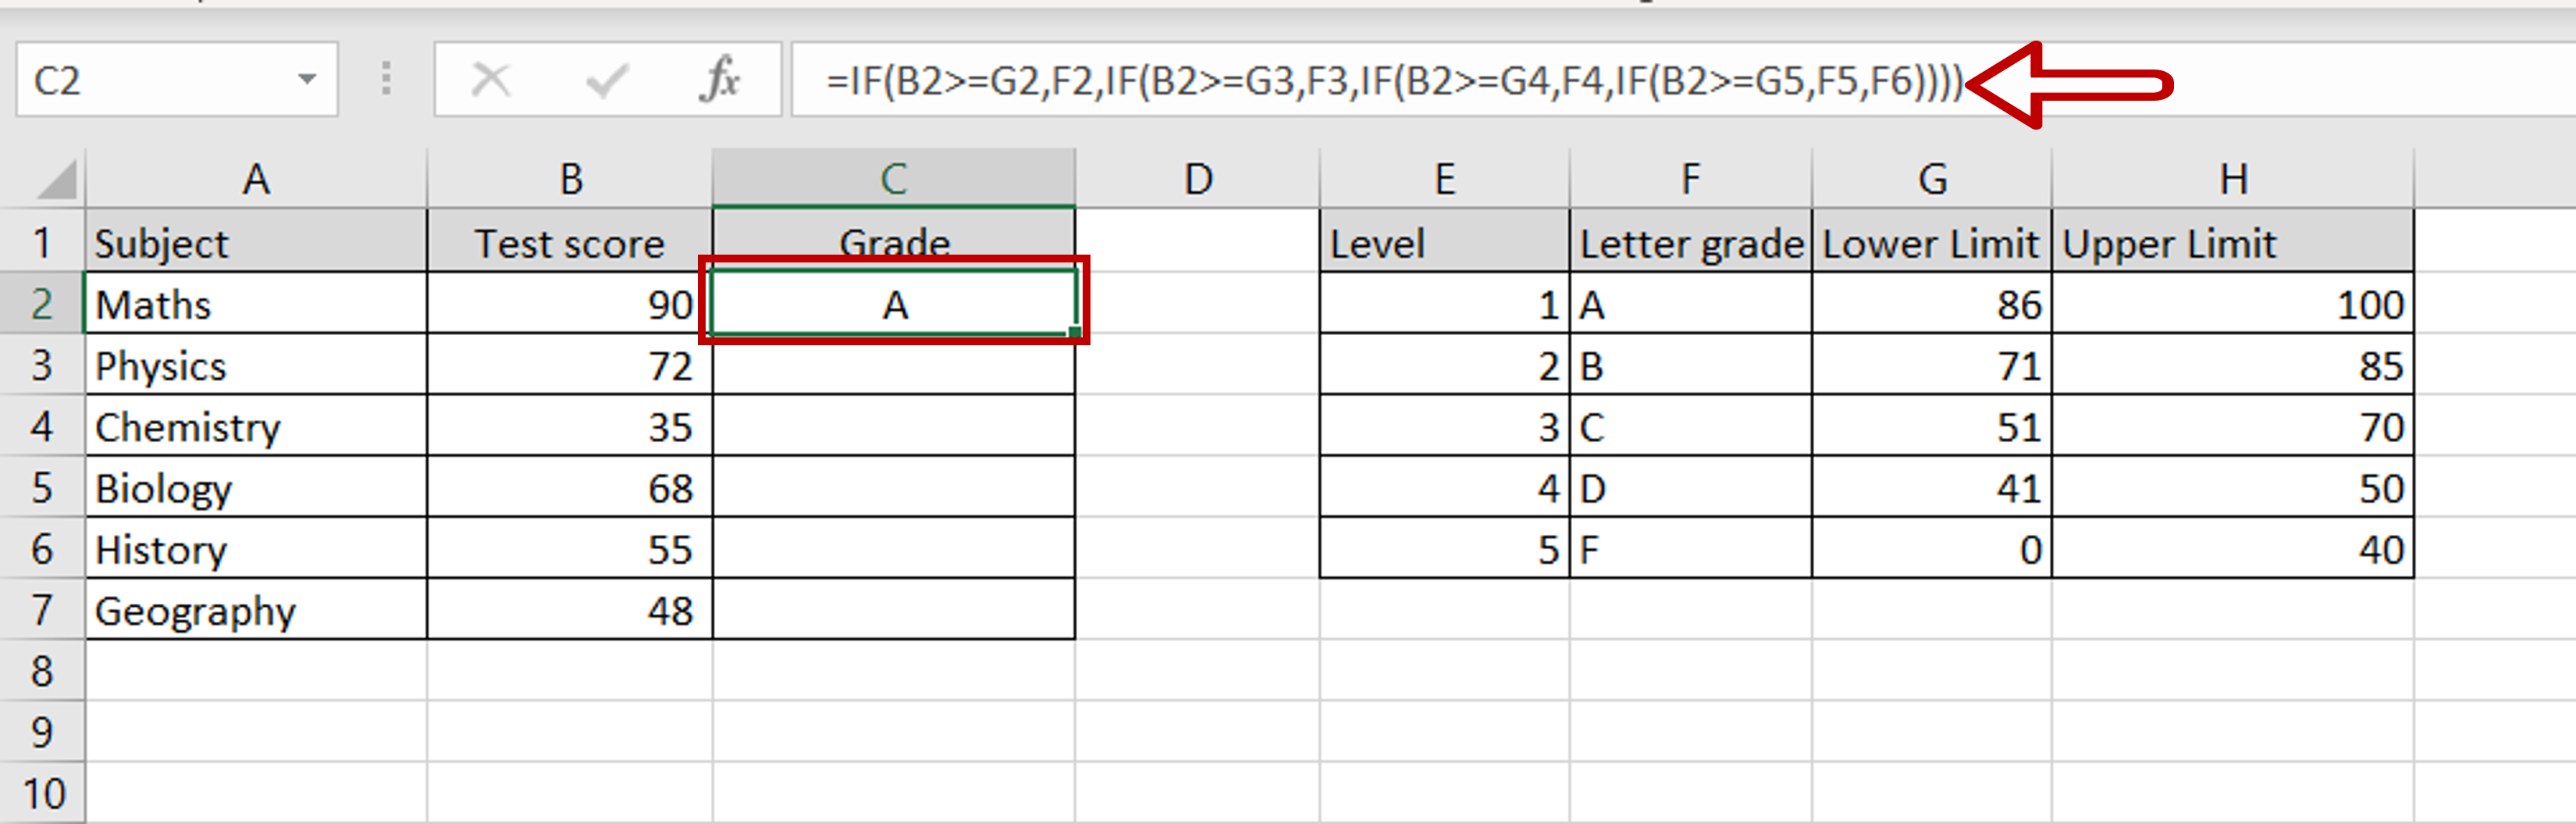
Step 2 – Make the cells being referred to constant
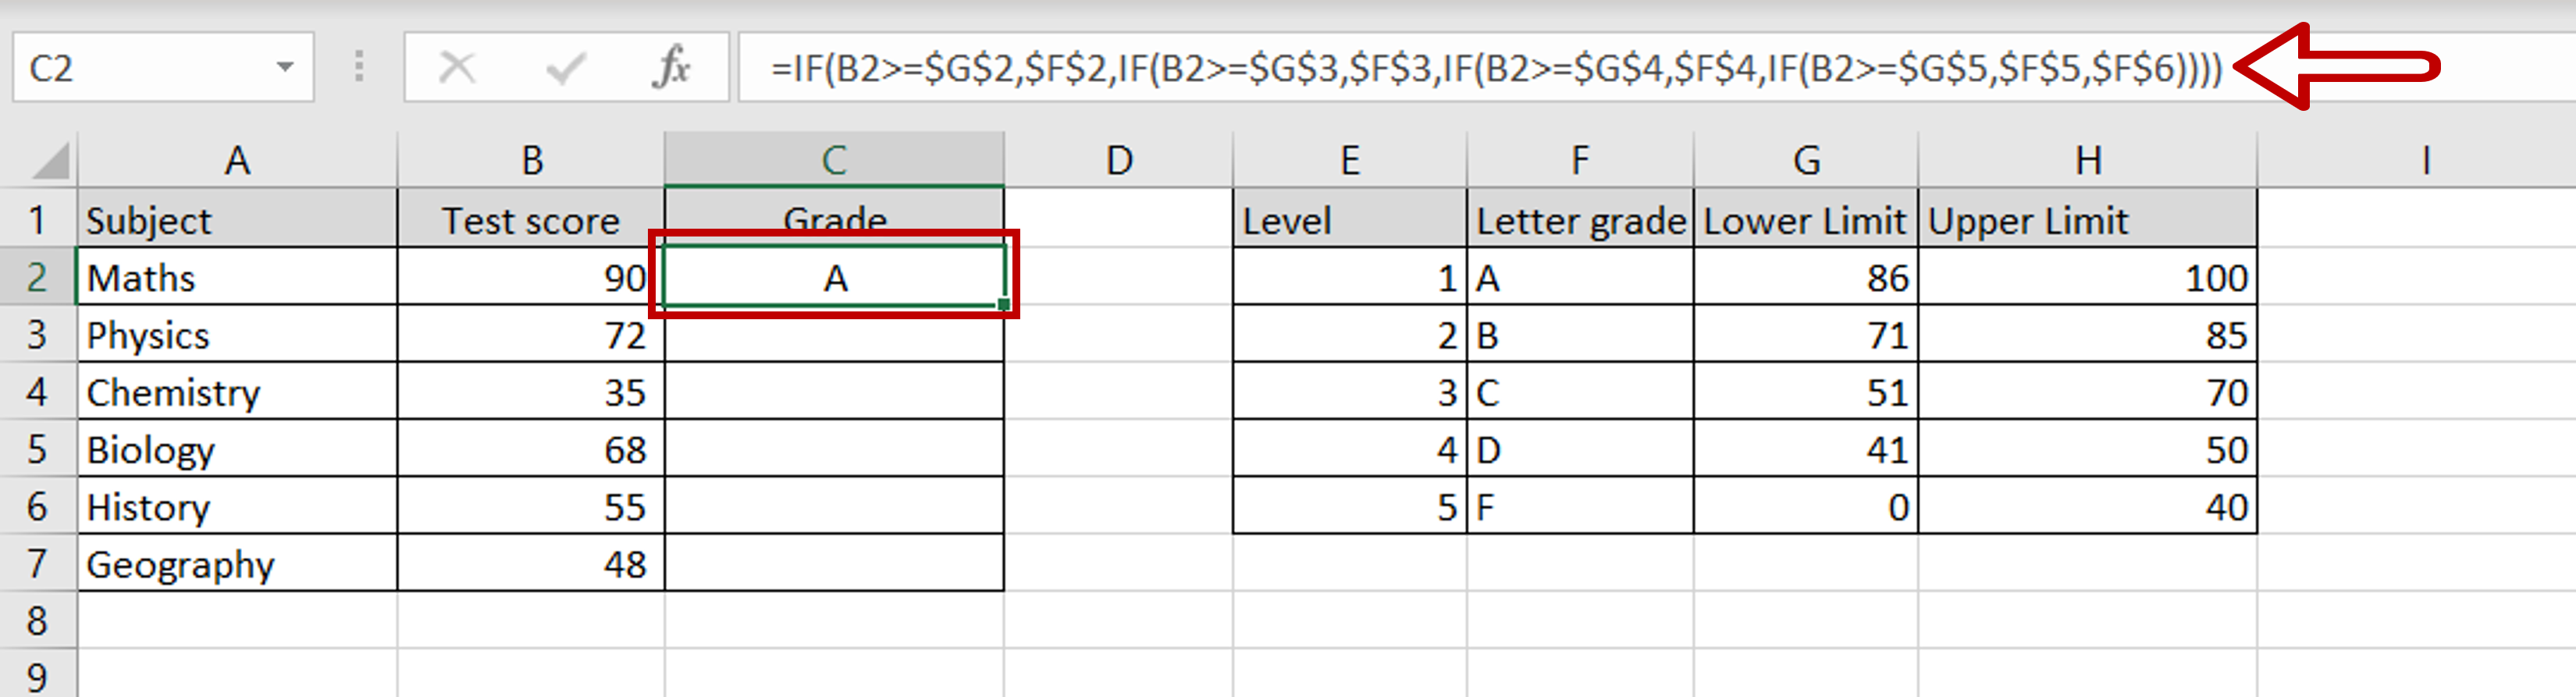
– Select the cell with the formula
– Press F2 to edit the cell
– Select each instance of the Lower limit cell reference and press F4
– Select each instance of the Letter grade cell reference and press F4
– This makes the Lower limits and Letter grades constant
Step 3 – Copy the formula
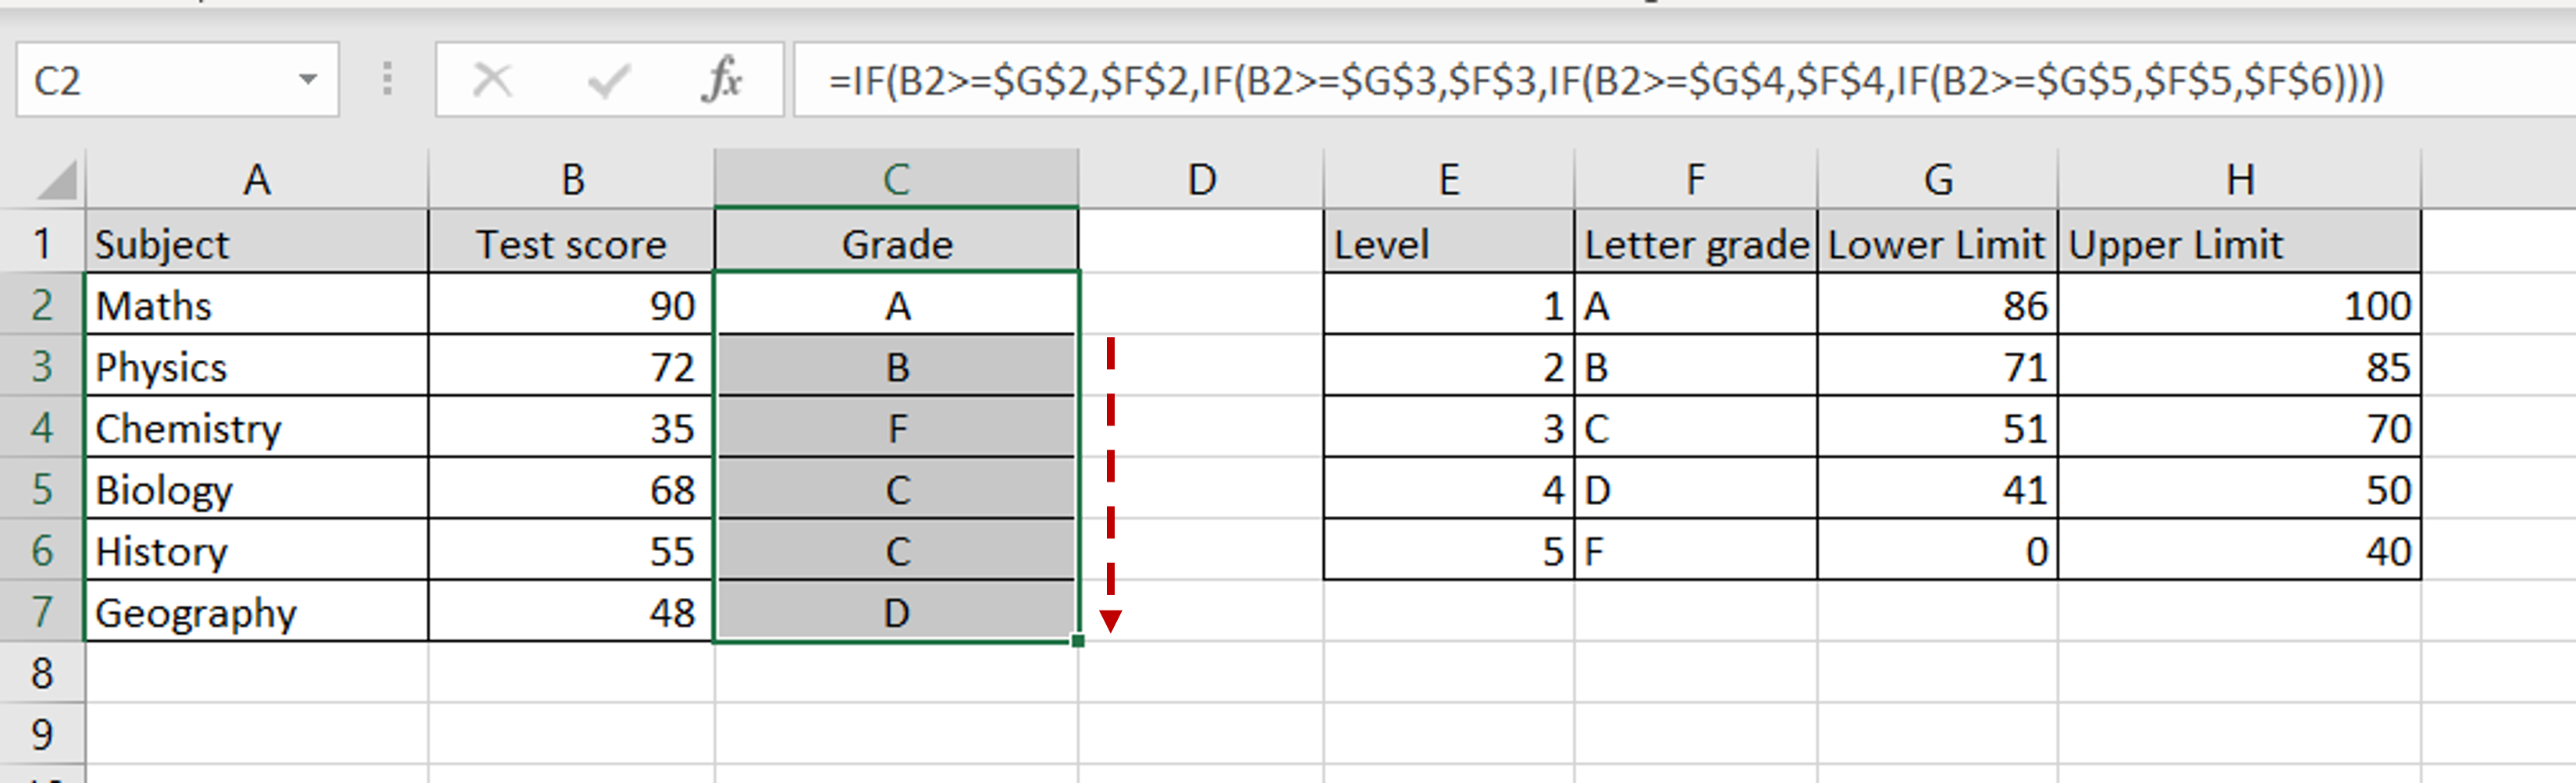
– Using the fill handle from the first cell, drag the formula to the remaining cells
OR
a) Select the cell with the formula and press Ctrl+C or choose Copy from the context menu (right-click)
b) Select the rest of the cells in the column and press Ctrl+V or choose Paste from the context menu (right-click)


