How to do alphabetical order in Excel
You can watch a video tutorial here.
Arranging values in order or sorting is an operation that you will frequently need to do when working with Excel. When arranging a table in alphabetical order, it is important to keep the rows together so that the integrity of the data is maintained. If you sort on one column without sorting the corresponding columns, the data will be corrupted. Excel provides multiple ways in which data can be sorted in alphabetical order.
Option 1 – Use the in-column buttons
Step 1 – Enable the in-column buttons
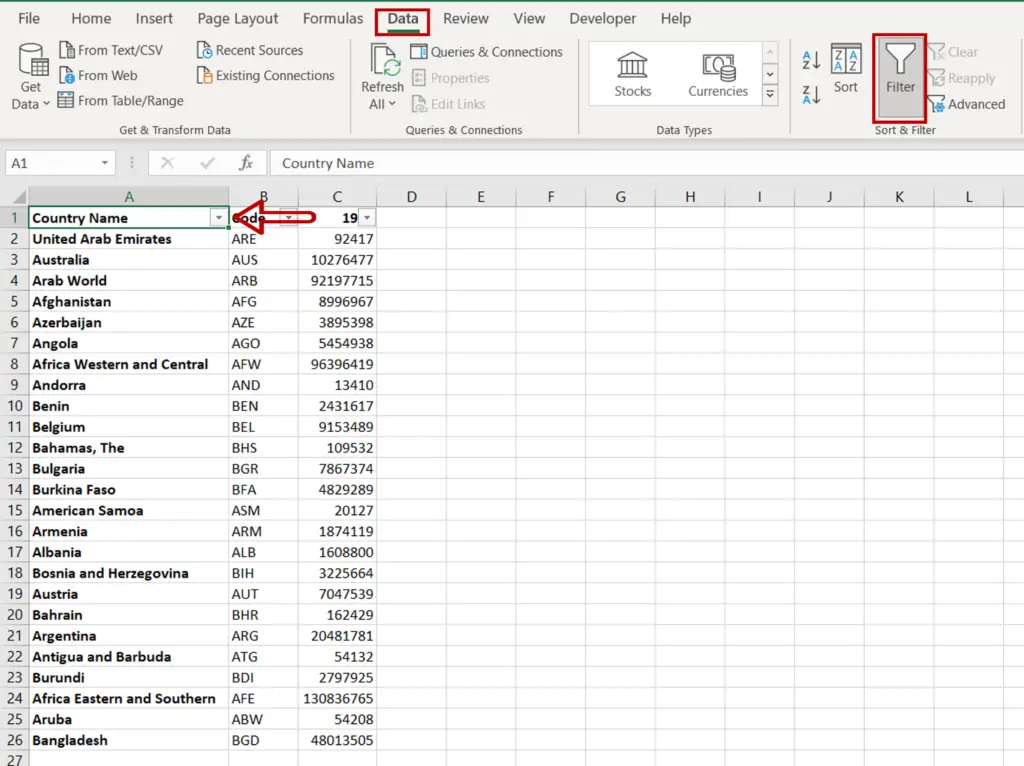
- Select the column to be sorted
- Go to Data > Sort & Filter
- Click the Filter button
Step 2 – Use any of the sort options
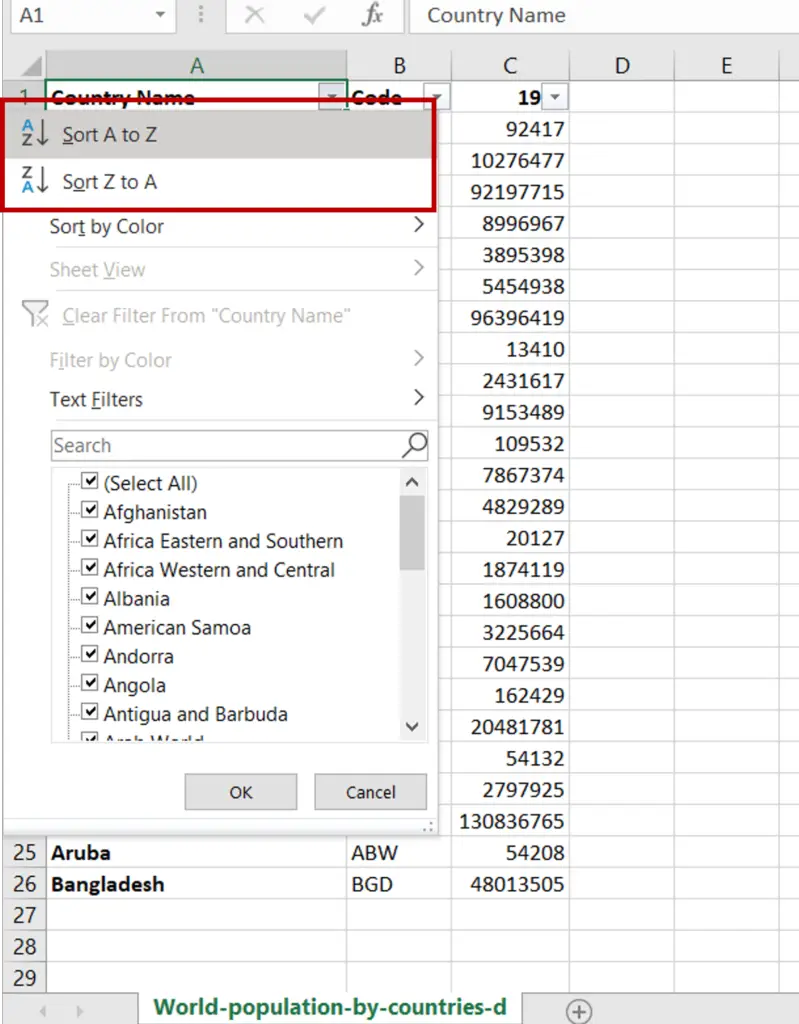
- Click on the arrow on the in-column filter to expand the menu
- Choose any of the options for sorting
Step 3 – Check the result
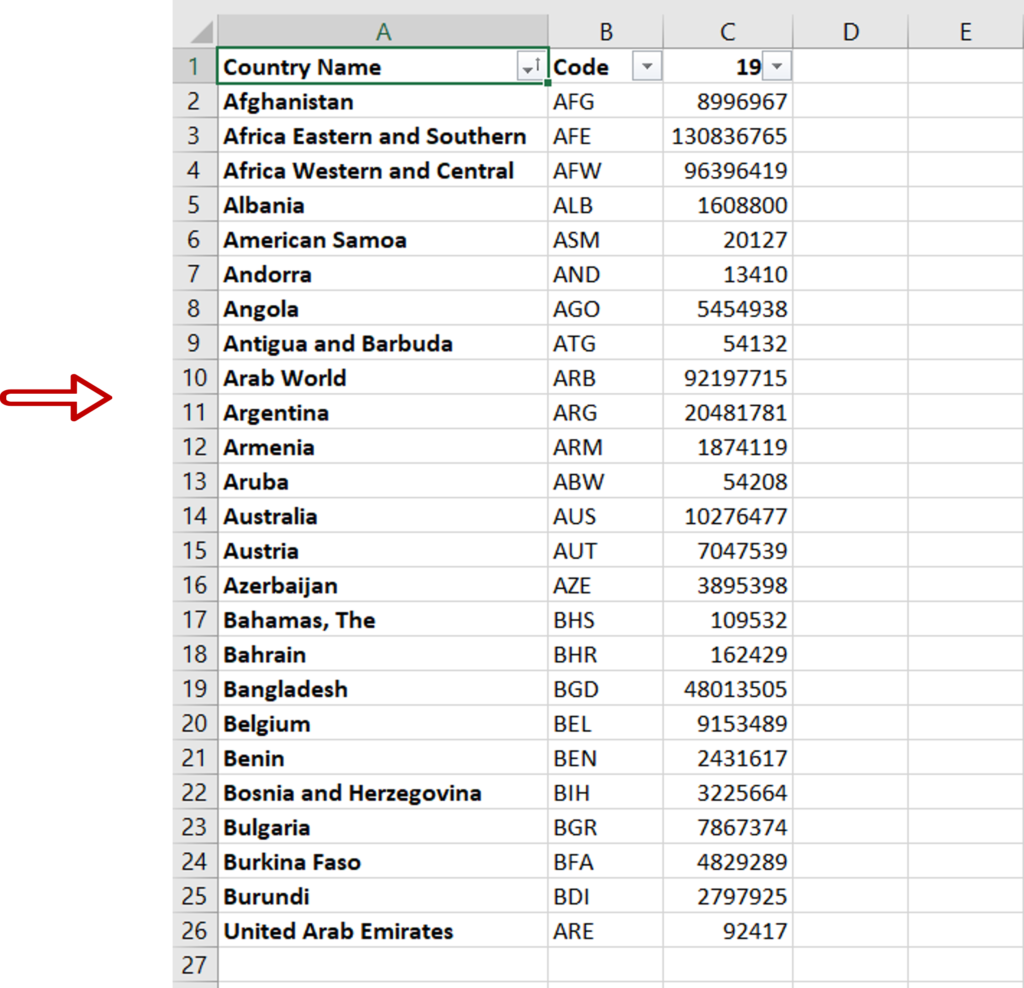
- The data has been sorted in alphabetical order from A to Z
Option 2 – Use the menu option
Step 1 – Open the Sort window
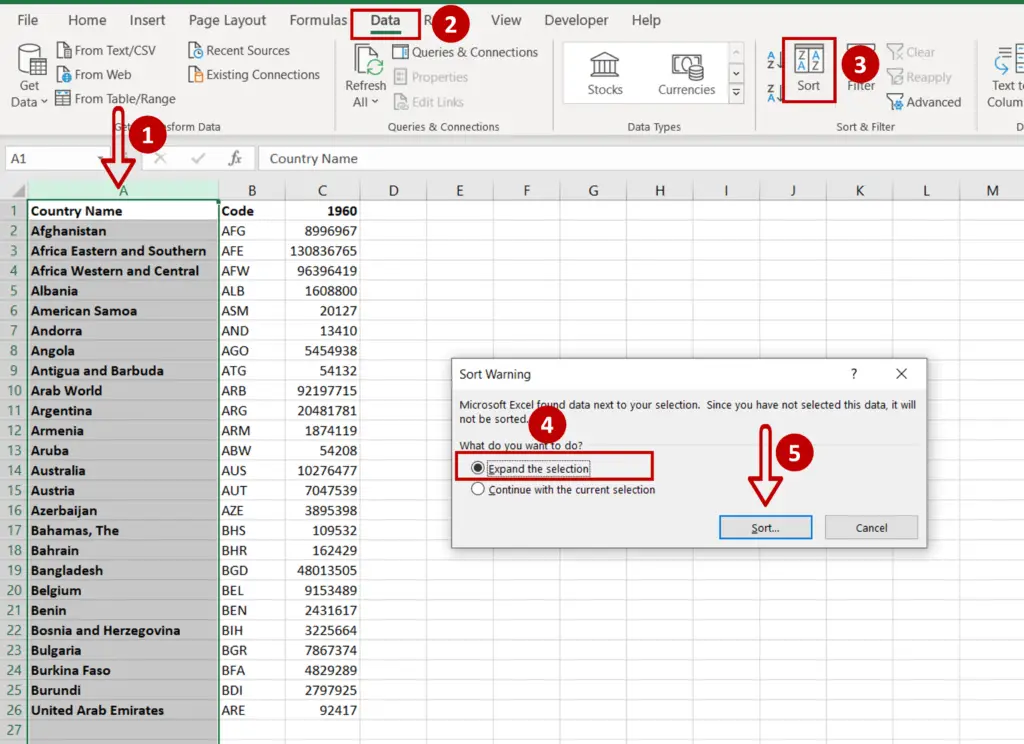
- Select the column on which the data is to be sorted
- Go to Data > Sort & Filter
- Click the Sort button
OR
Right-click and select the Sort option from the context menu
- In the warning window, select Expand the selection
- Click Sort
Note: If you select all the data before clicking the Sort button then the warning will not appear
Step 2 – Set the parameters for the sort
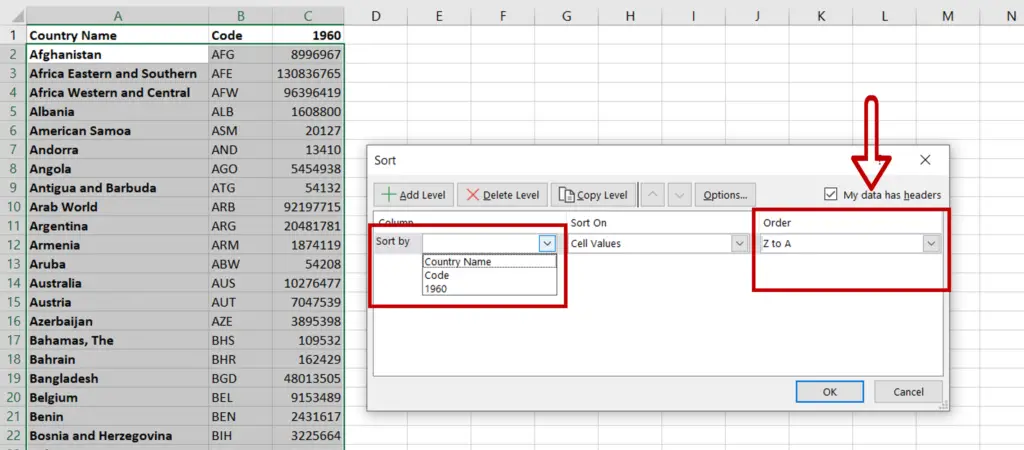
- Tick the My data has headers check-box so that the column headers are displayed in the Sort by box
Note: It is important to check this box if the data has headers. If not, then the column names (Column A, Column B etc.) will be displayed in the Sort by box and the actual headers will also be sorted along with the data
- Select the column on which the data is to be sorted from the Sort by option
- Specify the Order i.e. A to Z or Z to A
Step 3 – Check the result
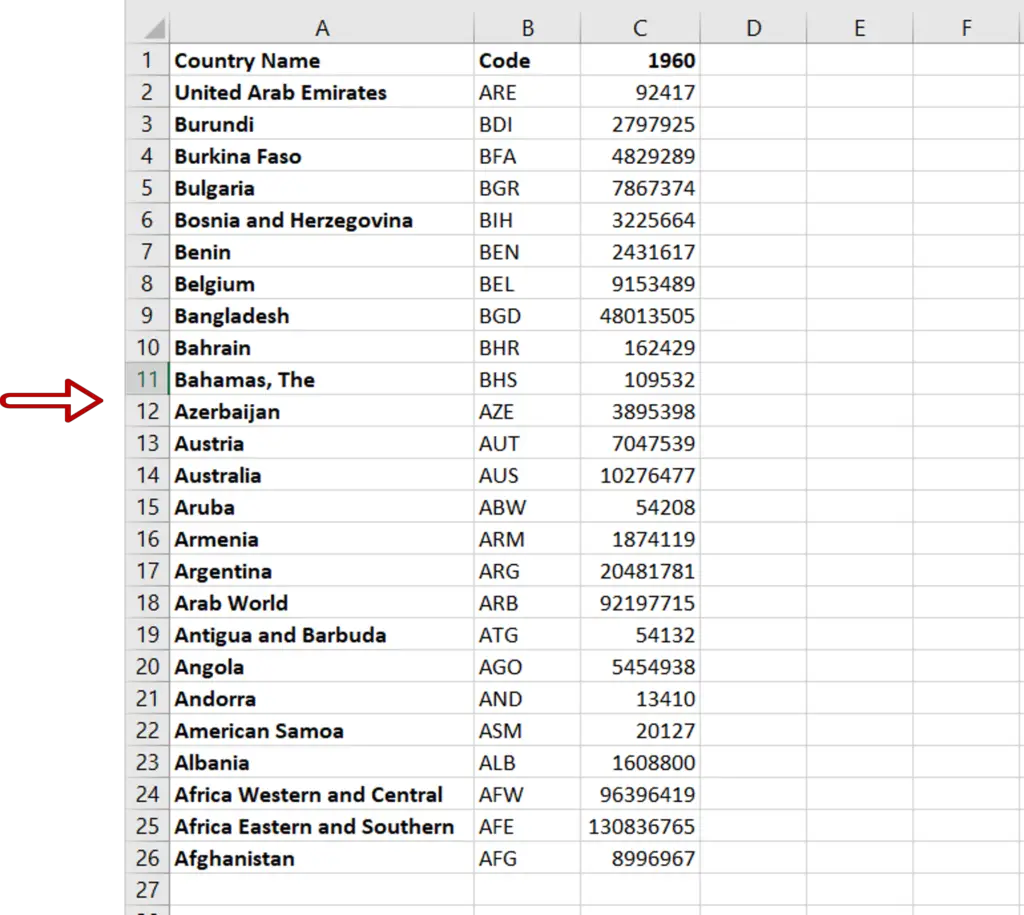
- The data has been sorted in alphabetical order from Z to A


