
How to crop Excel sheet
 By
SpreadCheaters
By
SpreadCheaters
Page last updated:
23/06/2023 |
Next review date:
23/06/2025
Cropping an Excel sheet means removing or hiding certain rows and columns that you don’t need to work on or view at the moment. It is a useful tool to make the sheet more manageable and to focus on the relevant data. The importance of cropping an Excel sheet is that it makes the sheet more readable and easier to work with.
Our dataset includes employee data from various regions within a company, including their ID, name, age, previous city, and salary. We need to extract the first 19 employees from the sheet for printing purposes. To achieve this, we have two methods available. The first is by using the Print Area option, and the second is by using the Margins option.
Method 1: Crop the sheet using the Print area option
Step 1- Select the range of cells
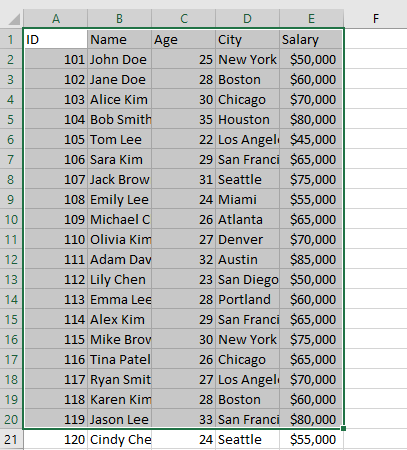
- Select the range of cells of the sheet that you want after the crop
- Here we have selected 20 rows i.e till the ID 119
- You may select any other range you want
Step 2 – Click on the Print Area option
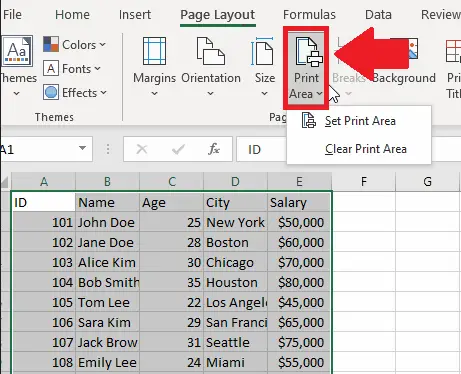
- After selecting the range of cells, click on the Print Area option in the Page Setup group of the Page Layout tab and a drop-down menu will appear
Step 3 – Click on the Set Print Area option
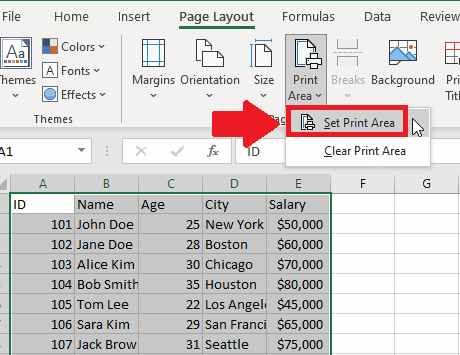
- In the dropdown menu, click on the Set Print Area option and the selected range will be set as the area to print while the remaining sheet will be removed while printing
Step 4 – Click on the File tab
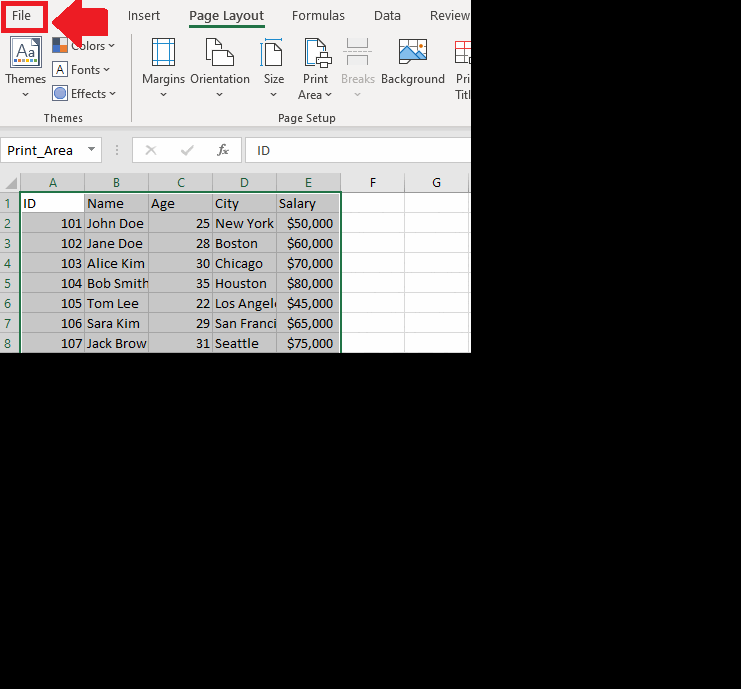
- After setting the print area, click on the File tab and a File window will appear
Step 5- Click on the Print option
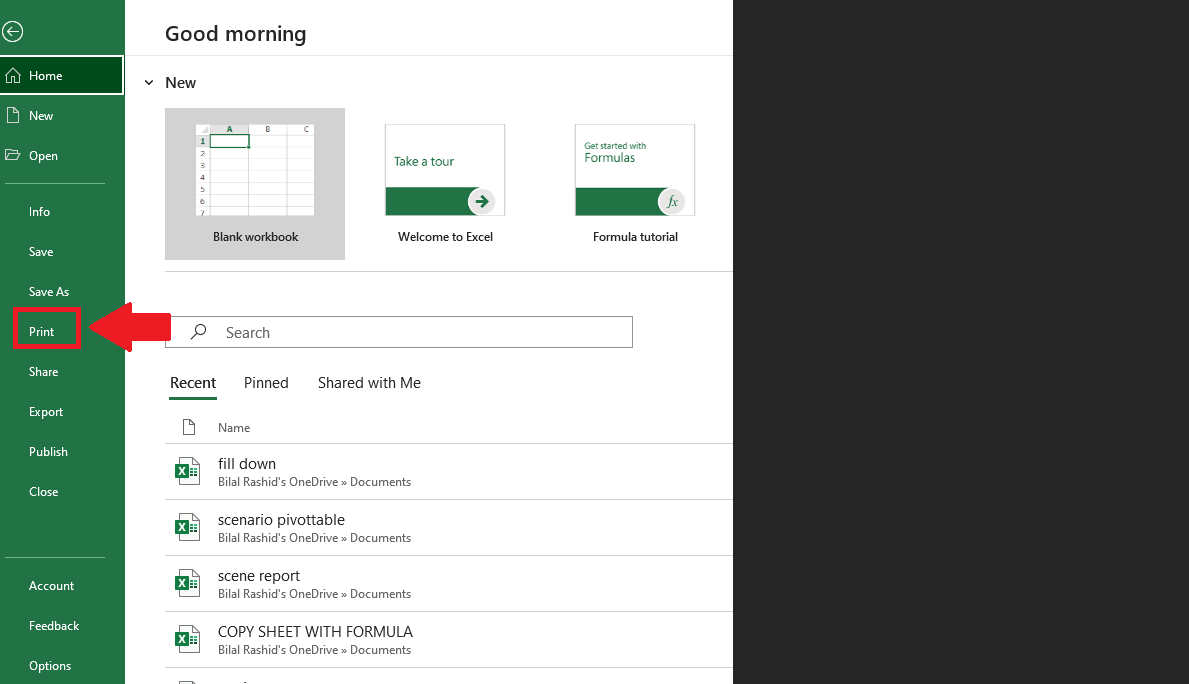
- In the file window, click on the print option and a dialog box for printing will appear
- In the print dialog bow you can see the page to be printed(on the right side) will contain the only range that you selected and the remaining is removed
Step 6 – Click on the Print option
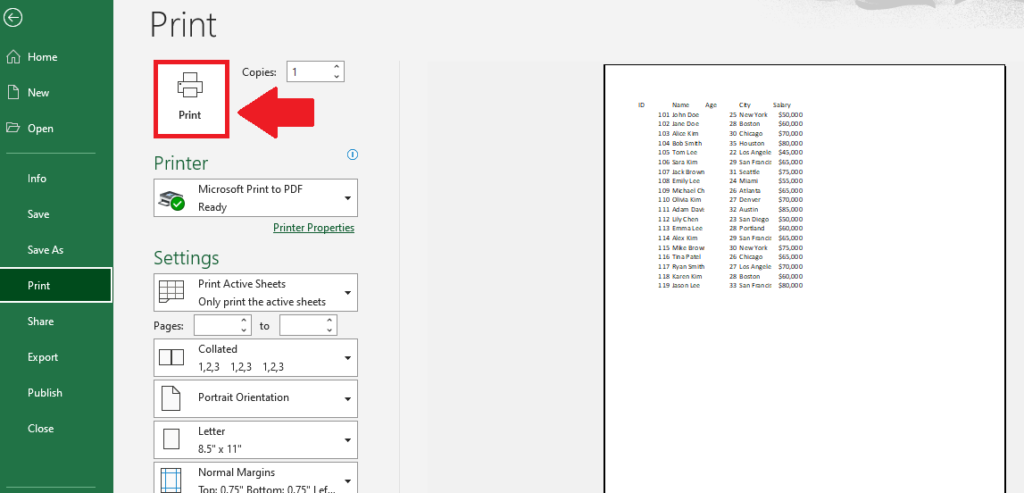
- In the print dialog box, click on the print option, to provide the printer with a printing command
Method 2: Crop the Sheet using the Margins option
Step 1 – Click on the Margins option
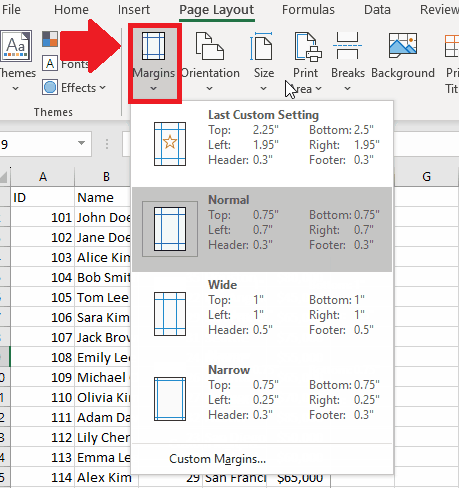
- Click on the margins option in the Page Setup group of the Page Layout tab and a drop-down menu will appear
Step 2- Click on the Custom Margins option
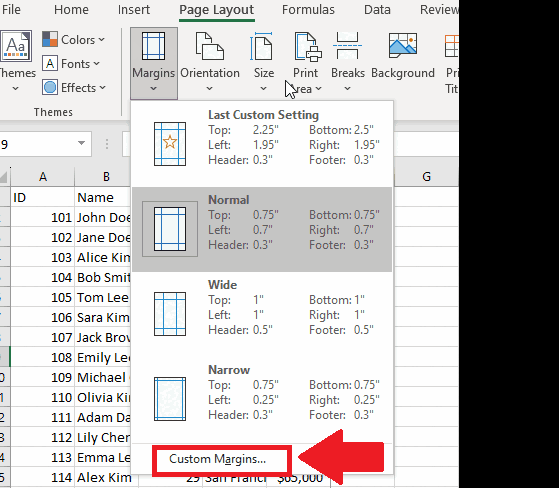
- In the drop-down menu, click on the Custom Margins option and a Page Set up dialog box will appear
Step 3 – Click on the Sheets tab

- In the dialog box, click on the Sheets tab
Step 4 – Select the Print Area
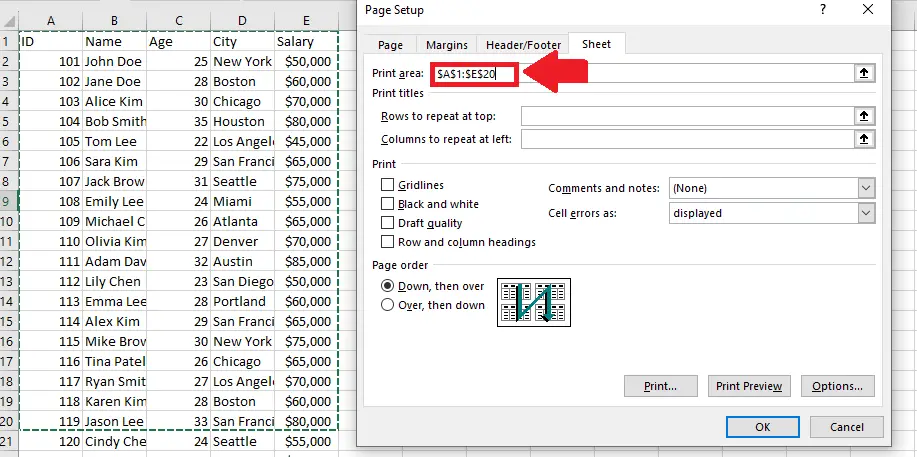
- In the sheets dialog box, set the range of cells you want
- Here we have selected 20 rows i.e till the ID 119
- You may select any other range you want
- Remember this is the ranger that will be left after the crop
Step 5 – Click on OK
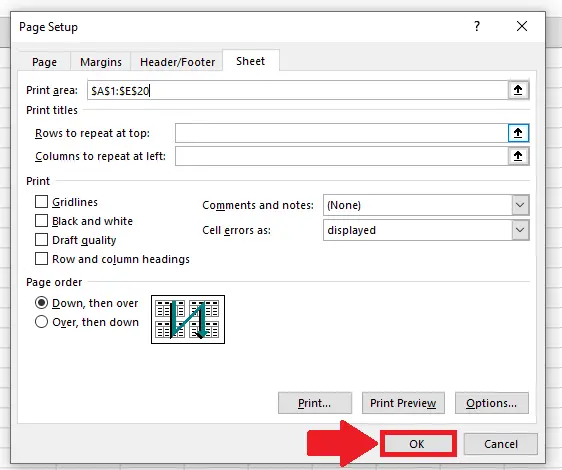
- After selecting the range you want, click on OK
Step 6 – Click on the File tab

- After setting the print area, click on the File tab and a File window will appear
Step 7 – Click on the Print option

- In the file window, click on the print option and a dialog box for printing will appear
- In the print dialog bow you can see the page to be printed(on the right side) will contain the only range that you selected and the remaining is removed
Step 8 – Click on the Print

- In the print dialog box, click on the print option, to provide the printer with a printing command


