
How to create drop down list in Excel
 By
SpreadCheaters
By
SpreadCheaters
Page last updated:
16/11/2022 |
Next review date:
16/11/2024
You can watch a video tutorial here.
To validate the data that is entered in an Excel cell, it is possible to define the list of values that are allowed by creating a drop-down list. This is especially useful when creating data entry forms and you need to restrict the values that are entered. By restricting the values, you can ensure that the data collected is uniform and that less effort is spent on cleaning the data later. You can either type out the list or refer to a list of allowed values.
Option 1 – Type the list of values
Step 1 – Open the Data Validation window
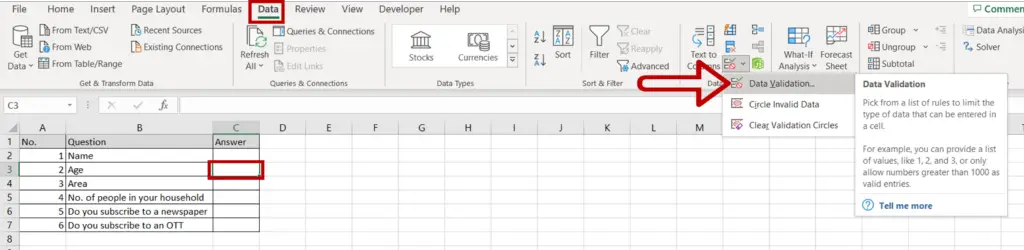
- Place the cursor in the cell for which the drop-down list is to be created
- Go to Data > Data Tools
- Click on Data Validation
Step 2 – Enter the list of values
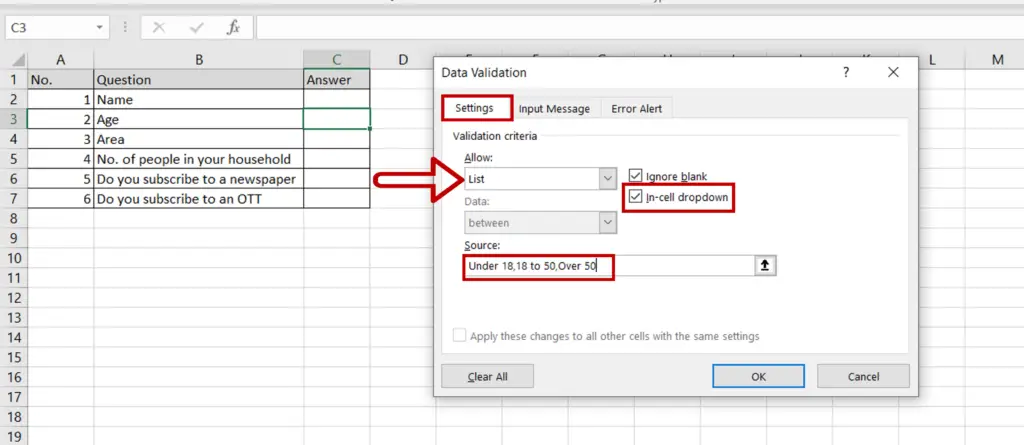
- Select the Settings tab
- Under Allow select List
- Ensure that the In-cell dropdown box is ticked
- Type the list of values that are allowed in the Source textbox
- Click OK
Step 3 – Check that the drop-down list has been added
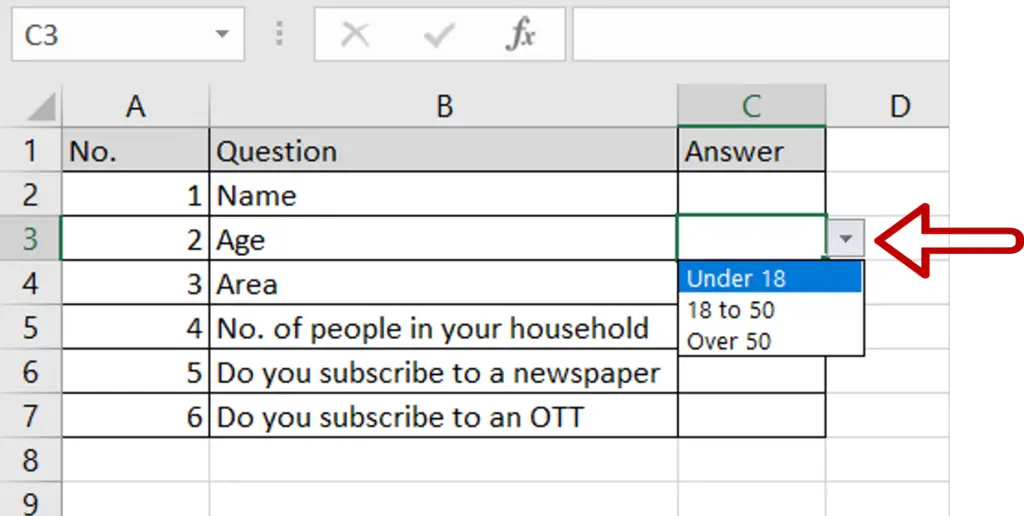
- A drop-down arrow will appear on the right border of the cell that will display the list of allowed values when clicked
- The user can select any value from the list
Option 2 – Refer to a list of values
Step 1 – Open the Data Validation window
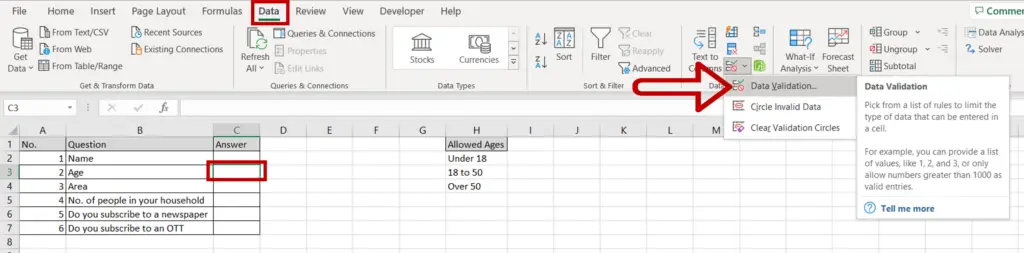
- Place the cursor in the cell for which the drop-down list is to be created
- Go to Data > Data Tools
- Click on Data Validation
Step 2 – Create a reference to the list of values
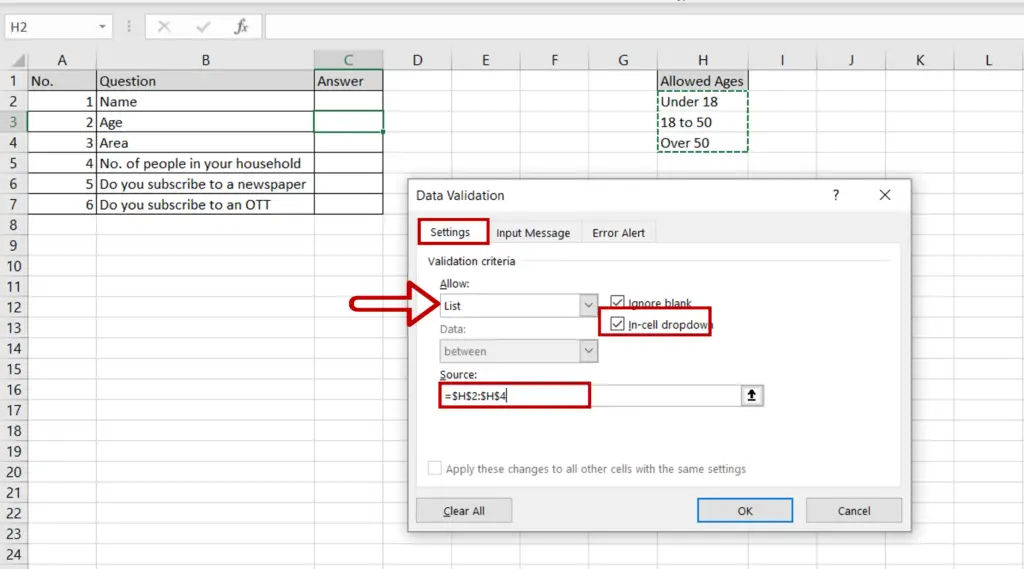
- Select the Settings tab
- Under Allow select List
- Ensure that the In-cell dropdown box is ticked
- In the Source textbox, type the range of cells that contain the allowed values
- Click OK
Step 3 – Check that the drop-down list has been added
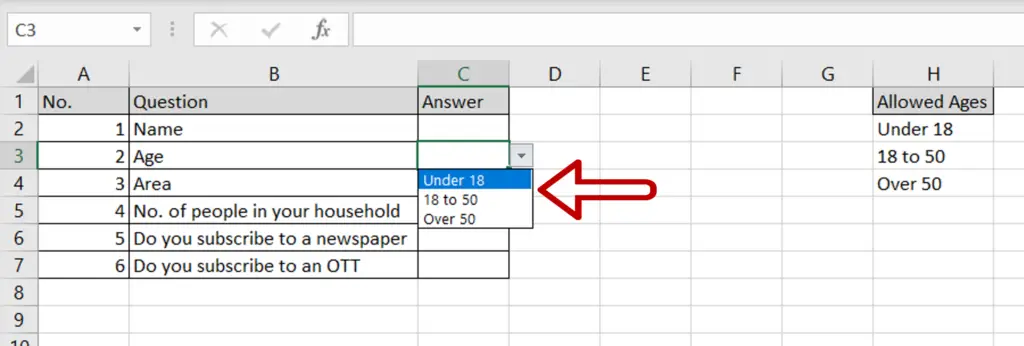
- A drop-down arrow will appear on the right border of the cell that will display the list of allowed values when clicked
- The user can select any value from the list
- Changes made to the source list will be reflected in the drop-down list


