How to create buckets in Microsoft Excel
In this tutorial, we will learn how to create buckets in Microsoft Excel. Various built-in functions in Microsoft Excel can be utilized while creating buckets. We can use the IF function to add the data in buckets according to the criteria of each bucket.
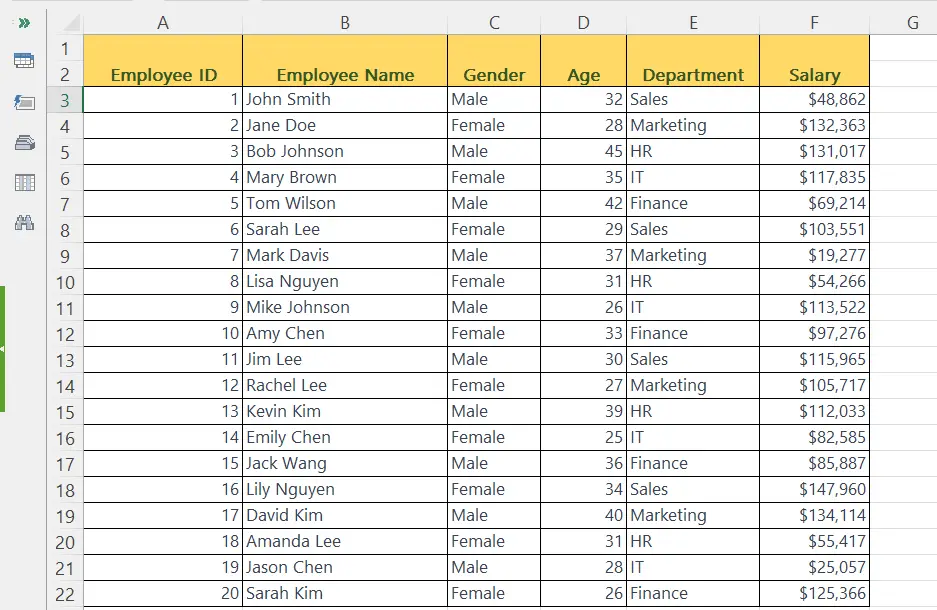
For instance, we have a data set representing the data of 20 employees. We want to make buckets based on the salary range of employees i.e. $10000-$50000, $50000-$100000, and $100000-$150000.
Creating buckets in Excel generally refers to grouping data into categories or ranges based on certain criteria or values. This can be useful when working with large data sets and wanting to analyze or visualize data in a more meaningful way.
Step 1 – Define a Column for the First Bucket and Select the First Cell
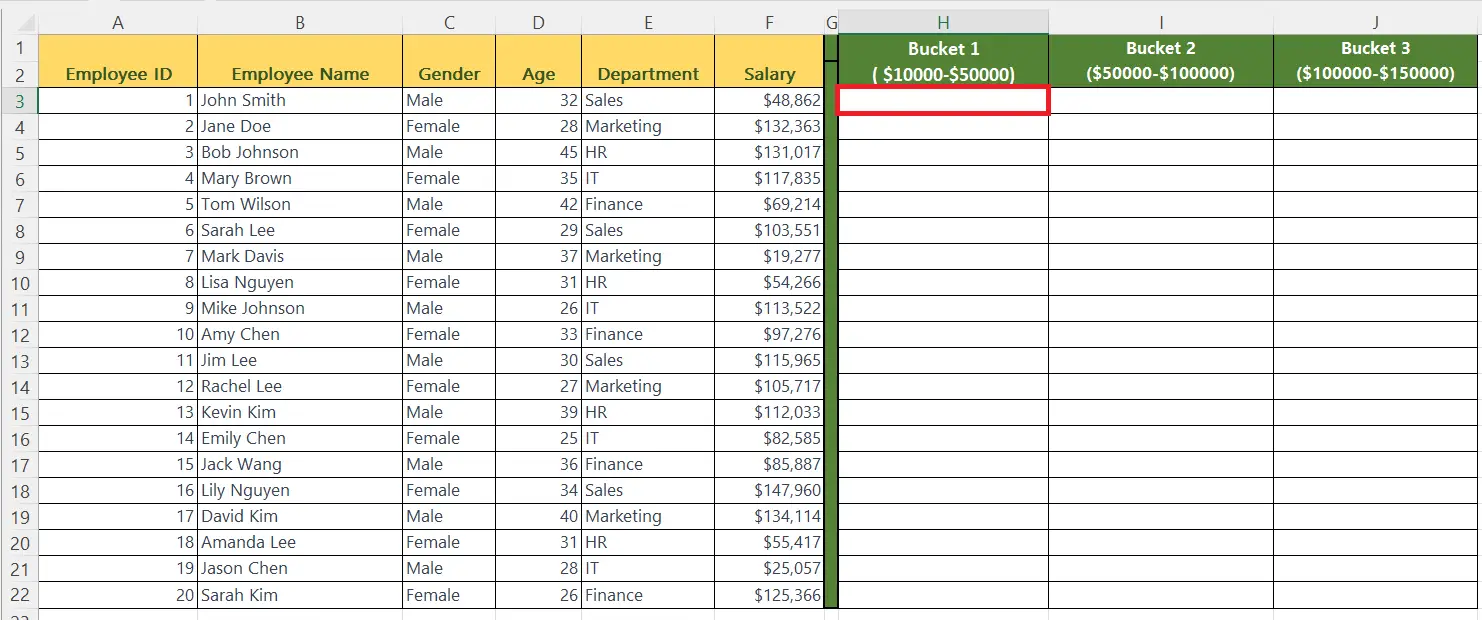
– Define a column for the first bucket.
– Select the first cell in the bucket.
Step 2 – Enter the IF Function and Create a Logical test
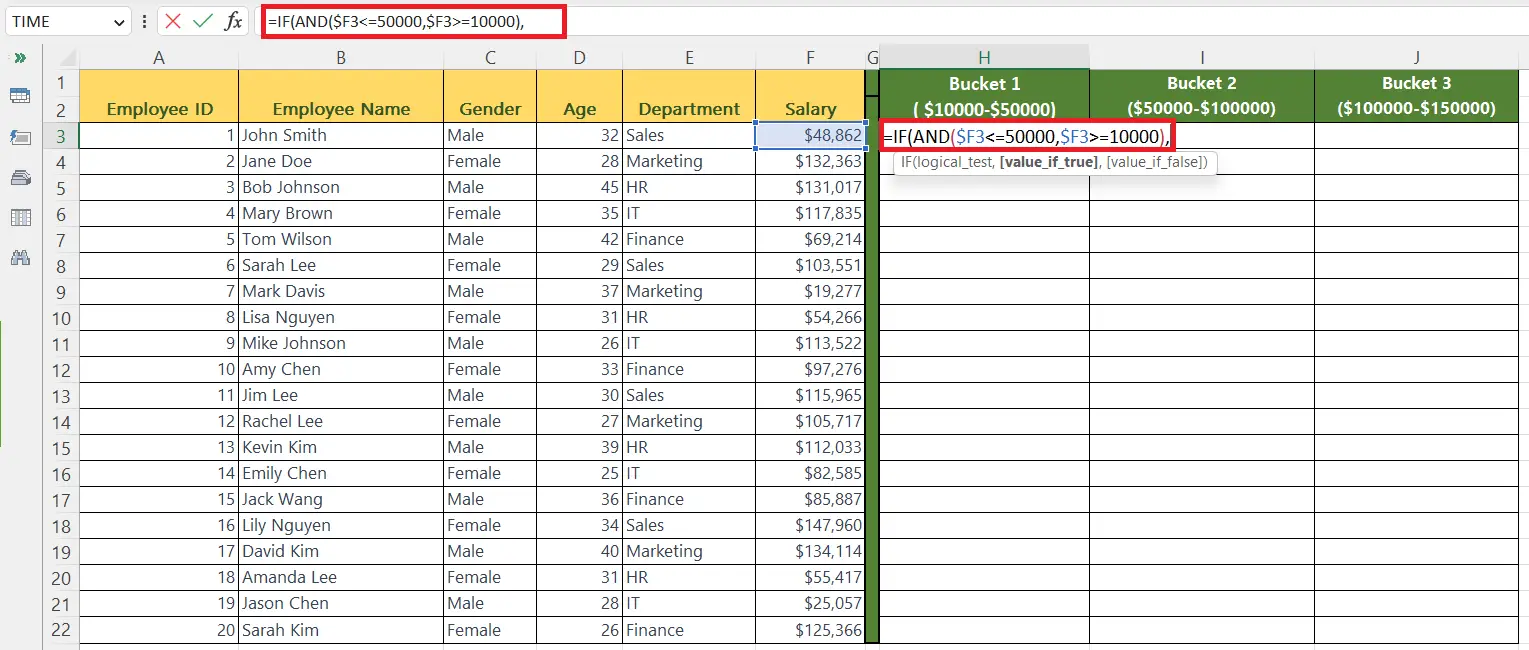
– Enter the IF function and the logical test.
IF(AND($F2<=50000,$F2=>10000),
– The AND function enables us to concatenate two logical tests.
– The first logical test in the AND function specifies the upper limit and the second logical test specifies the lower limit.
– F2 is the cell containing the salary of the employee.
– We have locked the column reference of the cell i.e. $F2.
Step 3 – Enter the Value_if_true and the Value_if_false
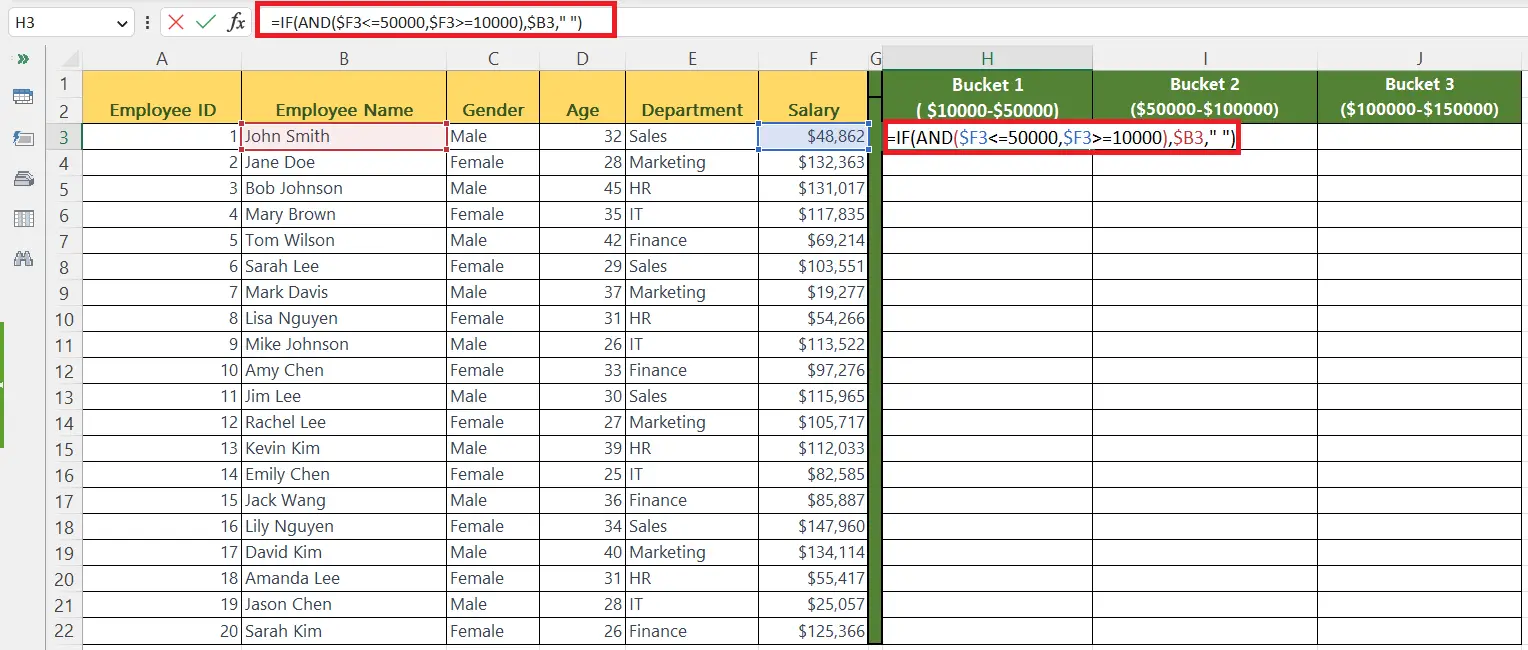
– The value_if_true and value_if_false arguments are the second and third parameters, respectively. This means that if the condition is true, the function will return the name of the employee; otherwise, it will return a blank value.
IF(AND($F2<=50000,$F2>=10000), “$B2″, ” “)
Step 4 – Press the Enter Key
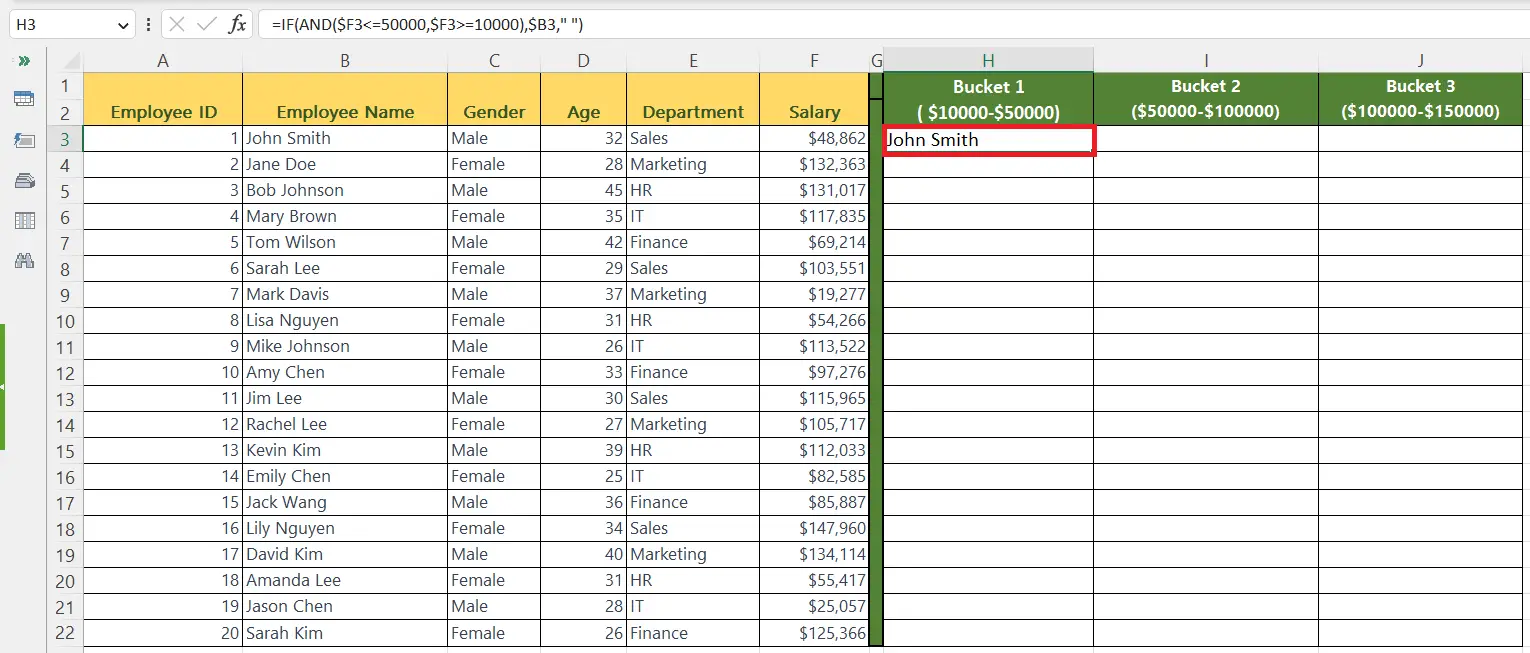
– Press the Enter key.
Step 5 – Apply the Formulae in the First Cell of Each Bucket
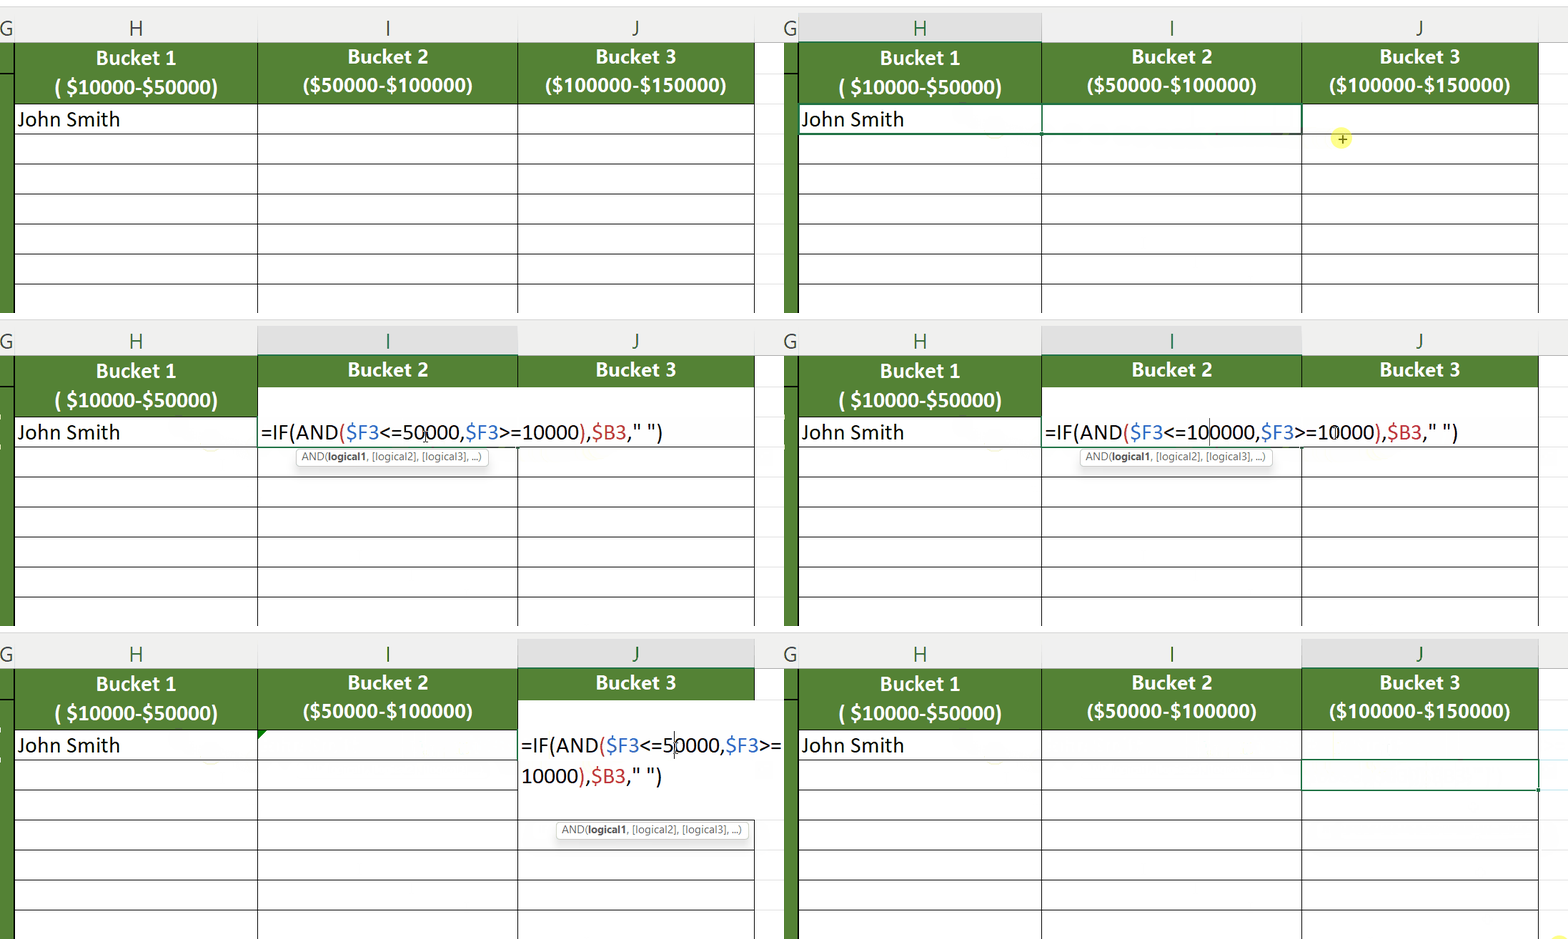
– Apply the formulae in the first cell of each bucket.
– Edit and change the range according to each bucket i.e. the Upper and the Lower limit.
– The formulae for the second bucket will be :
IF(AND($F2<=100000,$F2>=50000), “$B2″, ” “)
– The formulae for the third bucket will be :
IF(AND($F2<=150000,$F2>=100000), “$B2″, ” “)
– In this case, blank cells would be returned as the logical test is false.
Step 6 – Select the Range of All the Buckets
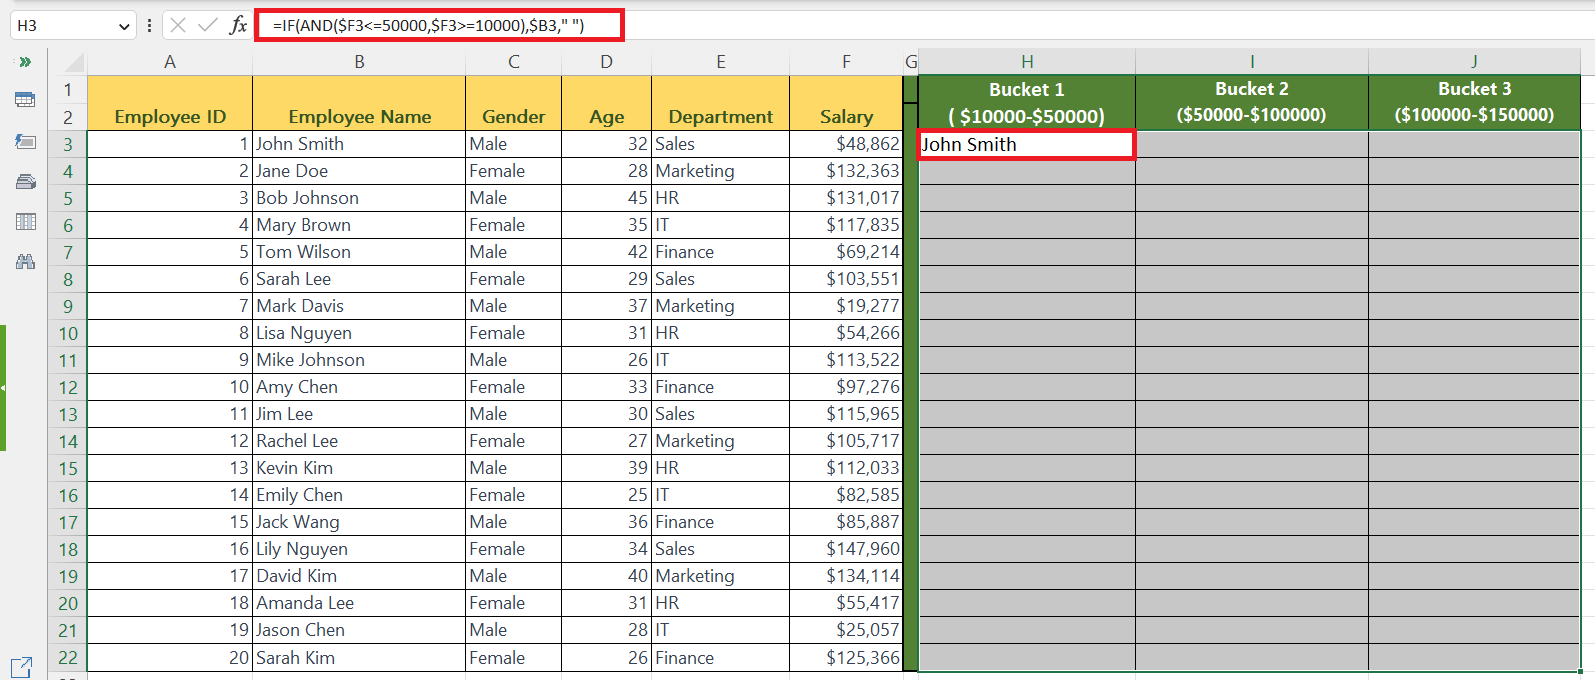
– Select the range of all the buckets i.e. including the cells in which the formulae are applied.
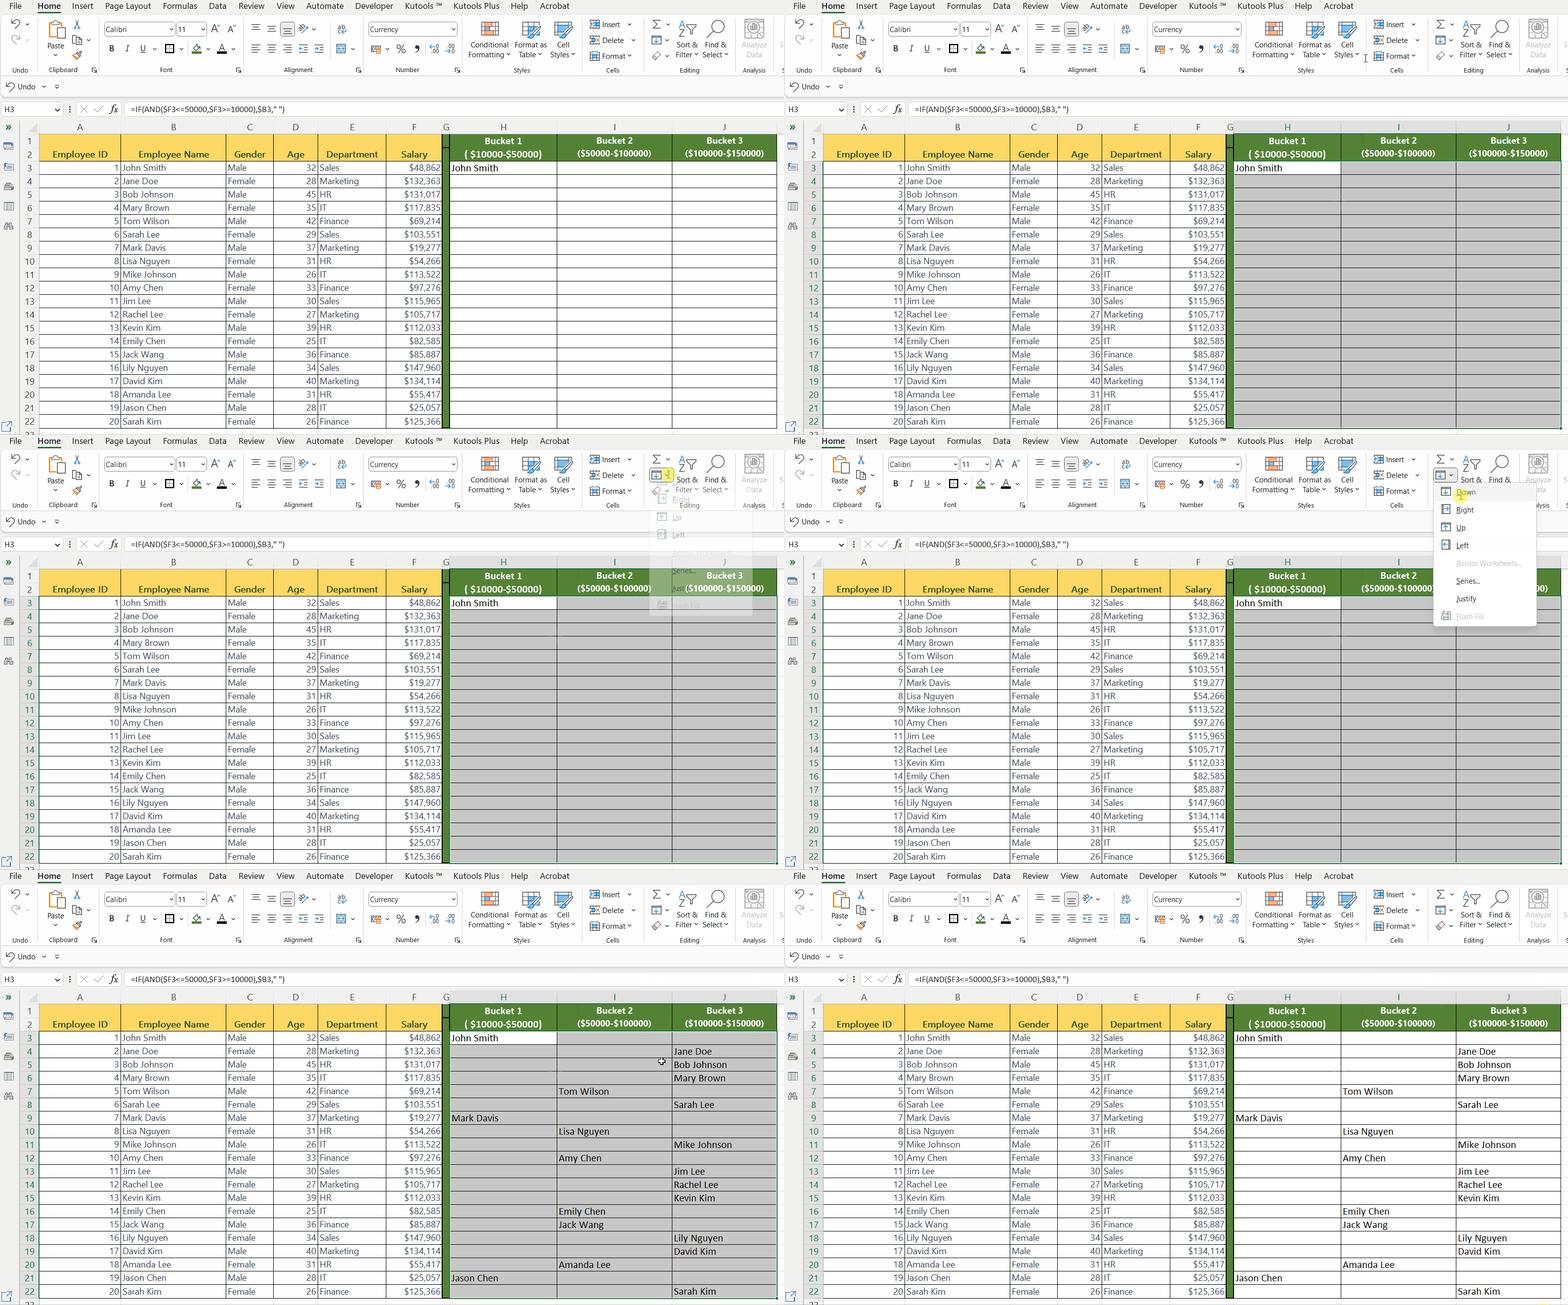
Step 7 – Use the Fill Command to Apply the Formulas to Multiple Buckets
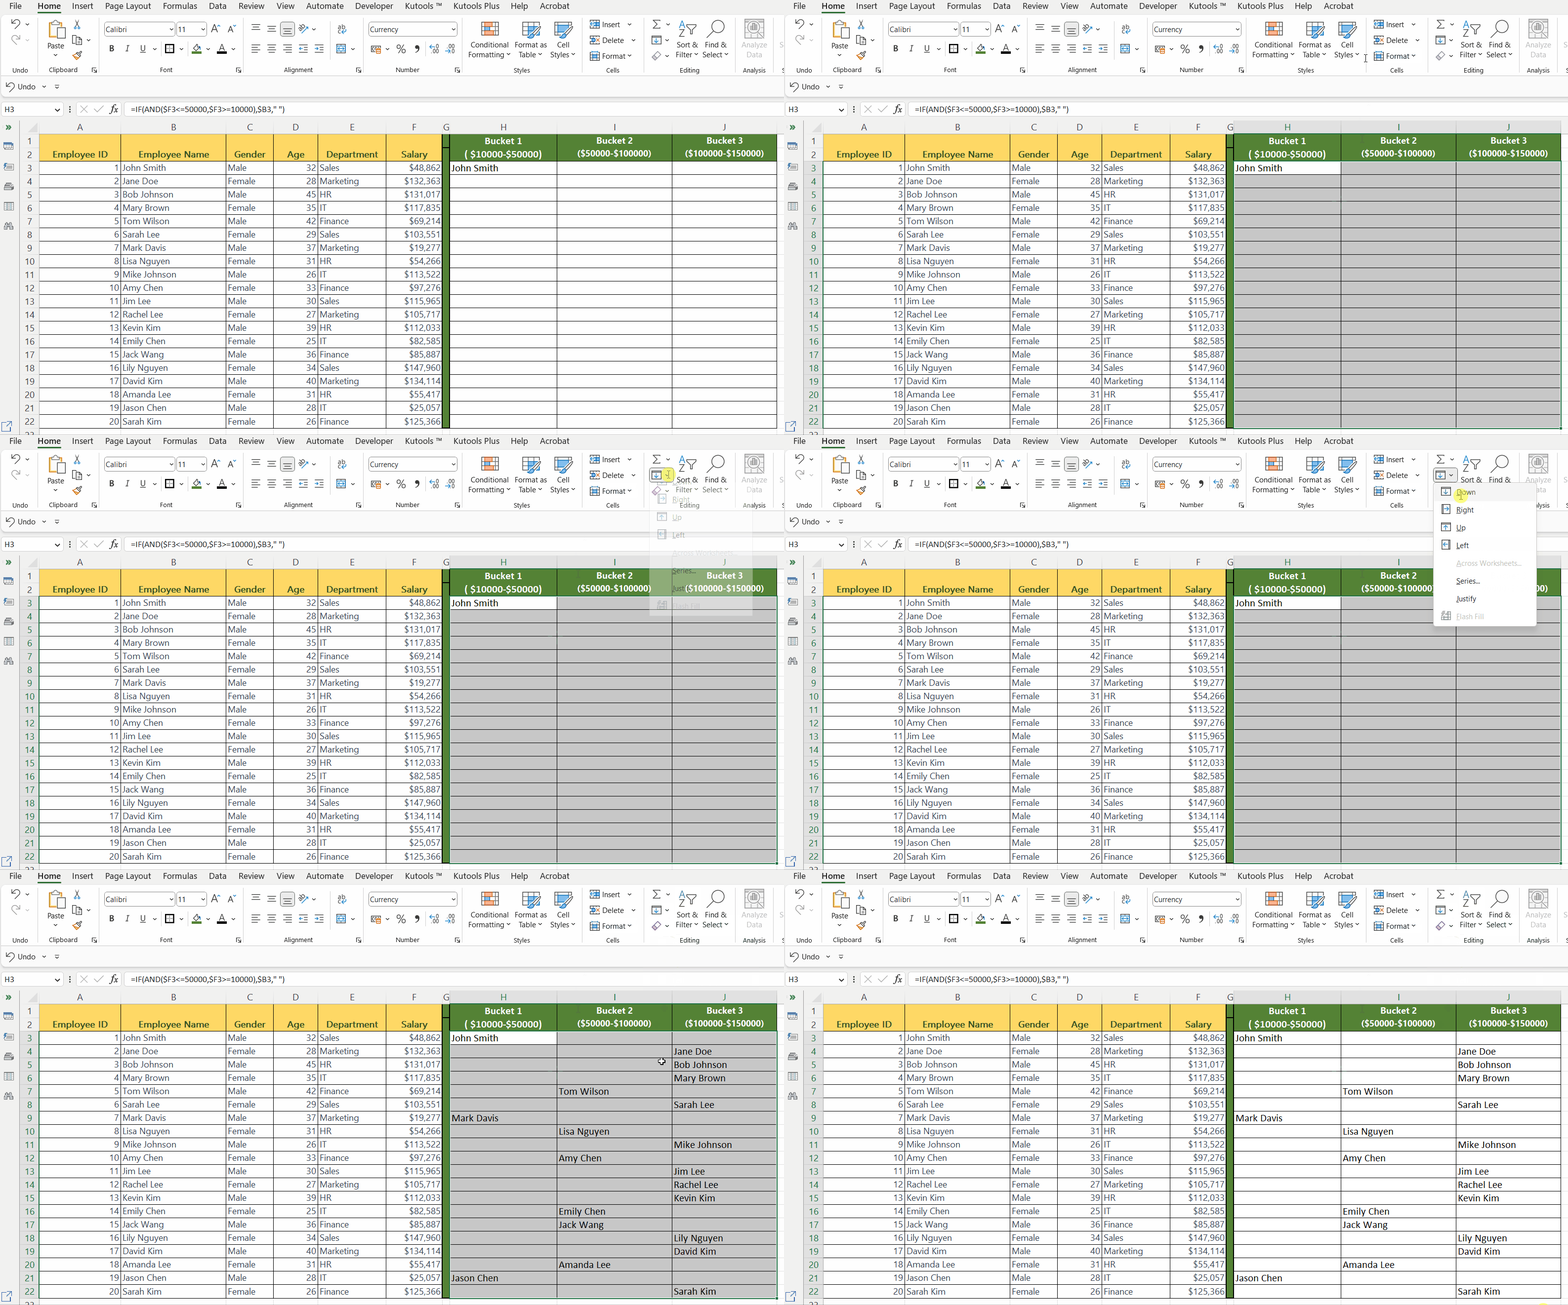
– Use the Fill command ( CTRL+D) to apply the formulas to multiple buckets in one go.
– The buckets will be created according to the range i.e. $10000-$50000, $50000-$100000, and $100000-$150000.


