
How to create a Yes or No dropdown in Excel
 By
SpreadCheaters
By
SpreadCheaters
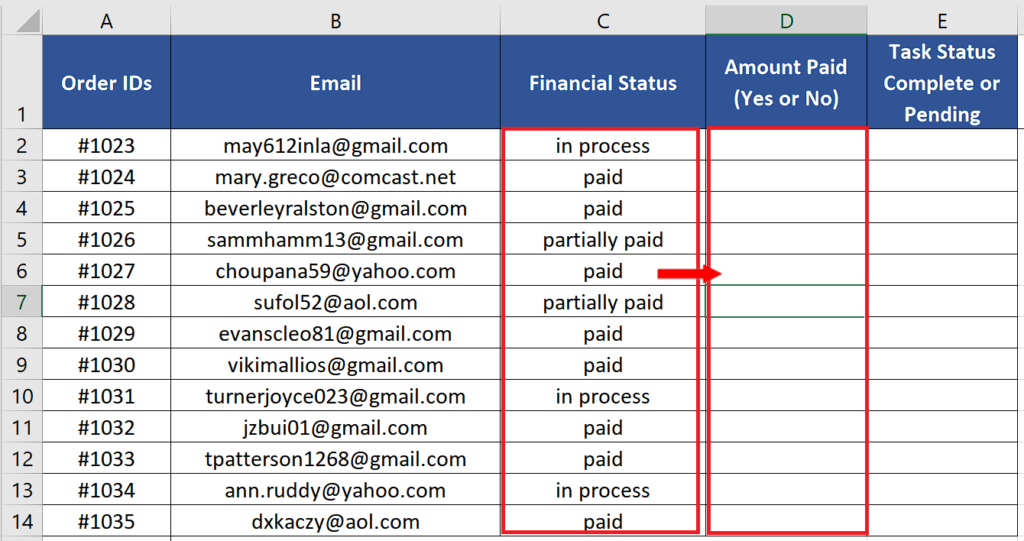
In this tutorial we’ll learn how to create a YES or NO dropdown in Excel. Let’s see the dataset above, it has records of payments made against order IDs. We’ll create a Yes or No drop-down list to mark the status of the amount paid to mark each paid item as Yes and others as No.
Let’s do it by following the steps mentioned below.

Drop down lists in Excel can be a useful tool for limiting the options available to users and ensuring that only valid entries are made in a cell or range of cells. This can be especially helpful in large or complex spreadsheets where it is important to maintain consistency and accuracy in the data. Drop down lists can also make it easier for users to enter data, as they only need to select from a predefined list rather than manually typing in a value. In addition, drop down lists can help to reduce errors and improve the overall organization and clarity of the spreadsheet.
Step 1 – Create the list items Yes No
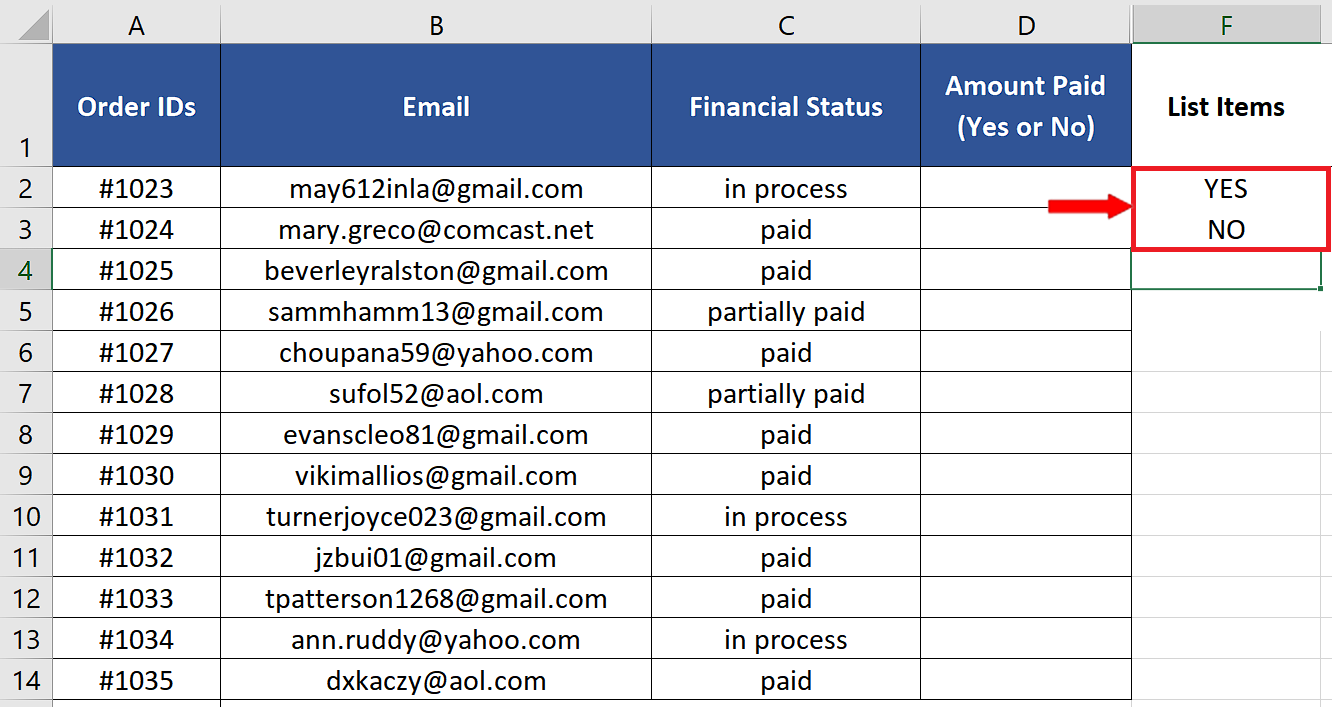
– Text dropdowns in Excel can be created by using the data from a list of data in Excel. So, we’ll create this list ourselves by writing Yes and No in two cells outside the dataset as shown above.
Step 2 – Locate the Data Validation action button in Data Tab
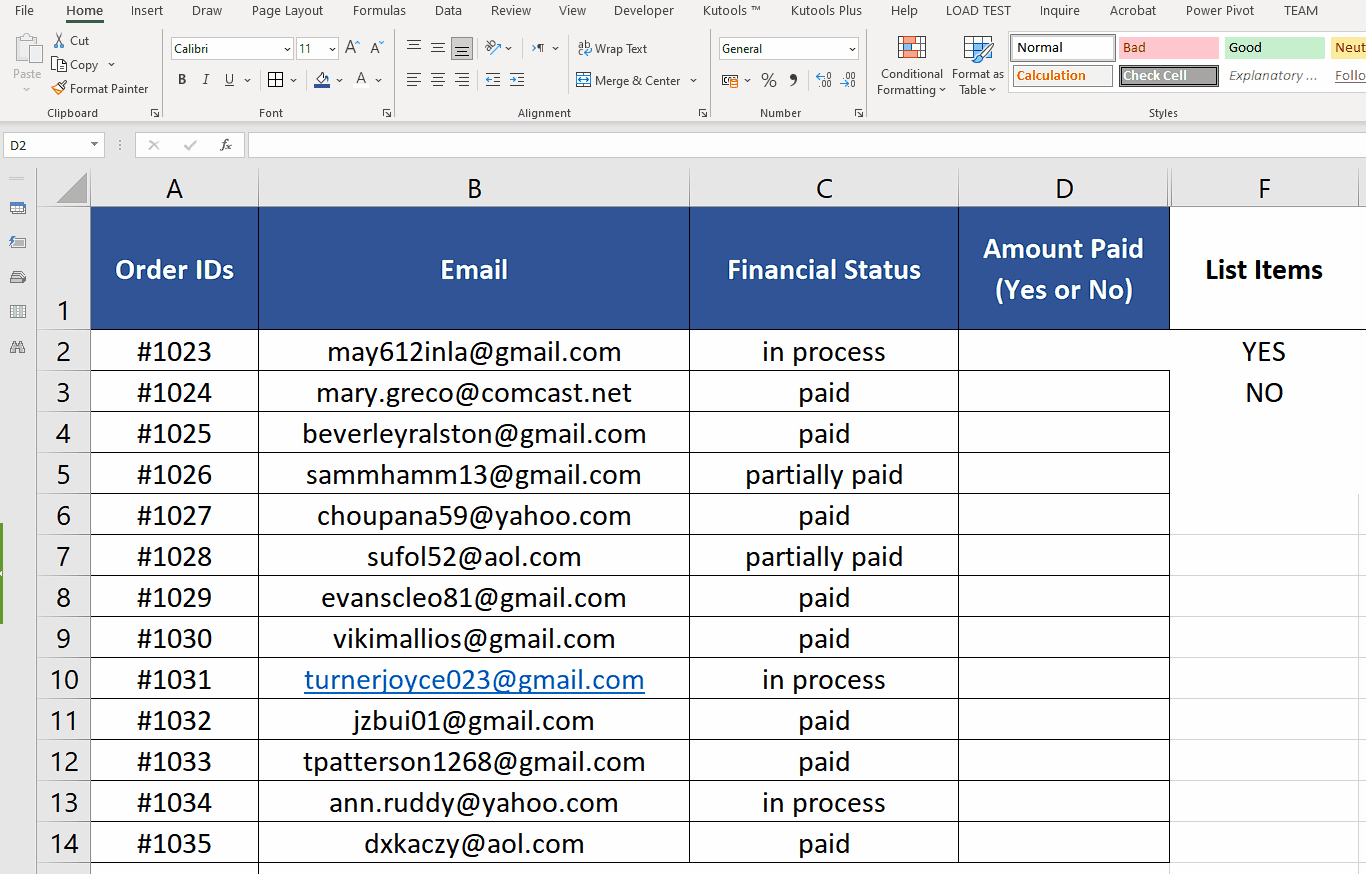
– Select all the cells where you want to create the dropdown list.
– From the list of main tabs, click on the Data tab.
– Now in Data Tools locate the Data Validation action button and press it.
– This will open up the Data Validation dialog box. In the validation criteria choose a list.
– Click on source and then select the cells F2 and F3. Press the OK button.
– This will create a Yes or No dropdown list in the selected cells as shown above.
– So, this is how we can create a Yes, No dropdown in Excel.


