
How to create a weekly schedule in Microsoft Excel
 By
SpreadCheaters
By
SpreadCheaters
A weekly schedule in Excel is a spreadsheet that helps to plan and organize activities or tasks over the course of a week. The purpose of a weekly schedule is to visually map out the activities or tasks that need to be accomplished each day, and to help ensure that all the important tasks are completed on time.
In this tutorial, we will learn how to create a weekly schedule in Microsoft Excel. In Excel, we can create a weekly schedule manually by adding the information and formatting the cells accordingly. A weekly schedule commonly consists of column headers representing the days of the week (Monday through Sunday) and row headers representing time slots. It can be personalized according to specific needs by adding additional information such as start time, end time, working hours, and time intervals. We can also create a weekly schedule using Excel’s built-in templates.
Method 1: Create a Weekly Schedule Manually
Step 1 – Create the Title
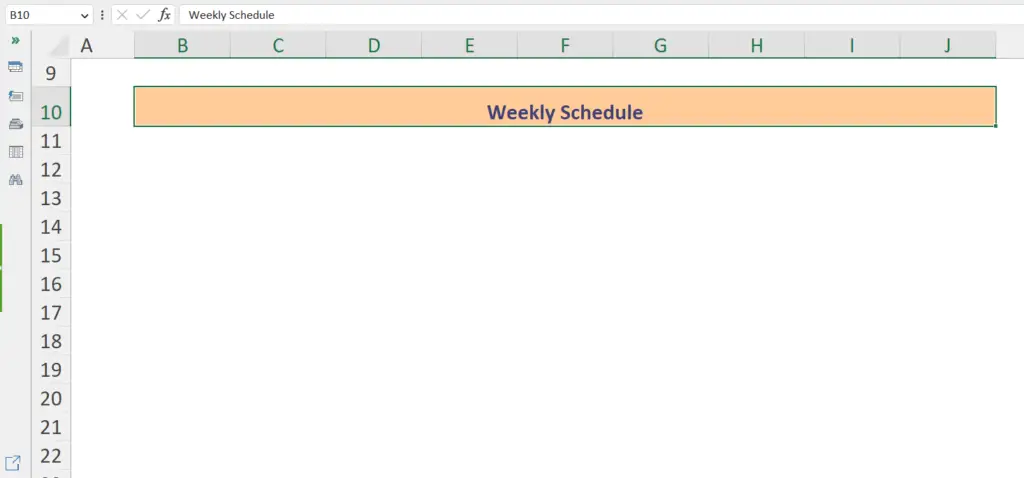
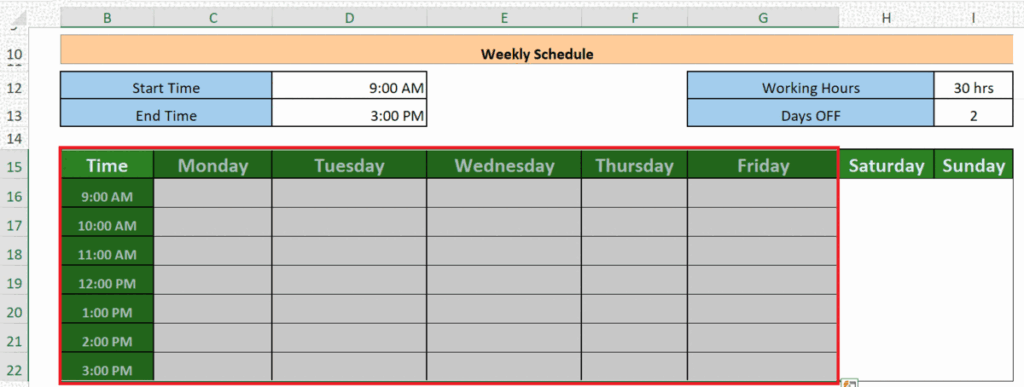
- Create the Title by merging some cells of the row.
- Enter the title i.e. “Weekly Schedule” in the row.
- You may format it to make it more prominent. For this, Cell Styles options can be utilized.
Step 2 – Add Some Details of the Week
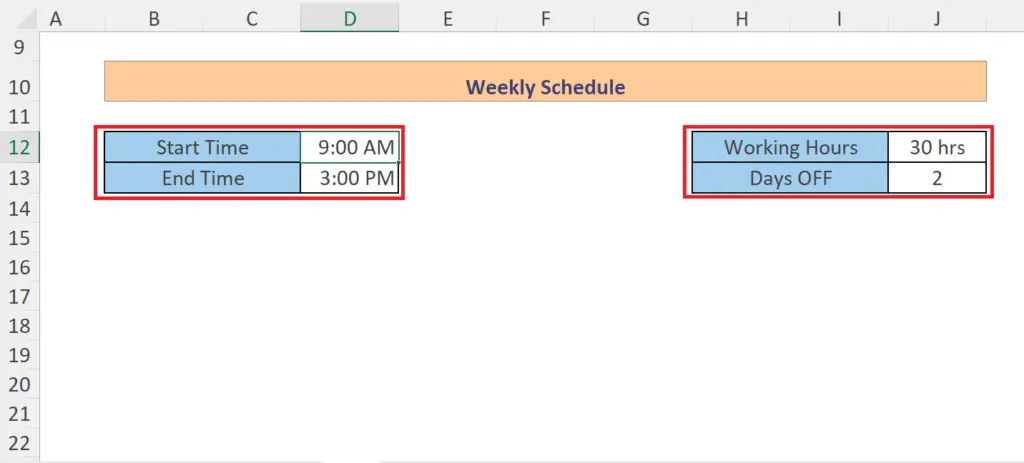
- Add some details of the week above the Title i.e. Start time, End time, Working hours, Days Off, etc.
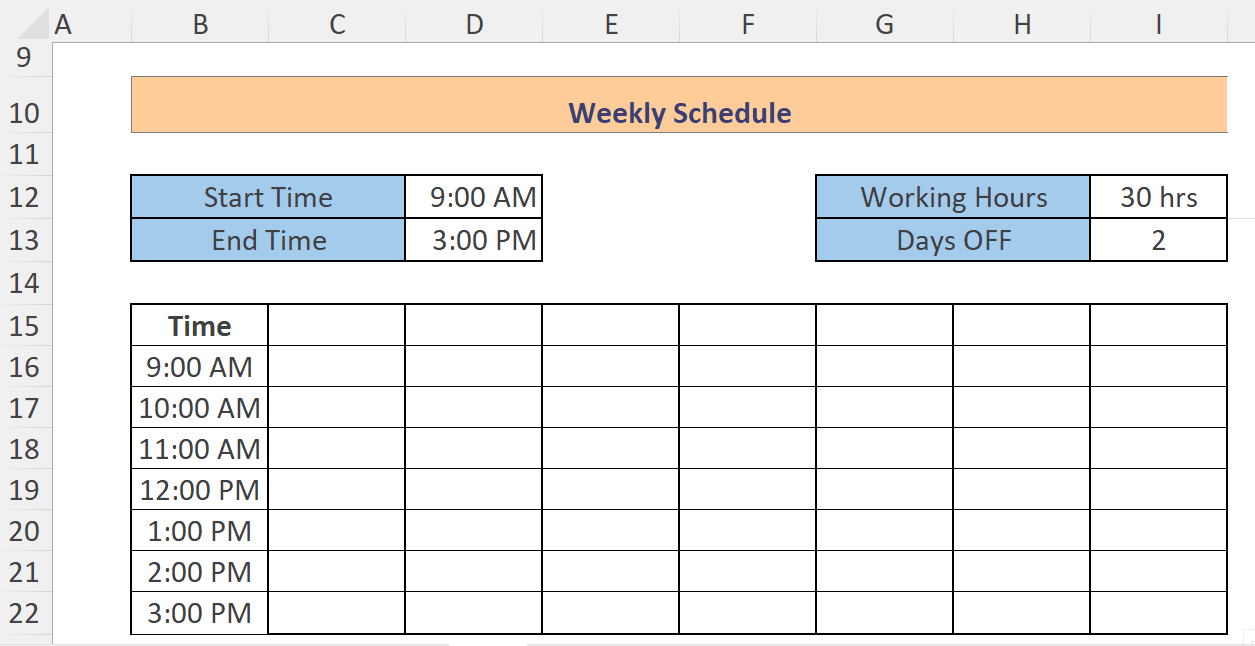
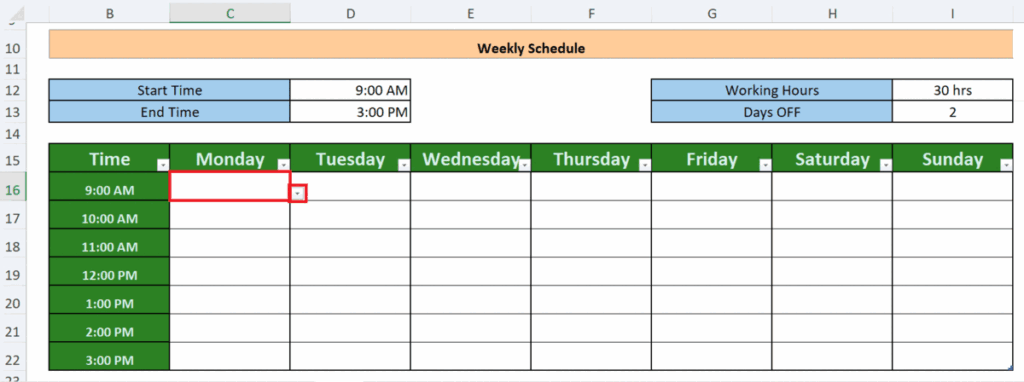
Step 3 – Enter the Time Stamps
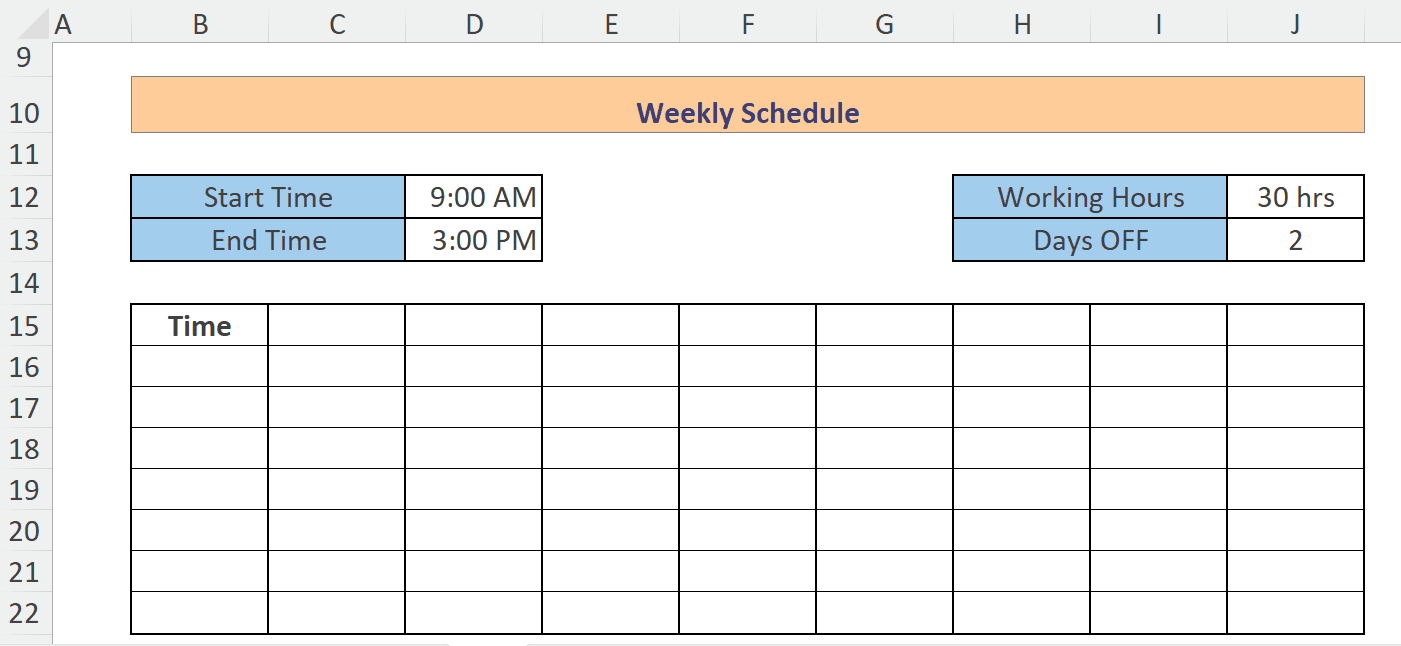
- Enter the Time stamps in the left-most column of the schedule.
- For this, we can use Autofill. Enter the first time stamp i.e. 9:00 AM and then use Autofill to fill the adjacent cells.
Step 4 – Enter Day Names
- Enter Day names in a row from the column next to the Time stamps.
- This can also be done using the Autofill feature.
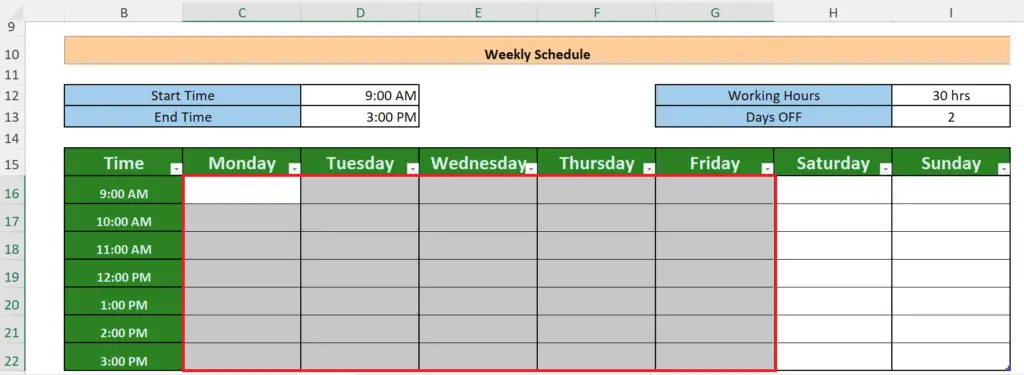
Step 5 – Convert the Range to a Table
- Convert the range containing the Time Stamps and Days till Friday into a table.
- For this, we can press the CTRL+T shortcut keys or we can insert a table from the Data tab.
Step 6 – Create a Named Range i.e. To-do List
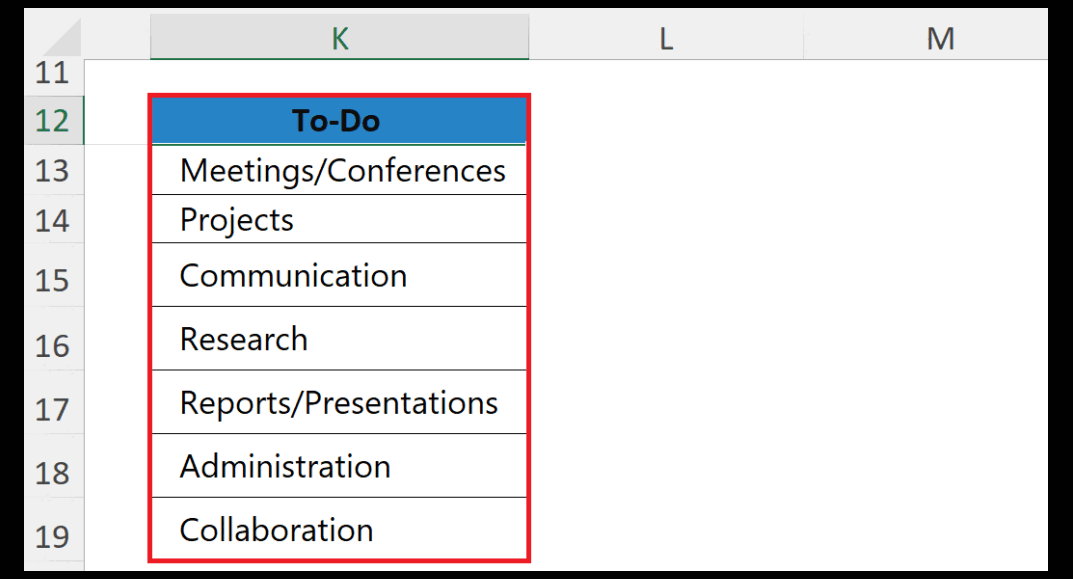
- List the tasks to be done in the week anywhere on the sheet with a header.
- Select the range containing the list and press CTRL+SHIFT+F3, a dialog box will appear.
- Select the Top row in the dialog box and click on OK, the list will be created.
Step 7 – Select the Range for Weekdays
- Select the range for each day up till the days off i.e. Saturday and Sunday.
Step 8 – Click on the Data Validation Option
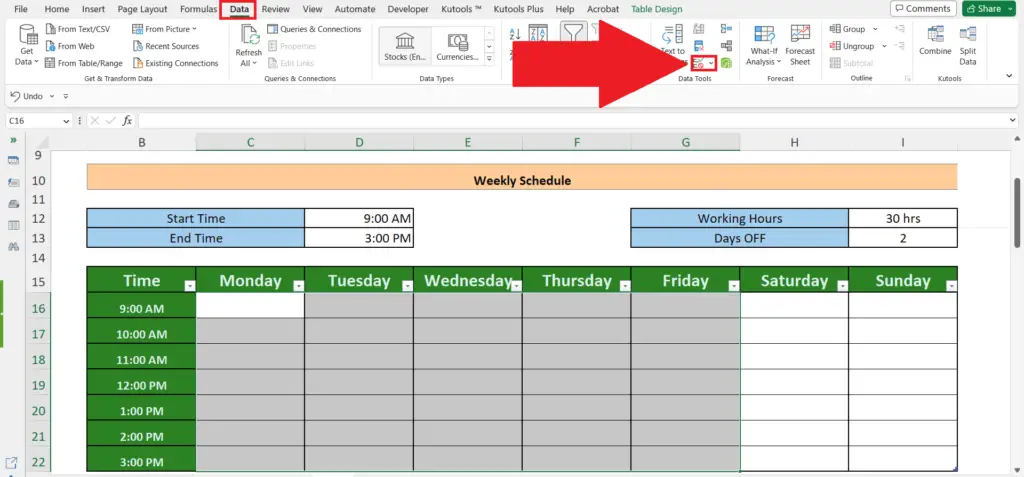
- Click on the Data Validation option in the Data Tools section of the Data tab.
Step 9 – Enter the To-do List in the Data Validation Source
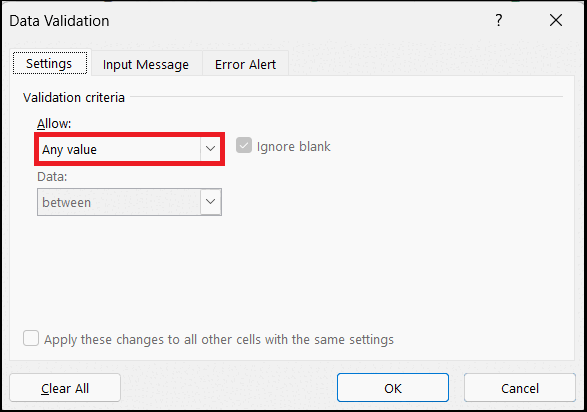
- In the dialog box, go to the setting tab.
- Select the List option from the Allow’s drop-down list.
- Then enter the name of the To-do list created in the source field by placing an equals sign before it i.e. =To-do.
- Click on OK.
Step 10 – Now Add the Tasks in the Slots
- Click on the cell in the range where you want to add the task.
- A drop-down arrow will appear next to the selected cell.
- Click on the arrow, the To-do list will appear.
- Select a task from the list, it will appear in the cell.
Step 11 – Merge the cells located in the columns for Saturday and Sunday
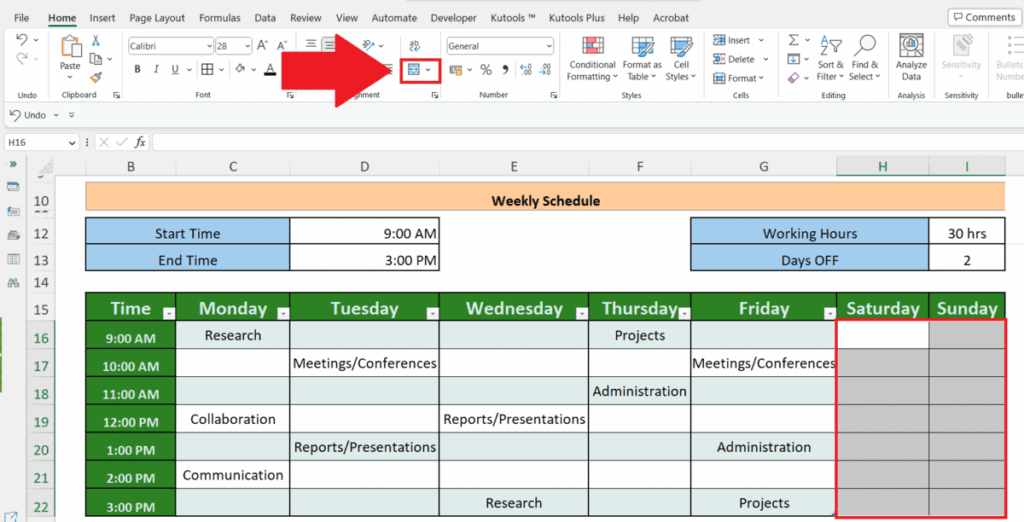
- Merge the cells located in the columns for Saturday and Sunday, then click on the Merge & Center option in the Alignment section of the Home tab.
- The cells will be merged.
Step 12 – Enter “OFF” in the Merged Cell
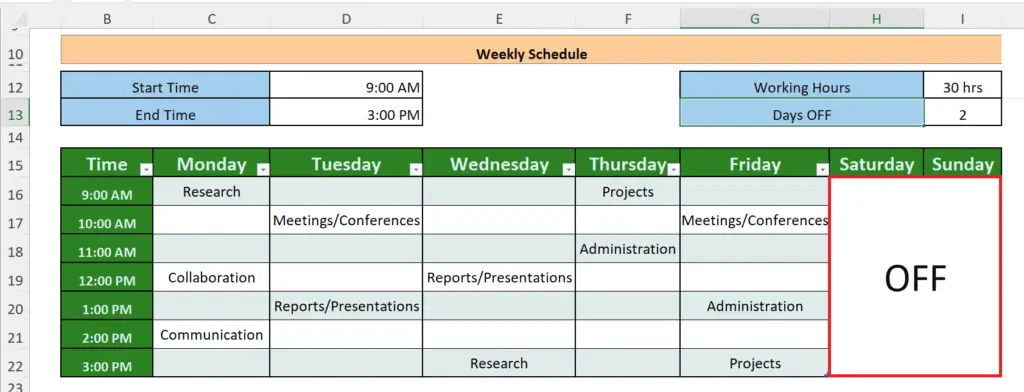
- Double-click on the merged cell and enter “OFF”.
Method 2: Create a Weekly Schedule from Built-in Template
Step 1 – Go to the File Tab
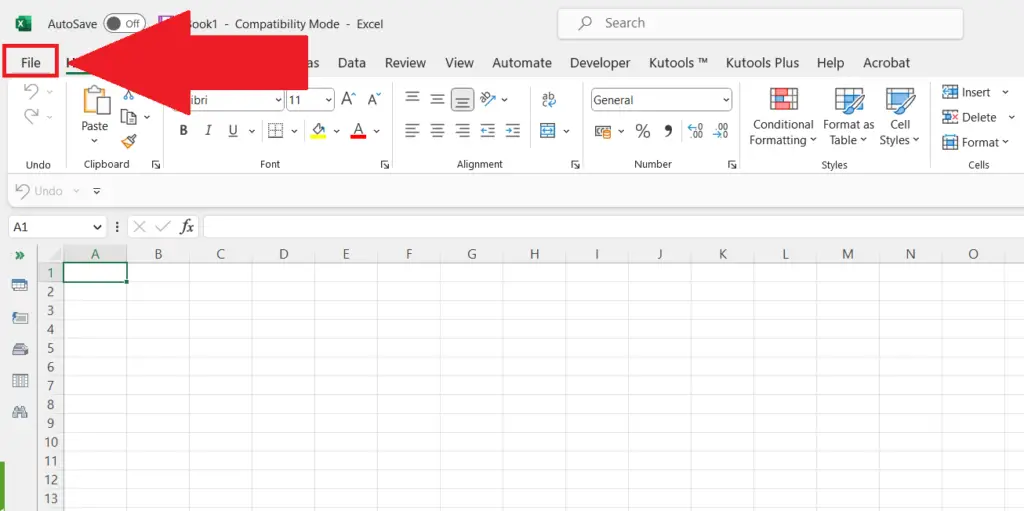
- Go to the File tab in the menu bar.
Step 2 – Click on the More Templates
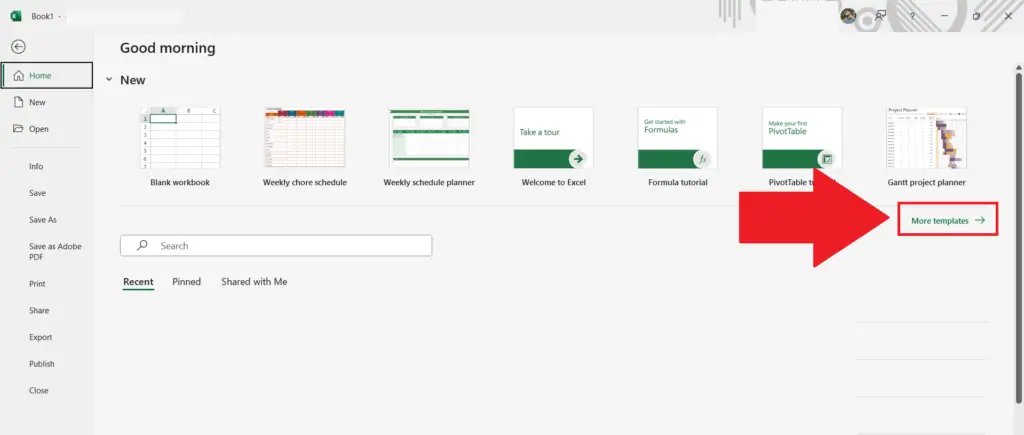
- Click on the More Templates option in the Home section.
Step 3 – Search for Weekly Schedule
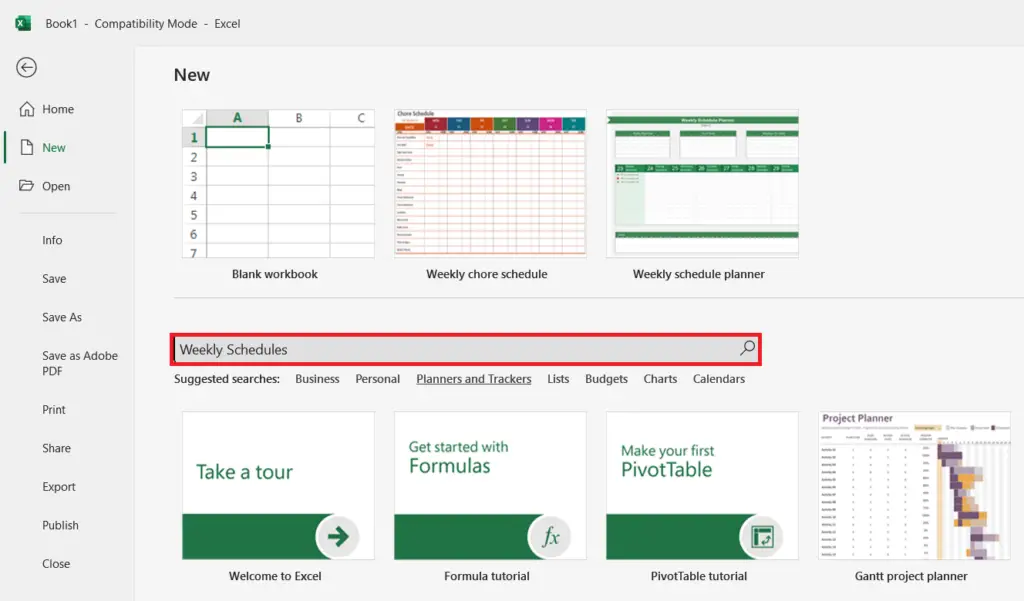
- Enter “Weekly Schedule” in the search bar.
Step 4 – Select a Template
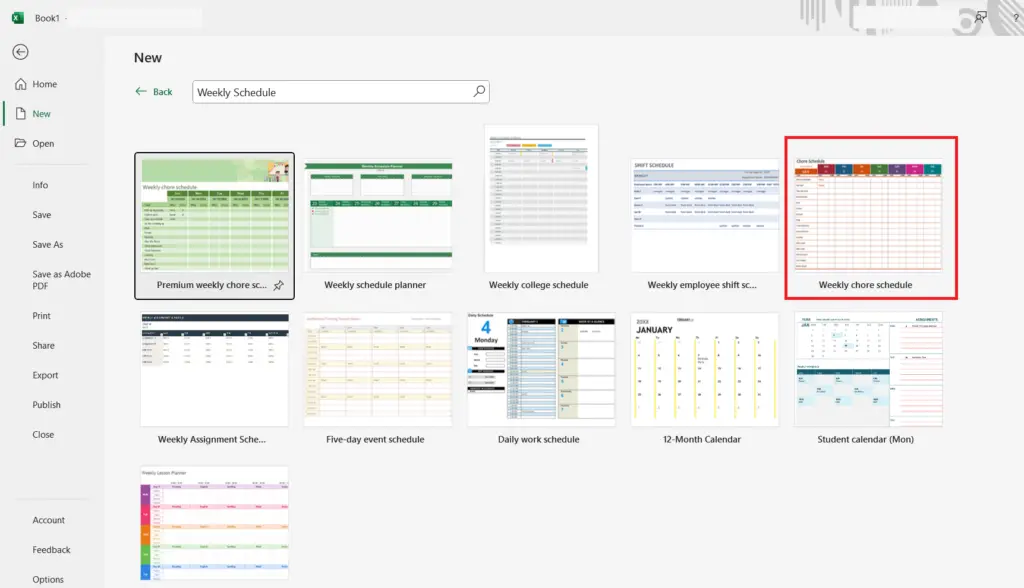
- Select a template from the options.
Step 5 – Click on Create
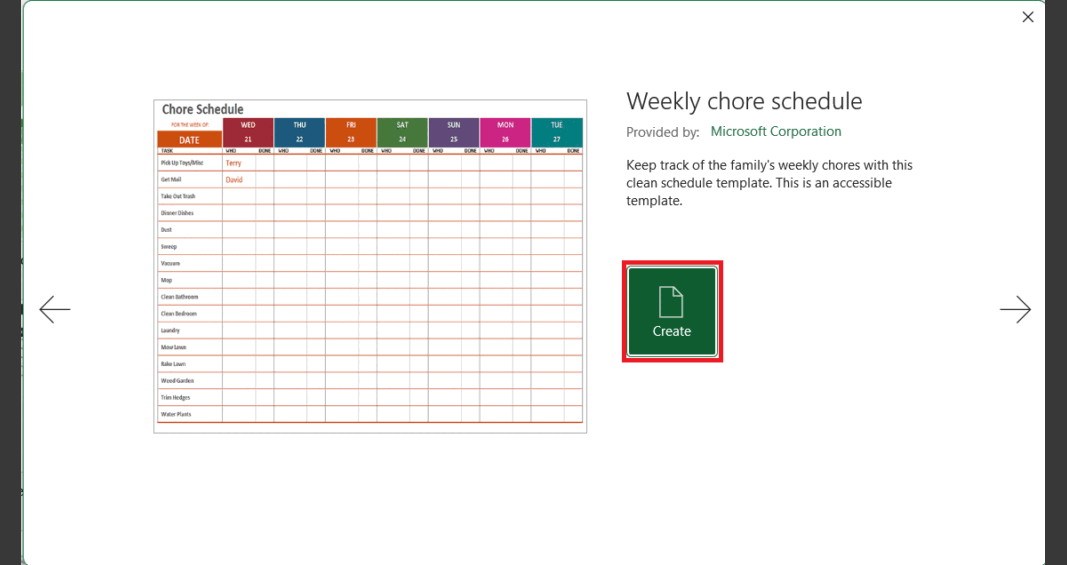
- Click on the Create button.
- The schedule will be created.
- You may then modify the schedule as required.


