How to create a task tracker in Excel
You can watch a video tutorial here.
The spreadsheet format of Excel lends itself to creating different types of lists. One list that is used both professionally and personally is a list of tasks. Microsoft Office provides templates that you can use or you can create your customized tracker. Using the task tracker you can define a list of tasks and then track them to completion.
Option 1 – Create your tracker
Step 1 – Define the columns

- Define the columns by giving the column headers:
- No.
- Task description
- Priority
- Due date
- Status
Step 2 – List the tasks

- List out the tasks to be done
- Assign a priority for each task
- Fix the due date for each task
Step 3 – Open the Data Validation box

- Select the cells in the ‘Status’ column
- Go to Data > Data Tools
- Expand the Data Validation menu
- Select Data Validation
Step 4 – Create the list
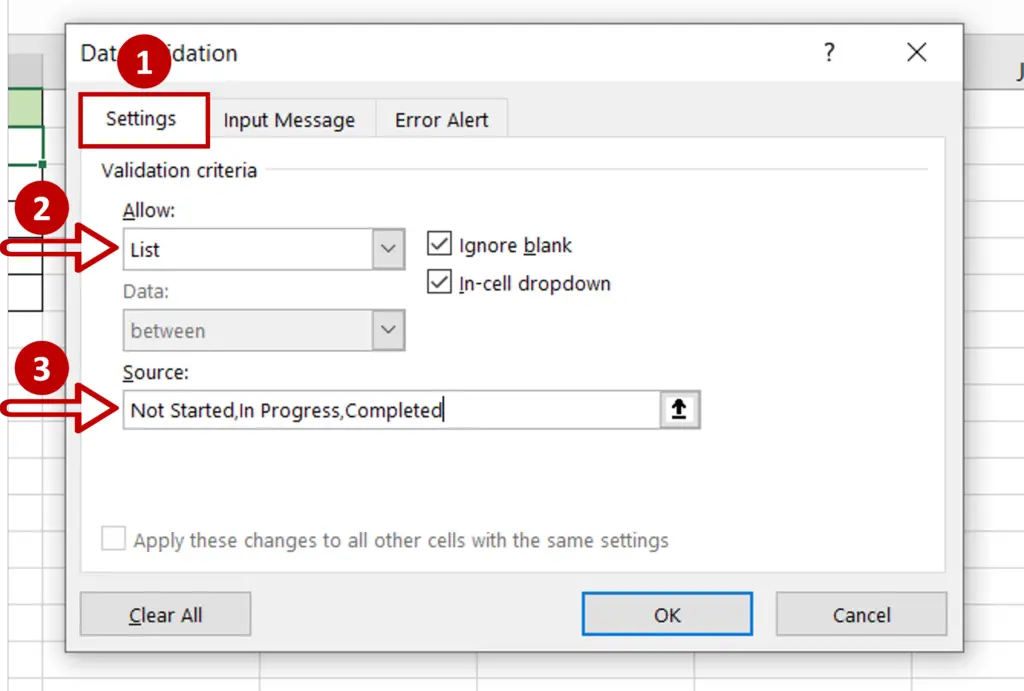
- Select the Settings tab
- Under Allow: select ‘List’
- Enter the values for Source: Not Started,In Progress,Completed
- Click OK
Step 5 – Select the values for the ‘Status’ column

- For each task, select a value from the dropdown for the ‘Status’ column
Option 2 – Use a template
Step 1 – Find the template
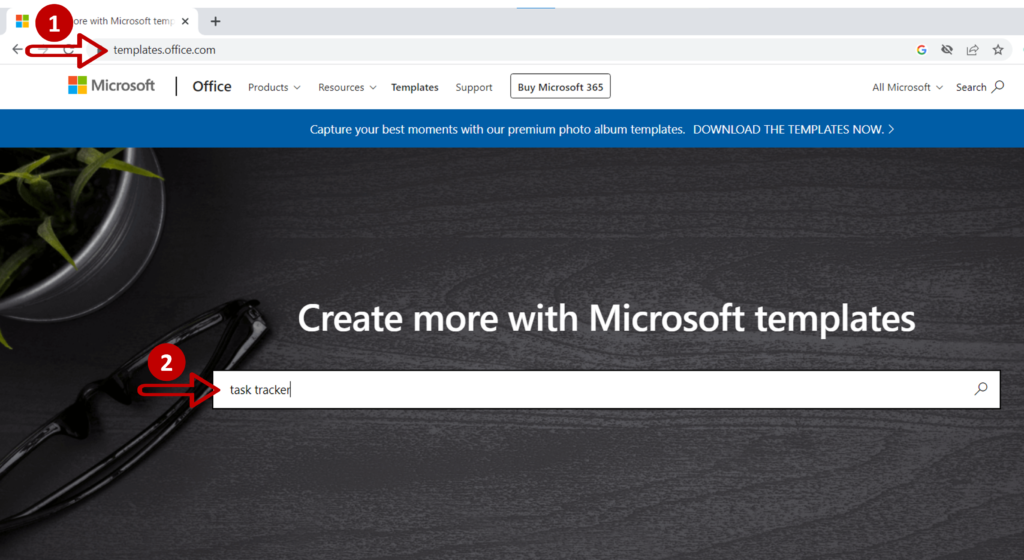
- Go to https://templates.office.com/
- Type ‘task tracker’ in the Search box
- Press Enter
Step 2 – Choose a template
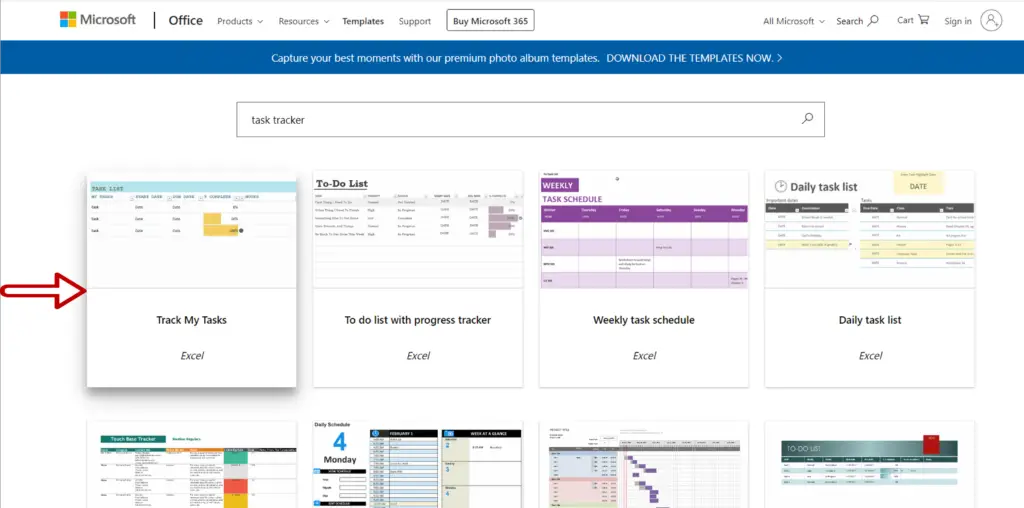
- Select the ‘Track My Tasks’ template
Step 3 – Download the template
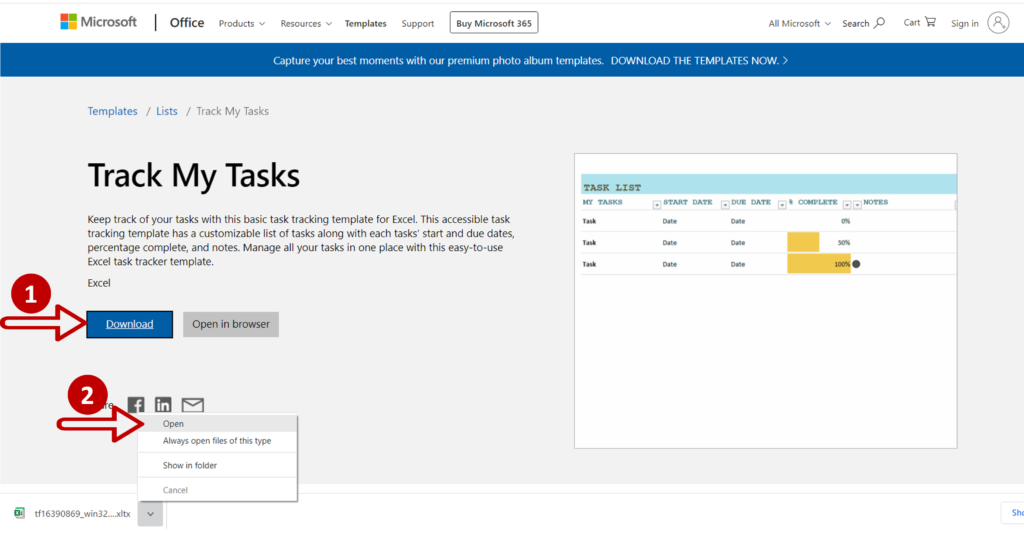
- Click Download
- After the file has been downloaded, click on the up arrow to expand the menu
- Click Open
Step 4 – Enable the file for editing
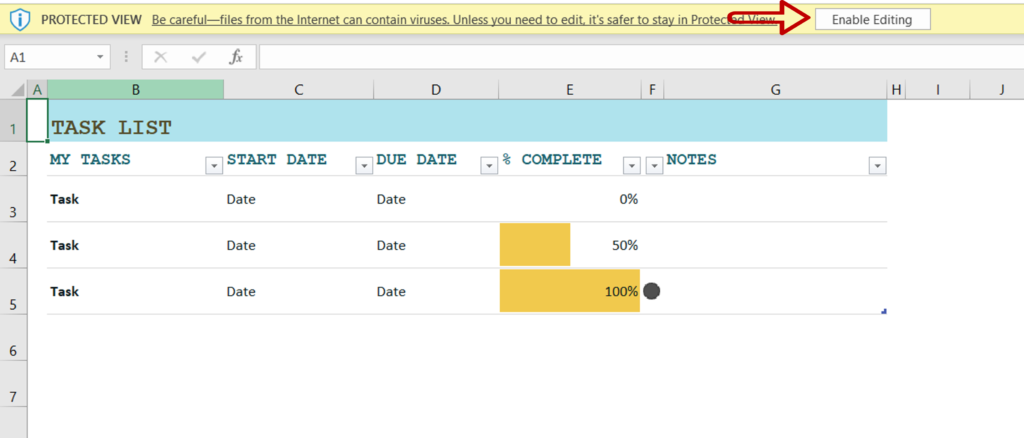
- Click the Enable Editing button to use the sheet
Step 5 – Use the tracker

- Follow the instructions to use the tracker


