
How to create a schedule in Microsoft Excel
 By
SpreadCheaters
By
SpreadCheaters
In this tutorial we will learn how to make a schedule in Microsoft Excel. Creating a schedule in Microsoft Excel is a convenient and efficient way to manage and keep track of appointments, tasks, and deadlines. With its various formatting options, formulas, and visualization tools, Excel makes it easy to create a professional-looking schedule that is tailored to your needs. Here we will create a weekly schedule.
Microsoft Excel is a spreadsheet software developed and published by Microsoft. It is part of the Microsoft Office suite and is widely used for various purposes, including data analysis, financial modeling, and project management. Excel allows users to create and format spreadsheets, perform calculations and analysis, and visualize data through charts and graphs. It also includes a variety of tools and functions that make it easy to perform complex calculations and analysis with just a few clicks.
Step 1 – Select a Blank Cell
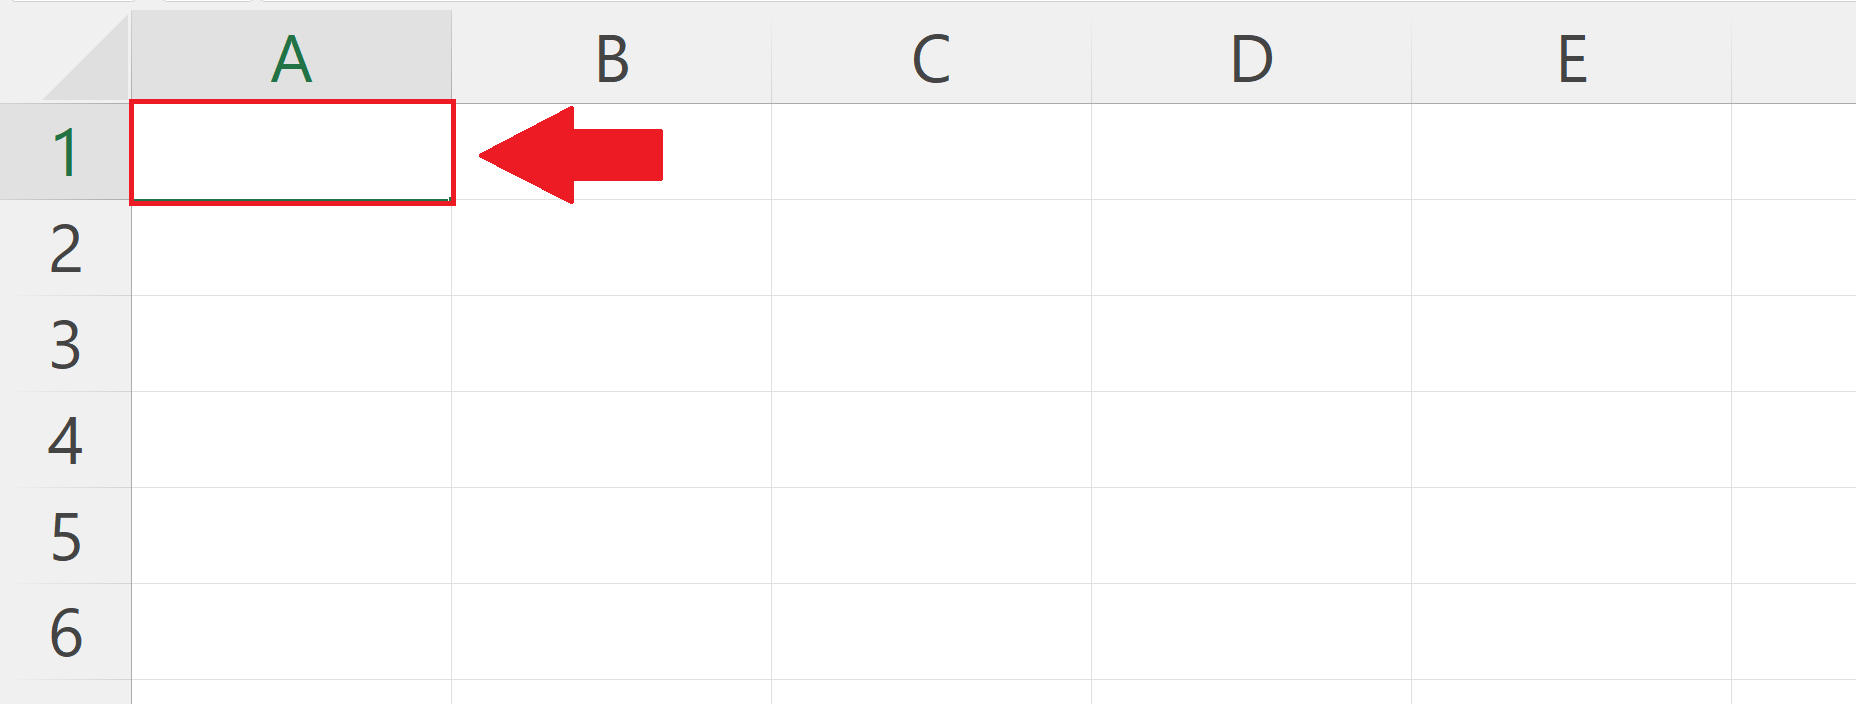
– Select a blank cell from where you want to start the schedule.
Step 2 – Go to the Insert Tab
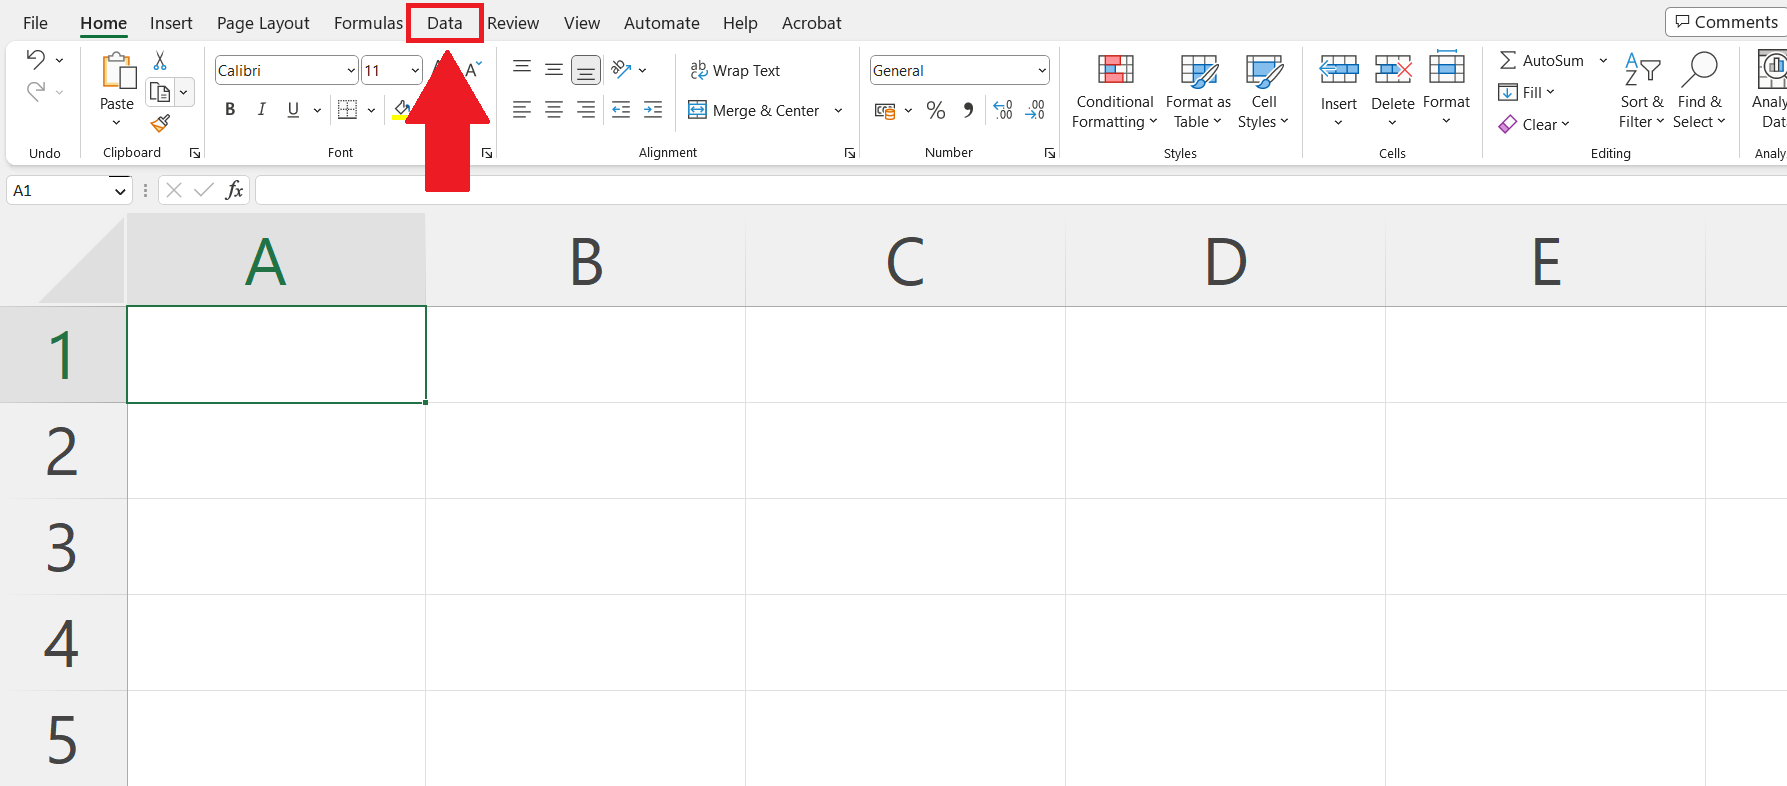
– Go to the Insert Tab in the menu bar.
Step 3 – Click on the Table button

– Click on the Table in the tables section.
Step 4 – Enter the range of the Table
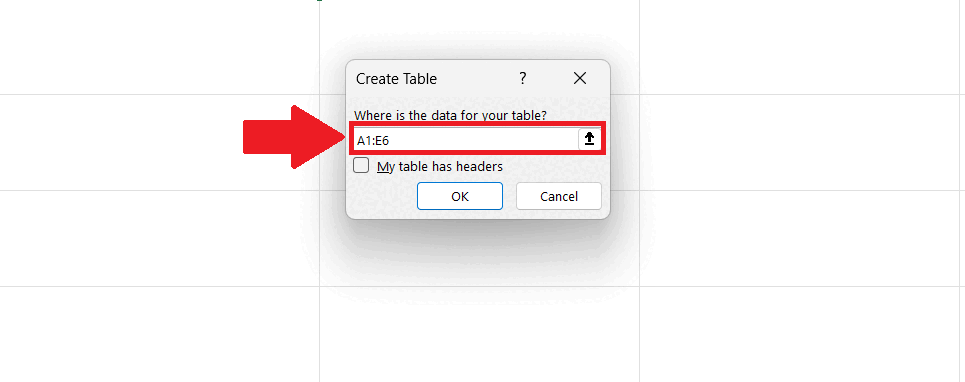
– Enter the range of cells of the table according to the requirement.
– Click on OK .
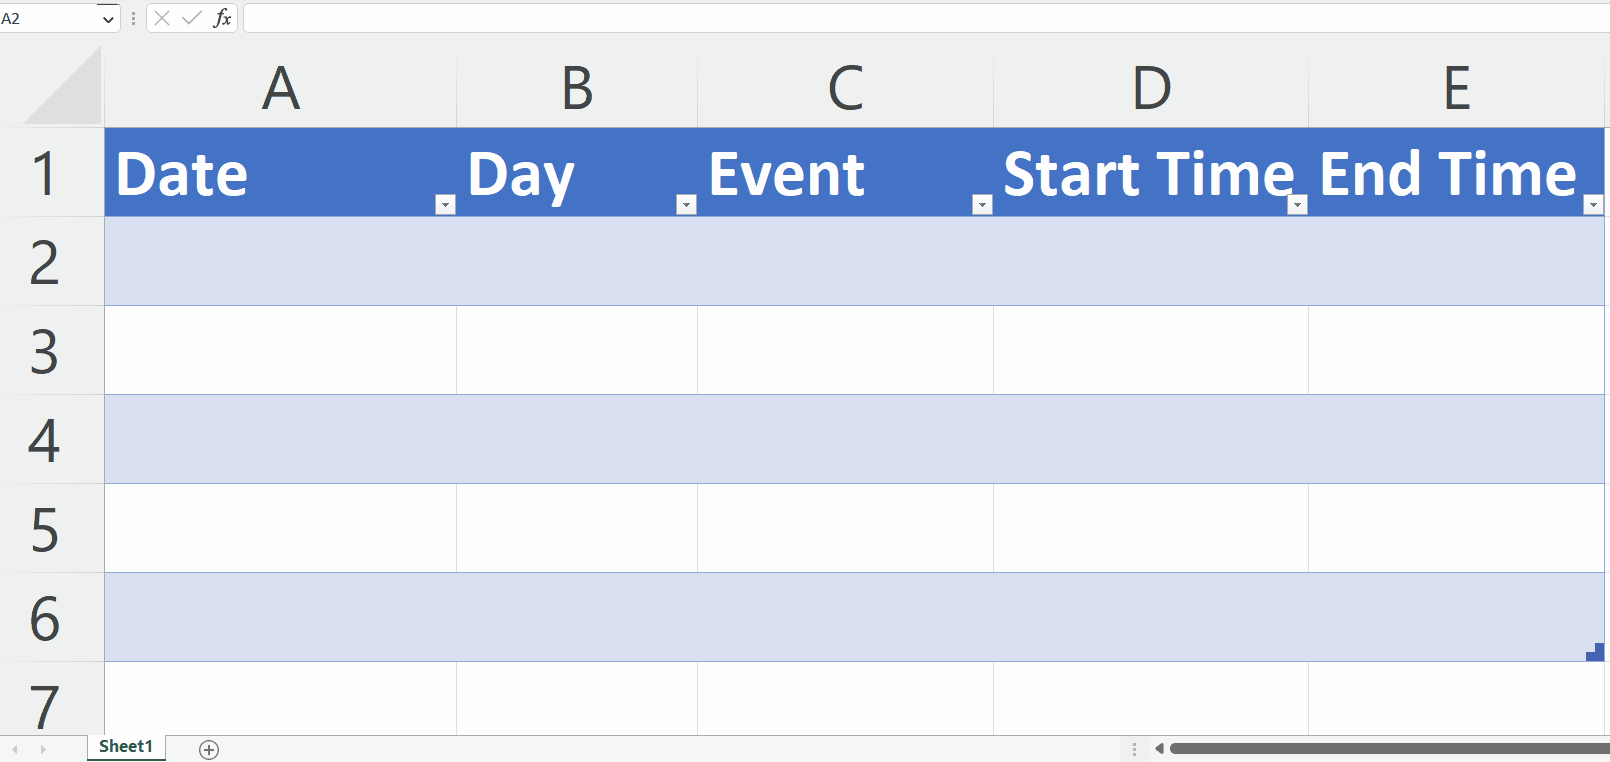
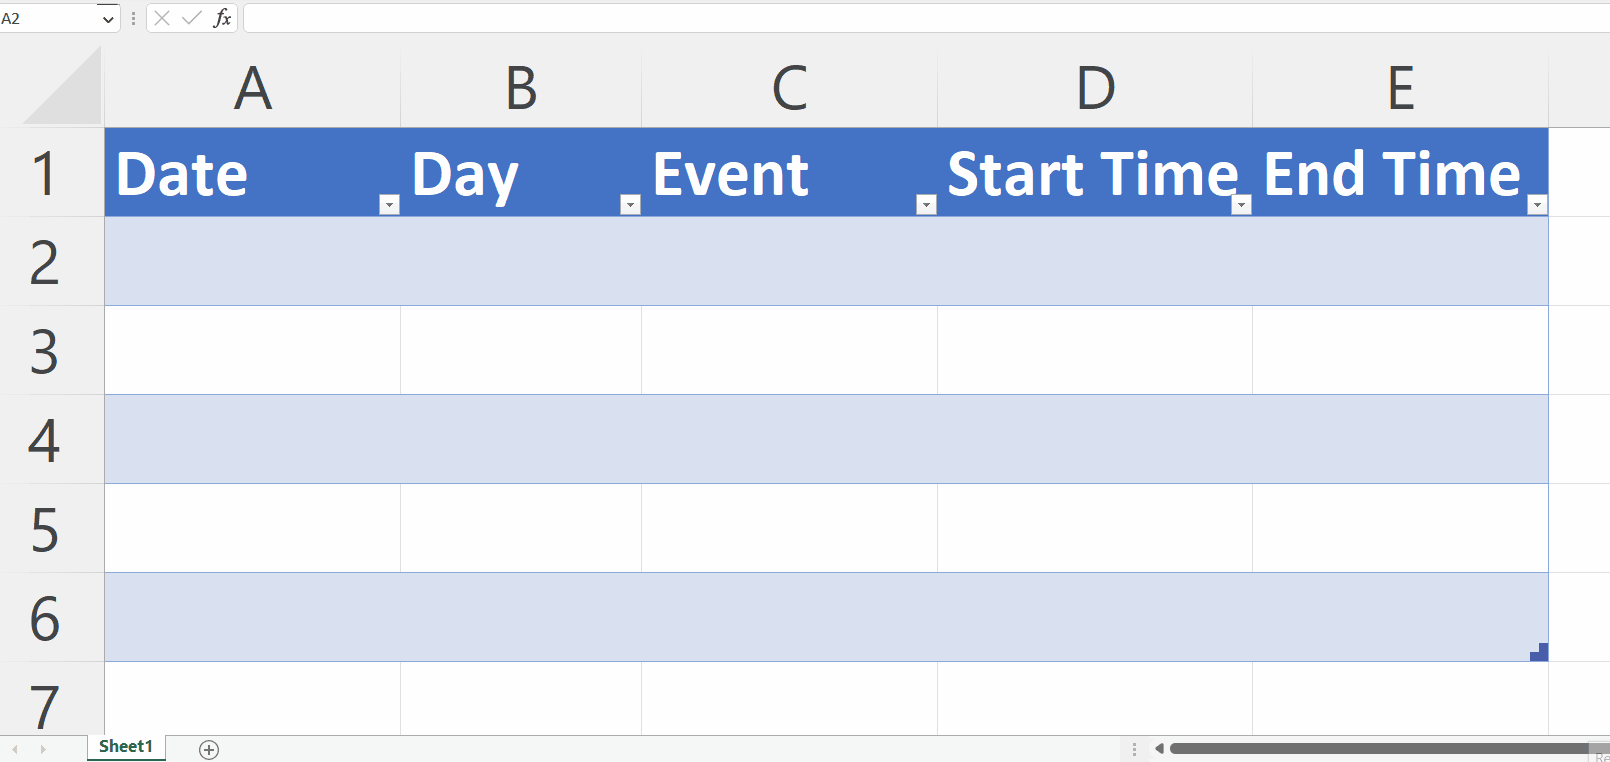
Step 5 – Label the Headers
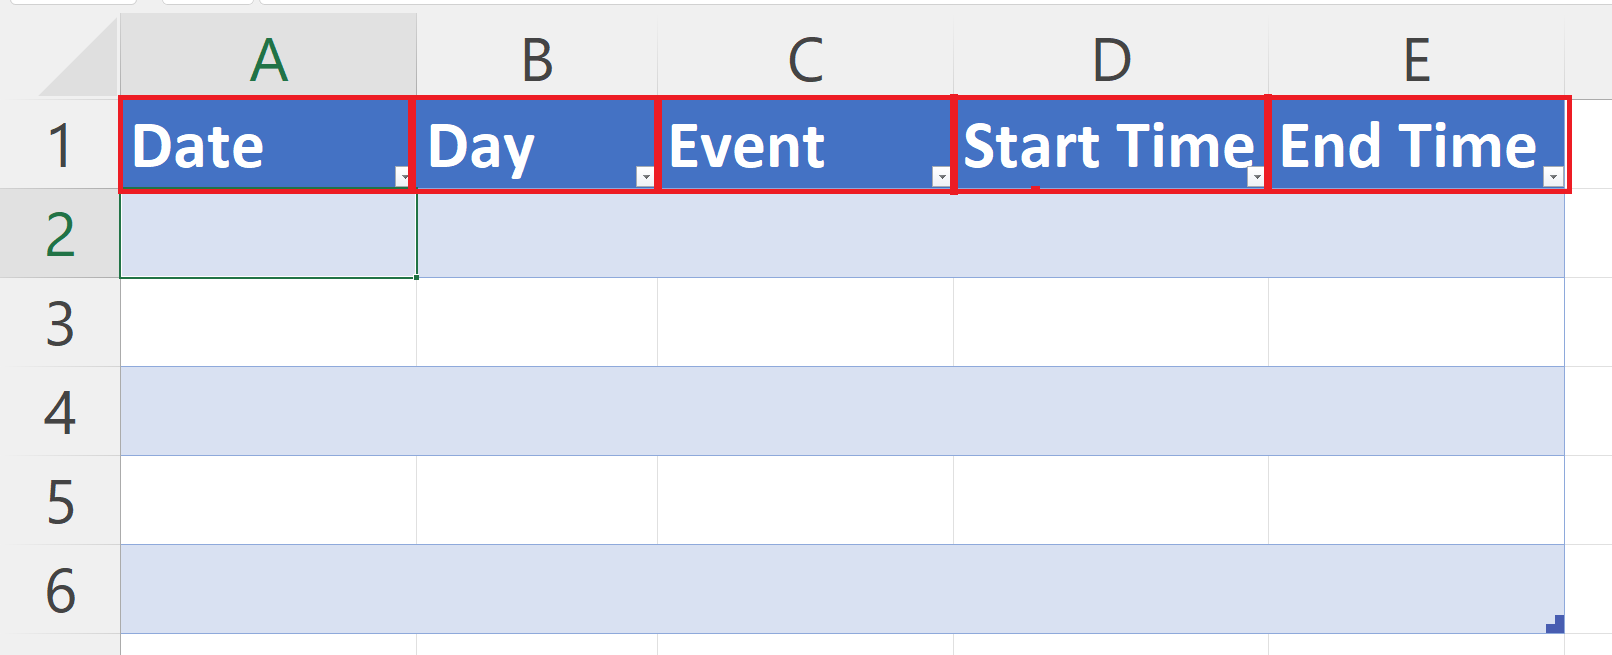
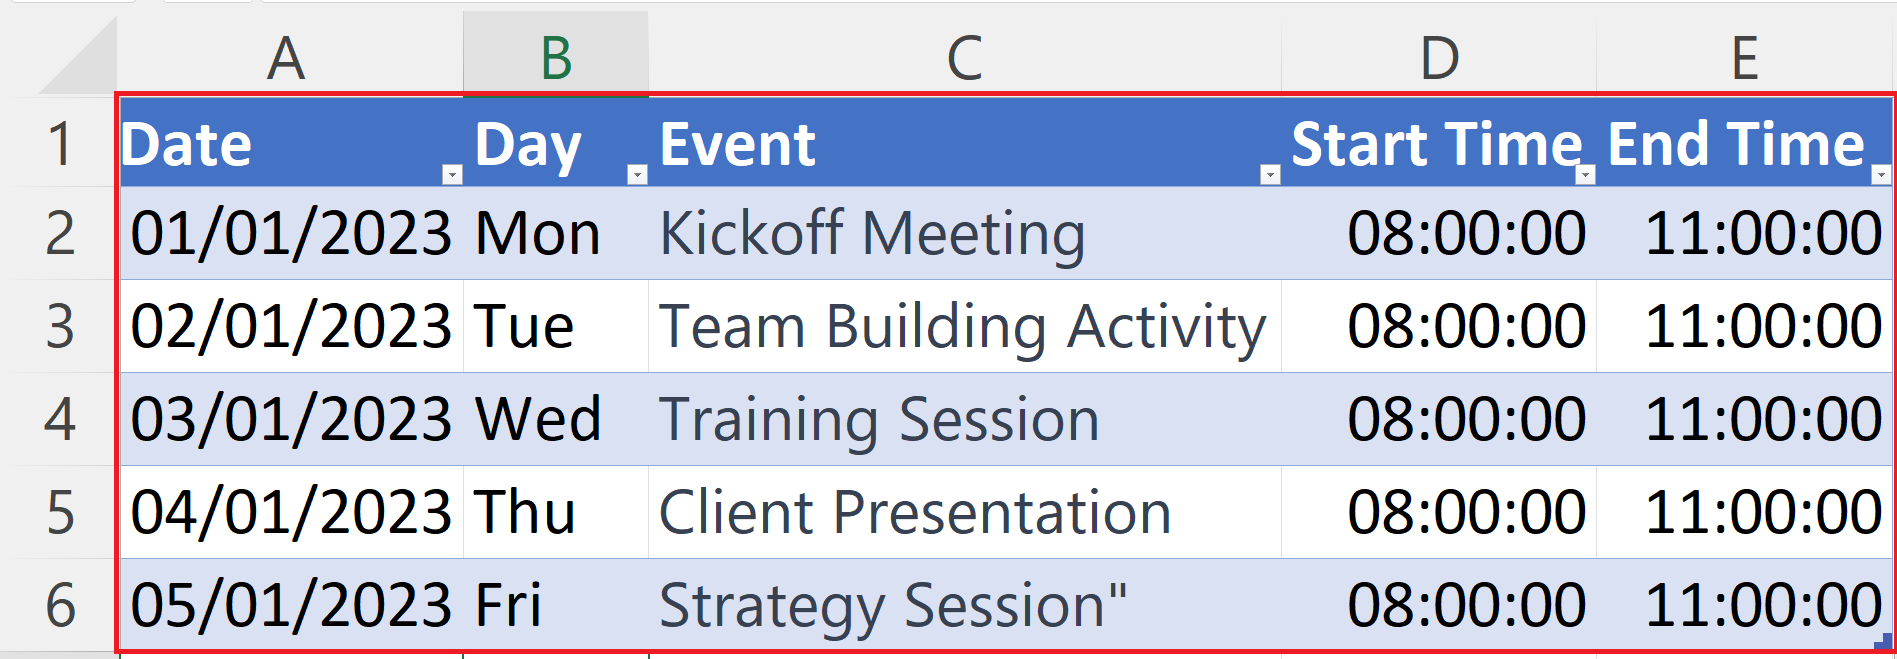
– Labels the headers i.e. Date, Day, Event, Start Time and End Time.4
Step 6 – Change the Format of Date Column
– Right Click on the Date Column and Click on Format Cells option.
– Select Date as the format in the Category section of the Numbers Tab.
– Click on OK in the Format Cells Dialog Box.
Step 7 – Change the Format of Time Columns
– Right Click on the Start Time Column and Click on Format Cells option.
– Select Time as the format in the Category section of the Numbers Tab.
– Click on OK in the Format Cells Dialog Box.
– Repeat the steps for the End Time Column.
Step 8 – Enter the Data in each Column

– Enter the Data in Each Column as per the requirement.


