
How to create a printable form in Excel
 By
SpreadCheaters
By
SpreadCheaters
You can watch a video tutorial here.
Excel is well-suited to creating different types of templates, particularly those that contain tables such as lists, trackers, forms, and schedules. These can be created either for use as soft copies or as print-outs. Templates designed for use as soft copies can include some amount of automation to help with filling in the fields. Those designed for use as hard copies can only include static information. When designing a form to be printed, it is important to ensure that the form fits on a printed page.
Step 1 – Set the page size
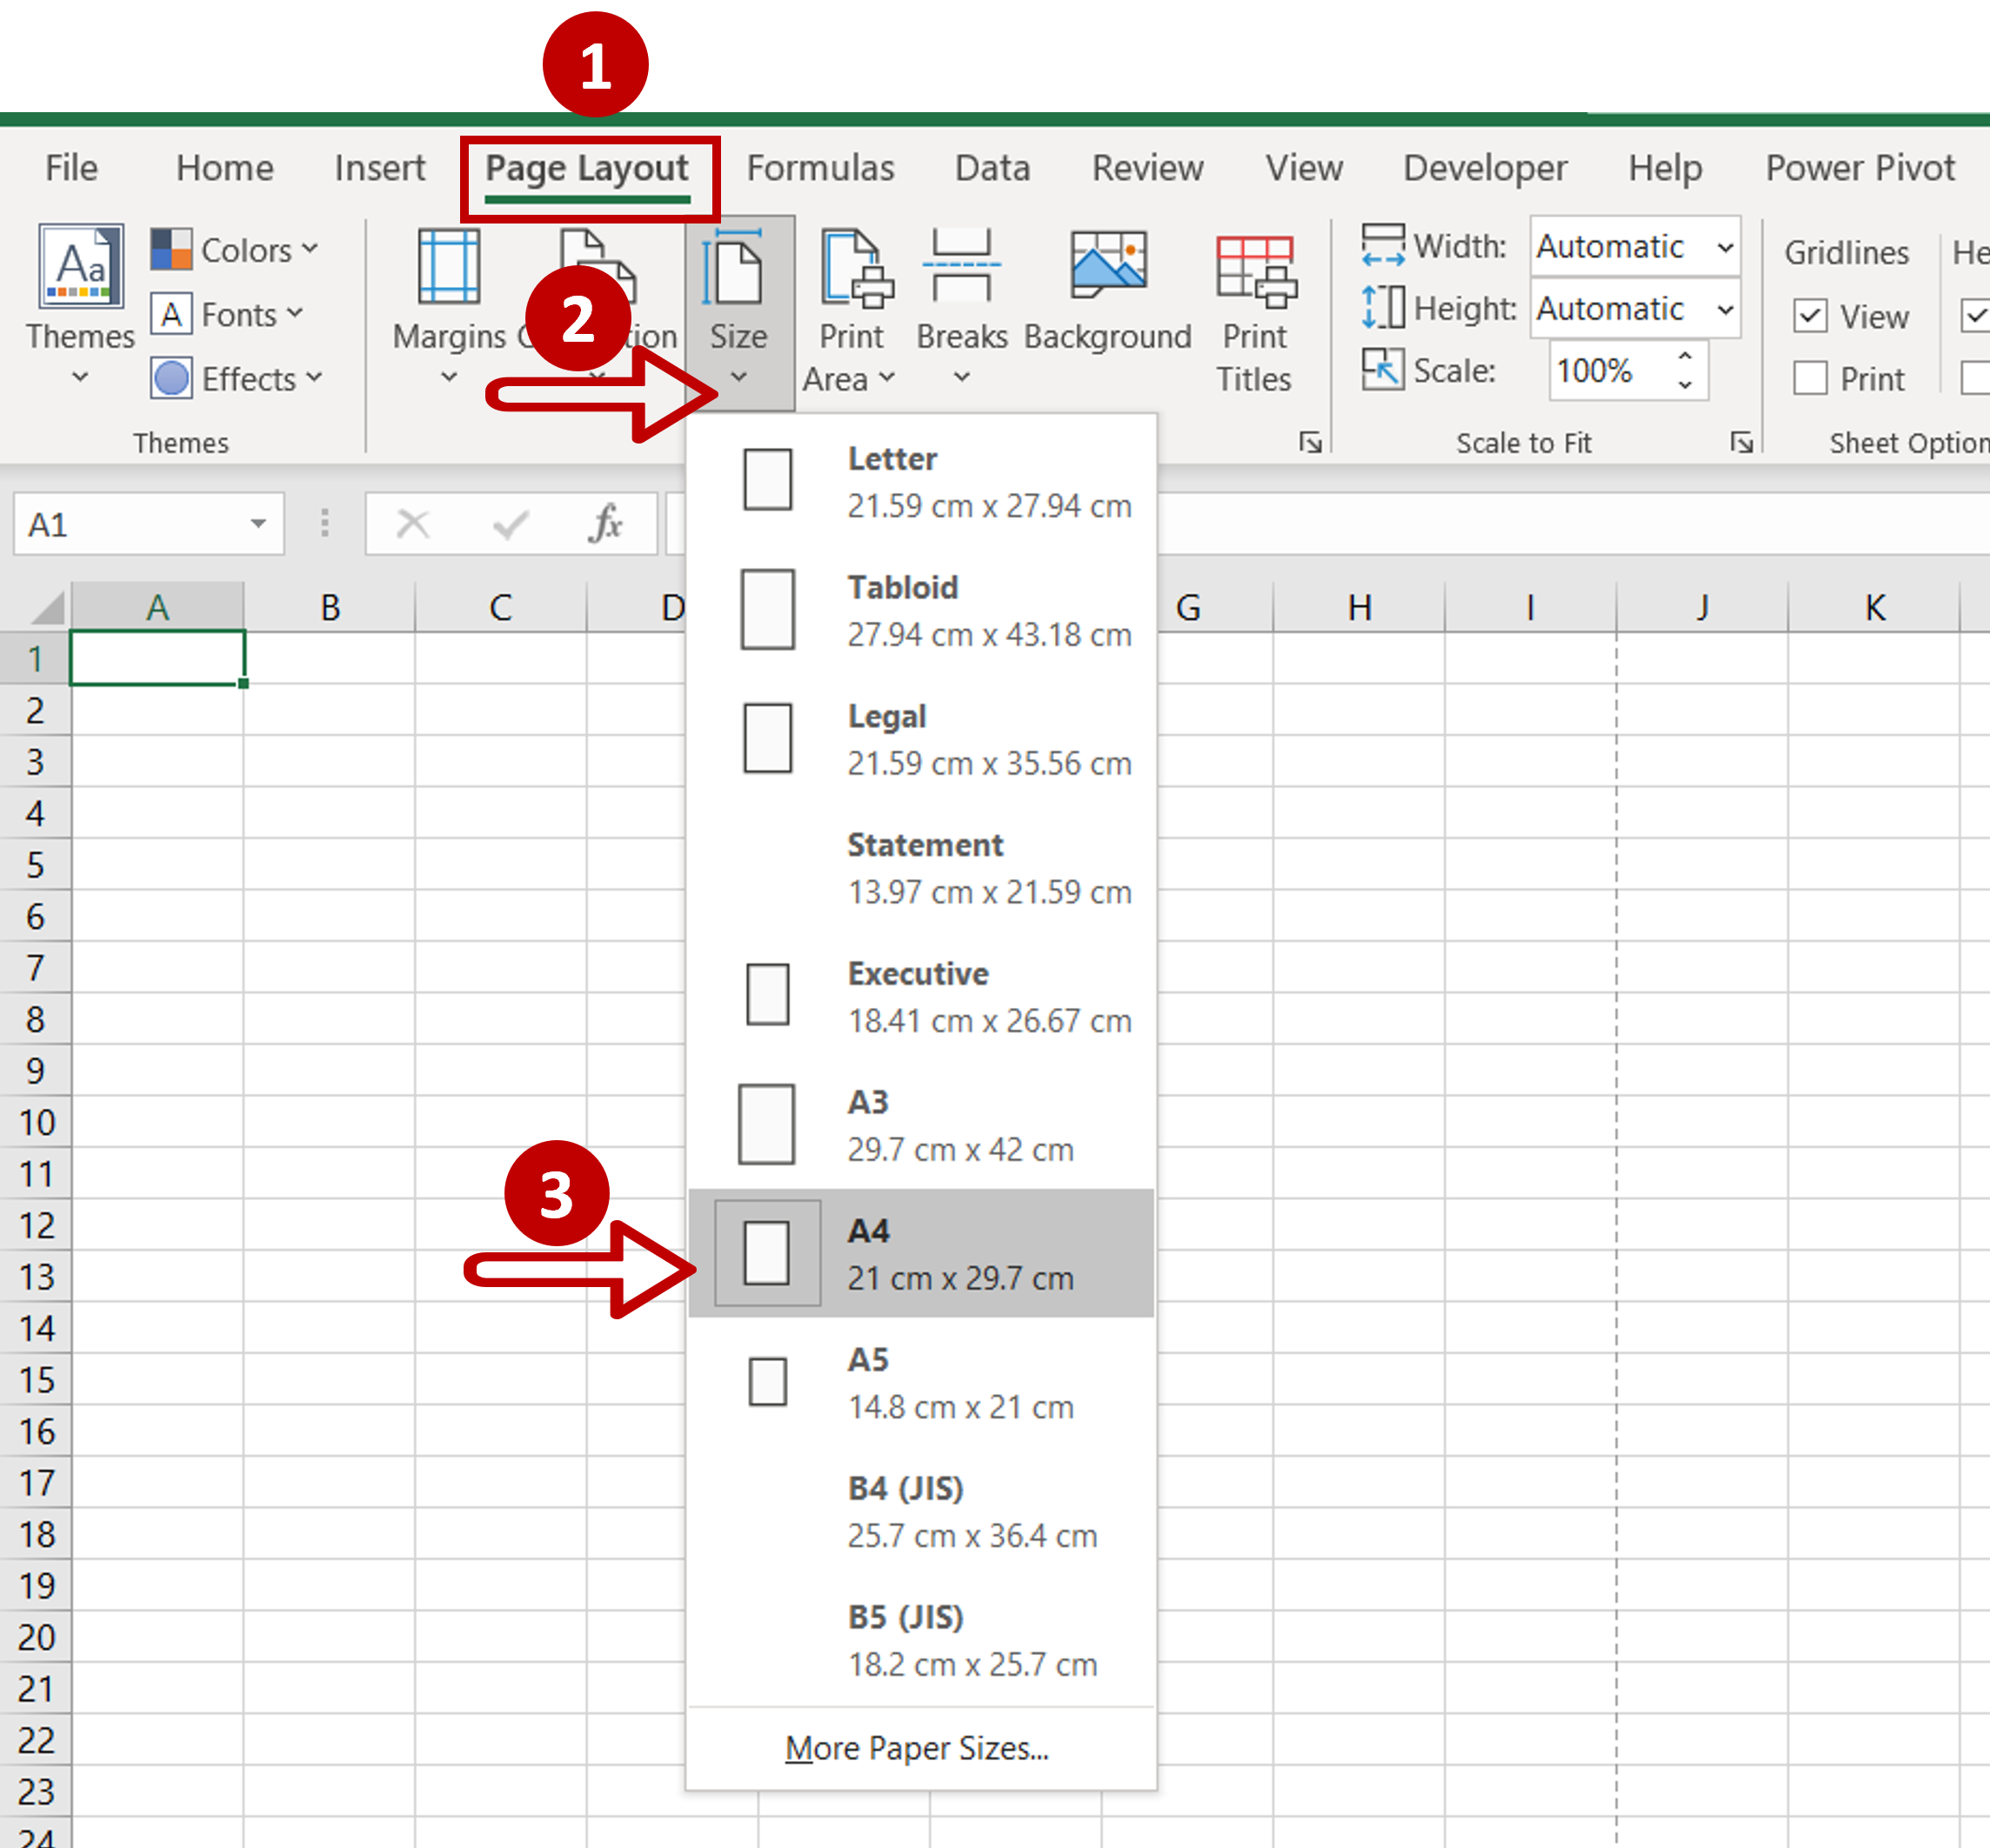
– Go to Page Layout > Page Setup
– Expand the Size dropdown
– Select A4
Step 2 – Remove the gridlines
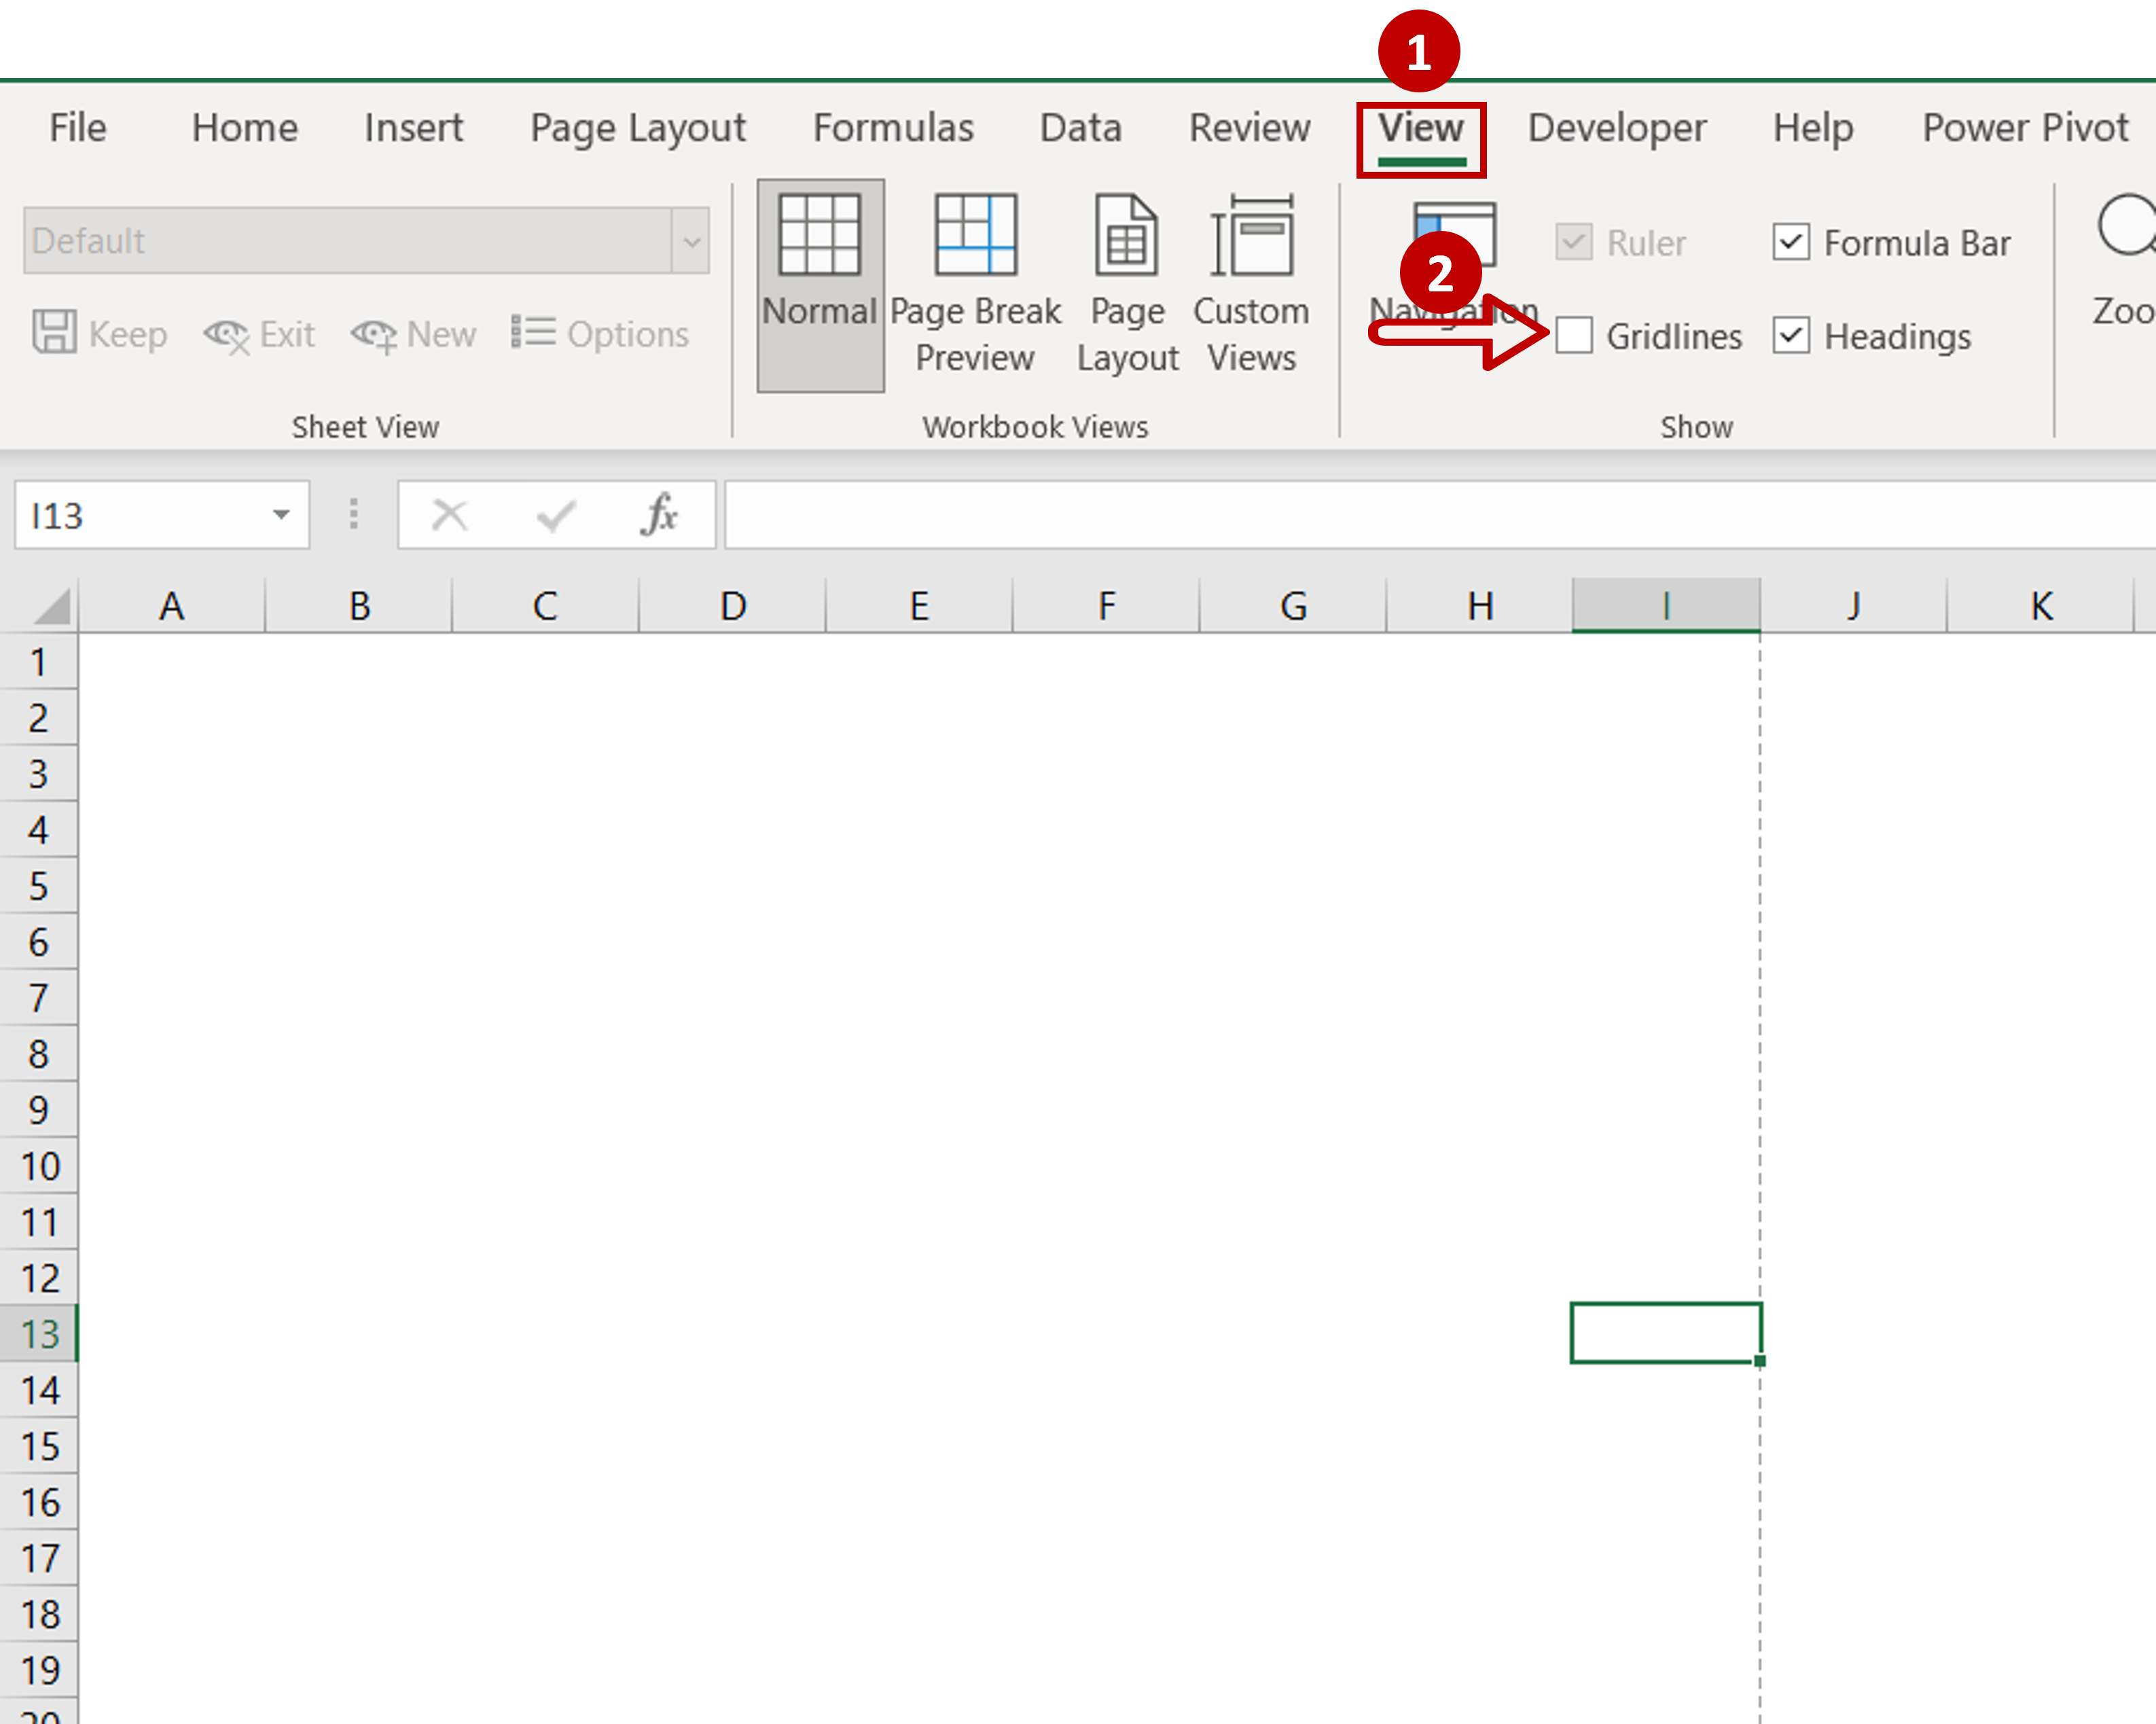
– Go to View > Show
– Uncheck Gridlines
Step 3 – Add the fields to the form
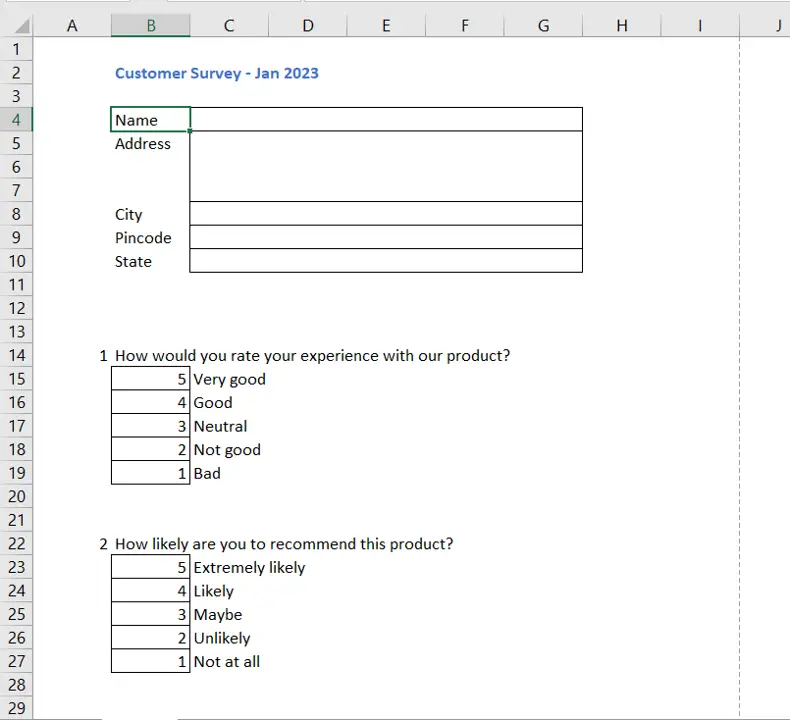
– Add the text to the form
– Go to Home > Alignment > Merge & Center to merge cells
– Ensure that the text stays within the dotted lines that indicate the borders of the page
– Format the form
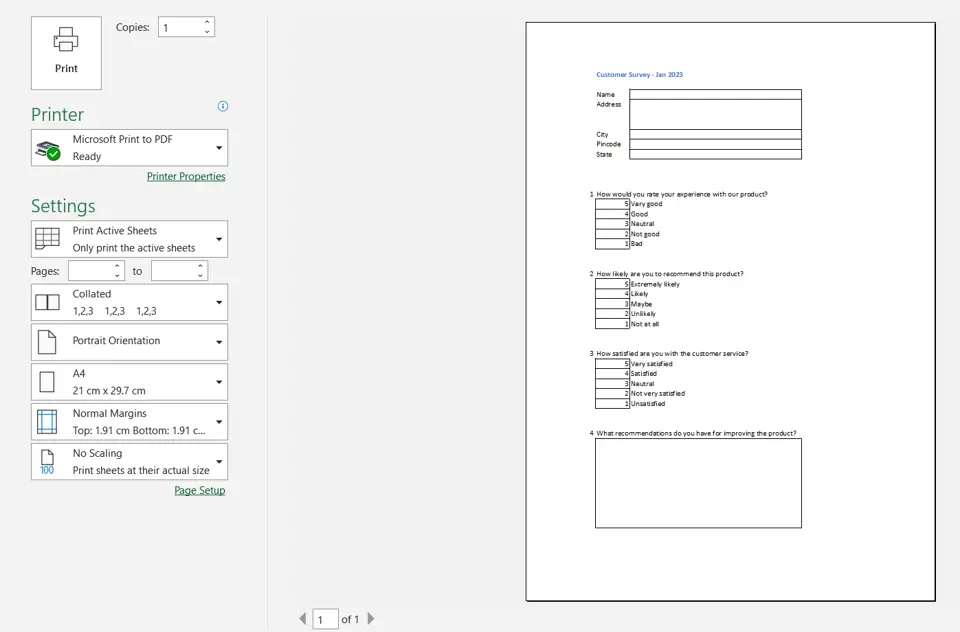
Step 4 – Print the form

– Go to File > Print
– Check that the form is properly aligned on a single page
– Press Print


