
How to create a counter in Excel
 By
SpreadCheaters
By
SpreadCheaters
In the tutorial we have for you today, we will delve into the process of creating a counter in Excel. By following our step-by-step instructions, you will acquire the knowledge and skills to implement a functional counter within your spreadsheet. This counter will empower you to efficiently track and manage numerical values, enabling you to easily increase or decrease a designated cell’s number with a single click.
One of the advantages of using a counter in Excel is its convenience in incrementing or decrementing a number in a specific cell with a single click. This feature eliminates the need for manual entry and reduces the chances of errors. By employing a counter, users can easily track and update numerical values in their spreadsheets, saving time and effort.
Step 1 – Insert a module
– For adding a module, navigate to the Developer tab.
– After that, click on the first option named Visual basic.
– You’ll see a new window on your screen and you can also open this window by using the shortcut key (Alt+F11) as well.
– Then, click on the Insert tab in this window and click on the Module option.
– Now, a new module would open.
Step 2 – Write the code
– Copy and paste the following code in the module.
Step 3 – Insert and modify shapes
– For inserting a shape that will act as a button, navigate to the “Insert” tab.
– Click on the “Shapes” option under the “Illustrations” group.
– After that, select any shape you like.
– To insert a shape at a specific location, hold down the left-click button on your mouse and drag the cursor.
– Follow these steps to insert all three buttons.
– Then, you can change “Shape Fill”, “Shape Effects” etc. in the “Shape Format” Tab.
– Now, you can add text such as “+”, “-” or “Reset” in the newly inserted shape.
Step 4 – Assign a Macro to shapes
– For assigning the macro, right-click on the shape and click on the “Assign Macro” option.
– Assign the “increment” macro to the button of your choice that you want to use as a counter button to increase the value.
– After that, assign the “decrement” macro to the button of your choice that you want to use as a counter button to decrease the value.
– Next, assign the “decrement” macro to the button you prefer as a counter button to decrease the value.
– Next, assign the “reset” macro to the button you prefer as a counter button to reset the value.
– Following that, assign the “reset” macro to the button of your choice as a counter button to restore the value to its initial state.
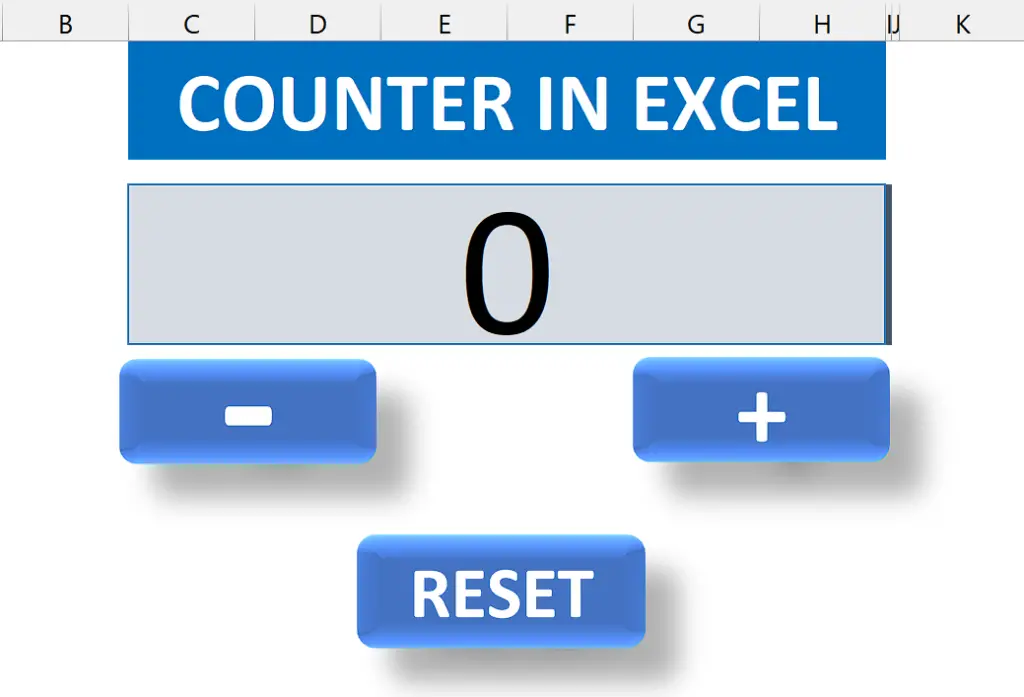
Step 5 – Use the counter
– After assigning macros to all buttons, you can use the counter.
– Use the “+” button to increase the value.
– Click on the “-” button to decrease the value.
– When you’ll click on the RESET button, the values will be reset to zero.
Explanation of the code used in Step 2:
This code consists of three subroutines. The first subroutine, “increment,” increases the value in cell C5 by 1 whenever it is executed. The second subroutine, “decrement,” checks if the value in cell C5 is greater than 0. If it is, it decreases the value by 1. This prevents the value from becoming negative. The third subroutine, “reset,” sets the value in cell C5 to 0, effectively resetting it to its initial state. Overall, these subroutines provide functionality for incrementing, decrementing, and resetting the value in cell C5 based on specific conditions.


