
How to convert text to columns in Excel
 By
SpreadCheaters
By
SpreadCheaters
You can watch a video tutorial here.
When working with data in Excel, you will frequently need to separate data from one column to multiple columns. This is usually done to make the data more granular so that it is easy to summarize and analyze the data. Also when working on data imported from other applications, you may need to clean up the text by weeding out junk data. Excel has a tool that separates text into columns based either on a delimiter or on the width of the text.
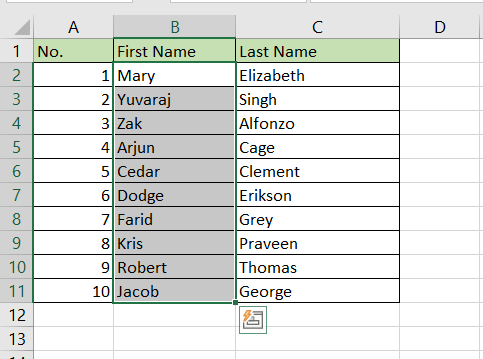
Step 1 – Analyze the data
– Check the data to see how the fields are separated
– In this example, they are separated by a space (“ “)
Step 2 – Open the Convert Text to Columns Wizard
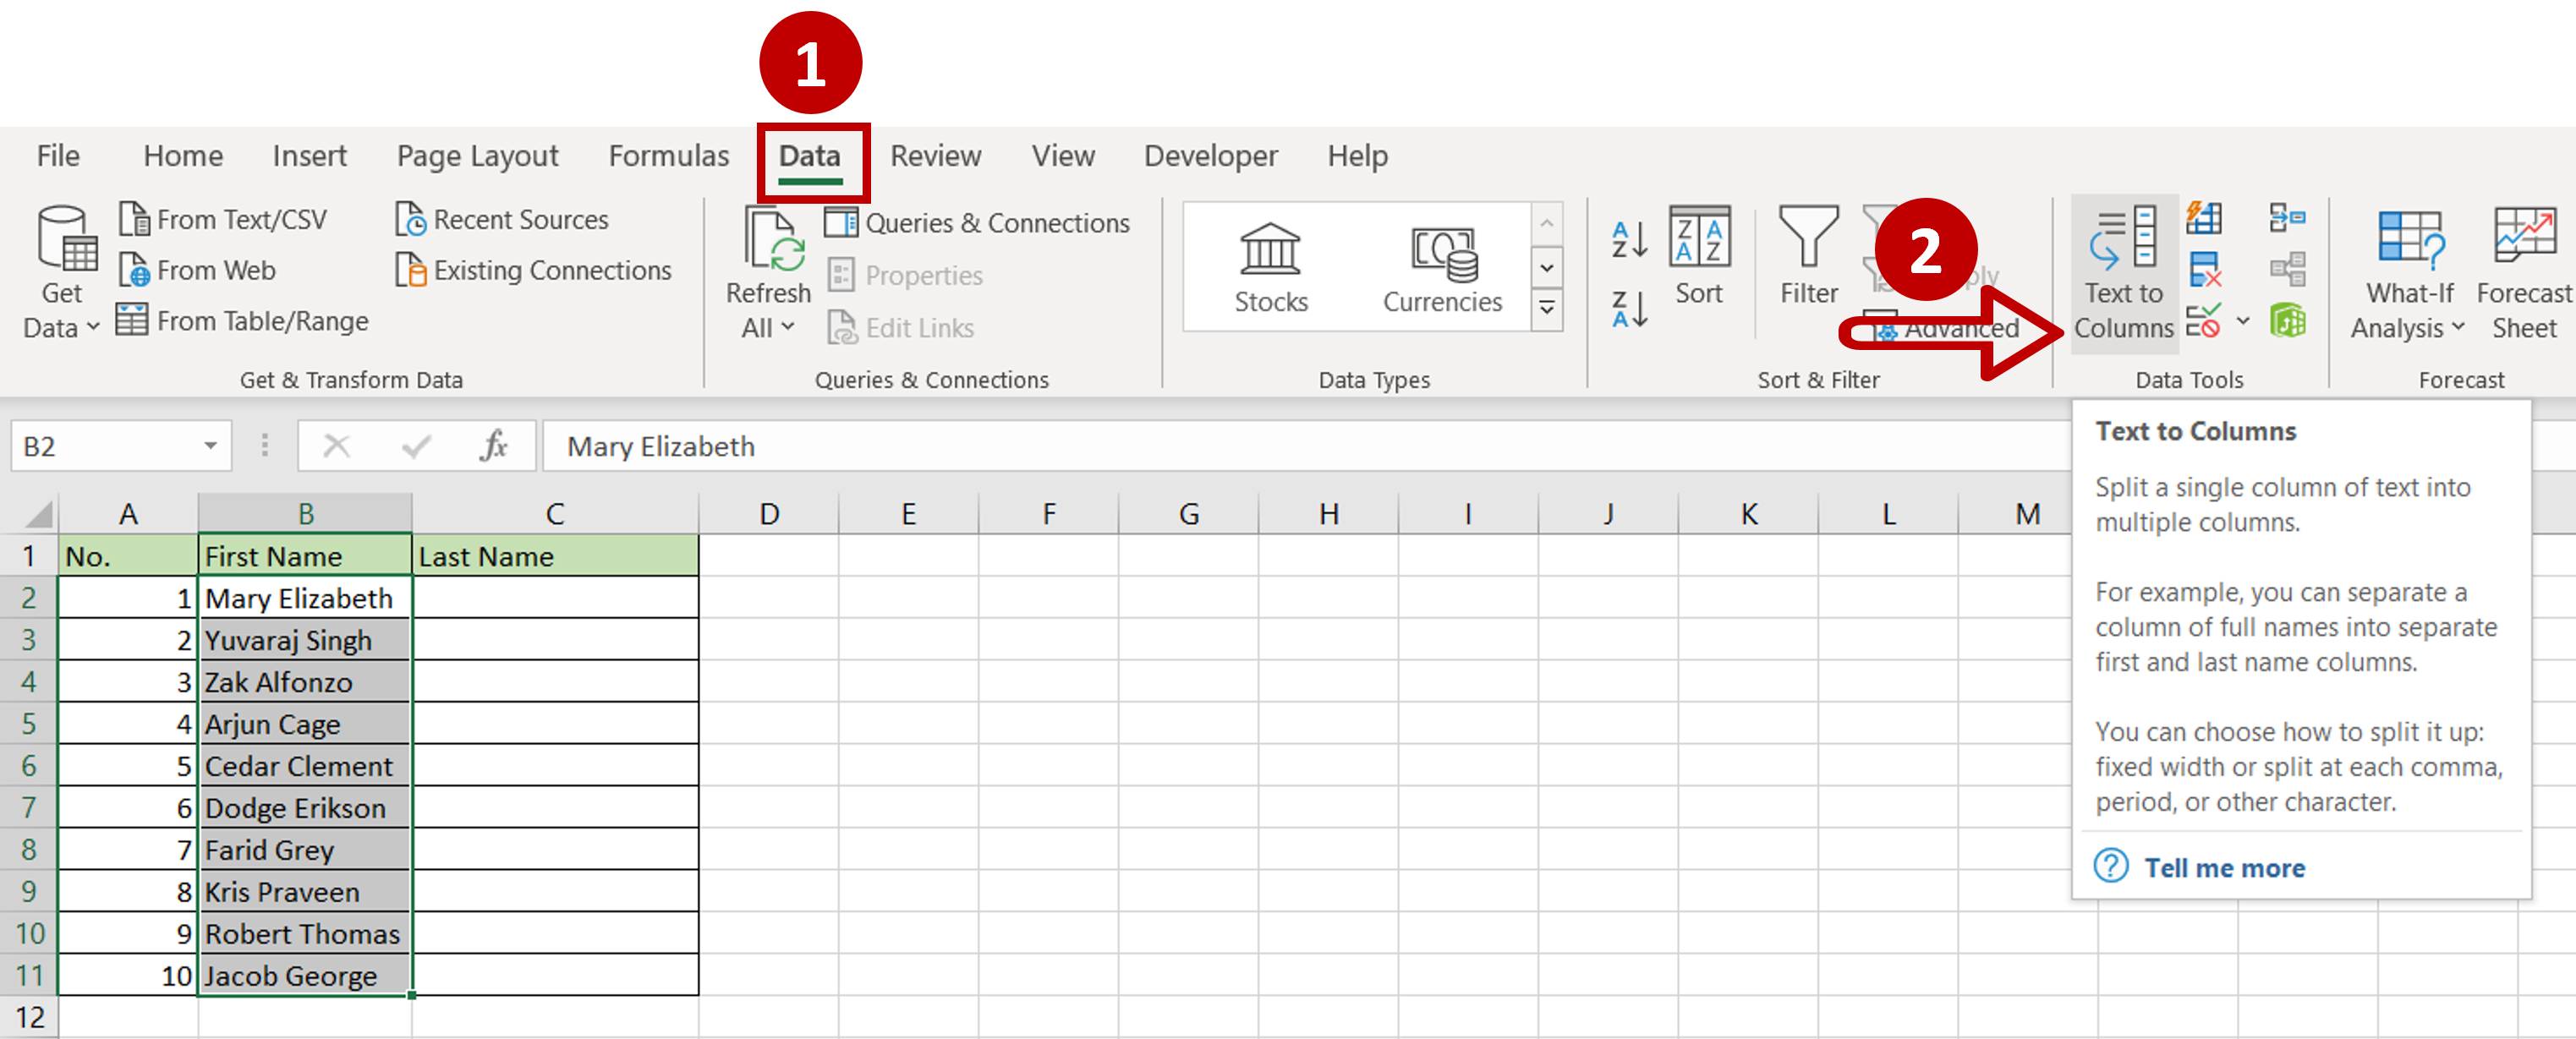
– Select the data
– Go to Data > Data Tools
– Click on Text to Columns
– Click OK
Step 3 – Choose the file type
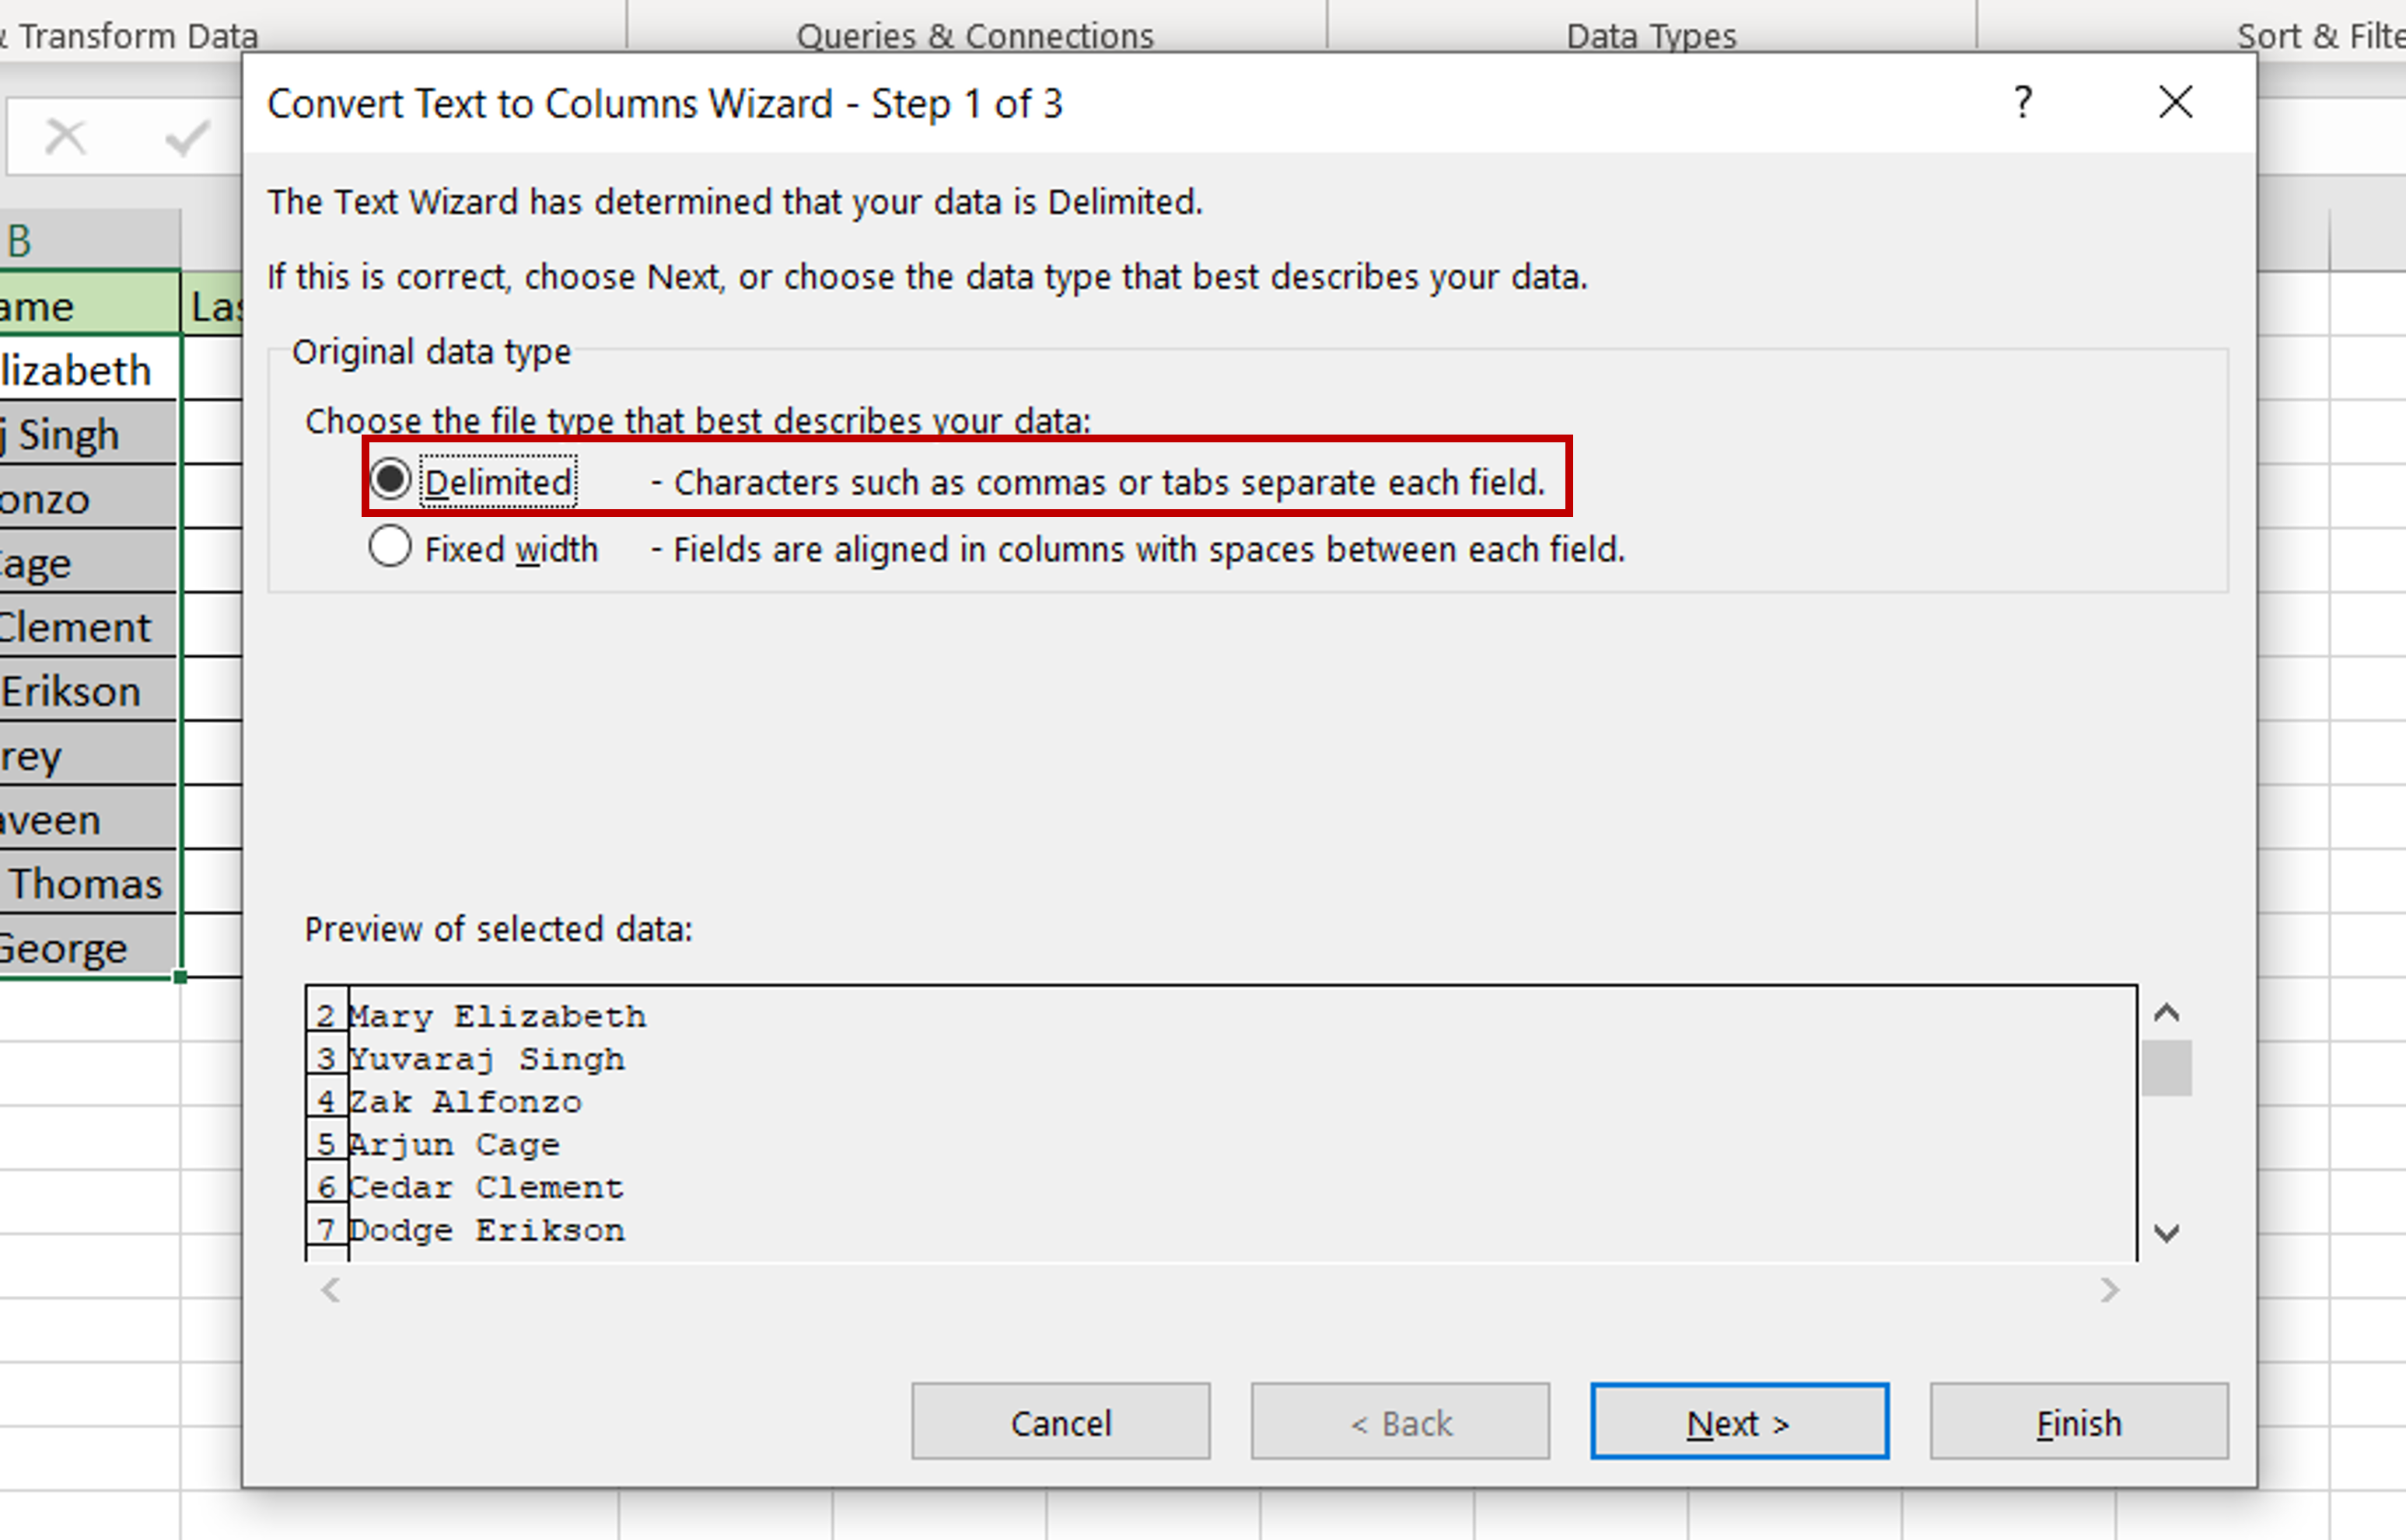
– Select the Delimited option as the addresses are separated (or delimited) by a hyphen
– Click on Next
Step 4 – Choose the delimiter
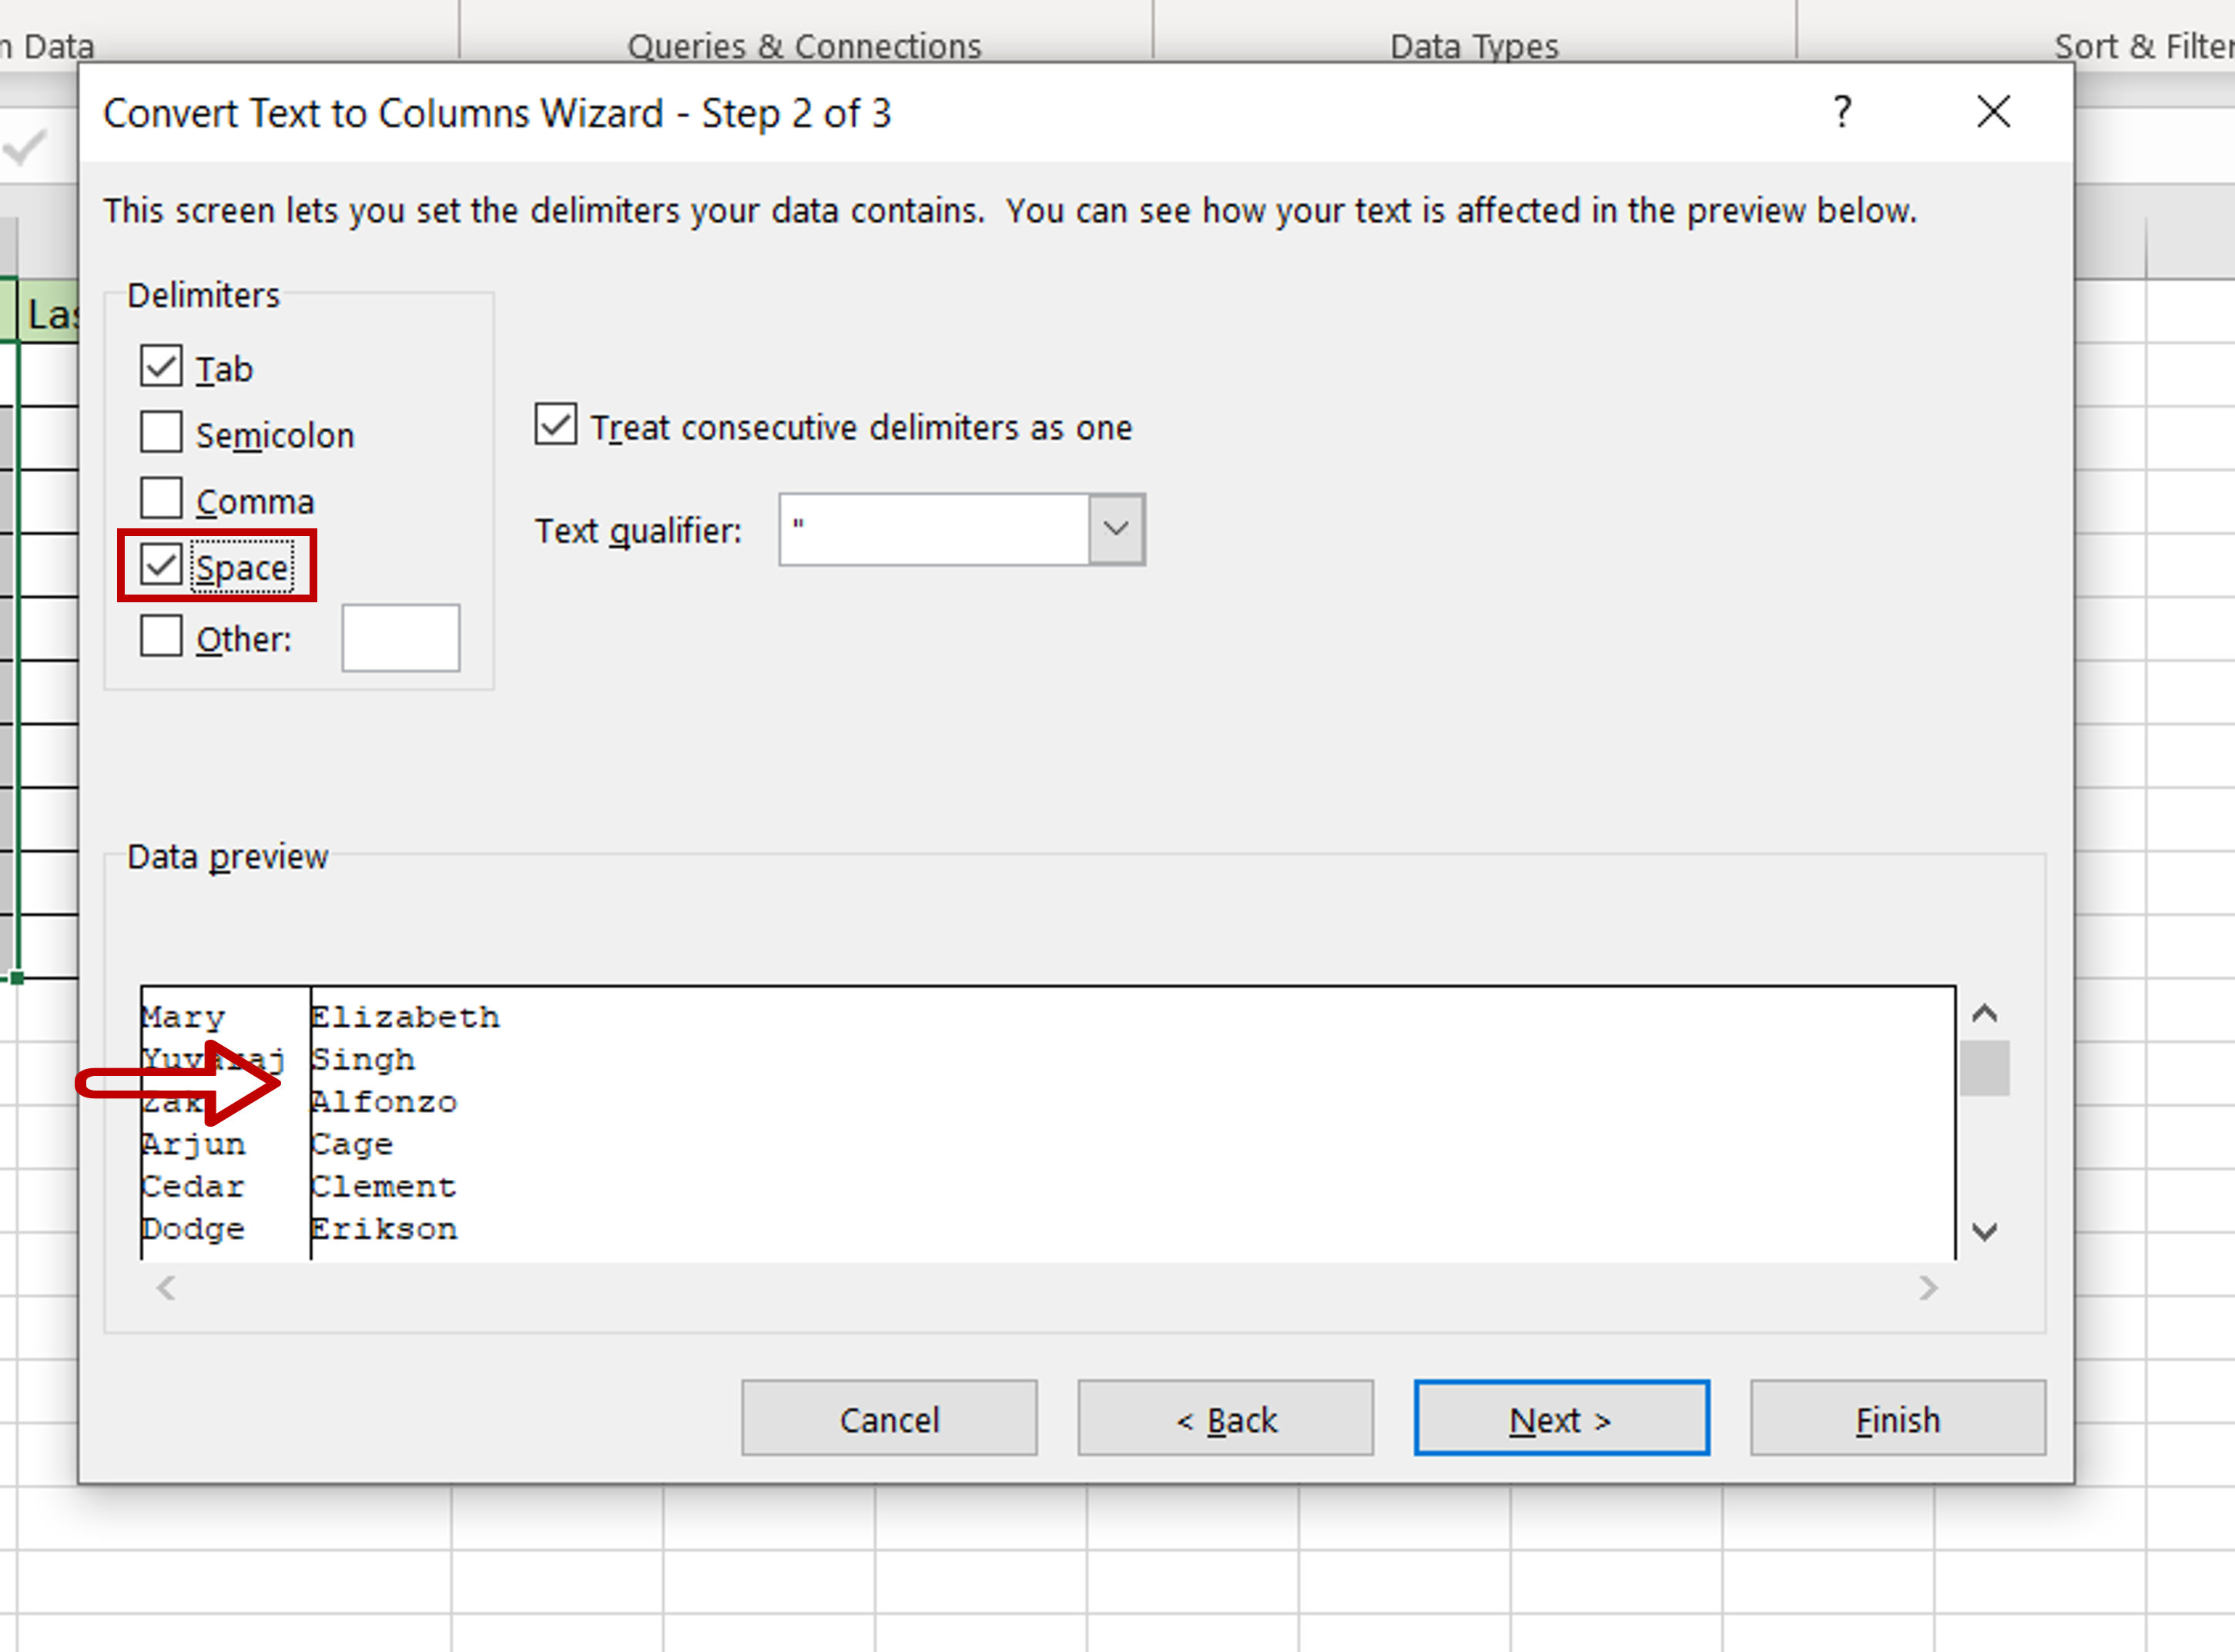
– Under Delimiters, choose Space
– Check how the data has been separated in the Data preview
Step 5 – Choose the format and destination
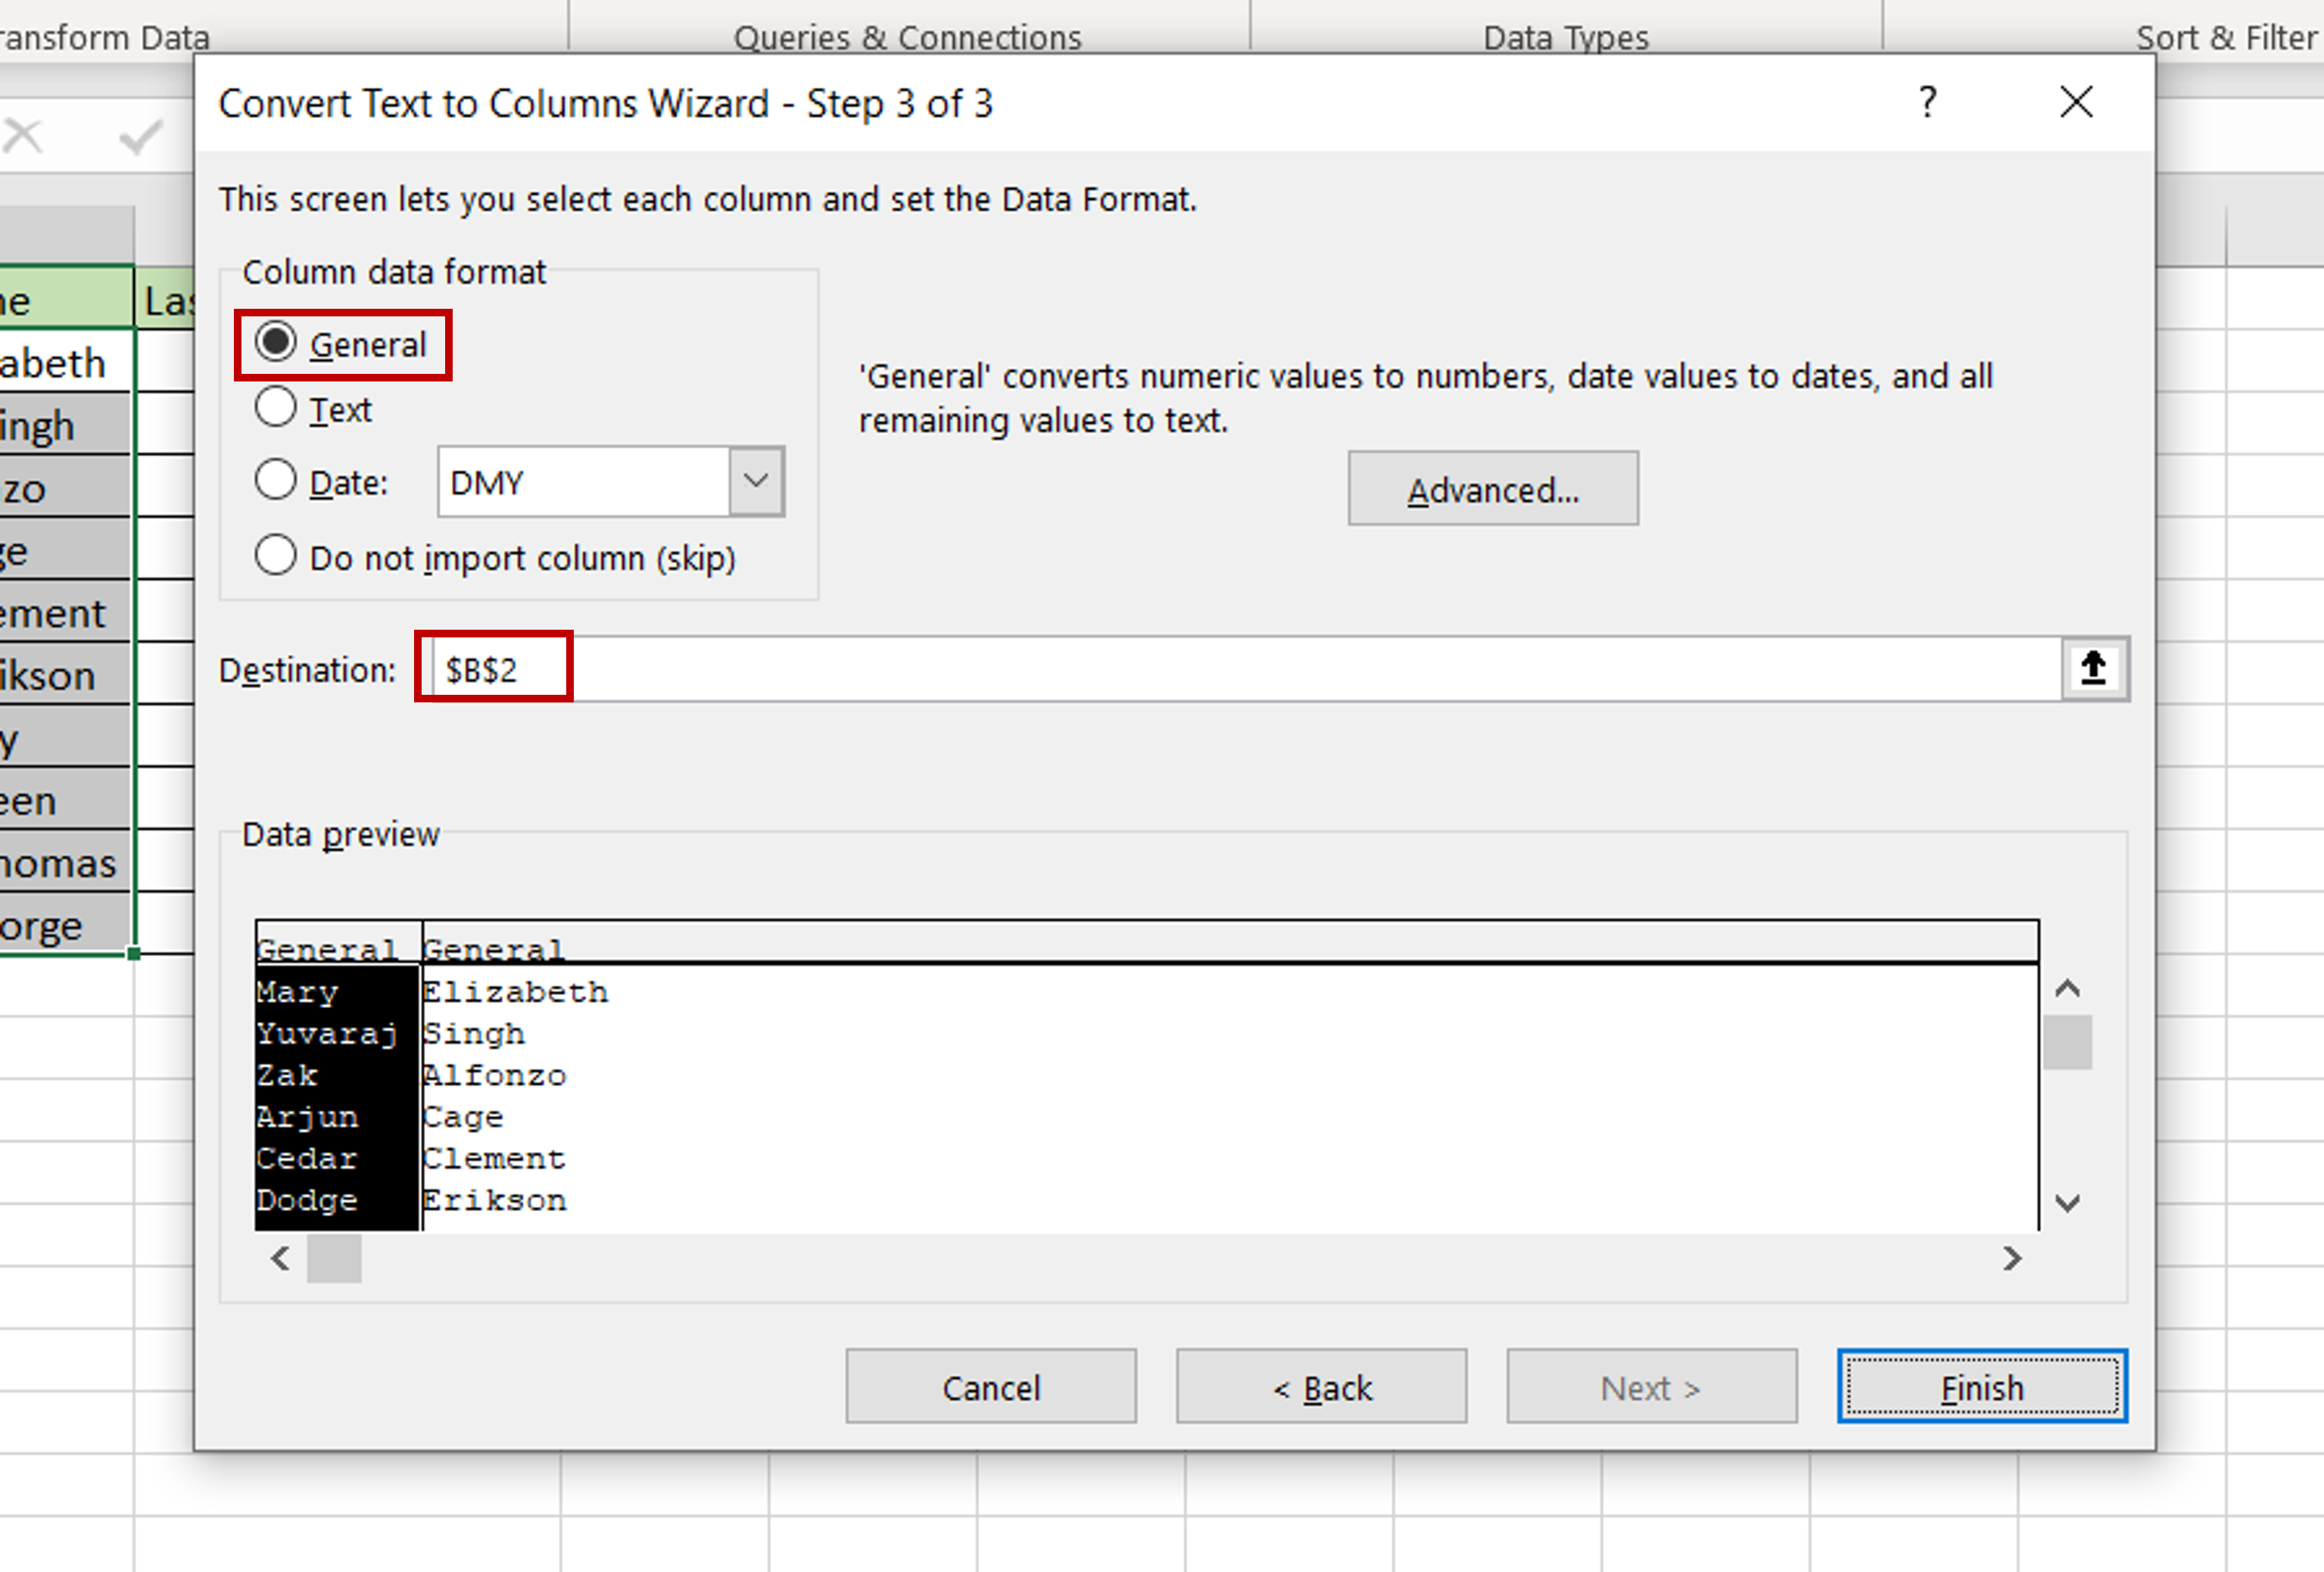
– Under Column data format, choose General
– Select the Destination for the data
– Click Finish
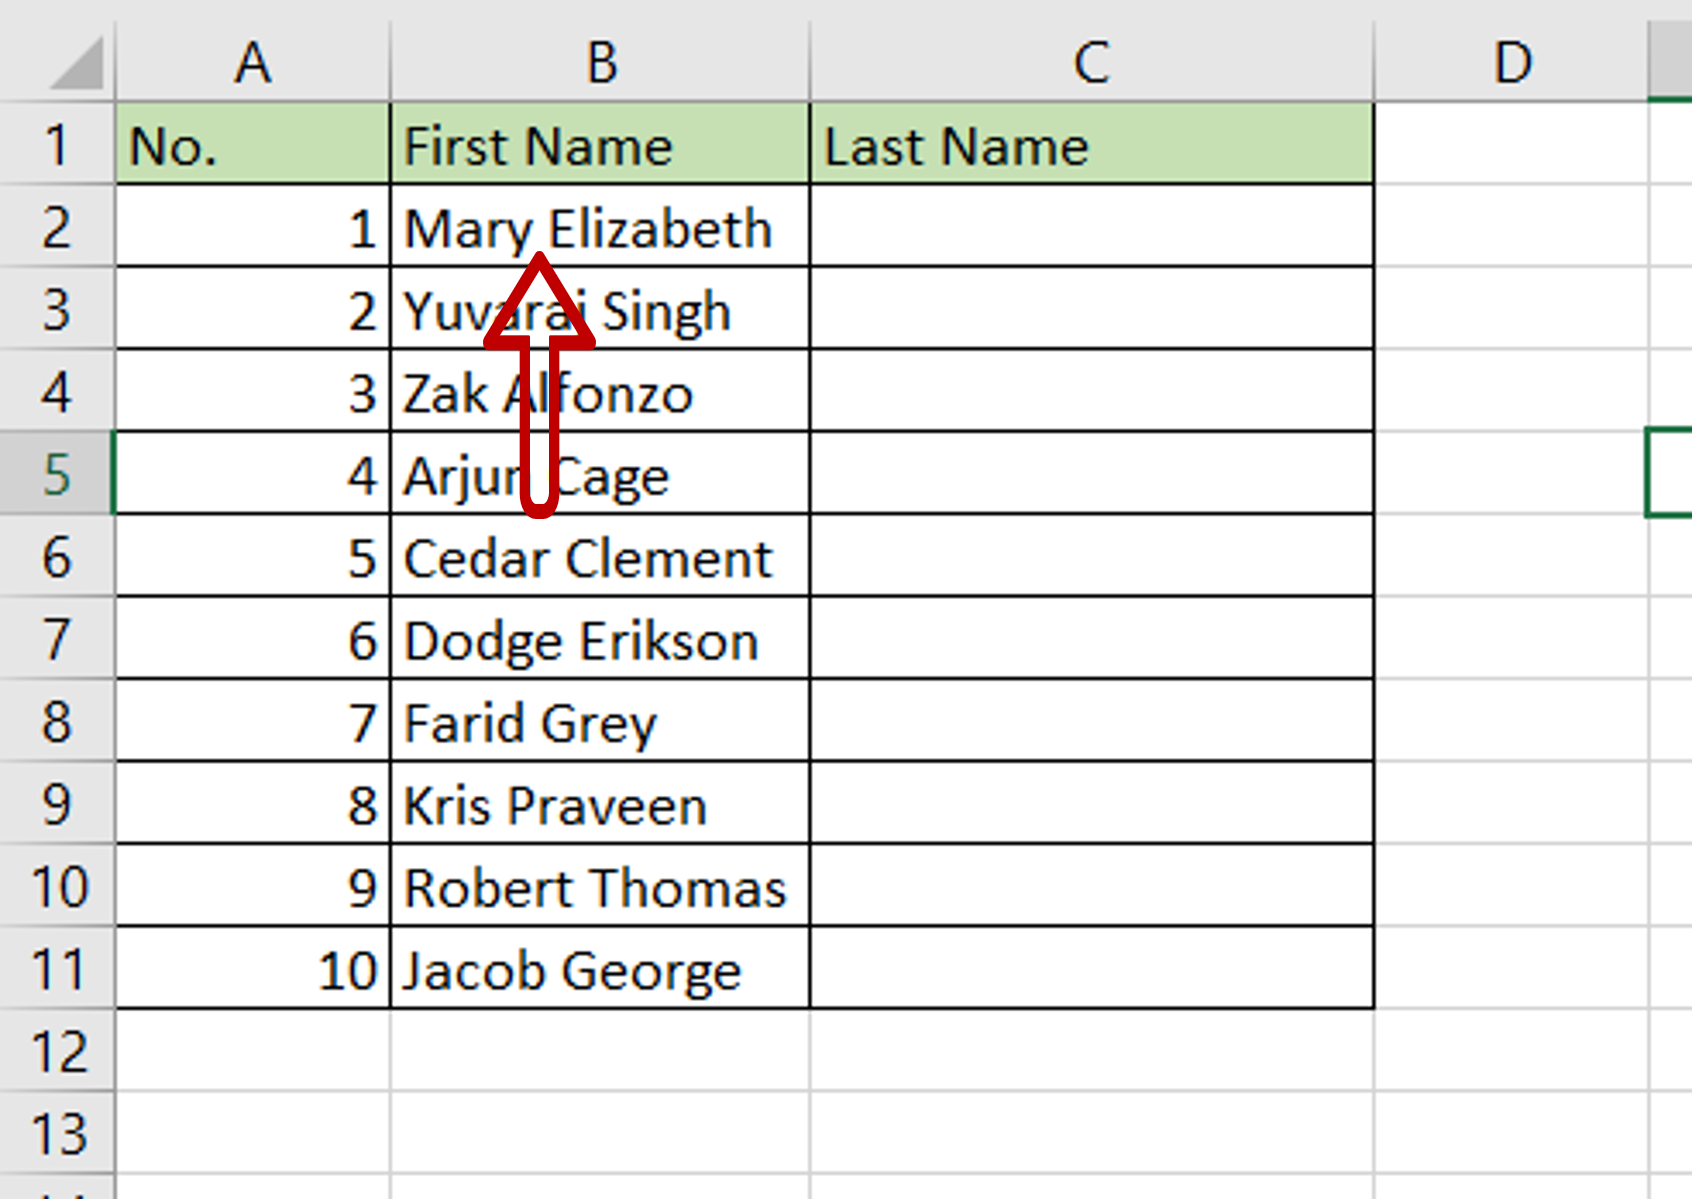
Step 6 – Check the result
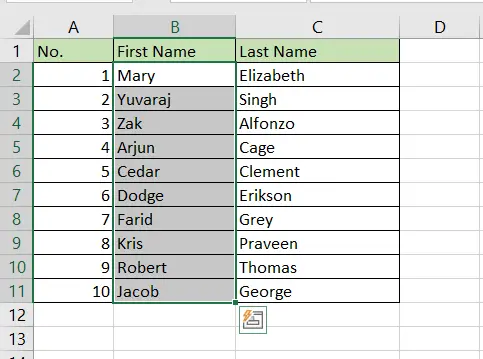
– The text has been separated into two columns


