
How to compress a picture in Microsoft Excel
 By
SpreadCheaters
By
SpreadCheaters
Page last updated:
07/06/2023 |
Next review date:
07/06/2025
The act of compressing pictures in Microsoft Excel involves the reduction of the size of image files that have been included in an Excel workbook. This process is carried out with the aim of decreasing the overall size of the file. By doing so, it is possible to enhance the workbook’s performance and lower the quantity of disk space that is needed to store it.
In this tutorial, we will learn how to compress a picture in Microsoft Excel. Compressing pictures in Microsoft Excel is a useful technique that can help to reduce the overall file size of a workbook. Microsoft Excel allows users to compress all pictures in the workbook. Alternatively, users can also compress pictures individually.
Method 1: Compressing All Pictures in the Workbook
Step 1 – Locate the Options Button
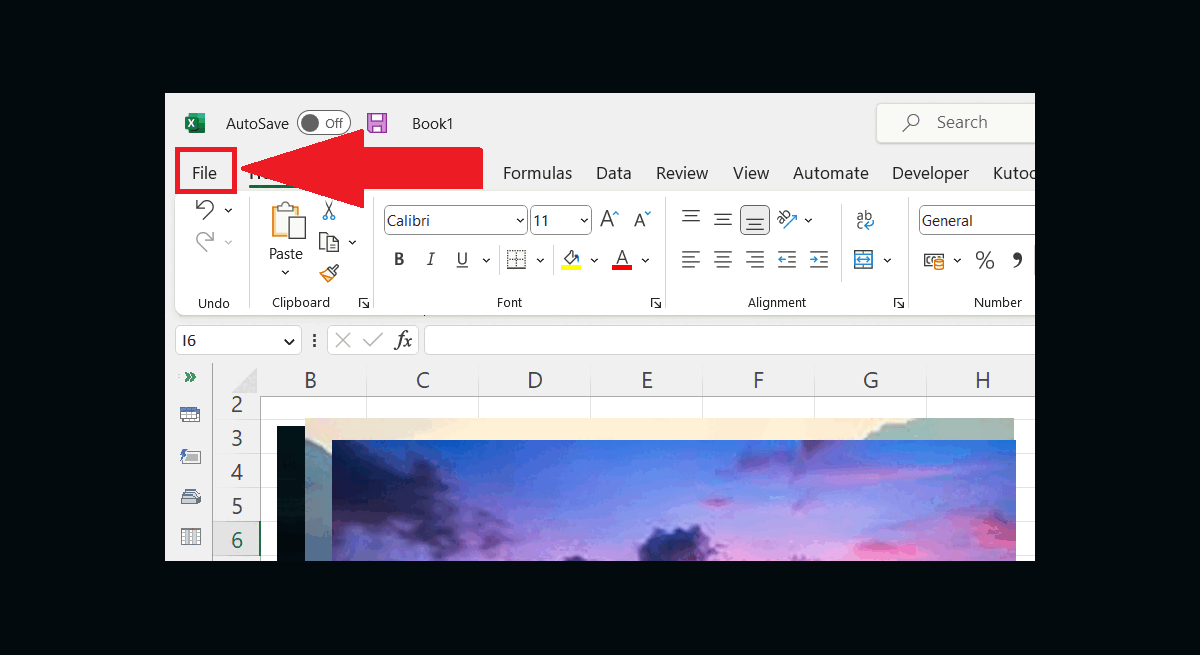
- Locate the Options button in the File tab of the menu bar.
- Perform a click on the Options button.
Step 2 – Go to Advanced Options
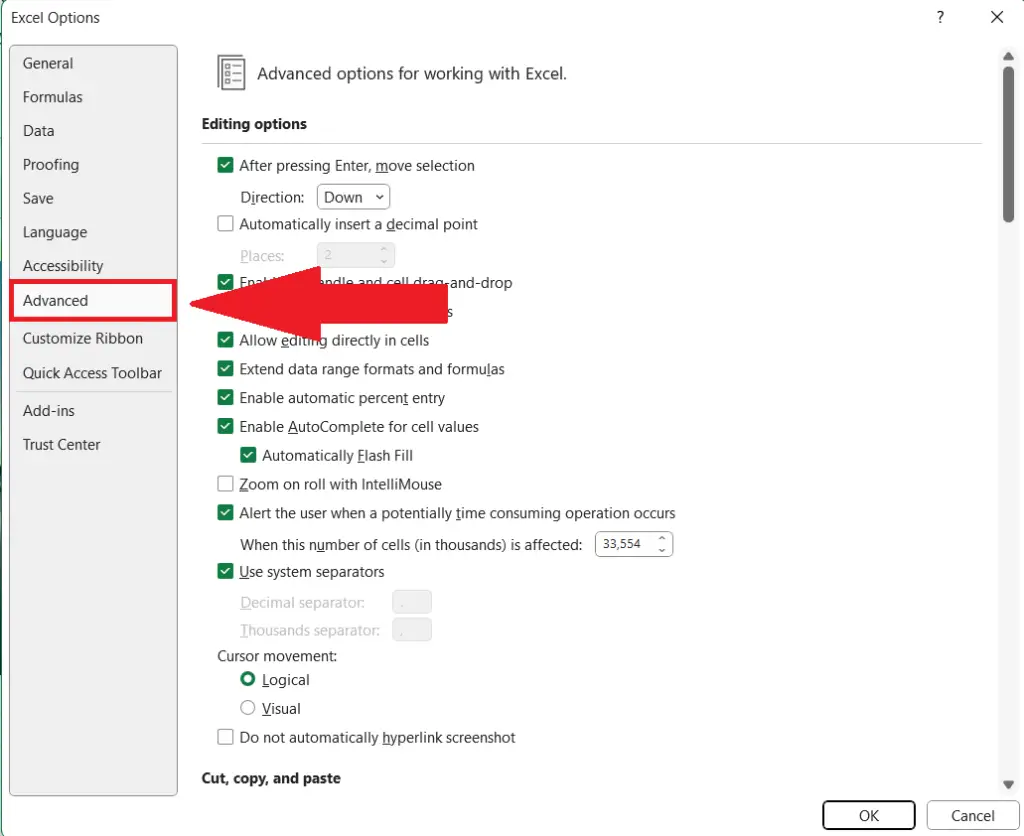
- Go to the Advanced options in the dialog box.
Step 3 – Scroll Down to the “Image Quality and Size” Section
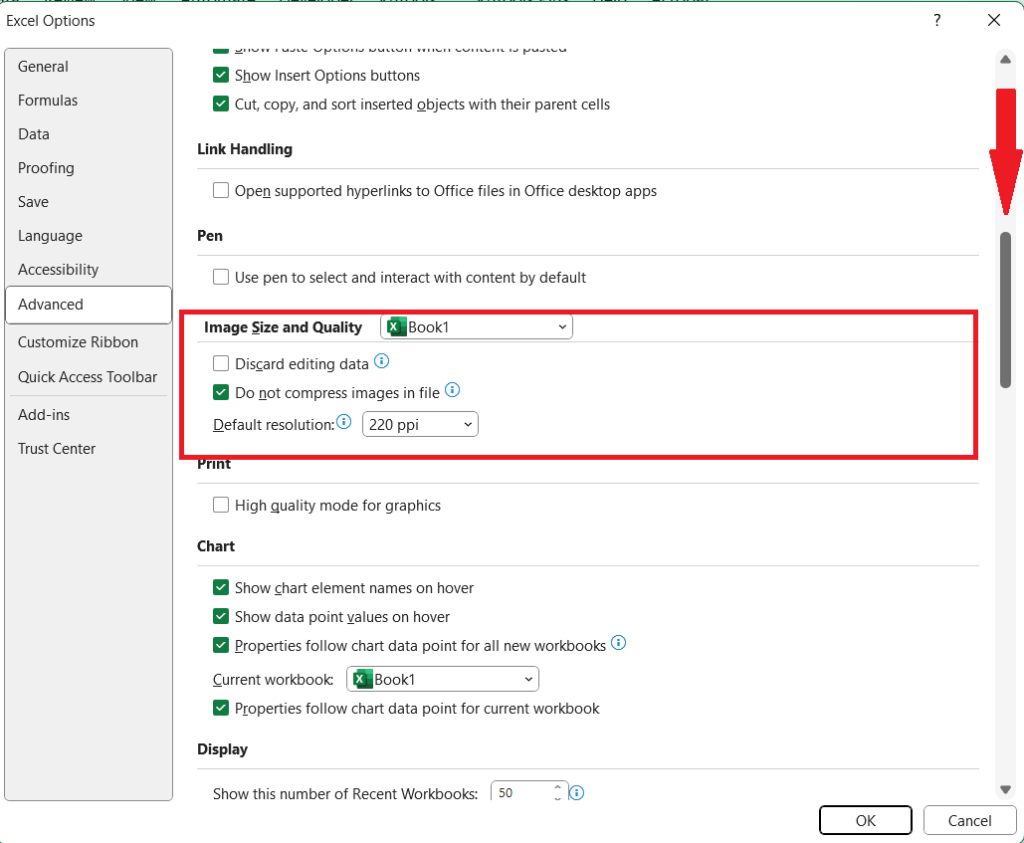
- Scroll down to the “Image Quality and Size” Section.
Step 4 – Uncheck the Checkbox Next to “Do not compress images in file” Option
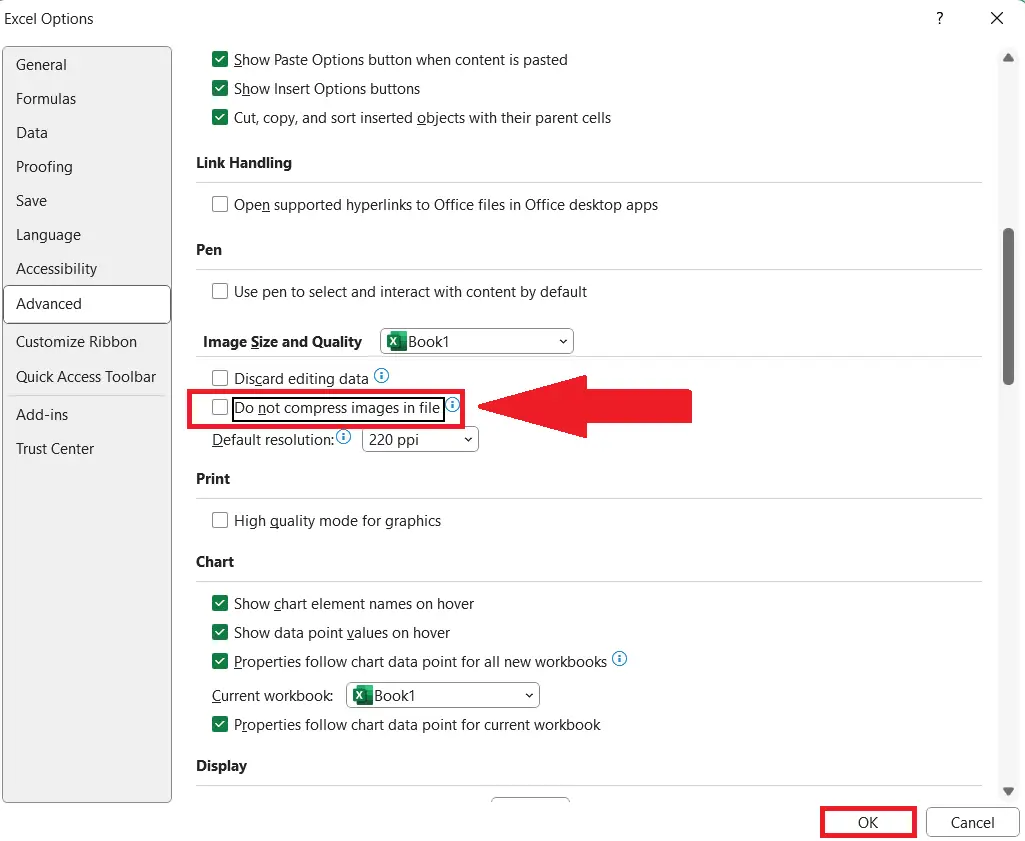
- Uncheck the checkbox next to the “Do not compress images in the file” option.
- Close the dialog box.
Method 2: Compressing an Image Individually
Step 1 – Select the Picture

- Select the picture you want to compress in Microsoft Excel.
- This will activate the “Picture Format” tab in the menu bar.
Step 2 – Locate the “Compress Pictures” Button
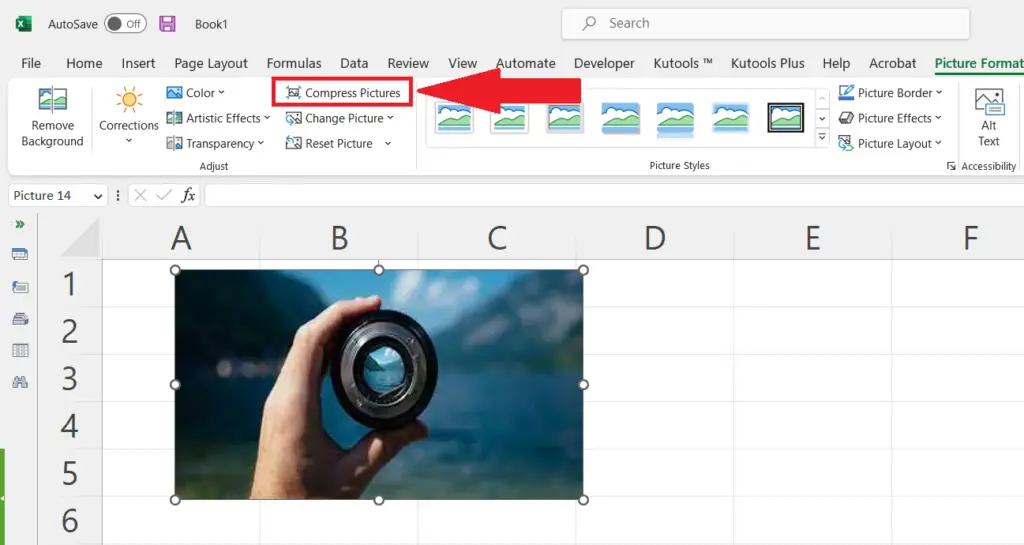
- Locate and do click on the “Compress Pictures” button in the Format Tab ribbon.
Step 3 – Customize the Compression and Strike the OK Button

- Customize the compression by manipulating the options in the dialog box.
- Strike the OK button.


