How to collapse rows in Excel
In this tutorial we will learn how to collapse the grouped rows in Excel. To collapse the rows, the mandatory prerequisite is to group the rows. When we group the rows At the left side of rows a subtraction (-) symbol appears. It is a collapse button. The areas in which the collapse button appears is known as outline.
Below are the steps to follow;

Microsoft Excel is a basic software for numeric data calculation the data is stored in rows and columns. When we work on large datasets during work, sometimes we need to group some data for the sake of space or visibility or for other conditions. Microsoft Excel has a built-in tool to group up different rows.
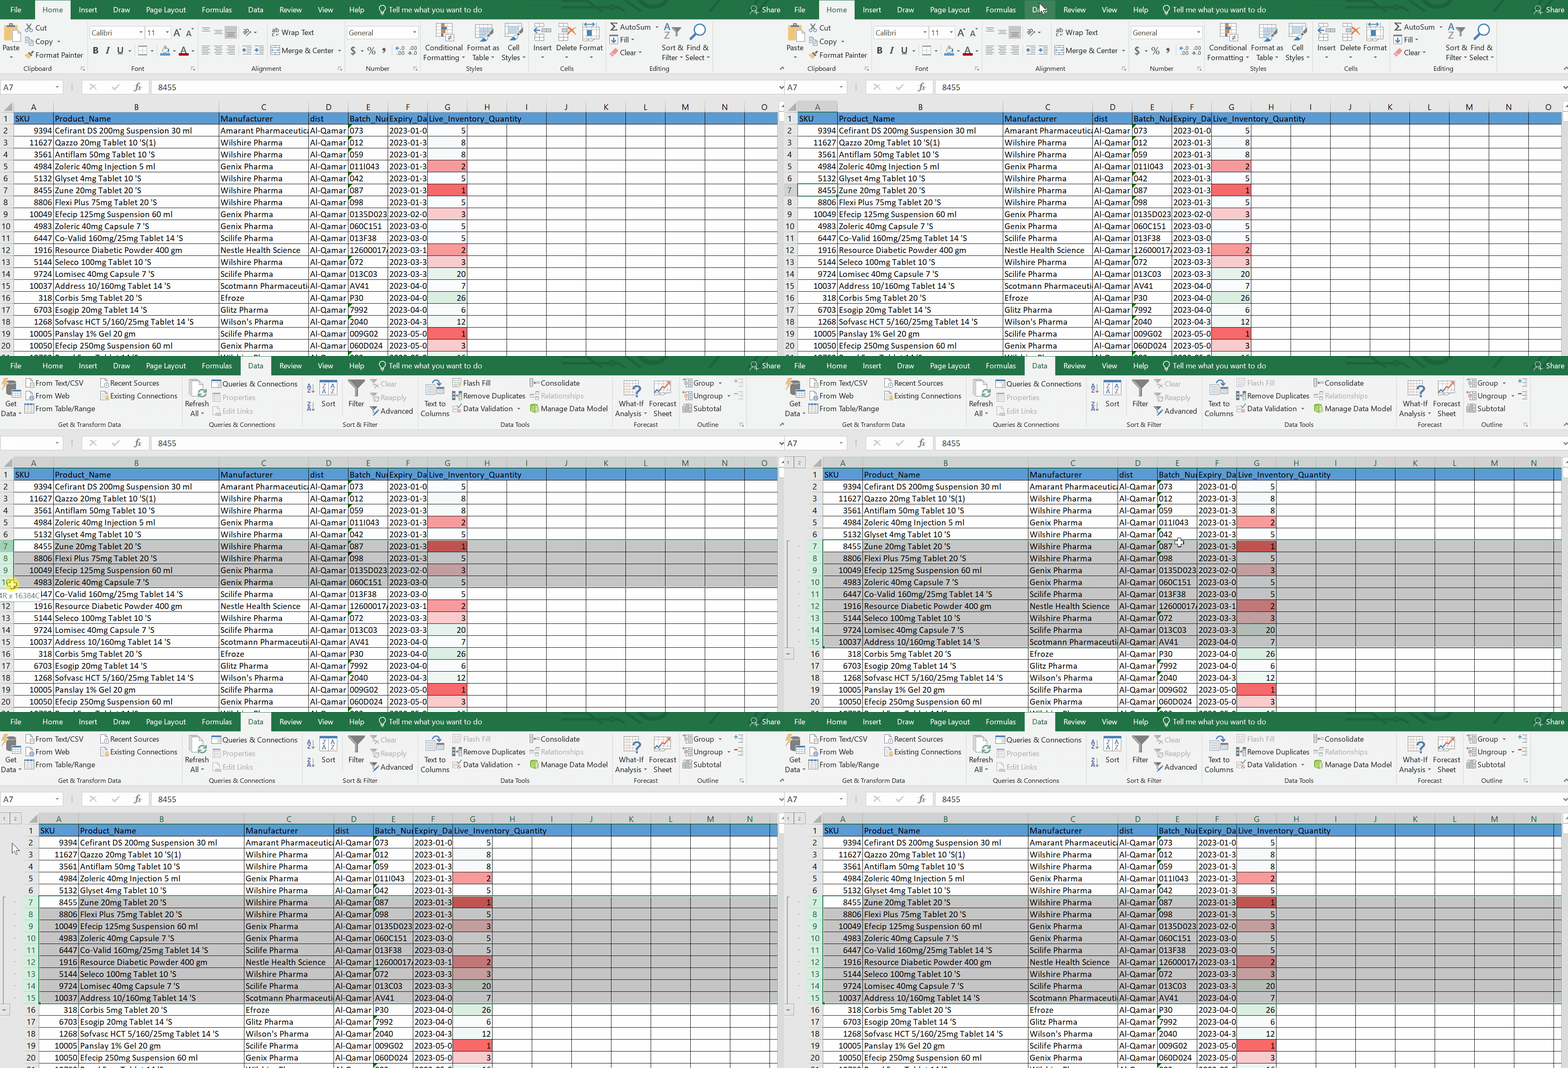
Step 1 – Select the rows and collapse

Animation is given above.
– Go to the main worksheet.
– Select the rows that you wish to group.
– Go to the data tab.
– Go to the outline segment.
– Click on the group button.
– Alternatively, you can use the shortcut key ALT+SHIFT+Right Arrow to do the same.
– A line will appear on the left side of selected rows and also a box with (-) sign will also appear.
– Click on the collapse (-) button.
– The selected rows will collapse.
Hence, we can see in this way we can collapse rows .
Bonus tip : Rows can be ungrouped by pressing short key ALT + SHIFT + LEFT ARROW


