How to collapse cells in Excel
You can watch a video tutorial here.
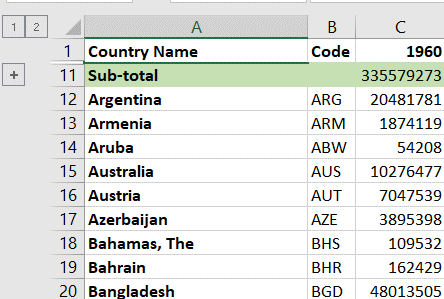
When you have a large amount of data that runs into many rows and columns, you can group either the columns or rows so that the data becomes more manageable. This is also useful when you have sub-totals within the sheet and would like to collapse the cells so that only the sub-totals are displayed.
Step 1 – Select the cells
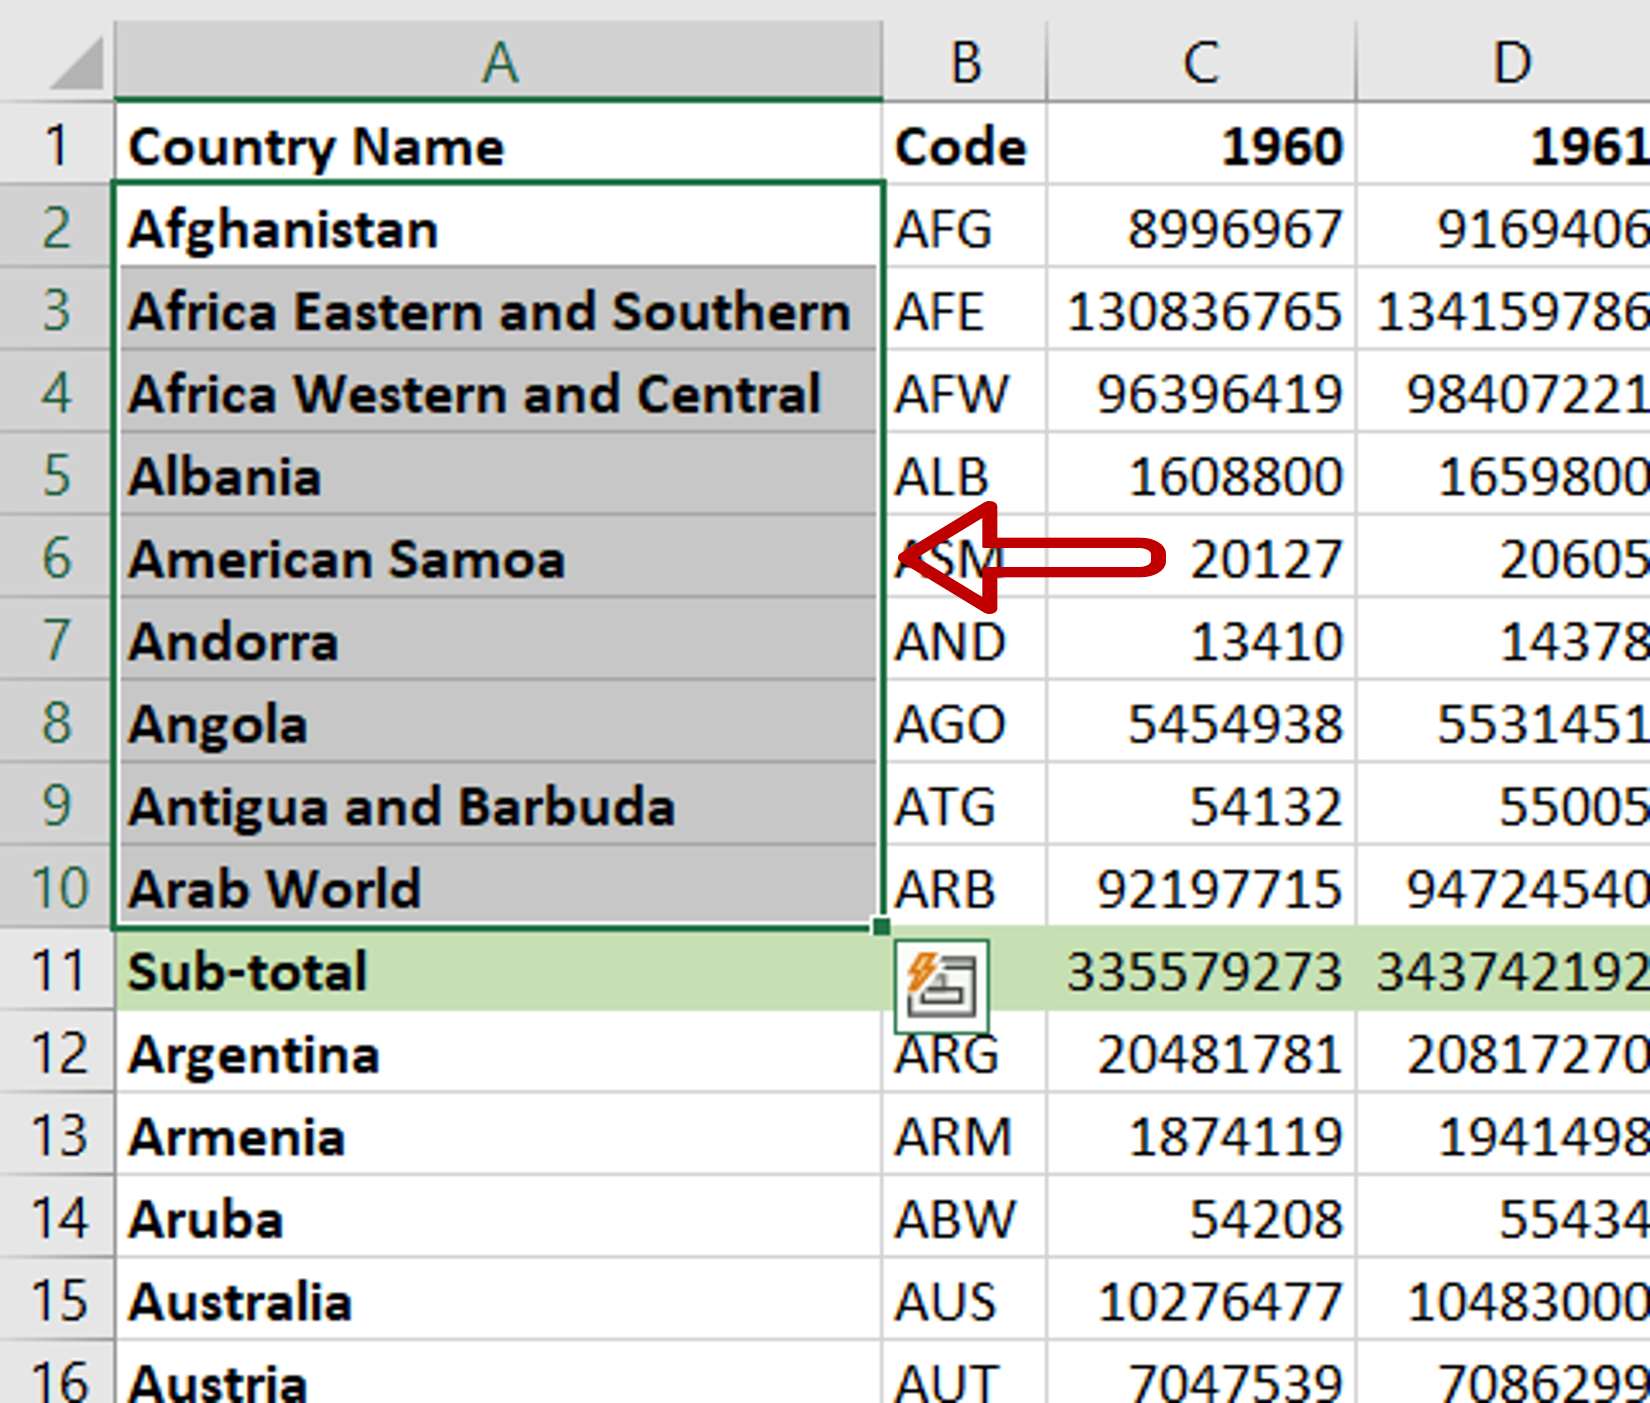
– Select the cells to be collapsed
Step 2 – Open the Group box
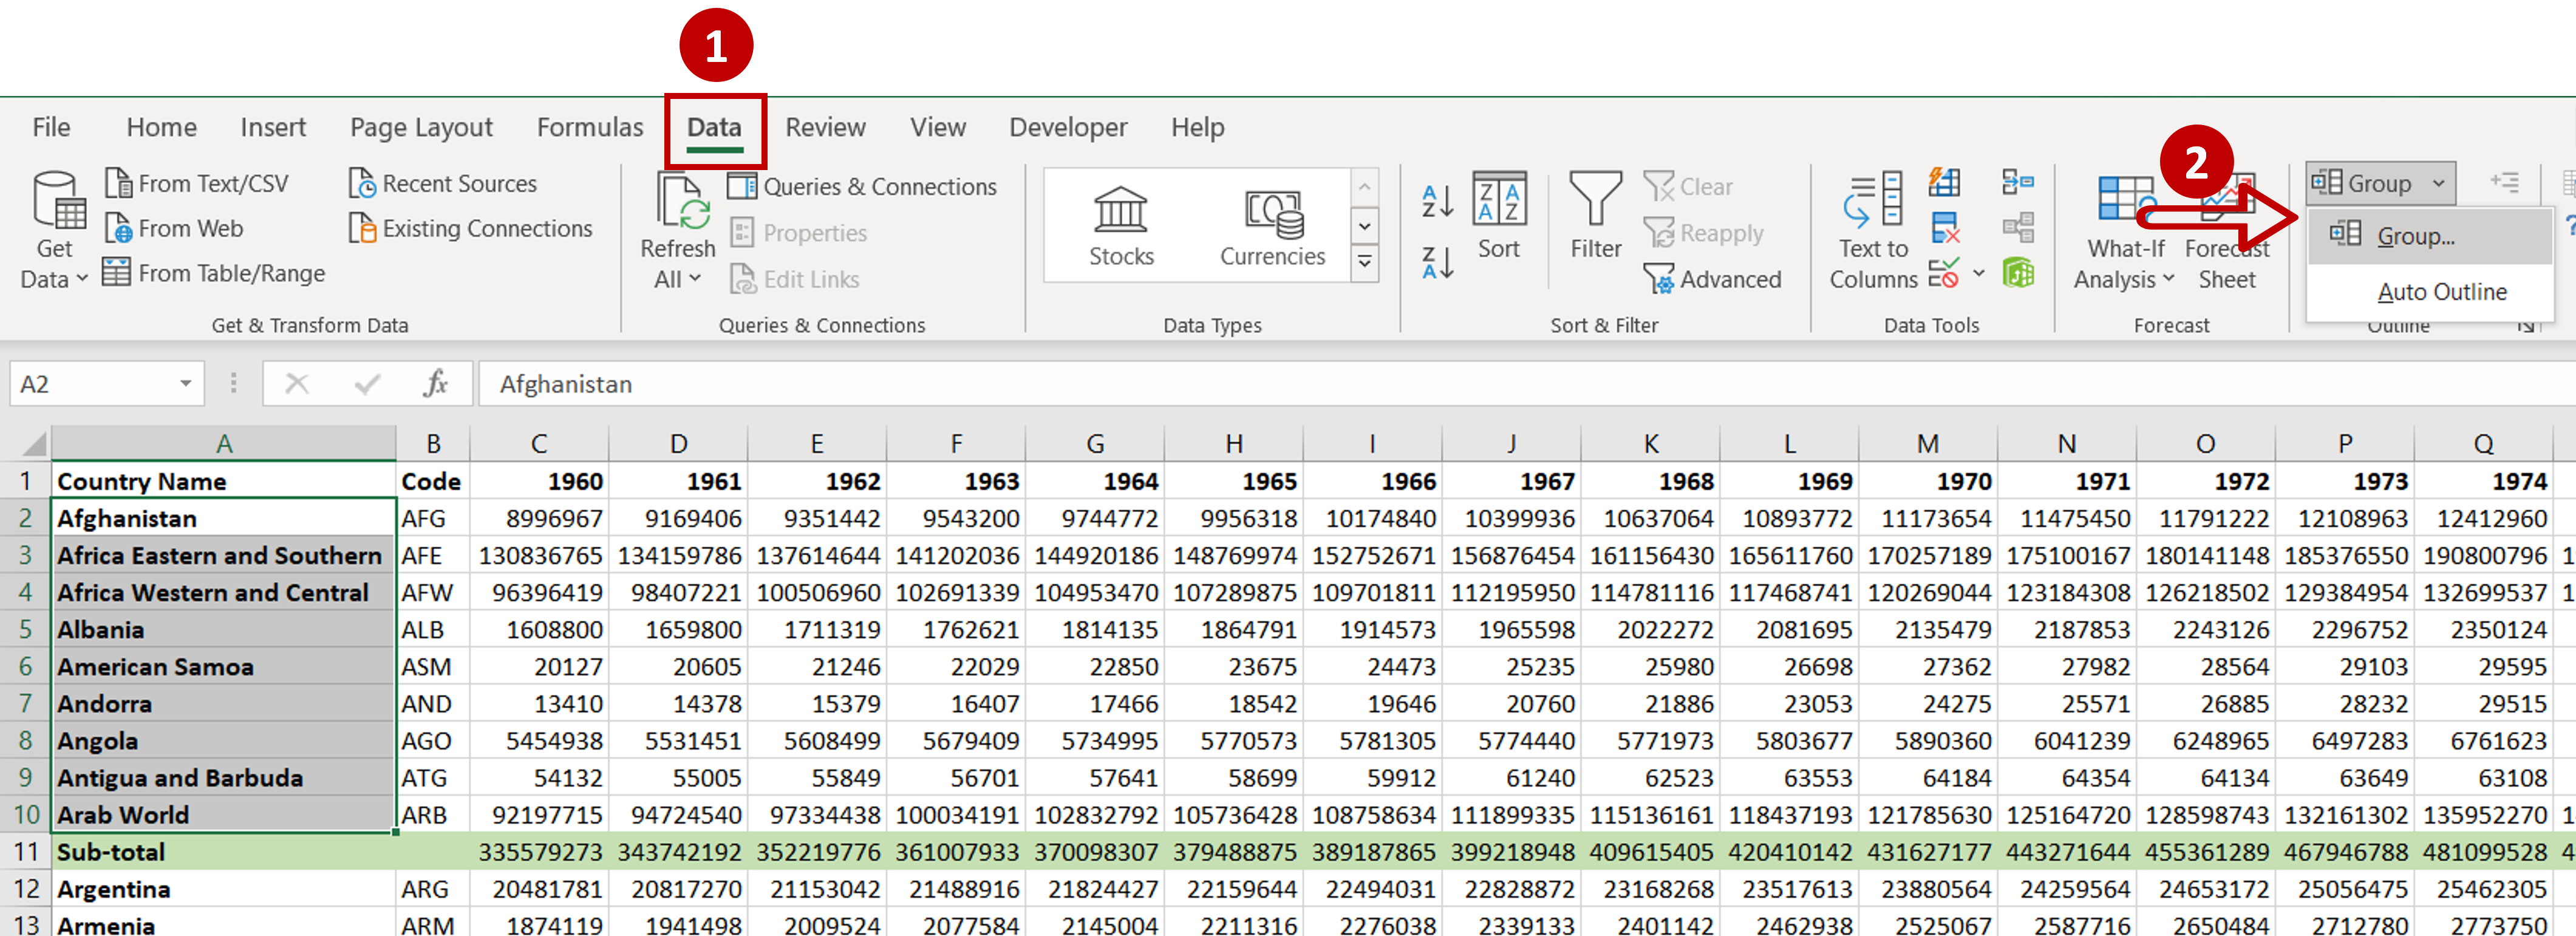
– Go to Data > Outline
– Select Group from the Group dropdown
Step 3 – Choose the cells to collapse
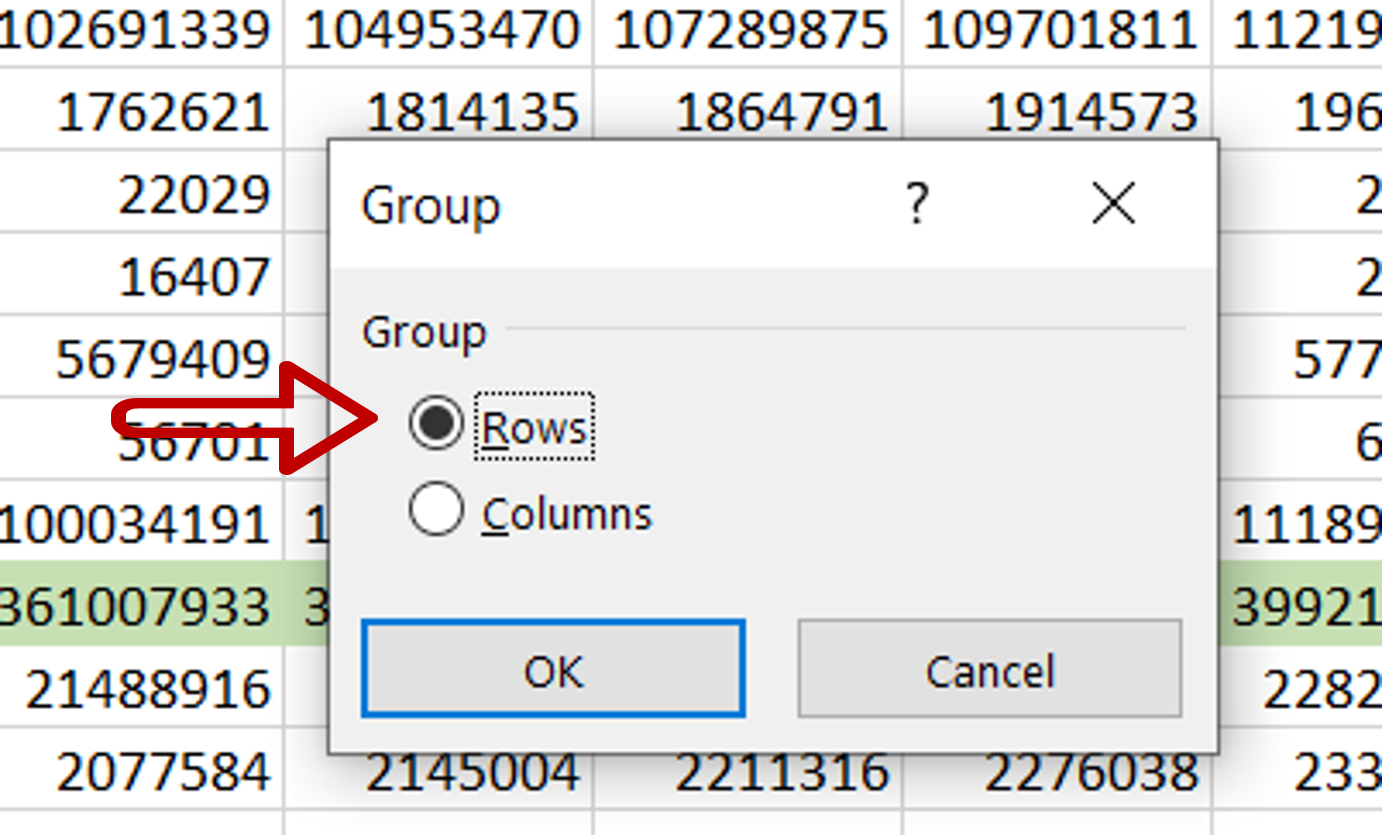
– In the pop-up, select Rows
– Click OK
Step 4 – Collapse the cells
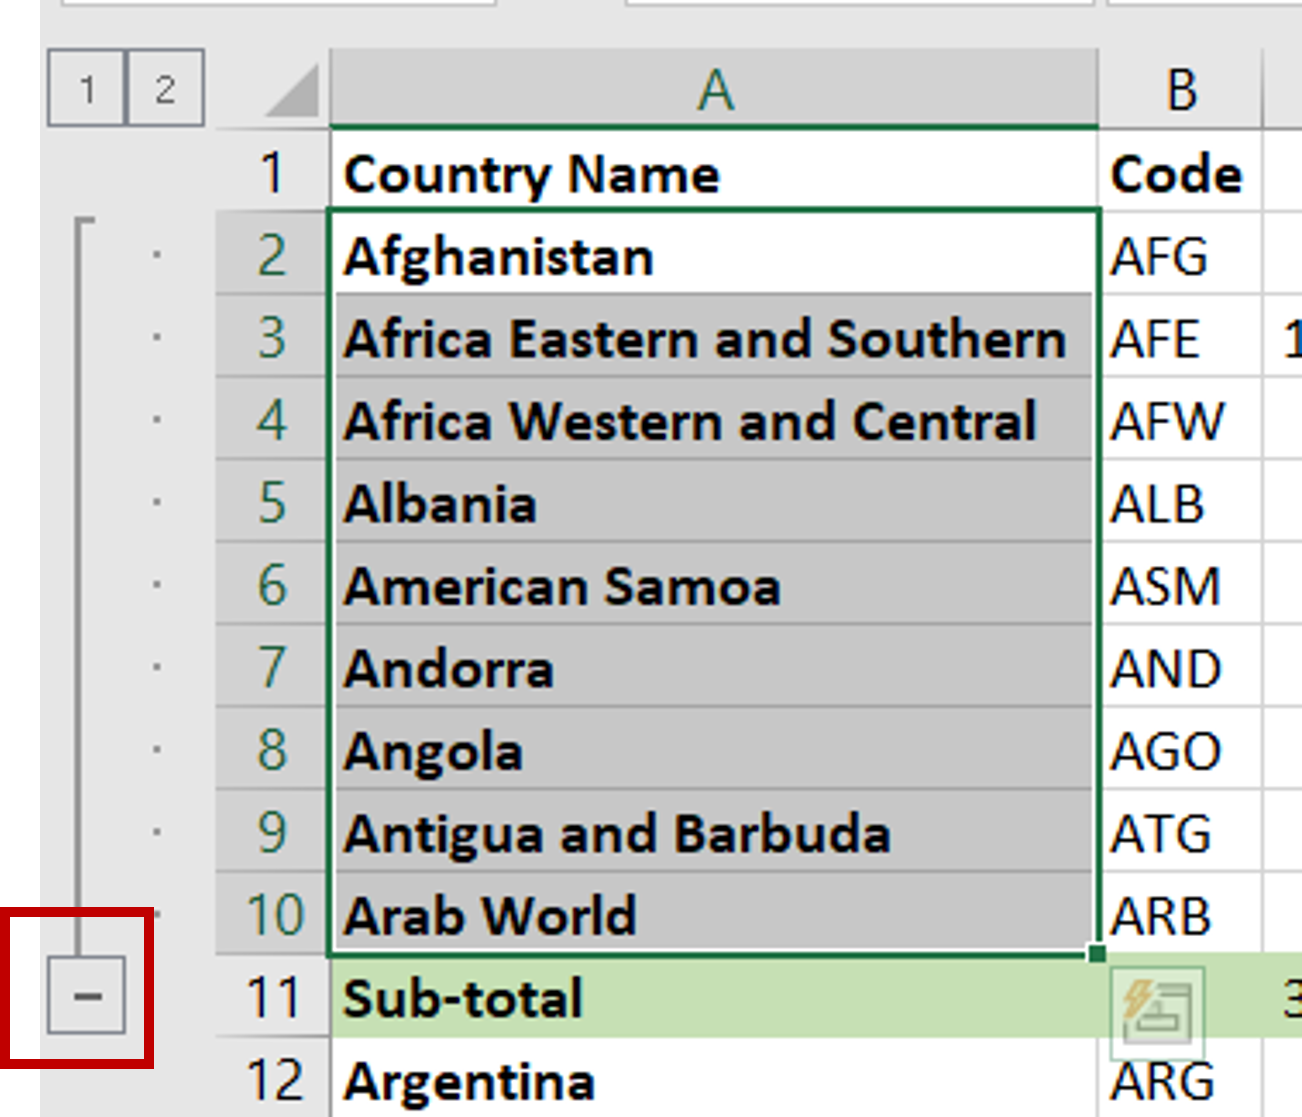
– Click on the minus sign (-) shown at the bottom of the group indicator
Step 5 – Check the result
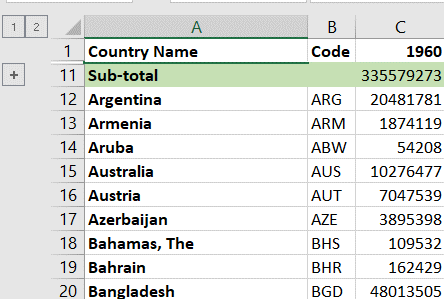
– The selected cells will be collapsed
– Click on the plus sign (+) to expand the rows


