
How to change the size of cells in Excel
 By
SpreadCheaters
By
SpreadCheaters
Page last updated:
05/01/2023 |
Next review date:
05/01/2025
You can watch a video tutorial here.
Cells in Excel are, by default, a uniform size. When formatting a spreadsheet, you may need to change the size of a cell or cells so that the text is properly displayed.
Option 1 – Use the column and row headers
Step 1 – Select the column and row lines
- Move the cursor to the line that borders the column
- When the cursor changes to a cross, either double-click or drag the line to the desired width
- Move the cursor to the line that borders the row
- When the cursor changes to a cross, either double-click or drag the line to the desired height
Step 2 – View the result
- The size of the cell increases and the text is displayed properly
Option 2 – Use the menu option
Step 1 – Select the rows
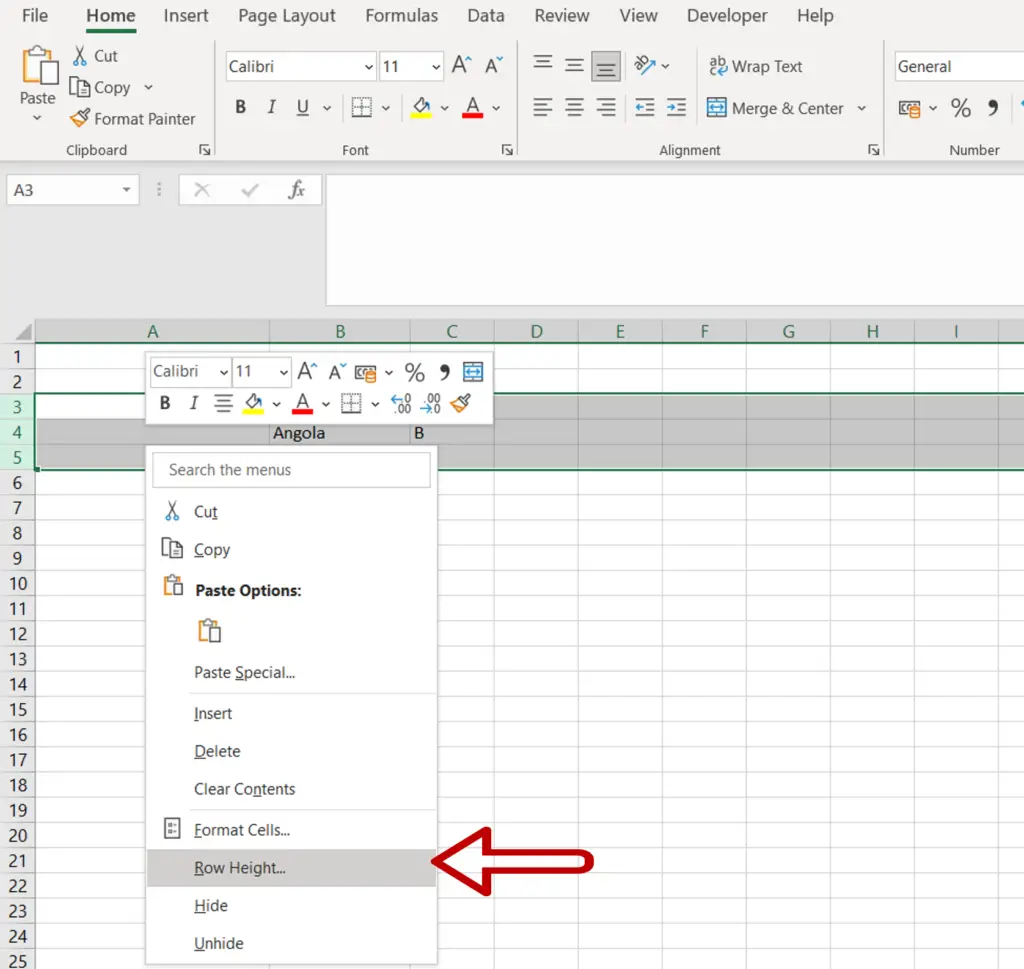
- Select the row or rows that are to be made bigger
- Right-click and select Row Height from the context menu
Note: The Row Height option is also available on the menu Home > Cells > Format
Step 2 – Enter the row height
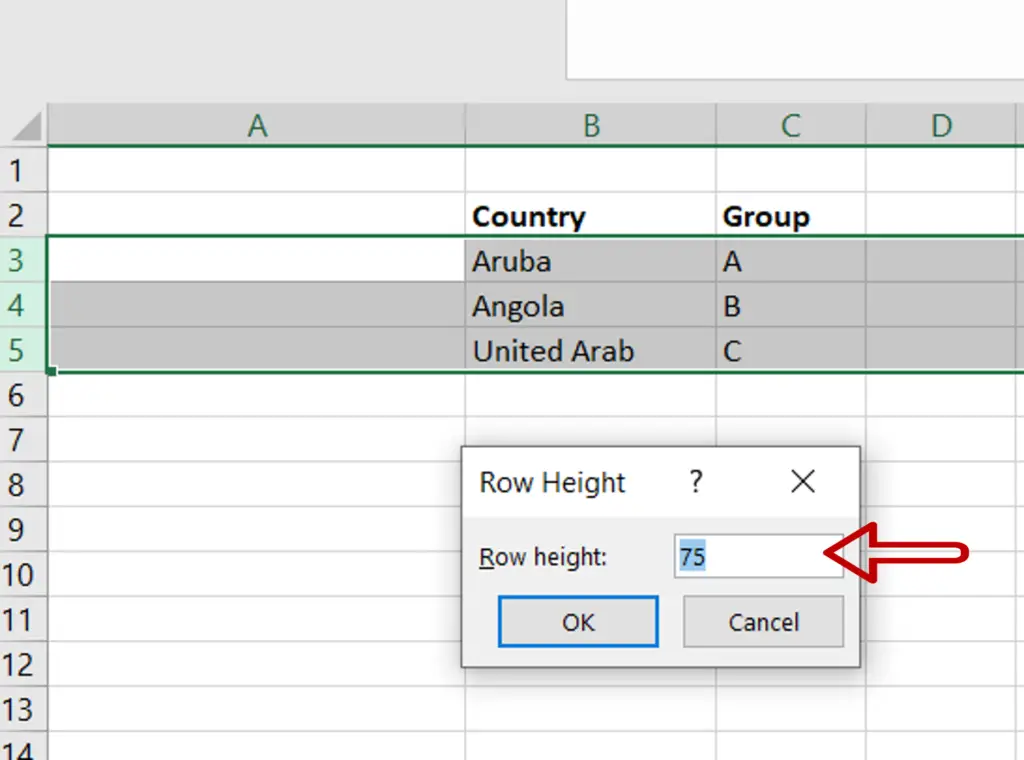
- In the box, increase the height of the row
- Click OK
Step 3 – Select the columns
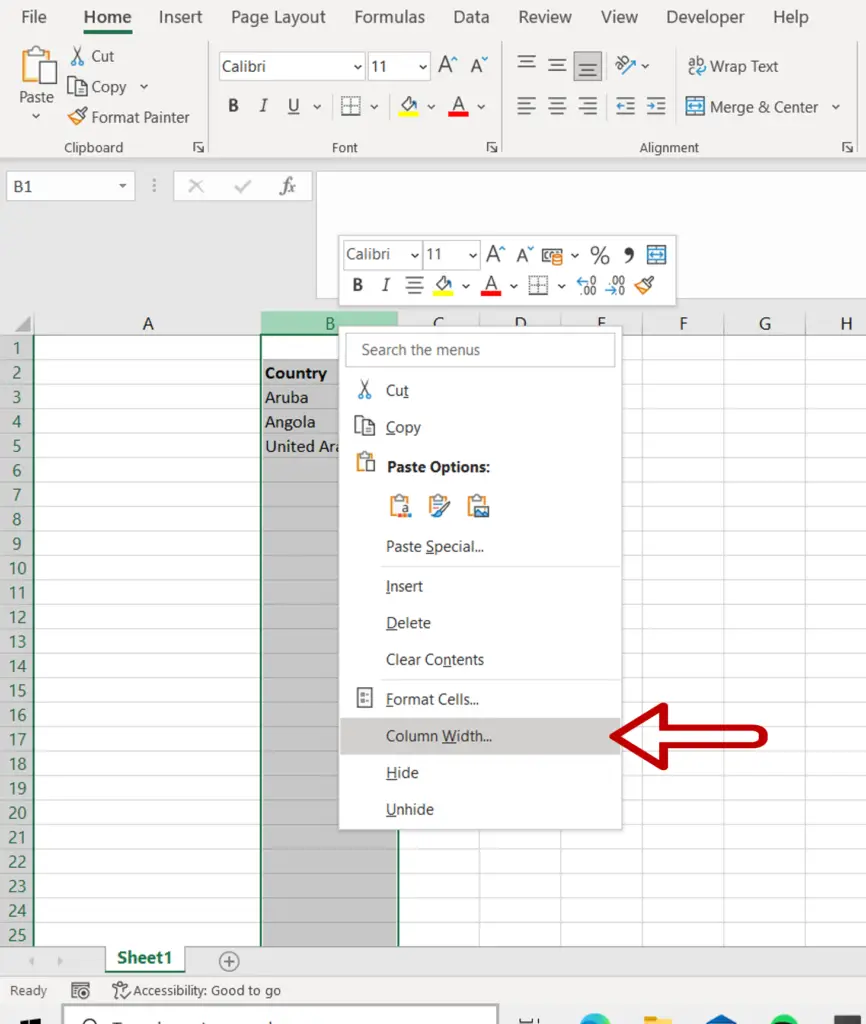
- Select the column or columns that are to be made bigger
- Right-click and select Column Width from the context menu
Note: The Column Width option is also available on the menu Home > Cells > Format
Step 4 – Enter the column width
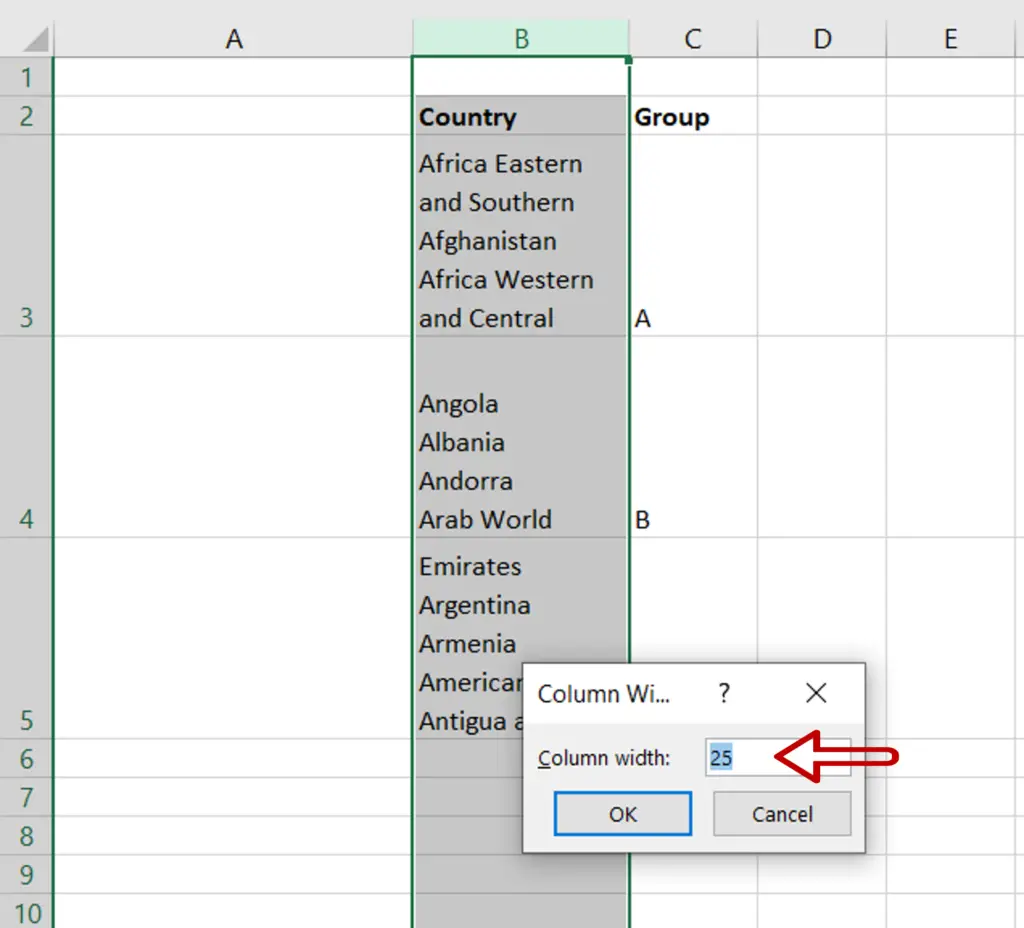
- In the box, increase the width of the column
- Click OK
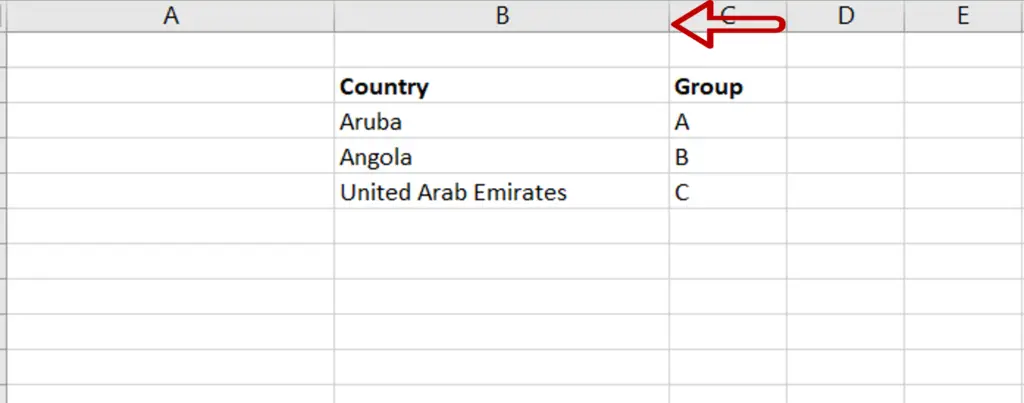
Step 5 – View the result
- The size of the cell is increased
Option 3 – Use the Autofit option
Step 1 – Increase the column width
- Position the cursor on the column line and drag it to increase the width
Step 2 – Autofit the column

- Select the column
- From Home > Cells > Format select Autofit Column Width
Step 3 – Autofit the row
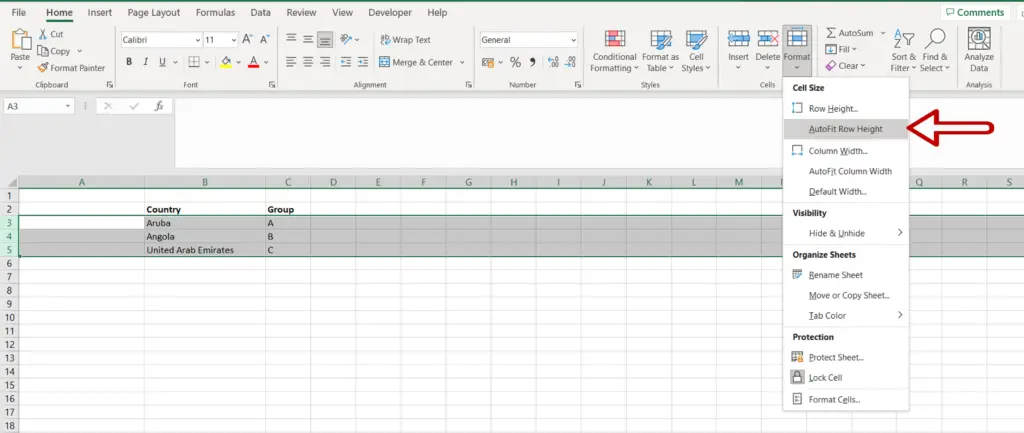
- Select the rows
- From Home > Cells > Format select Autofit Row Height
Step 4 – View the result

- The size of the cells is changed


