How to change the cell size in MS Excel
In this tutorial we will learn how to change the cell size in Microsoft Excel.
This minimum height of row is 0 and maximum 409. The default value is 8.43
This minimum width of column is 0 and maximum 255. The default value is 15.
Below are the steps to change the height and width of cells.

Microsoft Excel is one of the best numeric data calculation software produced by Microsoft and it gained popularity around the globe due to its agility , accuracy , smoothness, and sharpness in calculations . Data visualization is one of the key features in Excel. In daily tasks we face a situation where the data is bigger than the width and height of the cells. There is no specific tool available to adjust the height and width of a single cell. Microsoft Excel enables us to adjust the height and width of an entire row and column .
Step 1 – Select the cell and change the size

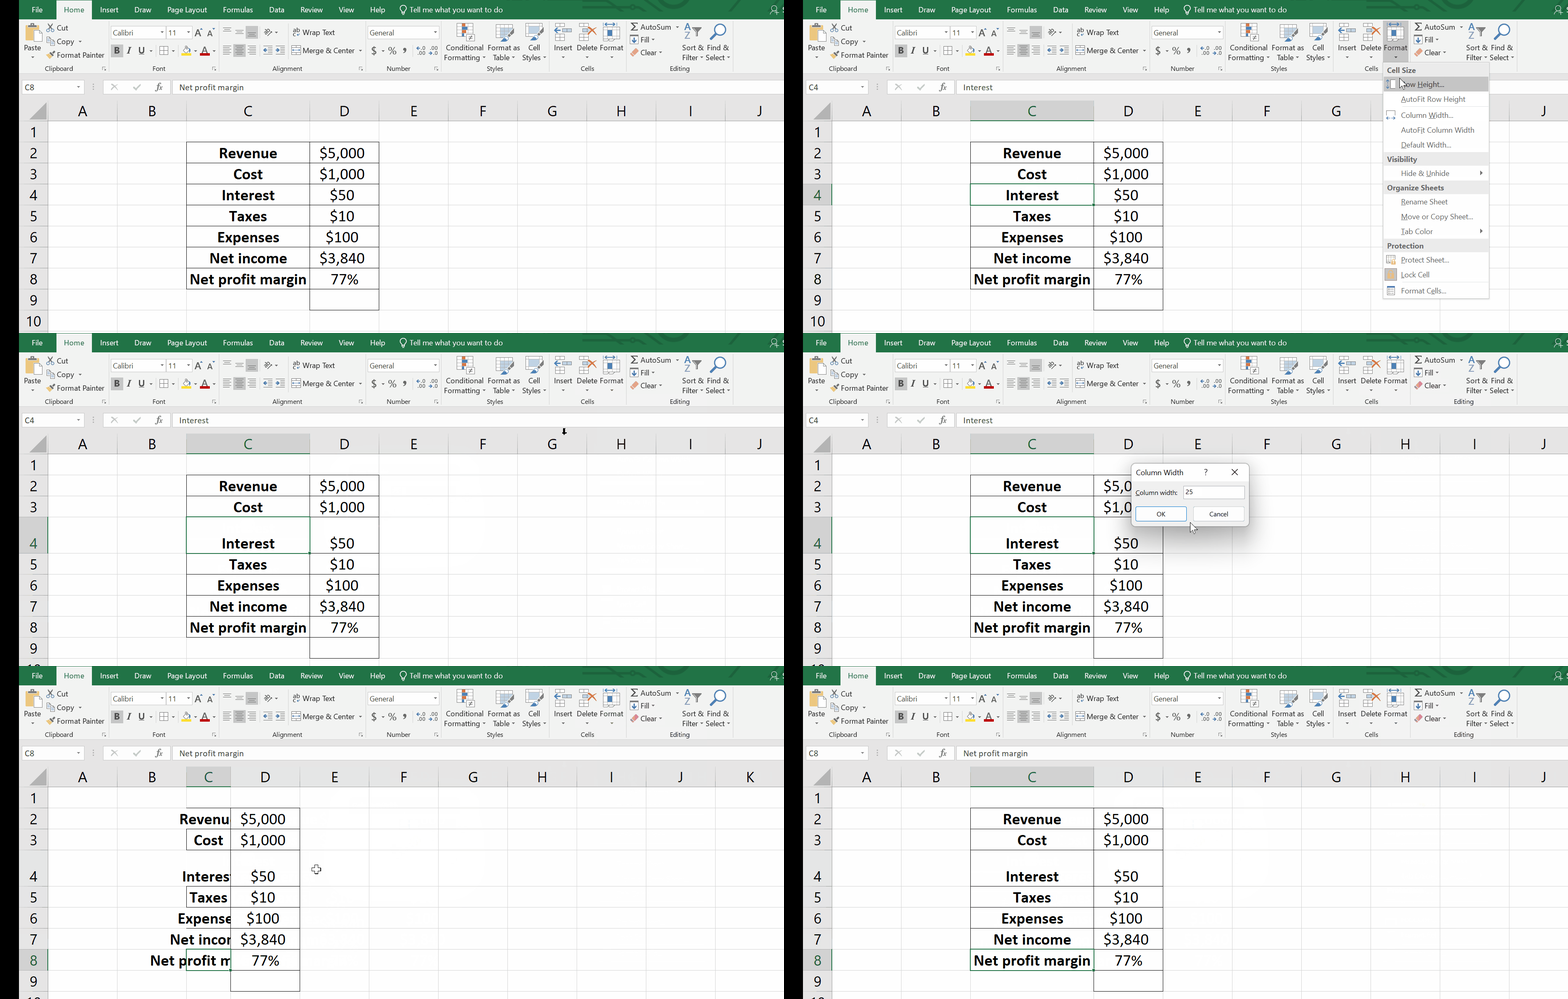
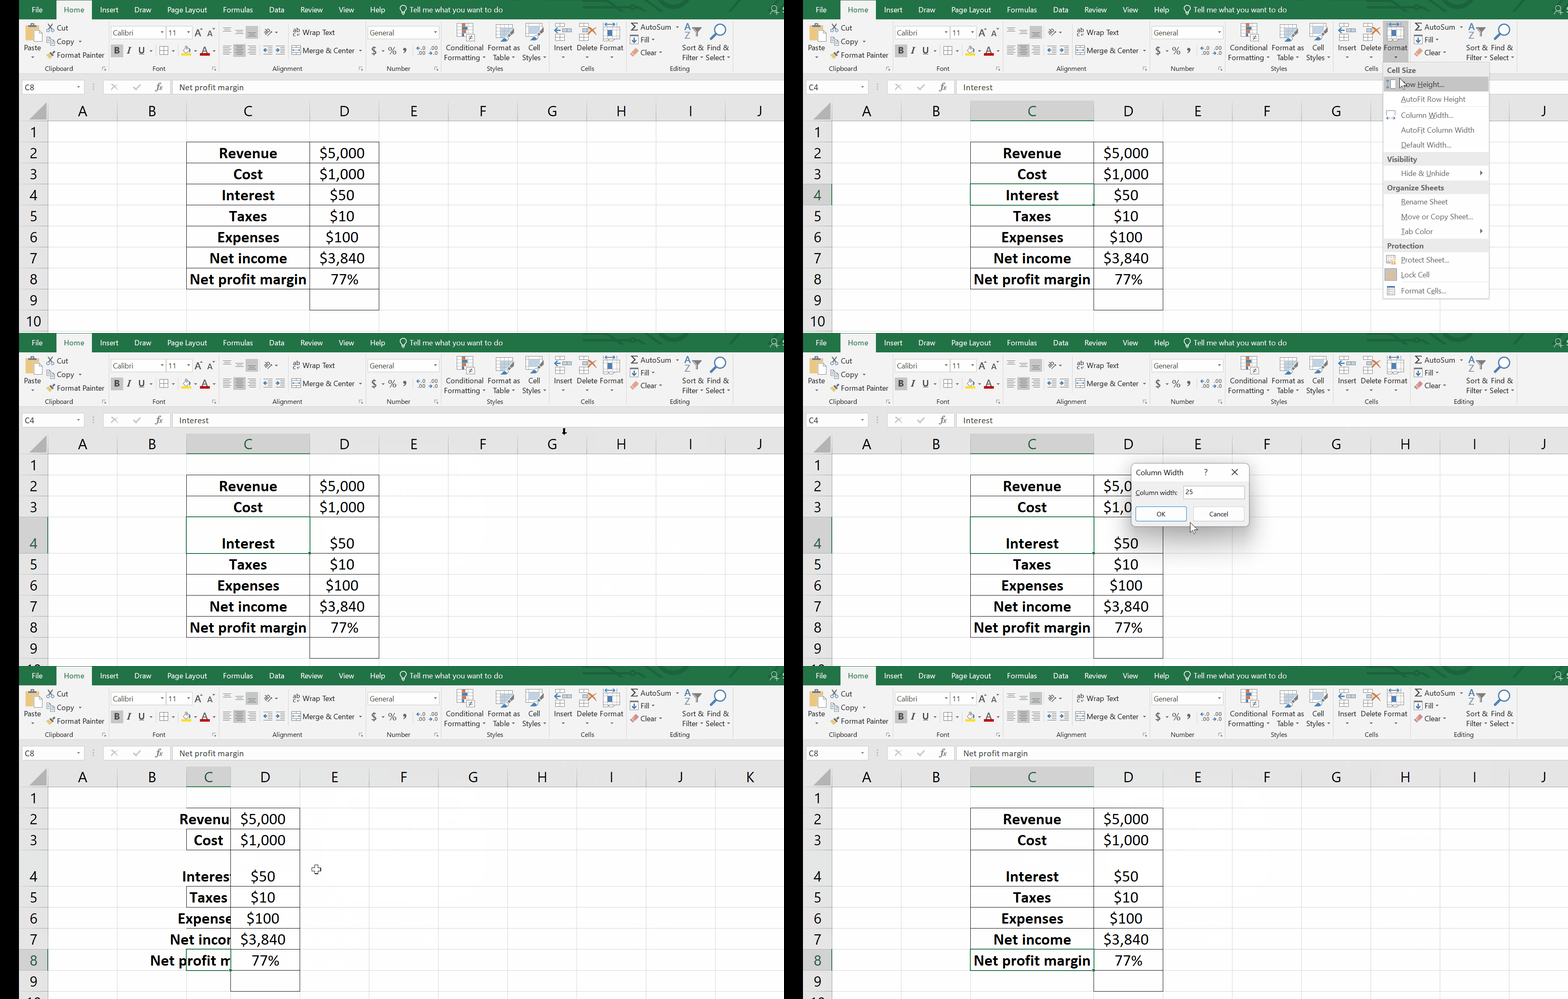
Animation is given above as an example.
– Select the cell or cells that you wish to change the size .
– Go to the Home tab.
– In the Cells cluster, click on the Format .
– A drop down menu will appear.
– Click on Row Height.
– A dialog box will appear.
– Type the desired value, Click OK.
– There is another option to auto fit row height. It automatically adjusts the height of the cell according to the data. I will apply for the whole row.
– To adjust column width, we can click on it .
– A dialog box will appear.
– Type the desired value, Click OK.
– There is another option to auto fit column width . It automatically adjusts the width of the cell according to the data. I will apply for the whole column.
As shown above we can change the size of the cell in MS Excel.


