
How to change delimiter in excel
 By
SpreadCheaters
By
SpreadCheaters
Excel features a wide range of tools and functions for working with data, including the ability to sort, filter, and calculate data using formulas and functions. It allows users to create charts and graphs to visualize data. It also provides the facility to export the excel file to various formats, for example a CSV (comma separated values) file, in which all values are separated by commas.
Default delimiter of Excel for CSV files
Microsoft Excel employs the default List Separator defined in Windows Regional settings while saving the CSV files. For North America and some other countries, the default list separator is a comma, so when you save an Excel file in CSV format you get comma delimited values in the CSV file.
While for European countries, a comma is reserved for the decimal symbol therefore, the list separator is set to semicolon by default. That is why the values in European CSV files will be semicolon delimited.
However, sometimes we need to change the delimiter in the CSV files to match the data format to some other program’s requirements. Therefore, in today’s tutorial, we’re going to learn how to change the delimiter in the CSV file while exporting from or importing to Excel. Follow the steps below to learn how to change the delimiter.
Method 1 – Changing Delimiters while exporting the file from Excel
Step 1 – Open the file and check the current delimiter
- First, we’ll open the existing file through the notepad and check the current delimiter as shown above.
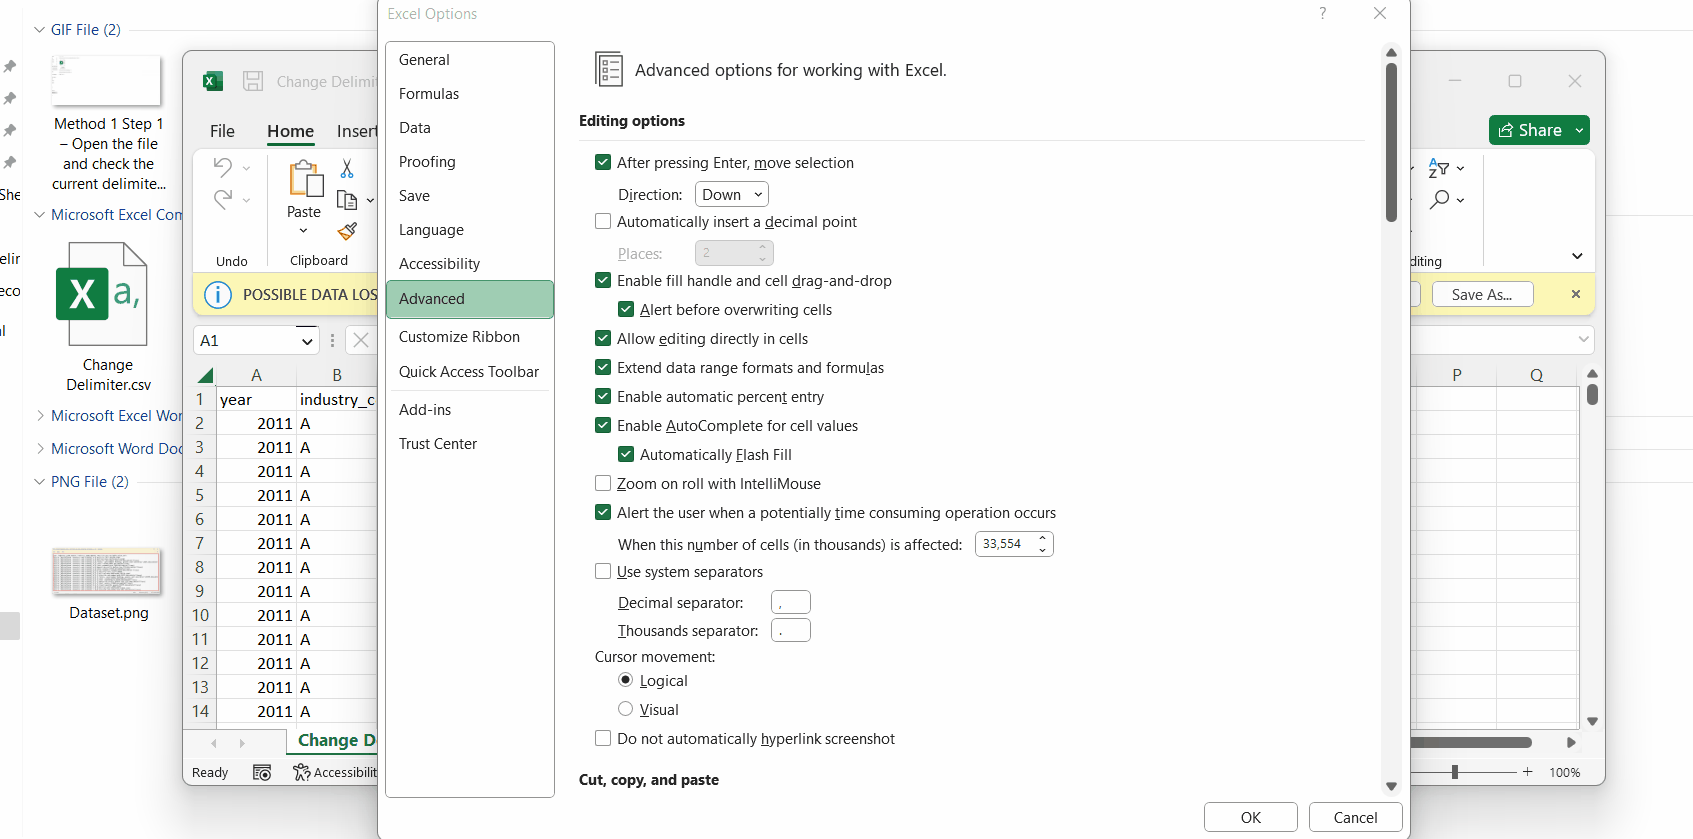
Step 2 – Open the file with Excel and go to Excel Options
- Now to change the delimiter, open the file with Excel.
- Click on the file menu and then click on options.
- This will open the Excel Options window as shown above.
Step 3 – Make necessary changes in Editing options to change delimiters
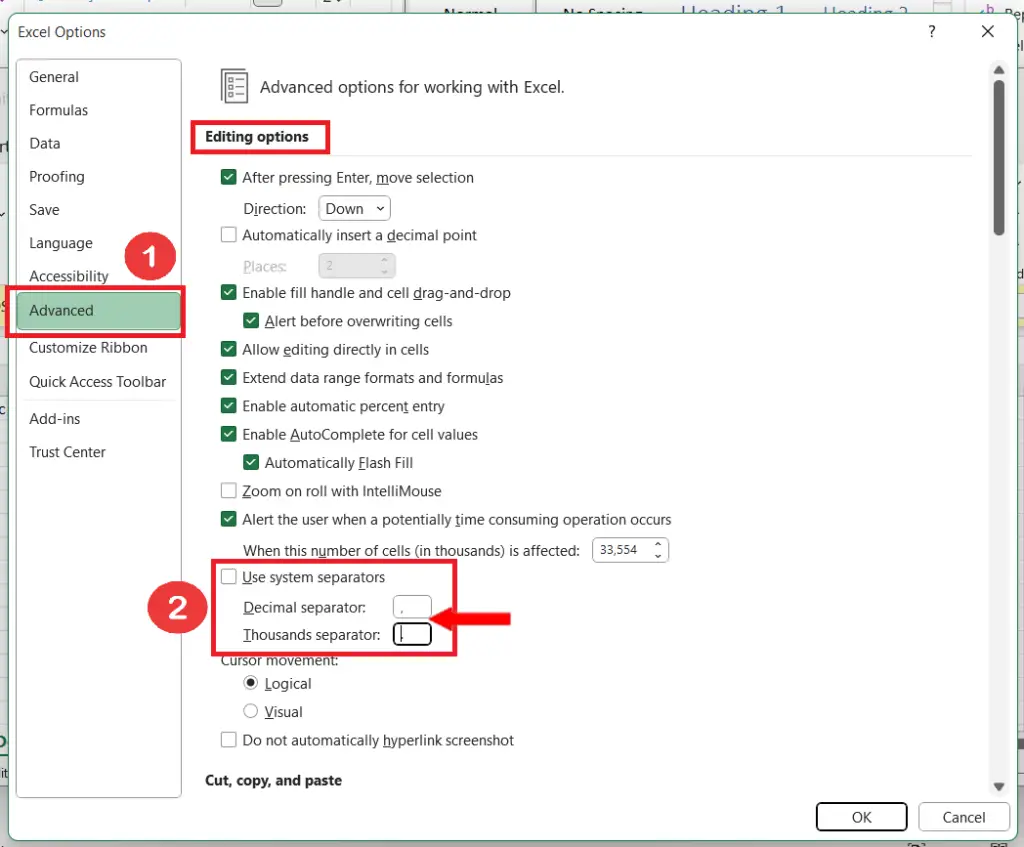
- Click on Advanced option.
- Locate the Use System Operators check box under Editing options.
- By default it will be checked, uncheck it.
- Then change the Decimal Separator from . (period) to , (comma) and Thousands Separator from , (comma) to . (period) as shown above.
Step 4 – Save the file again and open with notepad
- Save the file and close Excel.
- Open the file with notepad again and you will notice that the delimiter has been changed from , (comma) to ; (semi colon).
Method 2 – Changing Delimiters while importing the file to Excel
This method will use Power Query Editor of Excel to change the delimiter of a CSV file while importing it into Excel. Power Query is available for Excel 2010 to 2013 as an add-in that could be downloaded from here: Download the Power Query add-in.
For Excel 2016 and onwards Power Query Editor is available in Data Tab under Get and Transform group as shown in this article.
Step 1 – Open a new Excel file start file import process
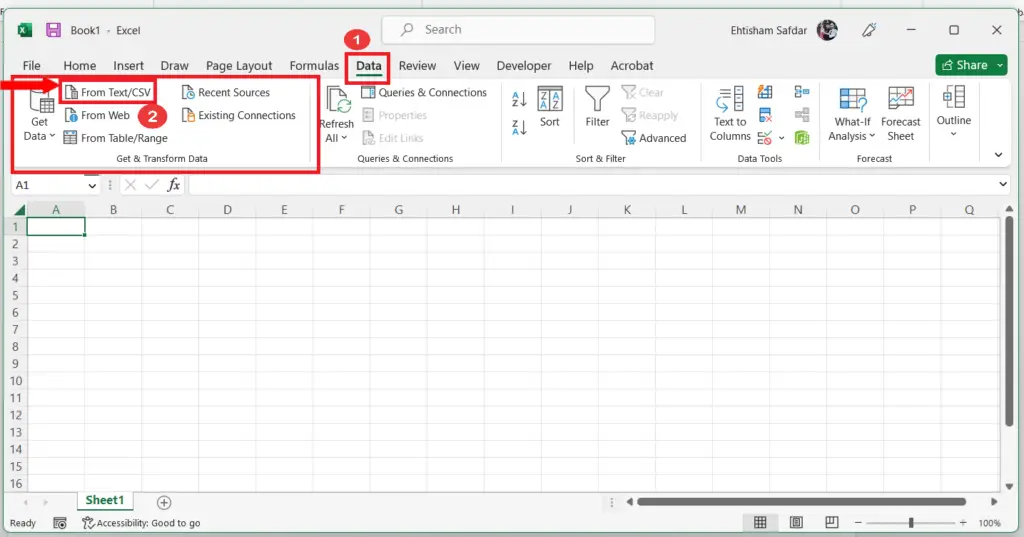
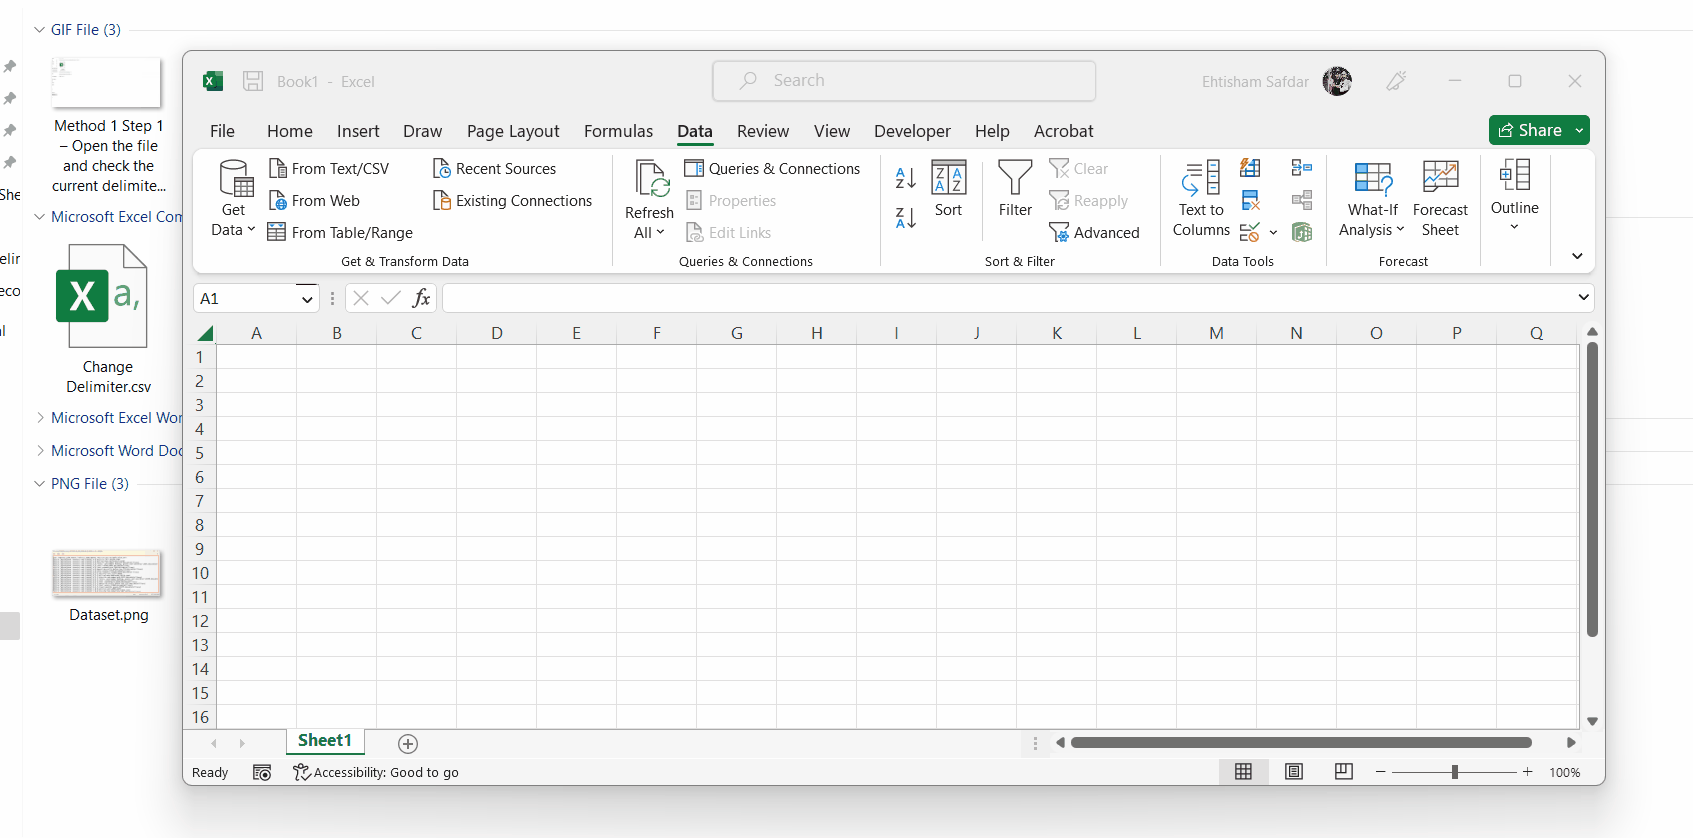
- Open a new Excel file and click on the Data tab from the list of main tabs.
- In Get and Transform Data, click on From Text/CSV.
Step 2 – Choose the target CSV file and open Power Query Editor
- The last step will open up a dialog box to choose the target file.
- Choose the appropriate file and click import.
- This will open the CSV file in Power Query Editor of Excel as shown above.
Step 3 – Change the delimiter
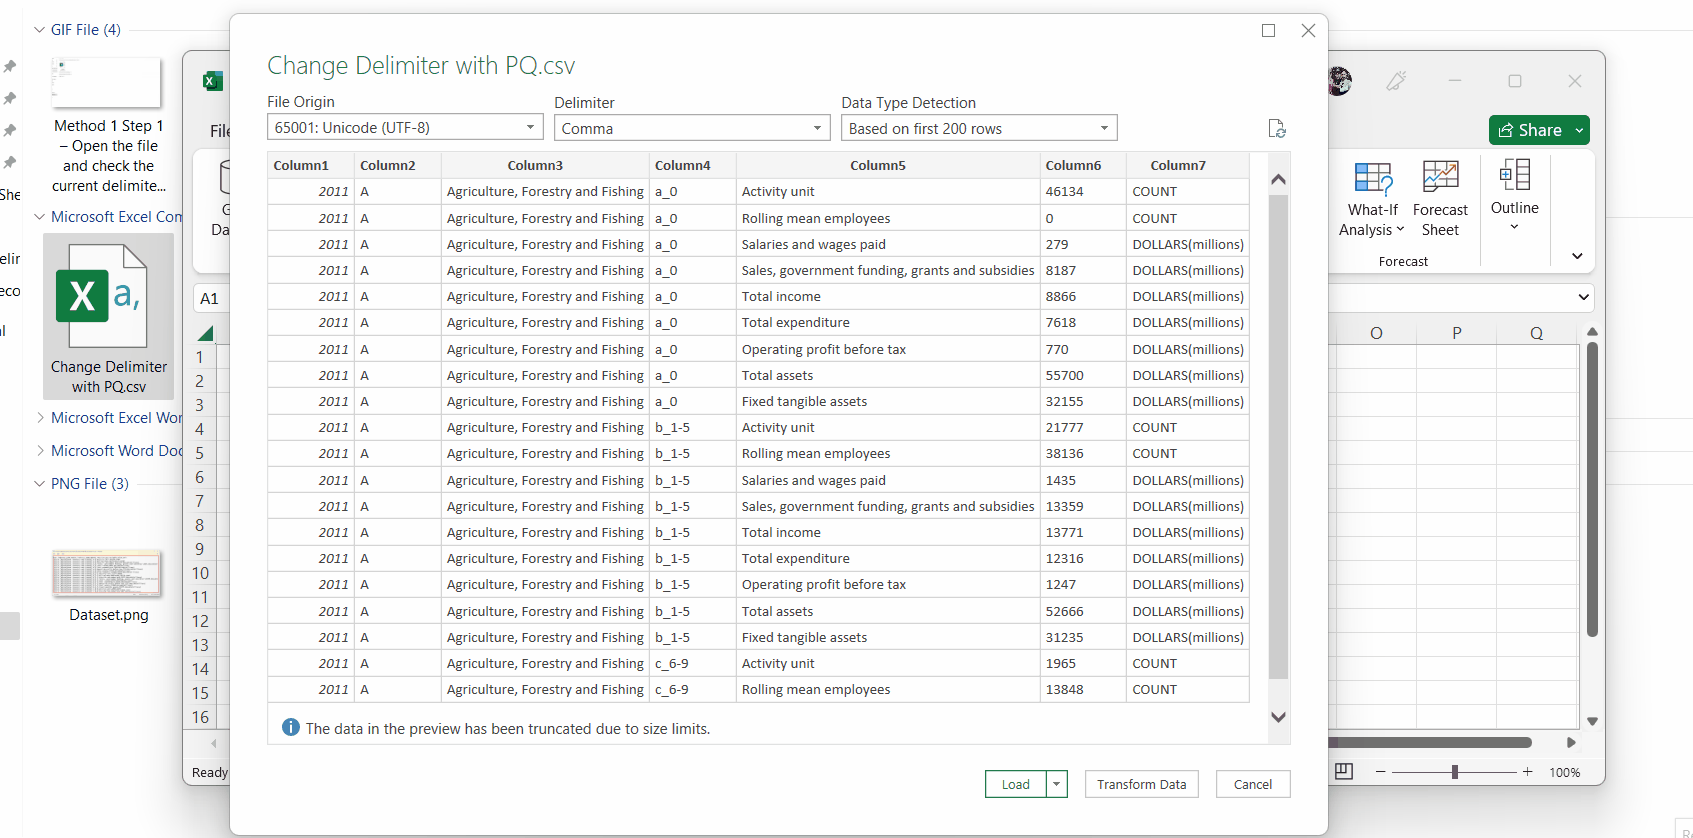
- The last step will open up a dialog box to choose the target file.
- Now you can choose the delimiter of your choice from a wide range. In our case, we will choose space as the next delimiter and the data will be delimited after each space. However, while choosing the delimiter care should be taken that the chosen delimiters should be present in the file. Otherwise, there will be no effect on the data.


