
How to build a database in Excel
 By
SpreadCheaters
By
SpreadCheaters
You can watch a video tutorial here.
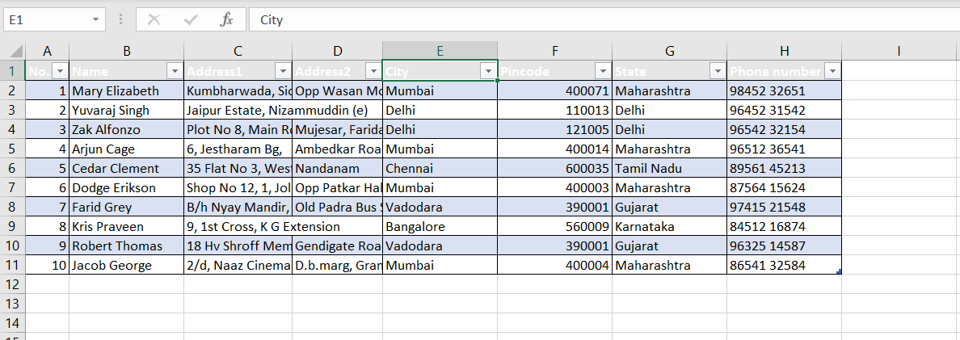
With over a million rows and more than 16,000 columns, Excel is well-suited for personal databases or to manage the records of small businesses. Organizing data as a database in Excel has several advantages. You can filter and sort the data to find information quickly, you can analyze it to get business insights, and create calculated columns to automate your business processes. In this example, we will create a database of customer information.
Step 1 – Define the columns

– Define the columns by giving the column headers
Step 2 – Enter the data
– Add data under each column
Step 3 – Open the Create Table box
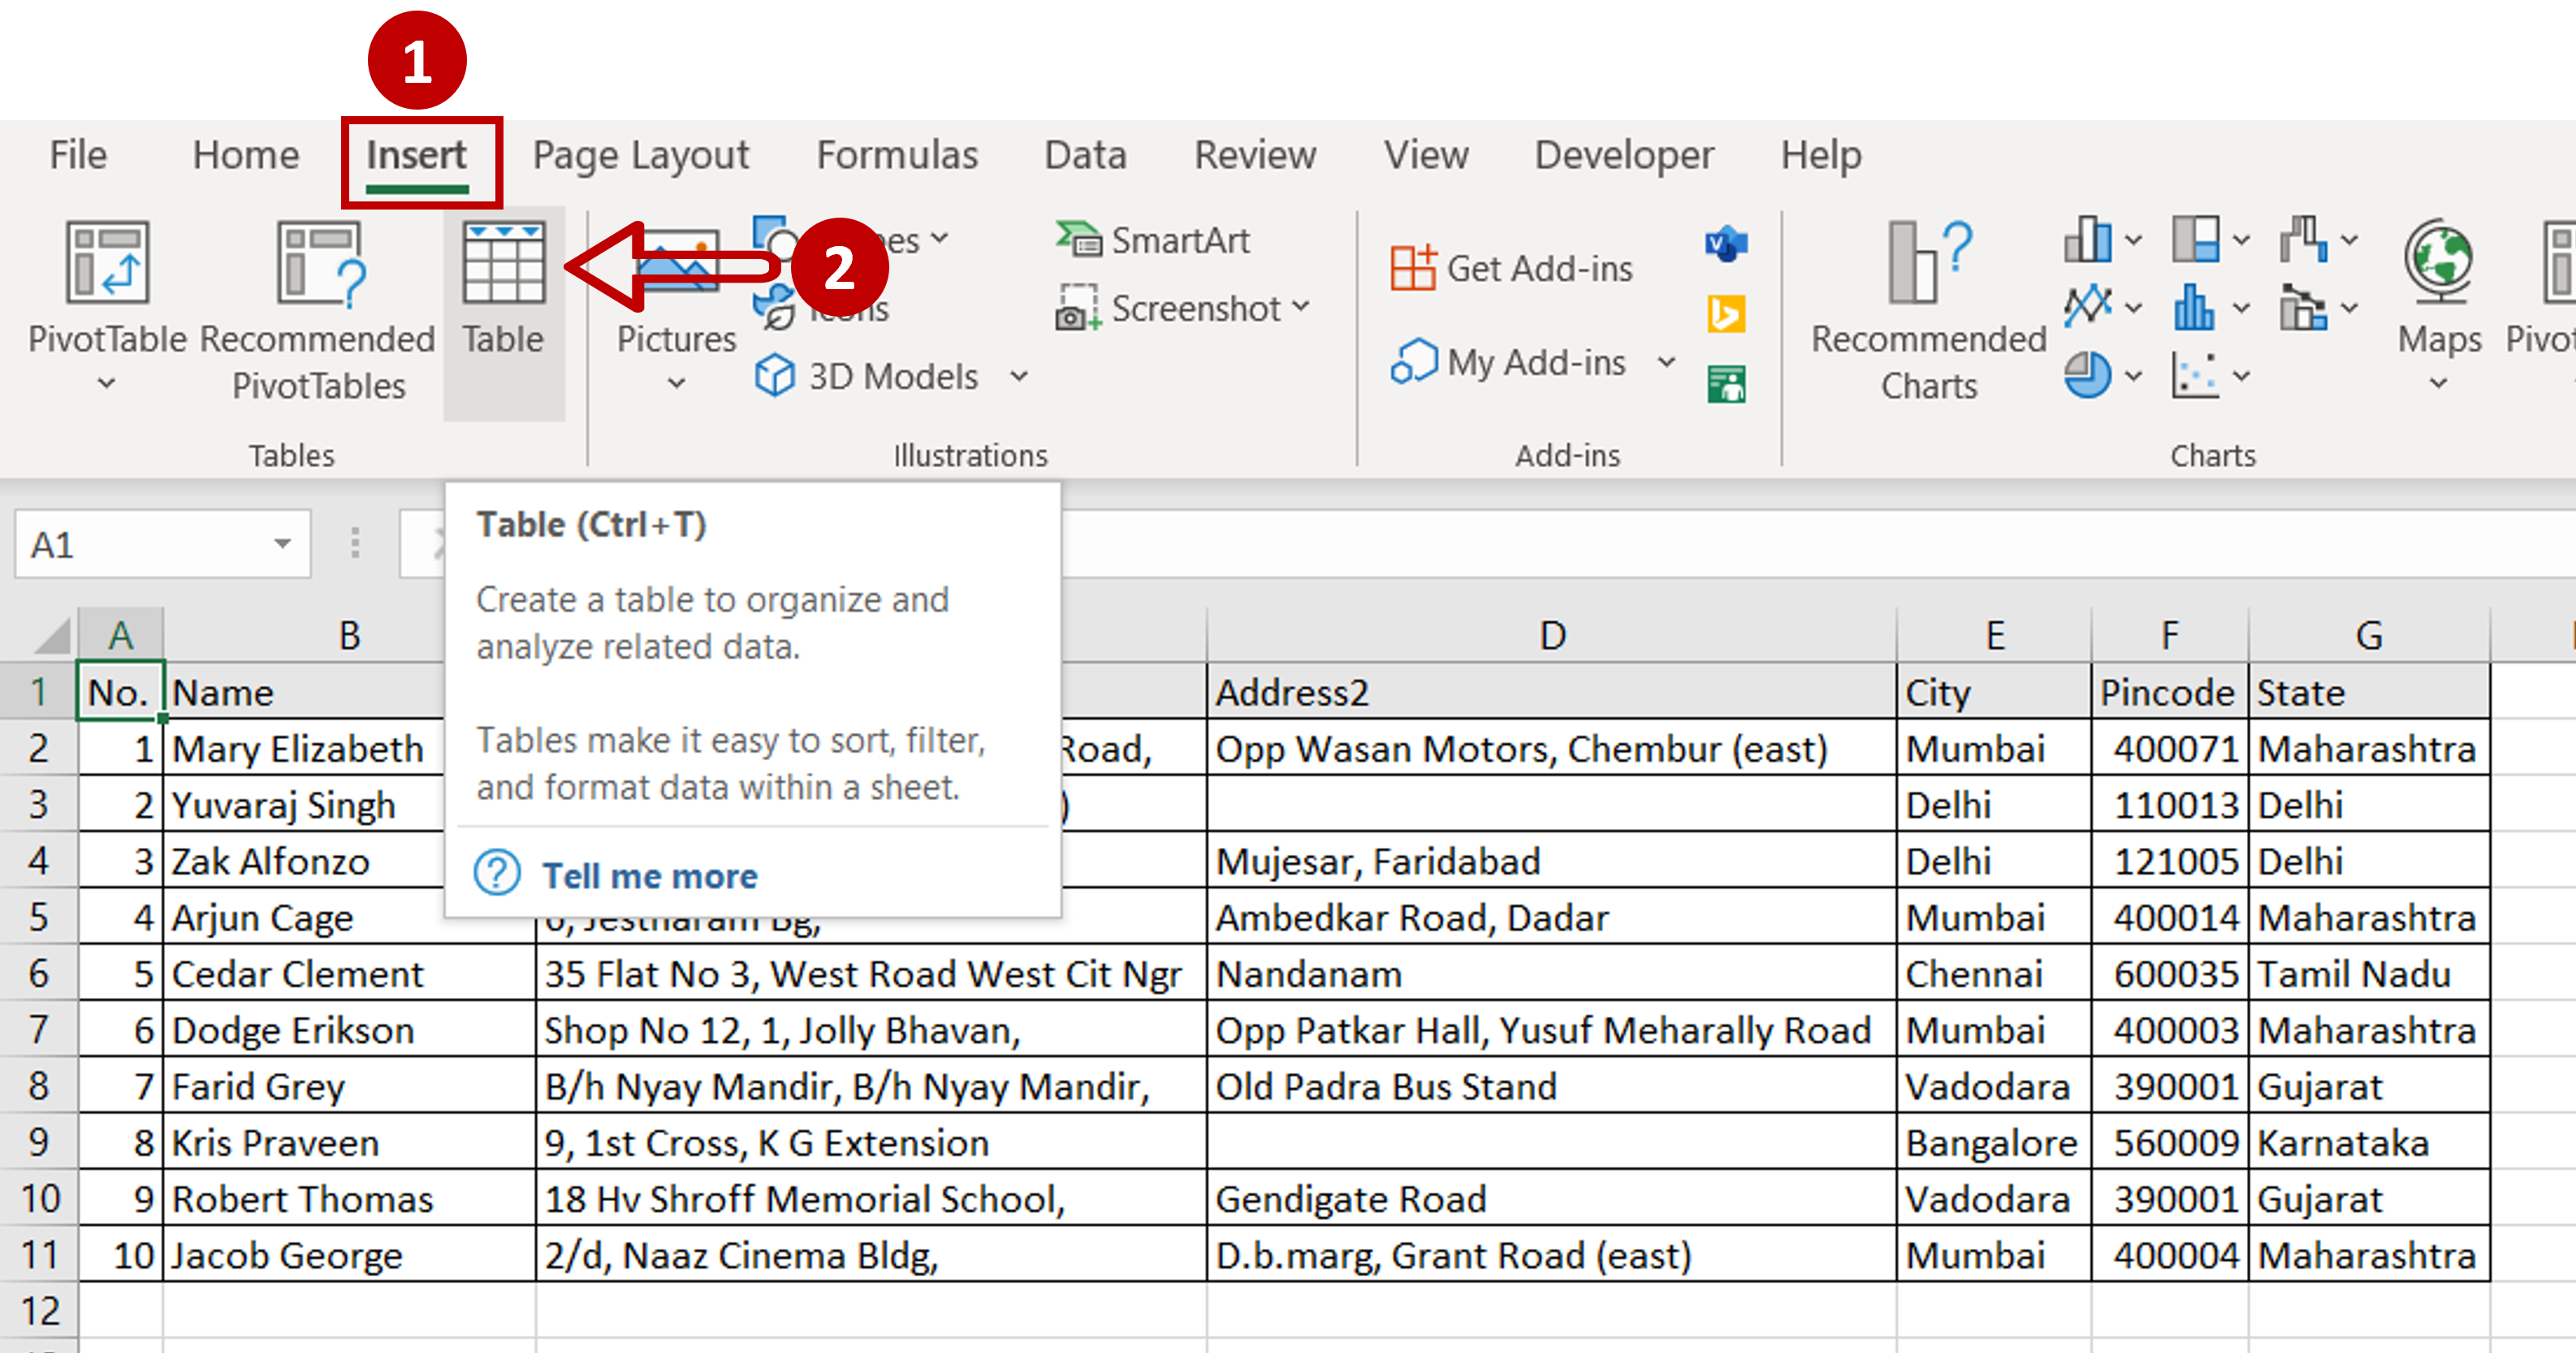
– Select any cell within the dataset
– Go to Insert > Tables
– Click the Table button
Step 4 – Define the range
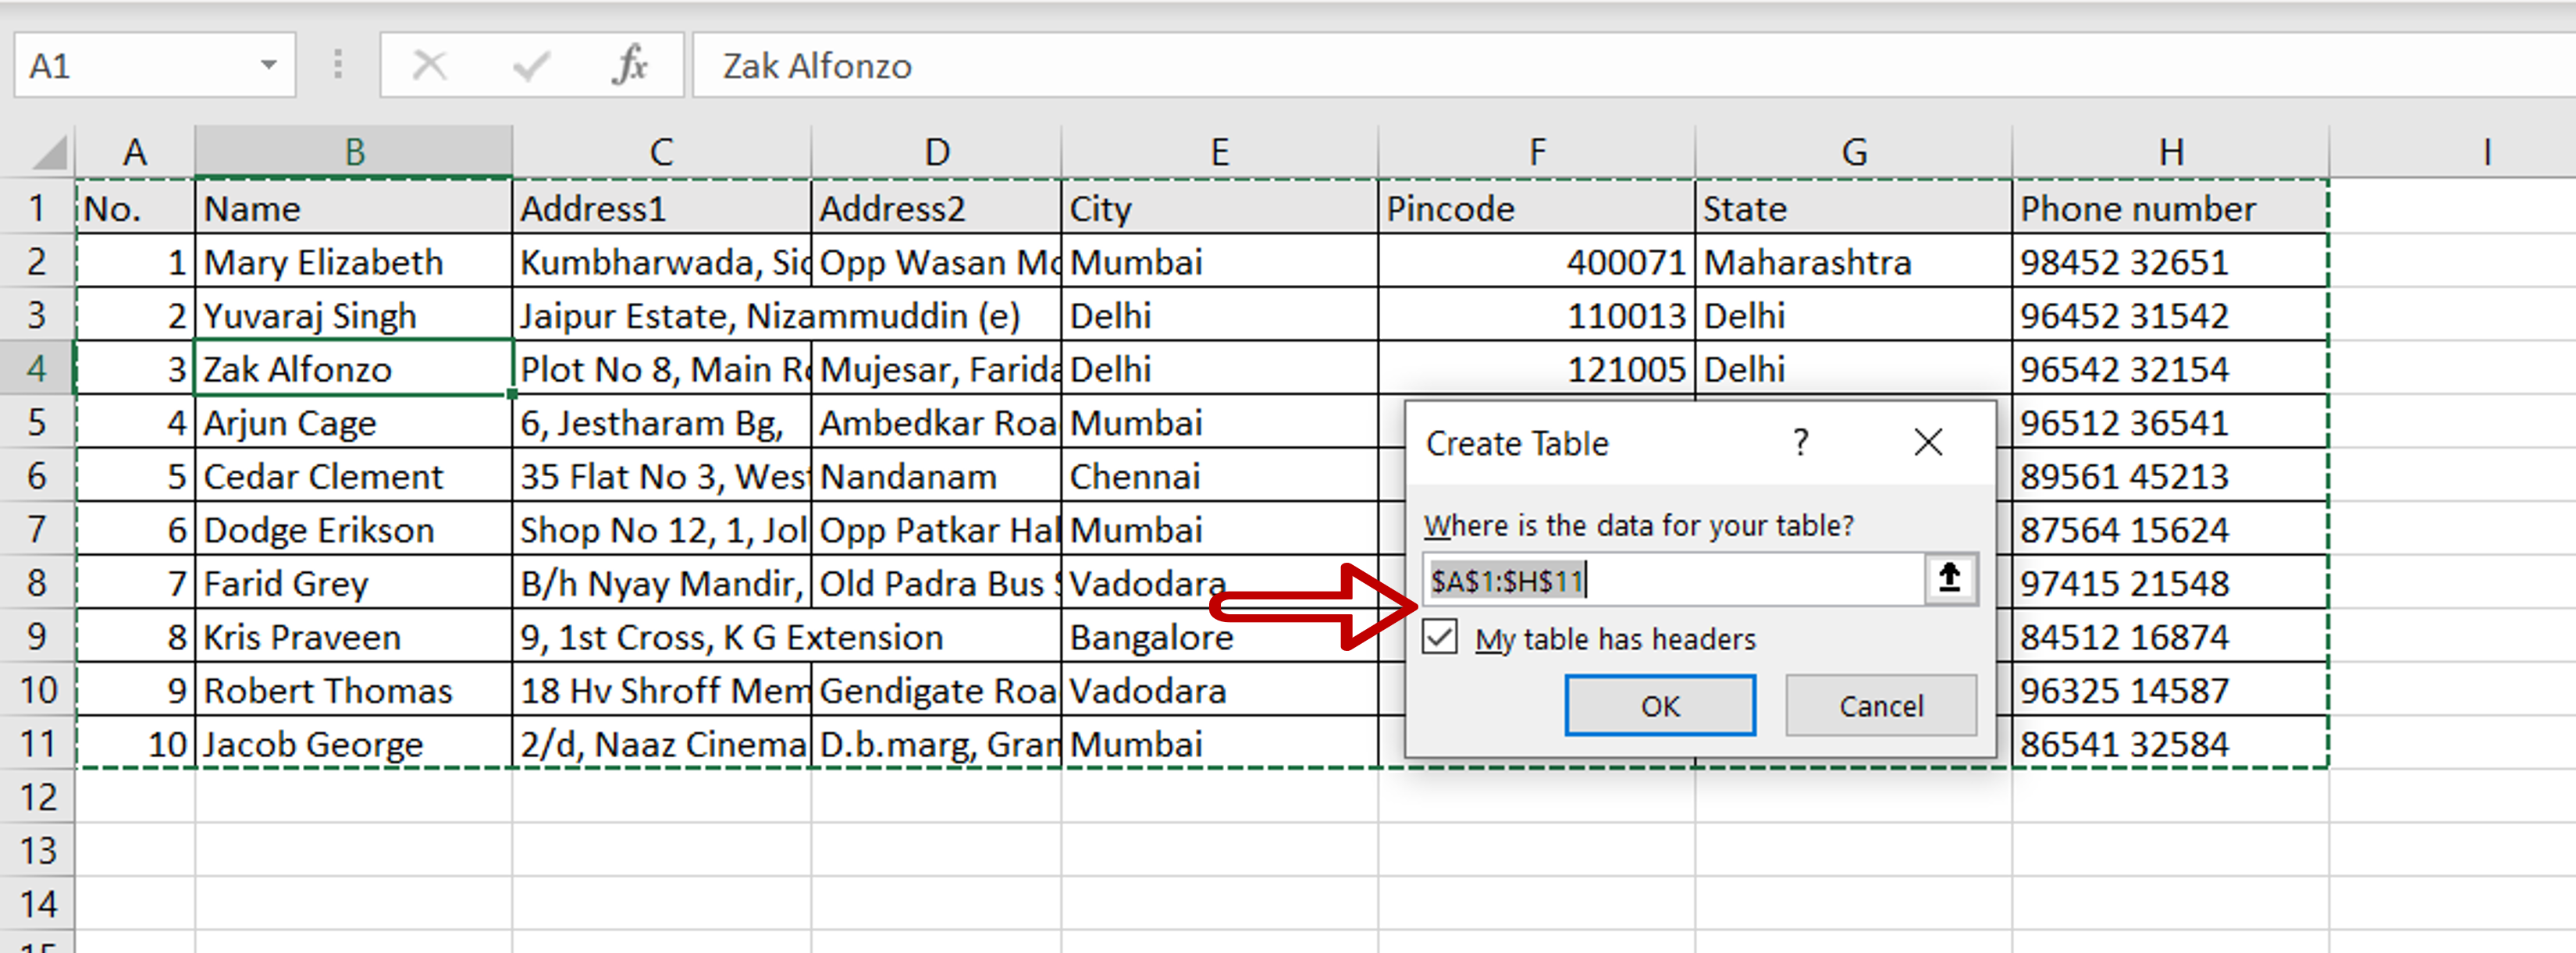
– Check that the range of the table is correct
– Ensure that My table has headers is ticked
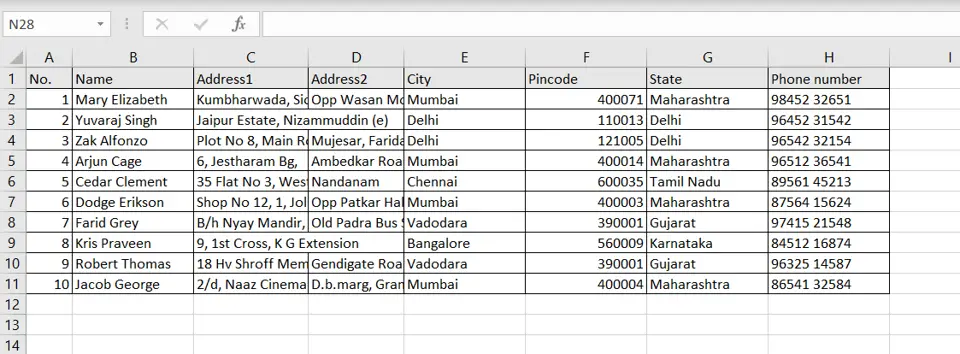
Step 5 – Check the result
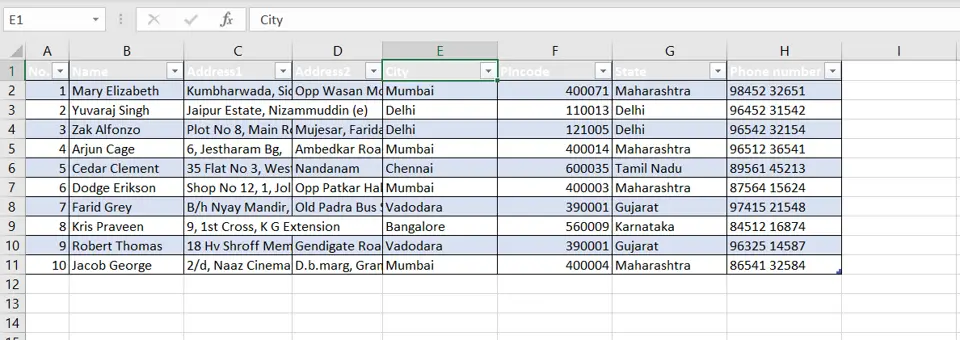
– The data is converted into a table
Step 6 – Add new rows
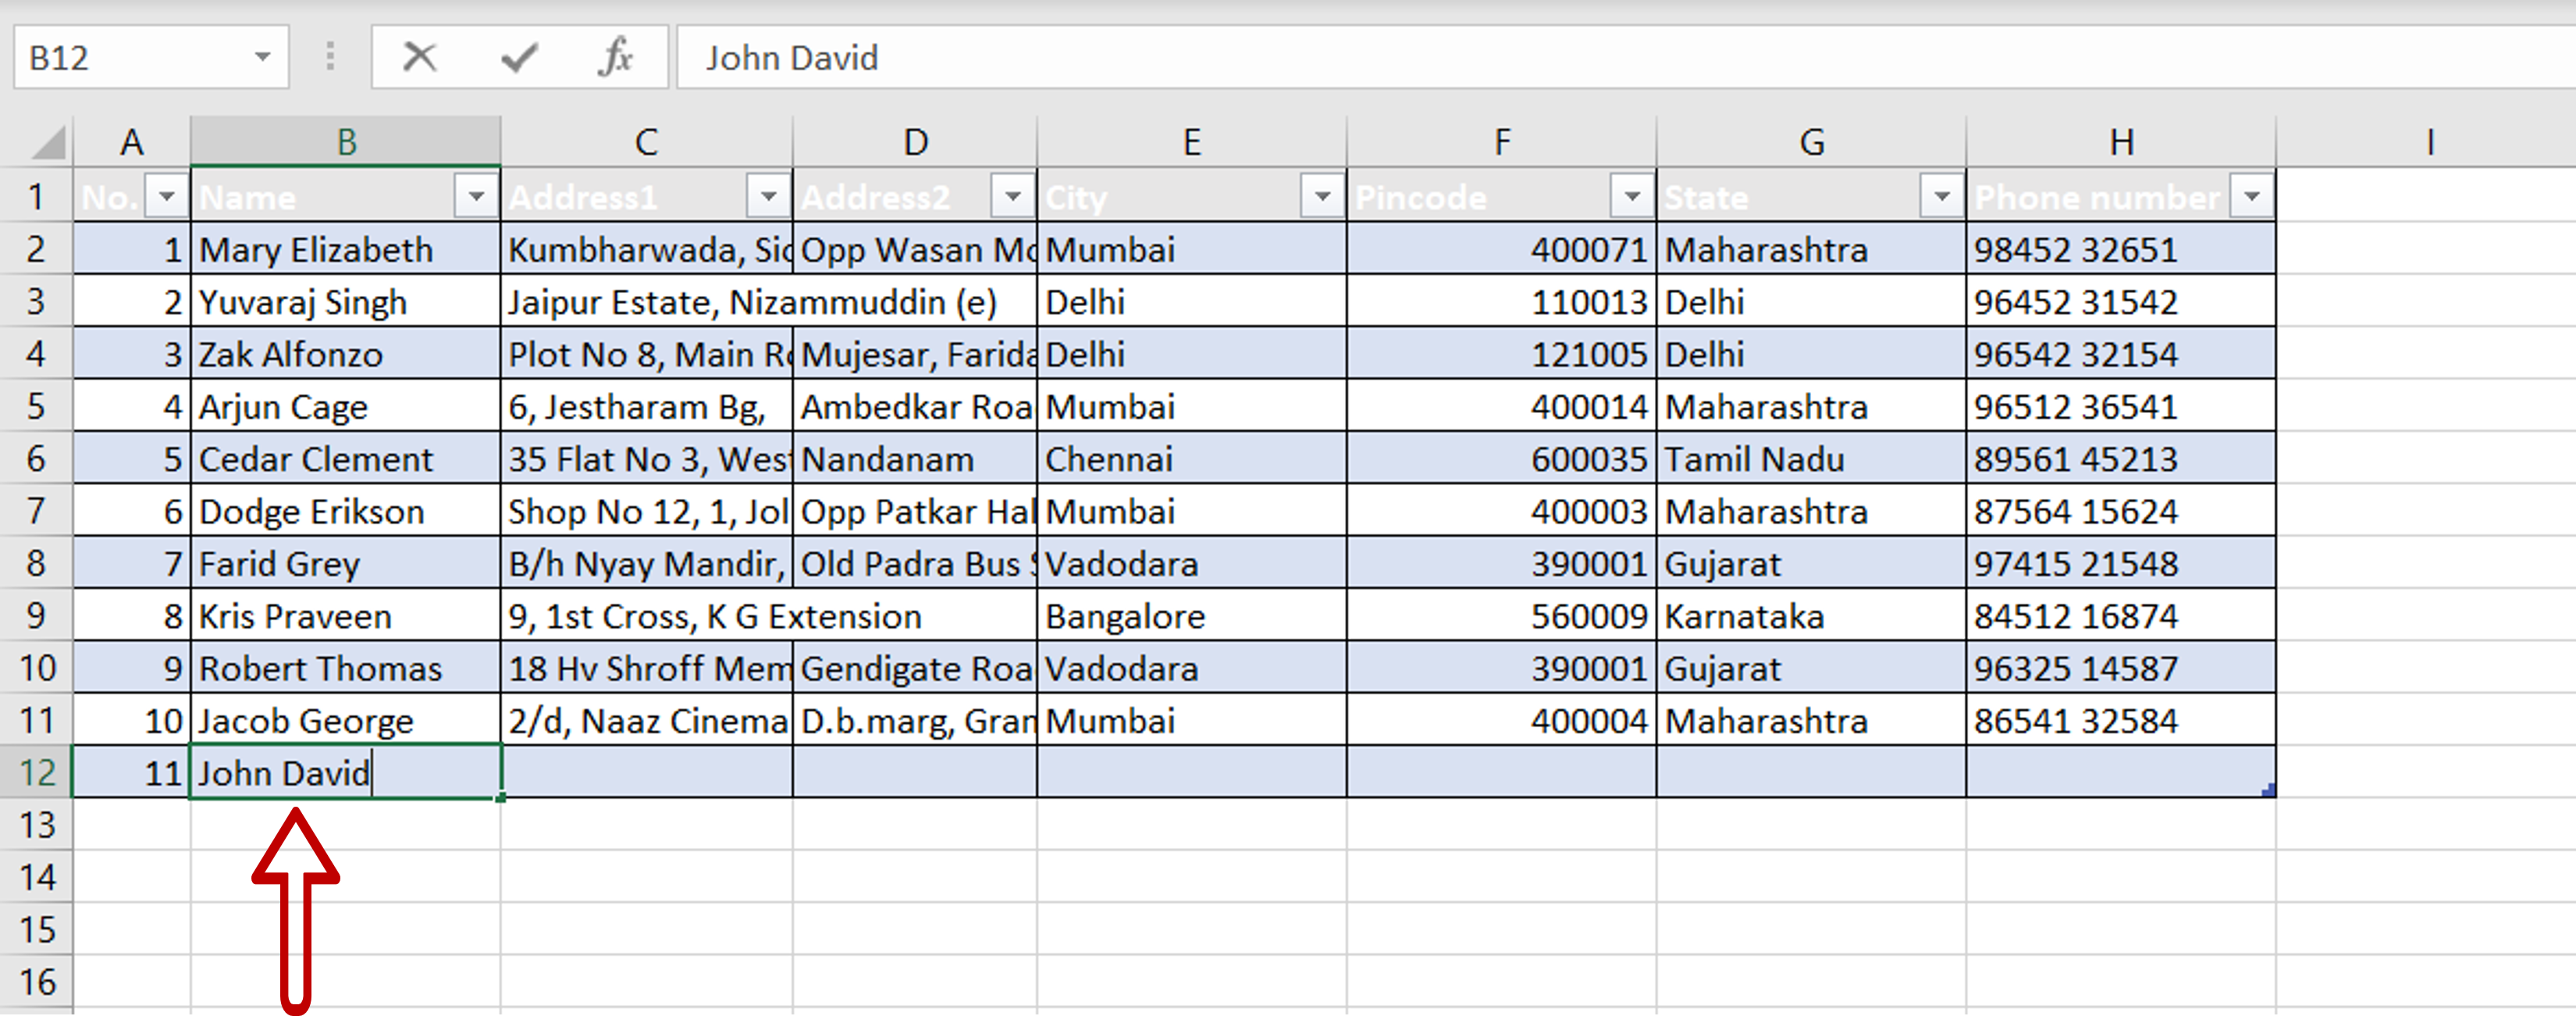
– New rows get automatically to the table and become part of the database


