
How to add Yes or No in Excel
 By
SpreadCheaters
By
SpreadCheaters
You can watch a video tutorial here.
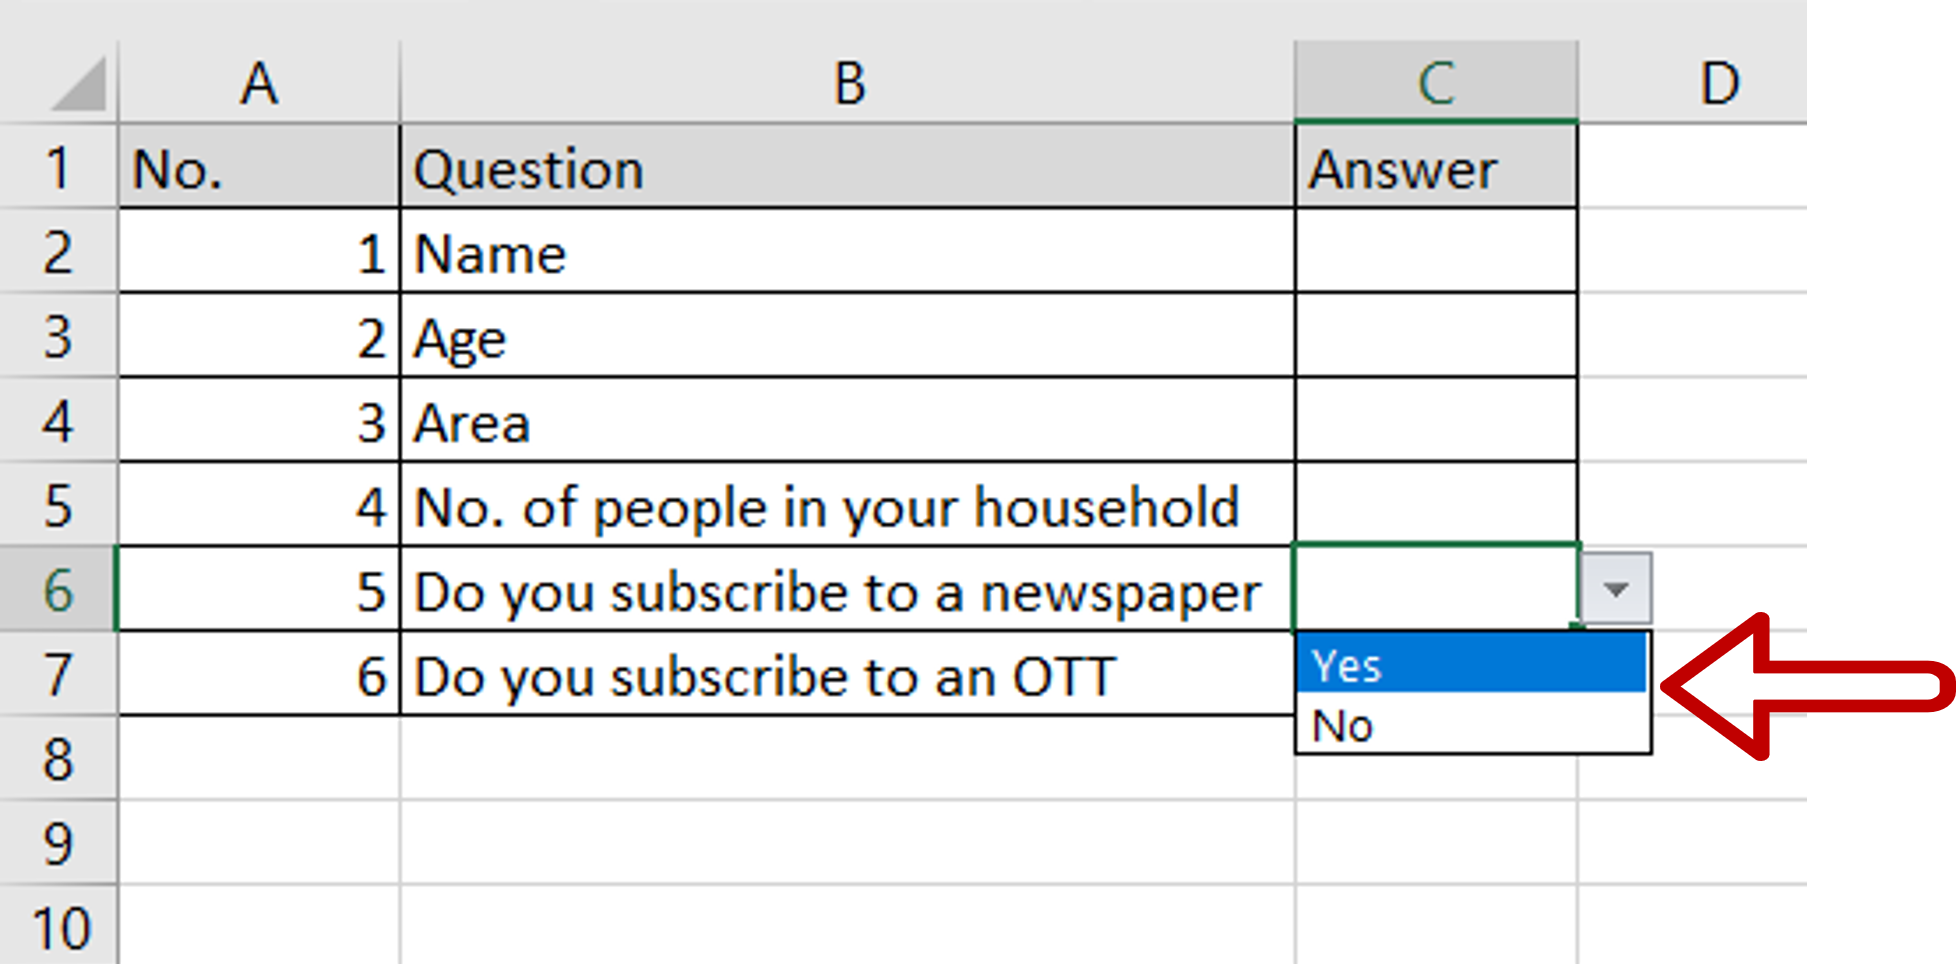
To validate the data that is entered in an Excel cell, it is possible to define the list of values that are allowed by creating a drop-down list. This is especially useful when creating data entry forms and you need to restrict the values that are entered. If you want to restrict the entry in a cell to either ‘Yes’ or ‘No’, you can do so by creating a drop-down list.
Step 1 – Open the Data Validation window
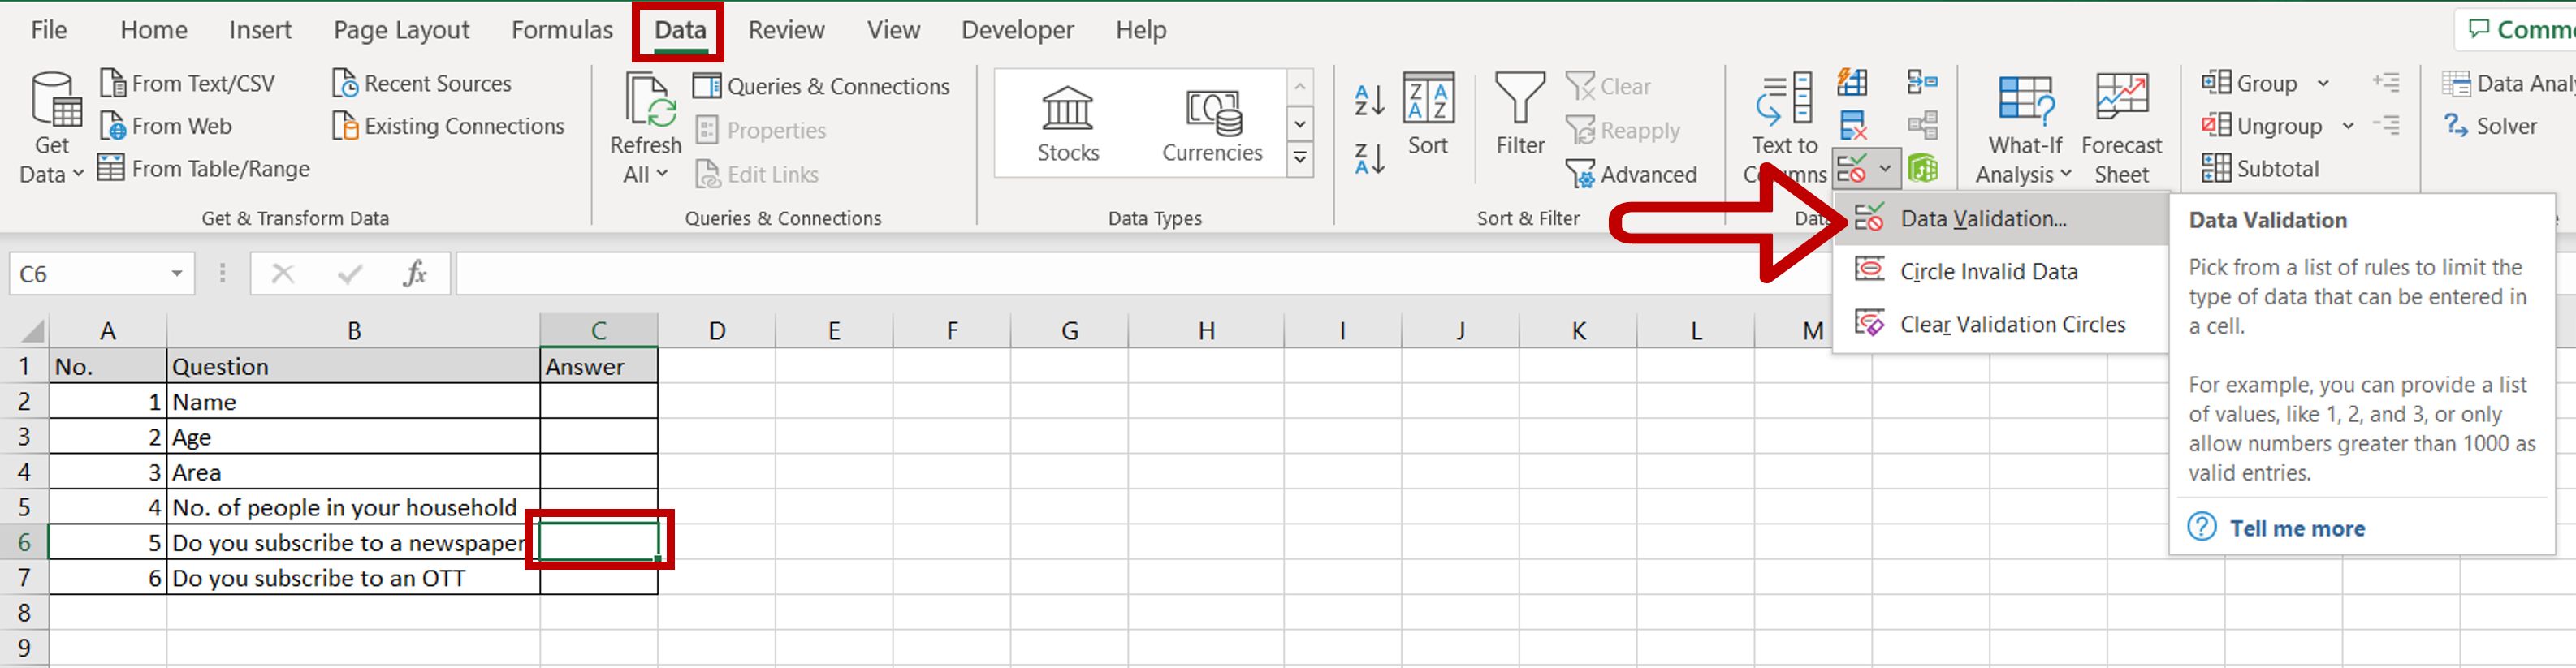
– Place the cursor in the cell for which the drop-down list is to be created
– Go to Data > Data Tools
– Click on Data Validation
Step 2 – Enter the list of values
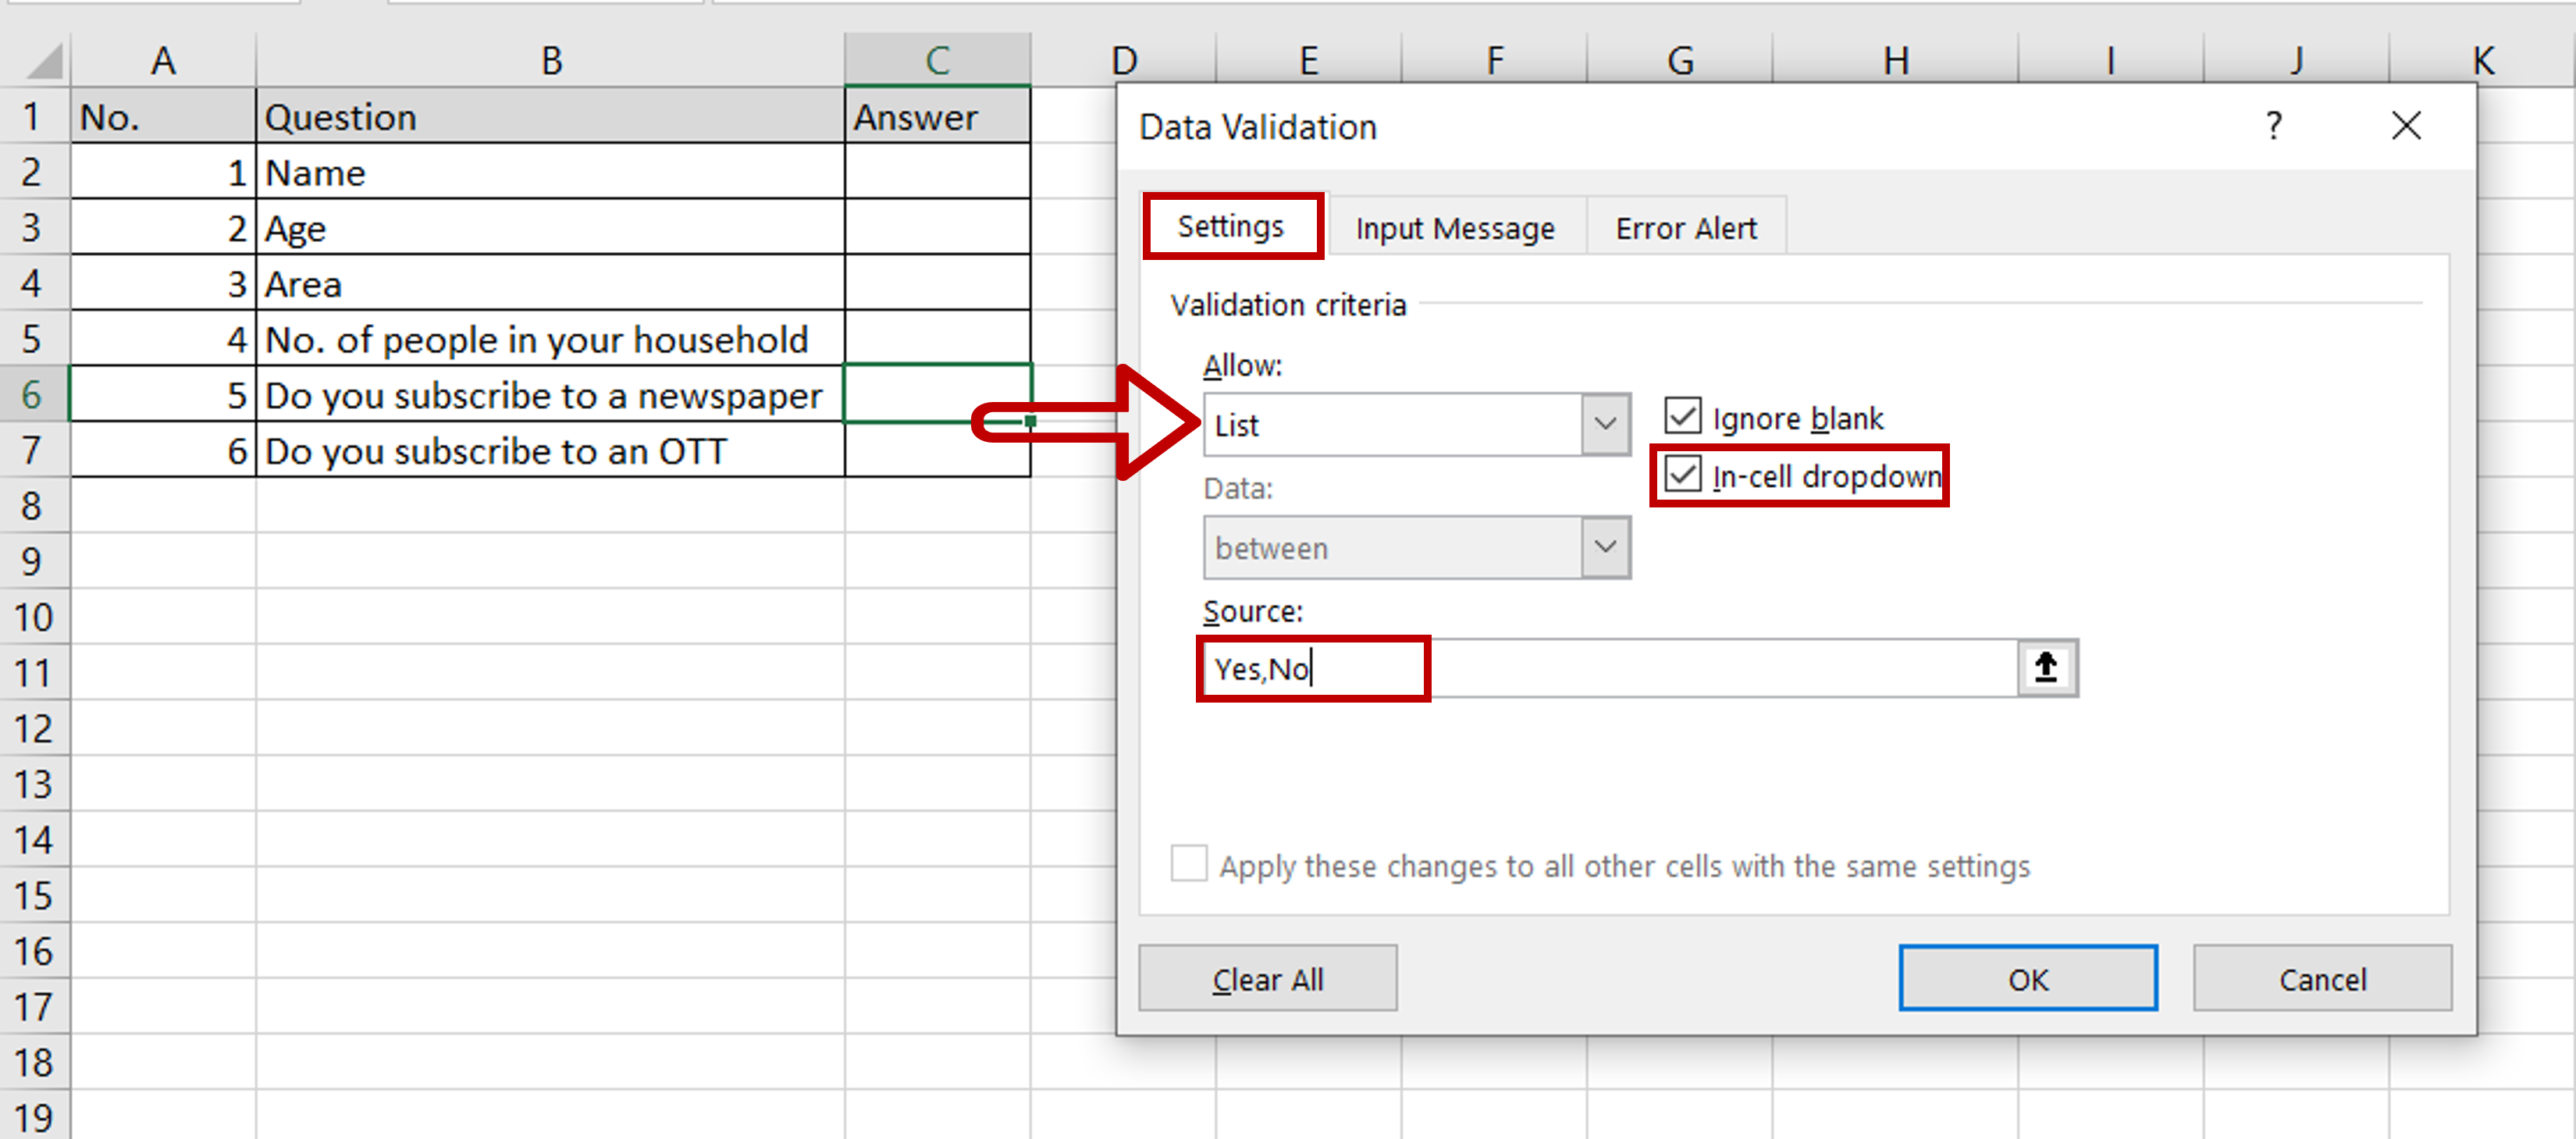
– Select the Settings tab
– Under Allow select List
– Ensure that the In-cell dropdown box is ticked
– Type “Yes, No” in the Source textbox
– Click OK
Step 3 – Check that the drop-down list has been added

– A drop-down arrow will appear on the right border of the cell that will display ‘Yes’ and ‘No’ when clicked


