
How to add multiple columns in Excel
 By
SpreadCheaters
By
SpreadCheaters
You can watch a video tutorial here.
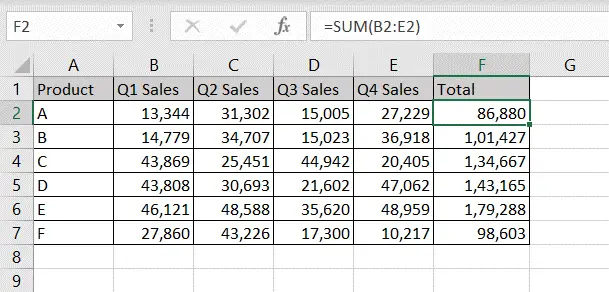
Excel is a great tool for performing calculations on tables. Using cell references, we can create formulas for totals that will be updated whenever the source numbers change.
Assume you have a table that has the quarterly sales for a set of products and you need to find the total sales for each product. The sales for each quarter are in separate columns so you will need to add multiple columns. This can be easily done using AutoSum which uses the SUM()function.
Step 1 – Click the AutoSum button
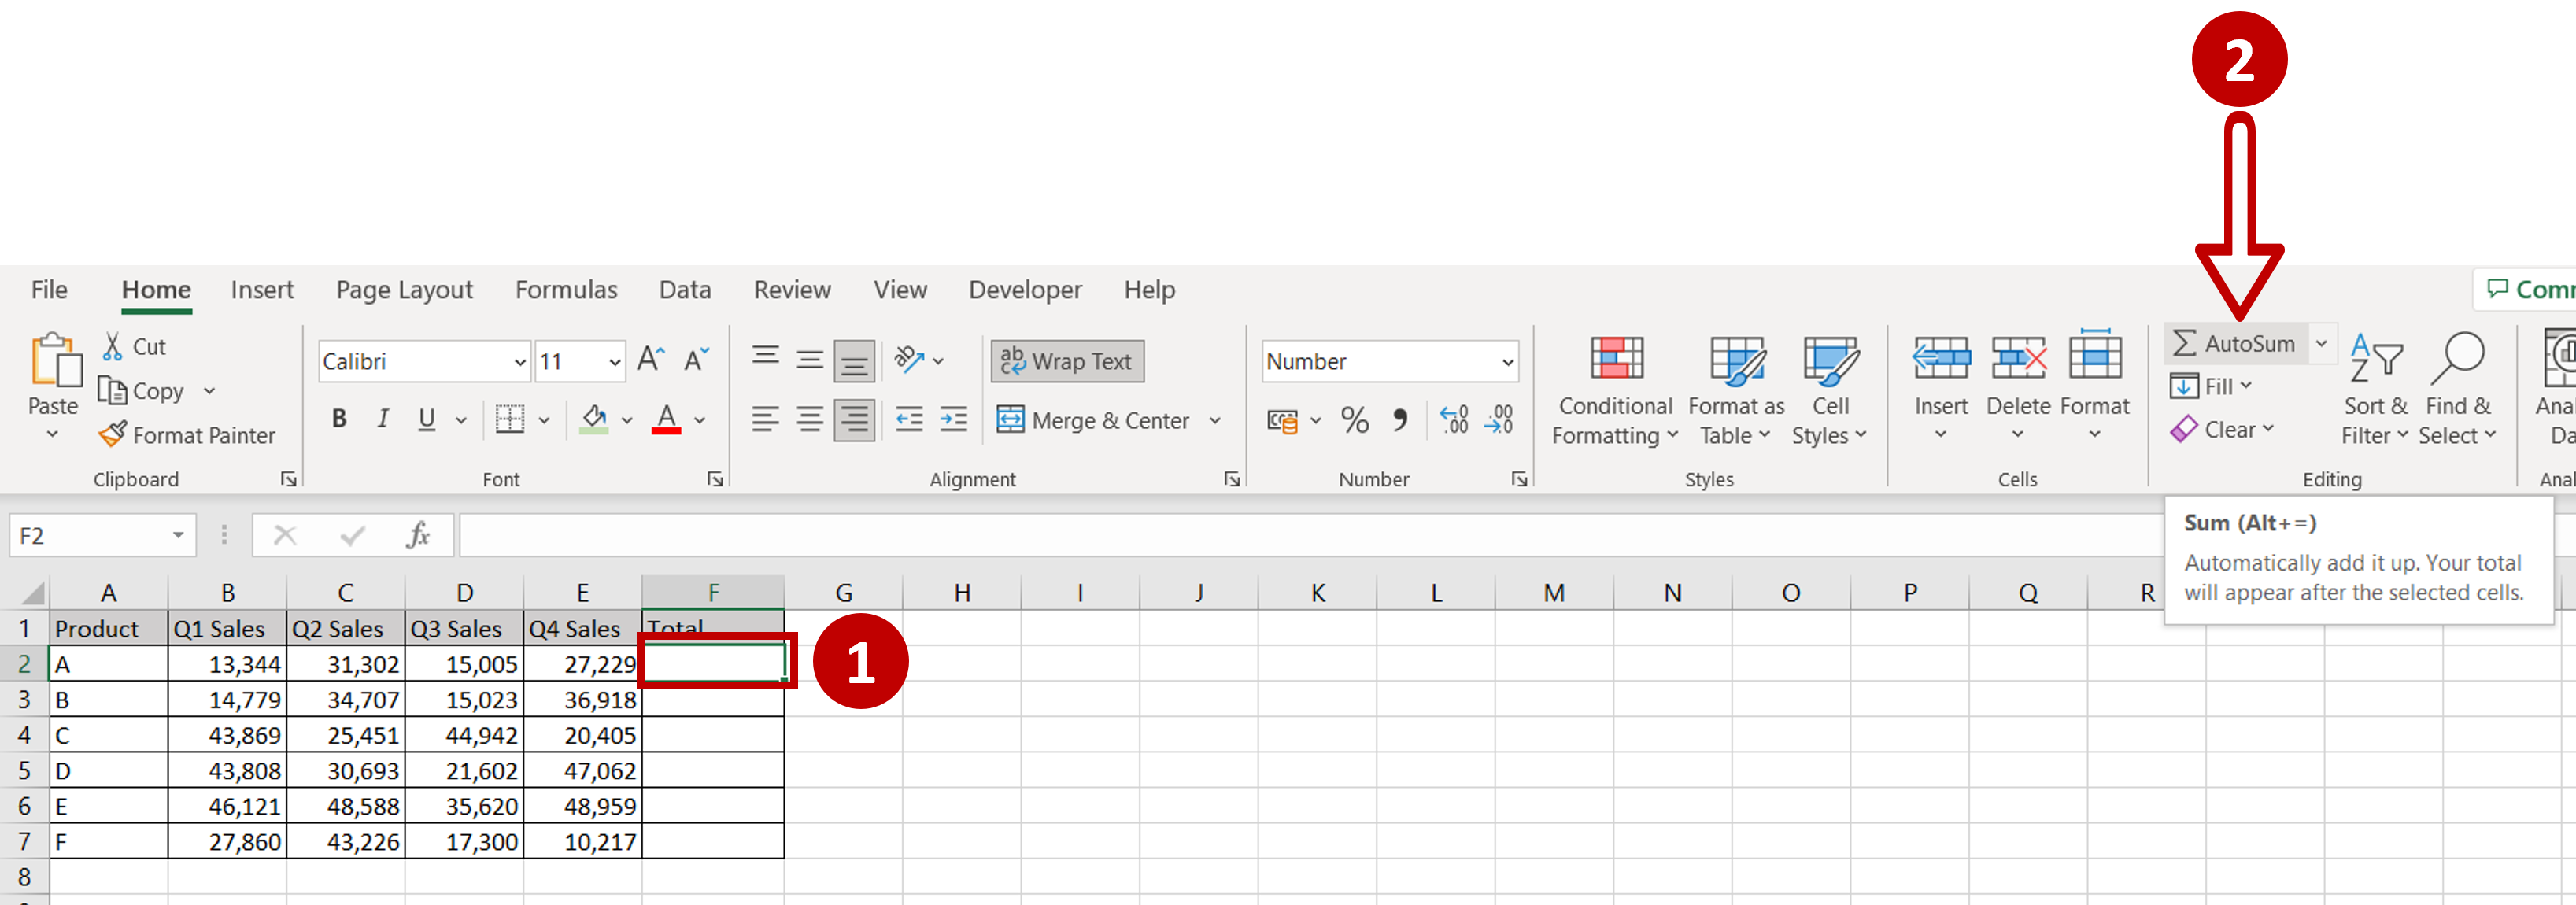
– Select the cell adjacent to the columns to be added
– Go to Home > Editing
– Click the AutoSum button
Step 2 – Check the formula
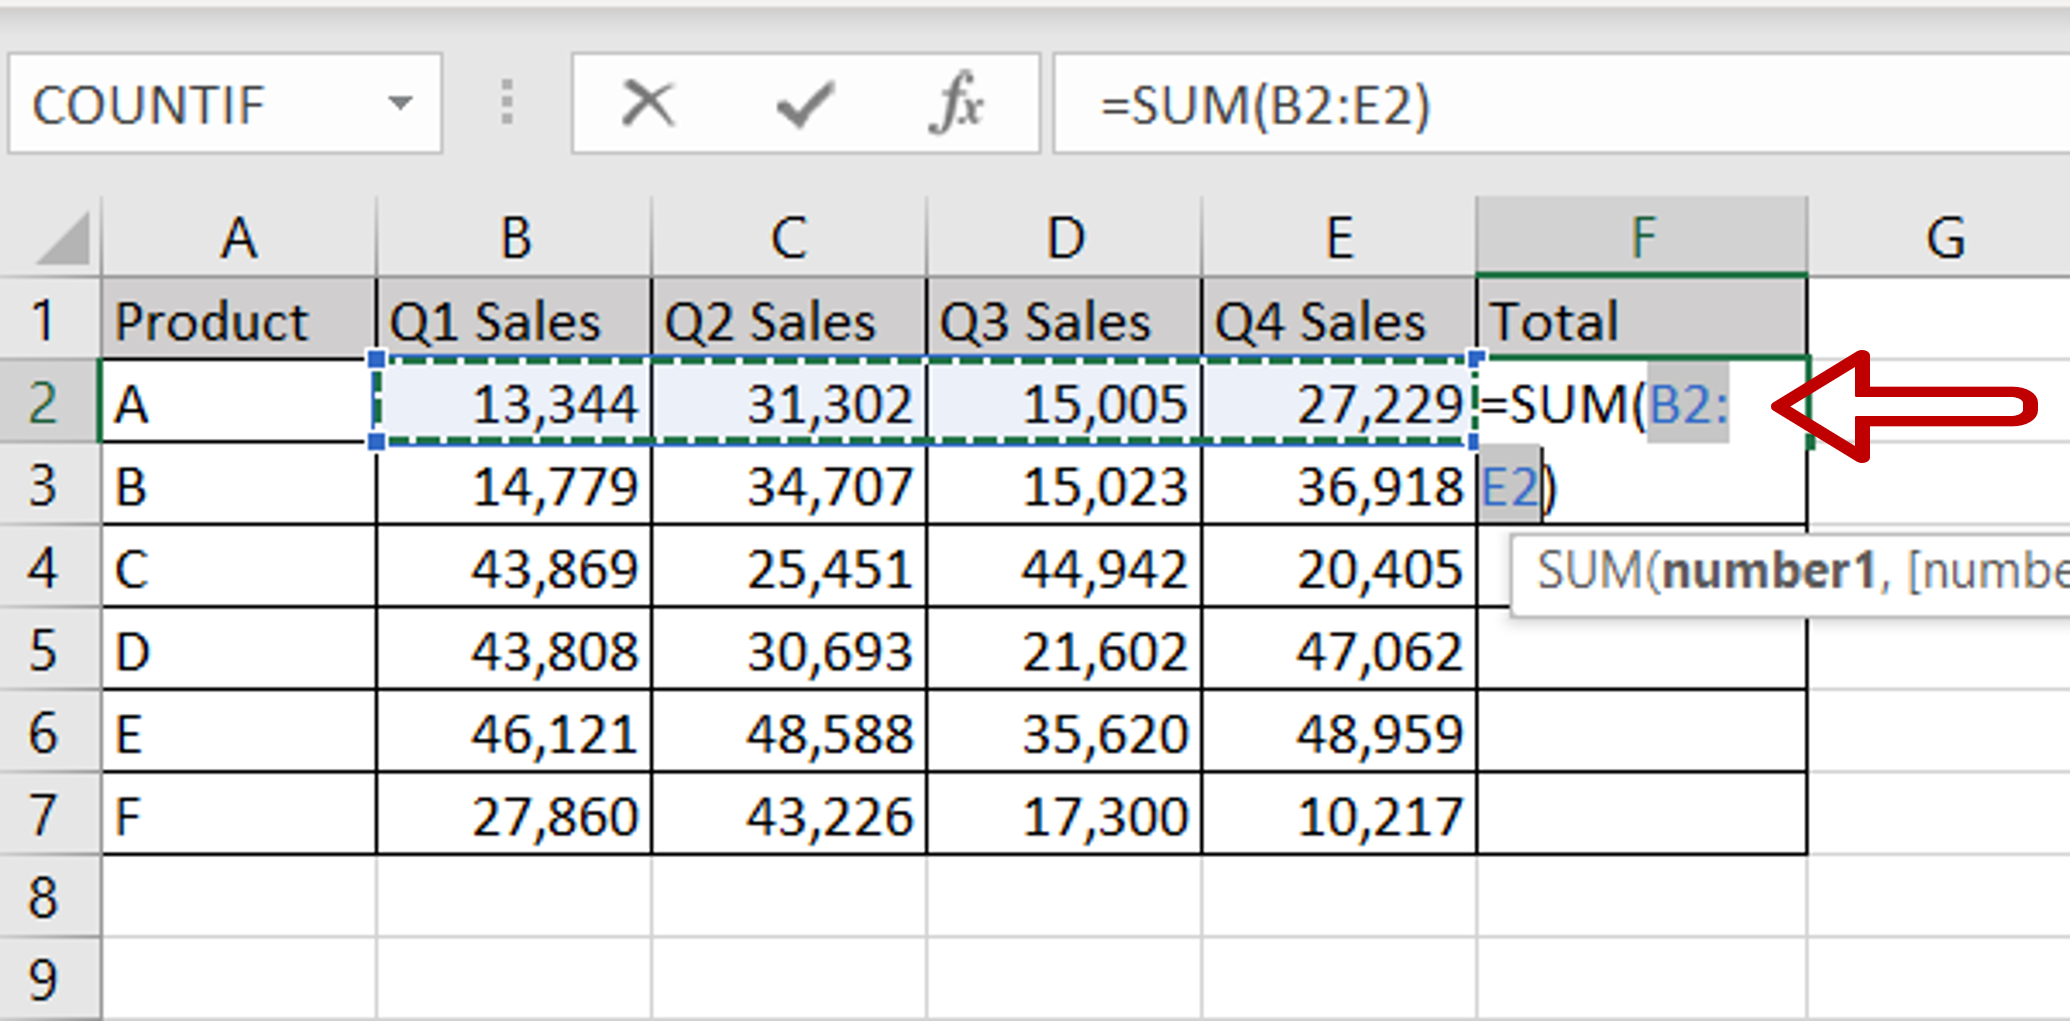
– The SUM() function with the range of cells will be automatically populated in the cell
– Check that the range is correct
– Press Enter
Note: AutoSum will automatically populate the range only if the cell for the result is adjoining the range. If the cell for the result is elsewhere on the sheet, you will need to select the range of cells for the formula.
Step 3 – Copy the formula
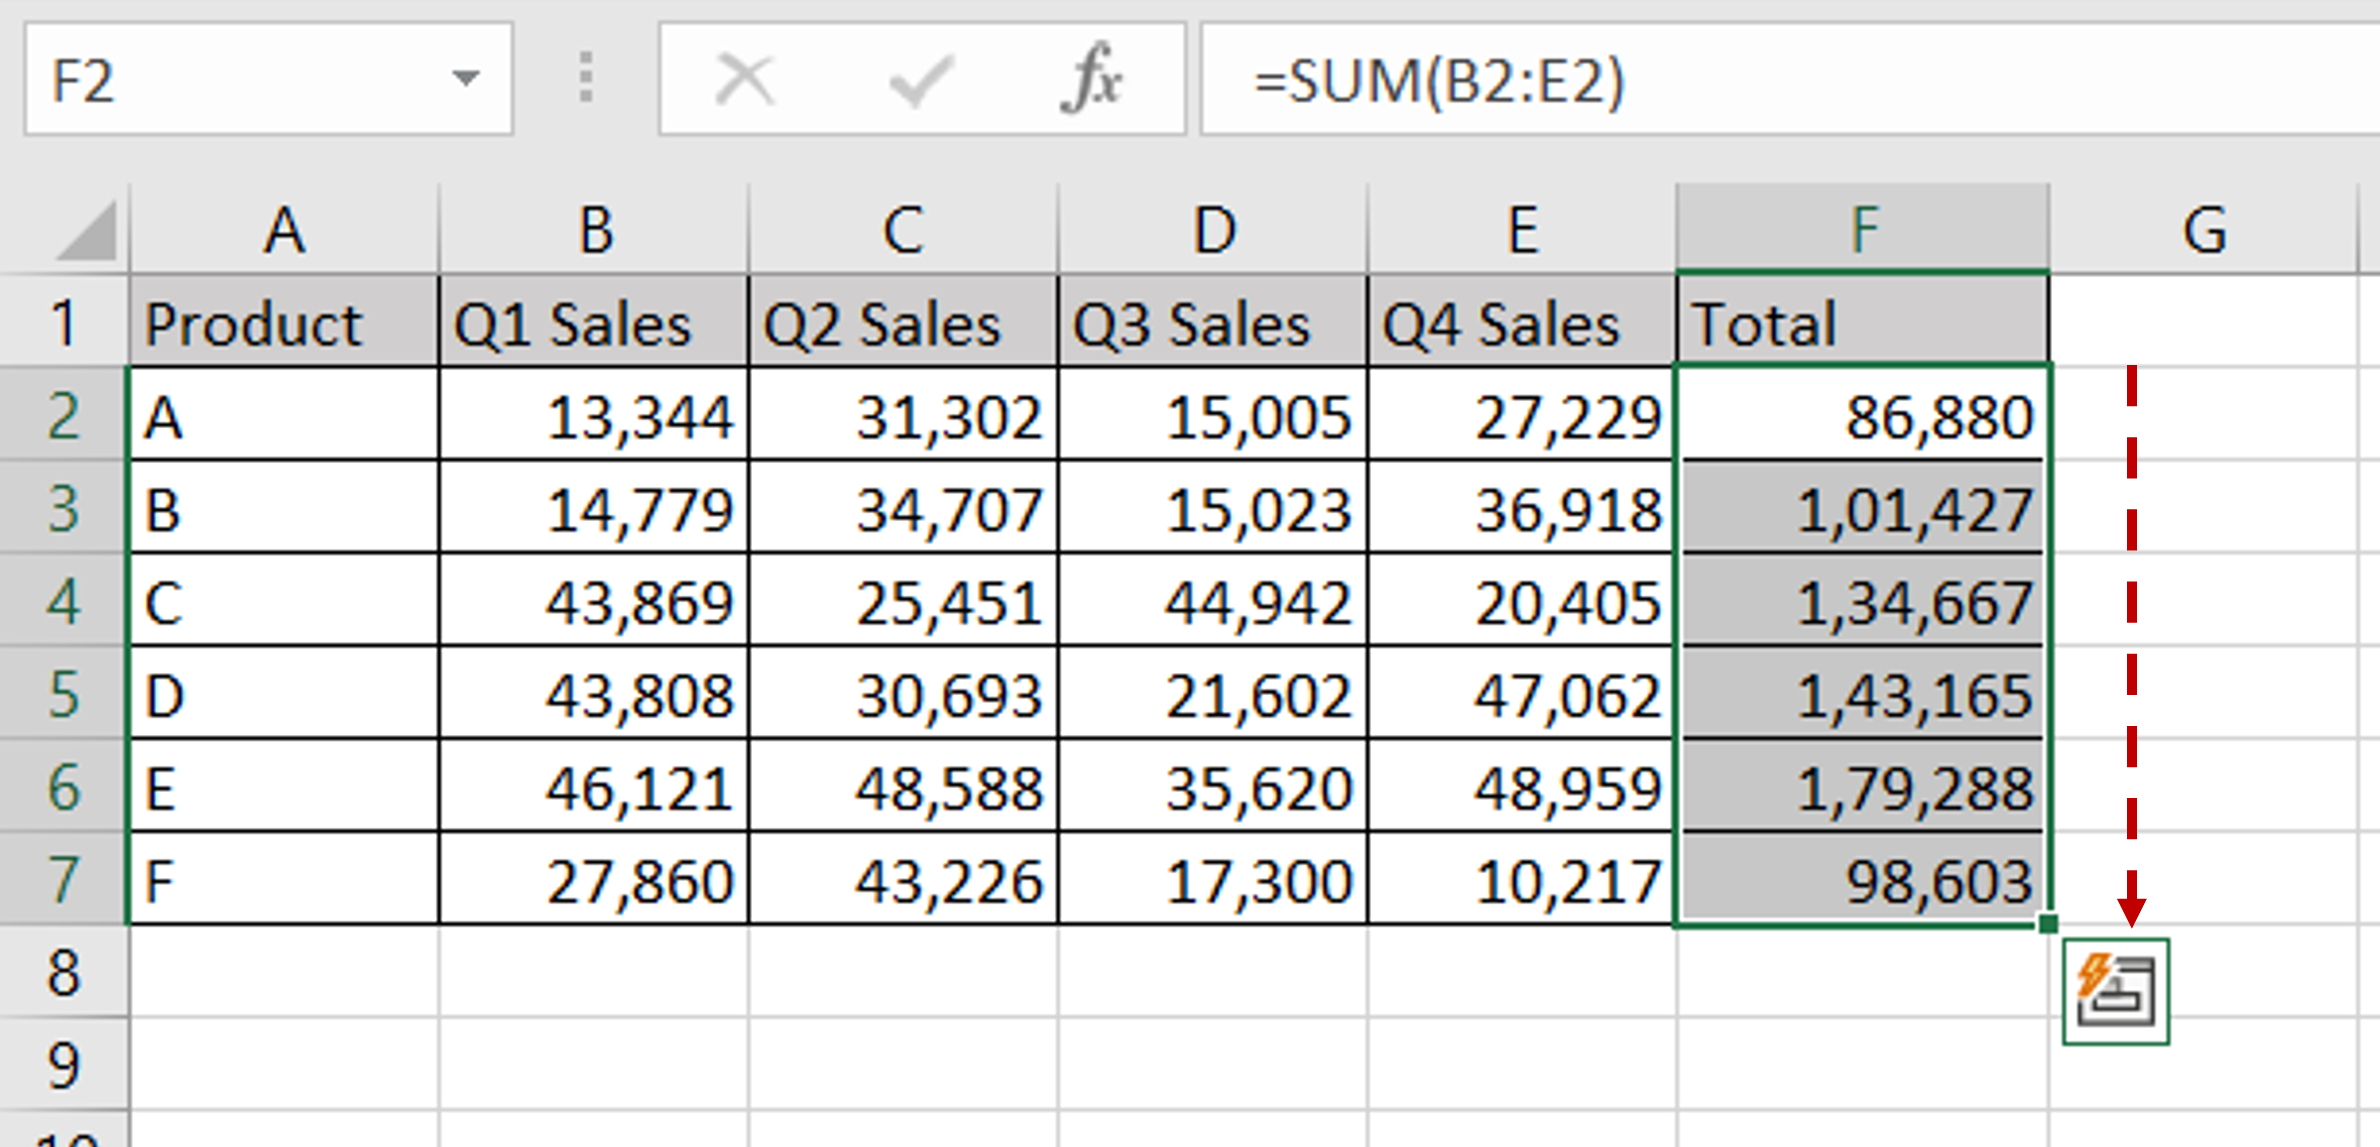
– Using the fill handle from the first cell, drag the formula to the remaining cells
OR
a) Select the cell with the formula and press Ctrl+C or choose Copy from the context menu (right-click)
b) Select the rest of the cells in the column and press Ctrl+V or choose Paste from the context menu (right-click)


