
How to add gridlines to specific cells in Microsoft Excel
 By
SpreadCheaters
By
SpreadCheaters
Page last updated:
04/04/2023 |
Next review date:
04/04/2025
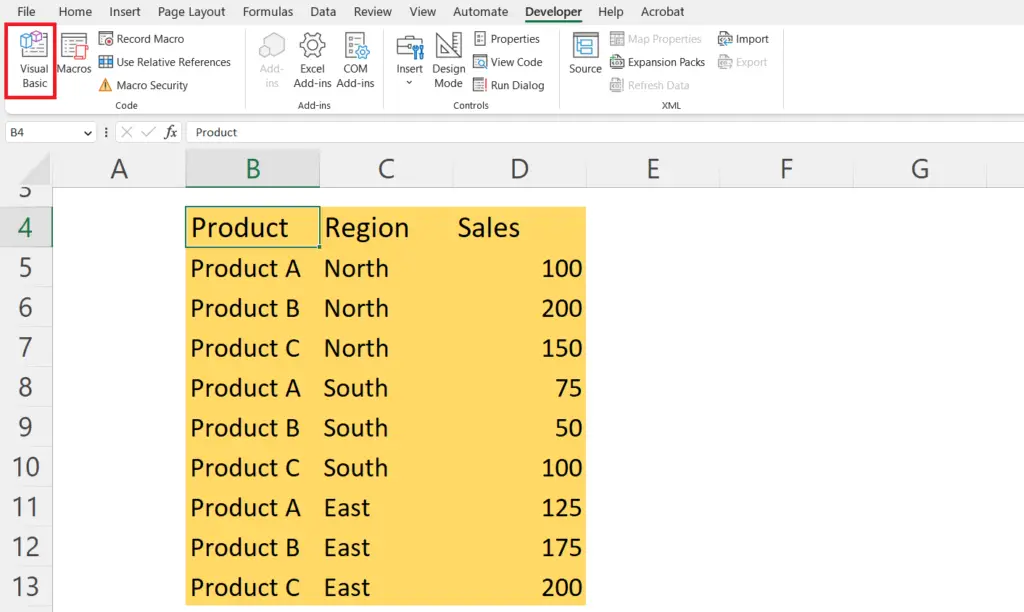
Gridlines are an essential feature of Microsoft Excel. They serve as a visual aid that helps users read and analyze data more efficiently by distinguishing between cells and rows. Gridlines also help to align data accurately, ensuring that charts, graphs, and other visual aids are correctly positioned within the worksheet.
In this tutorial, we will learn how to add gridlines to specific cells in Microsoft Excel. To add gridlines to specific cells in Excel, you can either use the “Format Cells” dialog box or the “Borders” button on the “Home” tab. In the “Format Cells” menu, you can select the “Border” tab and choose the type of gridline to apply. Alternatively, you can use the “Borders” button to add gridlines to cells or ranges quickly.
Method 1: Using the Borders Button in the Home Tab
Step 1 – Select the Cells

- Select the cells to which the gridlines are to be added.
Step 2 – Locate and Click on the “Borders” List Arrow
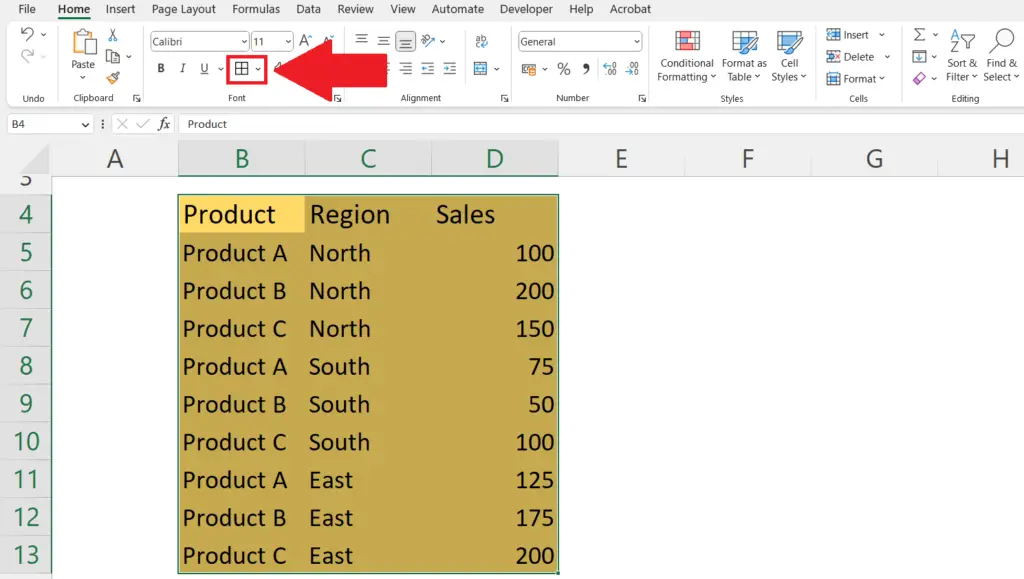
- Locate and click on the “Borders” List Arrow in the Font section of the Home tab.
- A drop-down menu list will appear.
Step 3 – Select the “All Borders” Option
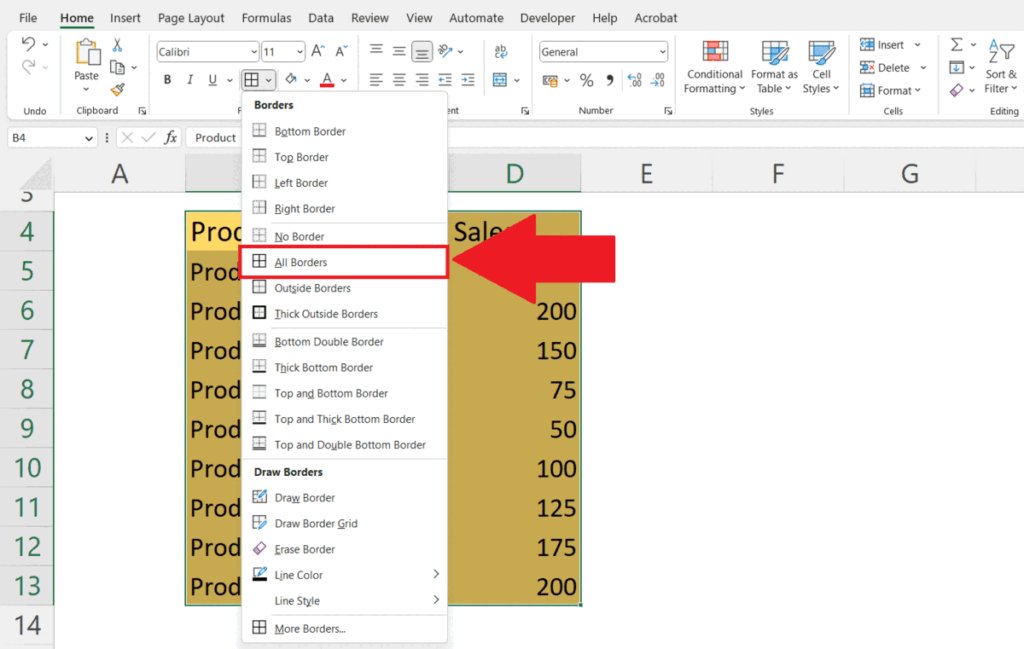
- Select the “All Borders” option in the drop-down list.
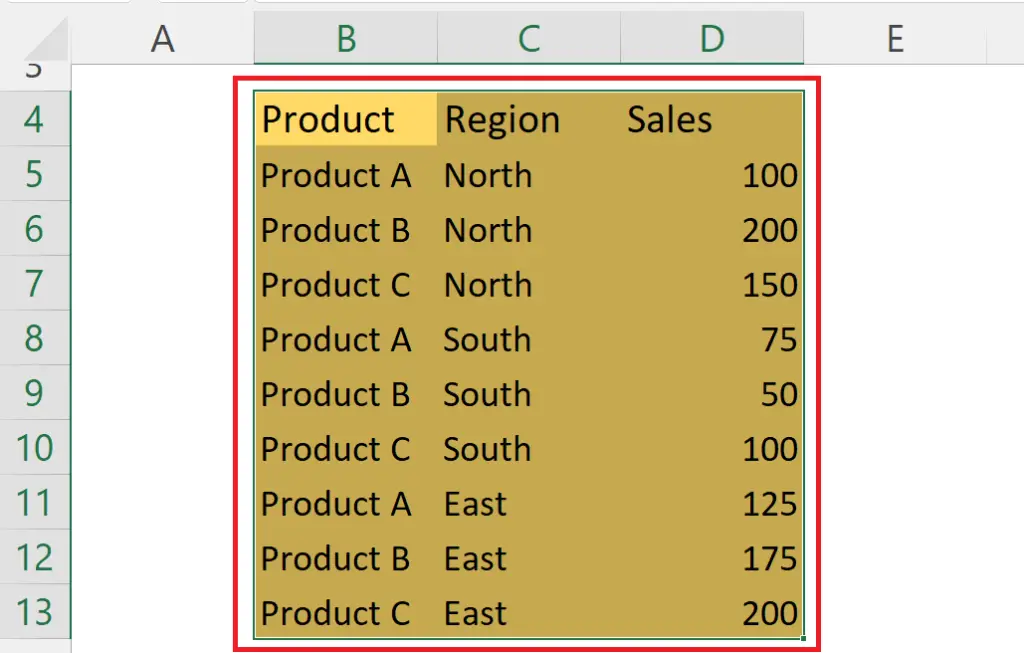
- Gridlines will be added to the selected cells.
Method 2: Using the Format Cells Dialog Box
Step 1 – Select the Cells
- Select the cell to which the gridlines are to be added.
Step 2 – Right-Click on the Selected Cells
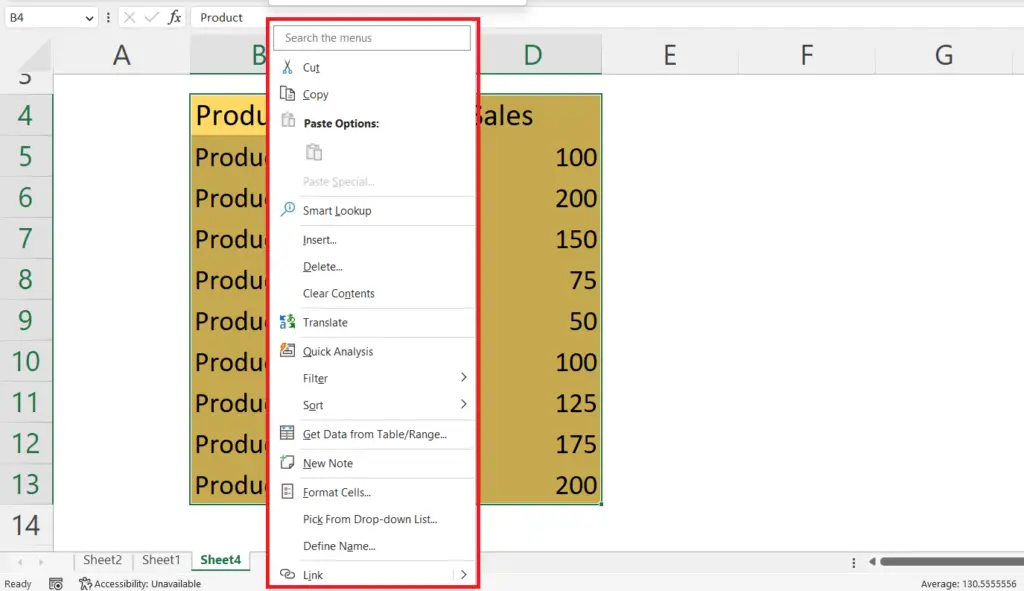
- Right-click on the selected cells.
- A context menu will appear.
Step 3 – Click on the Format Cells Option
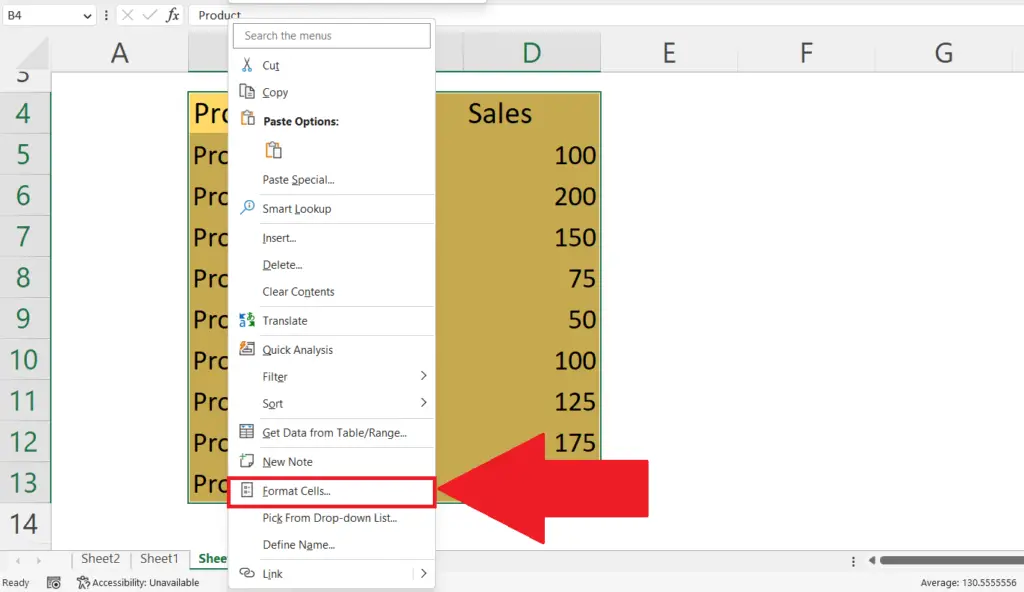
- Click on the Format Cells dialog box option in the context menu.
Step 4 – Go to the Borders Tab
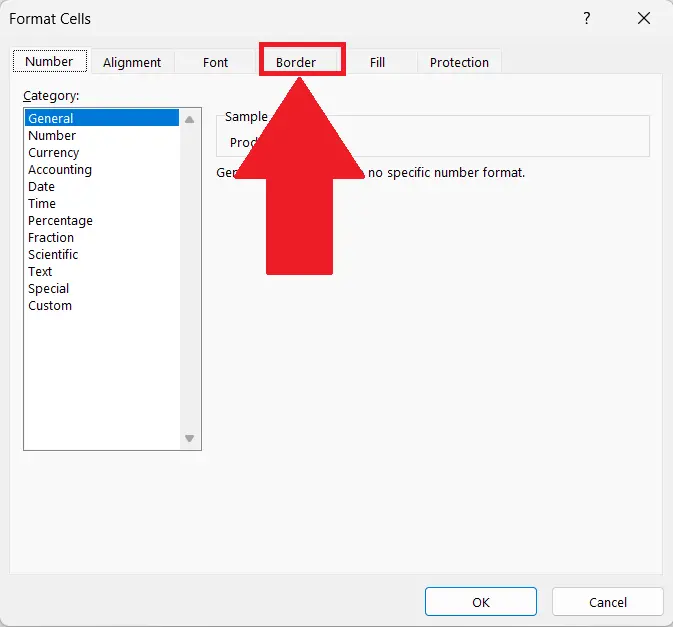
- Go to the Borders tab in the Format Cells dialog box.
Step 5 – Select the Inside and Outside Option
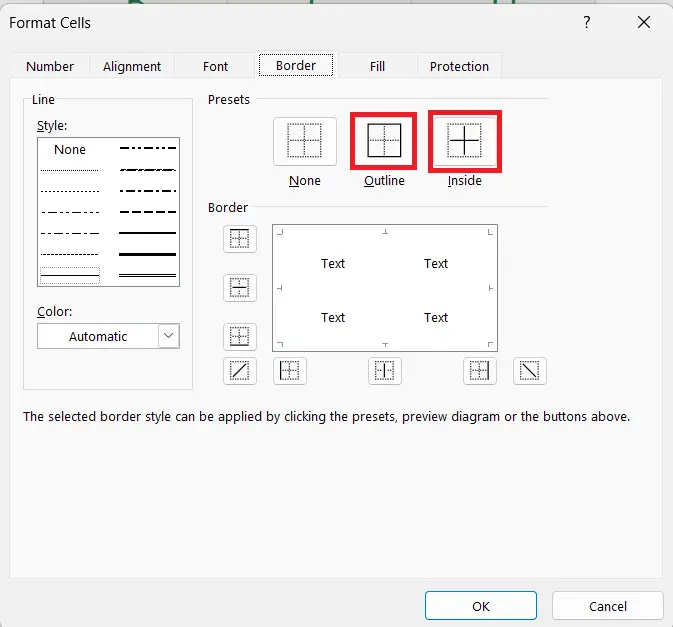
- Select the Inside and Outside options in the Presets sections.
Step 6 – Click on OK

- Click on OK in the Format Cells dialog box.
Method 3: Using VBA Code to Add Gridlines
Step 1 – Go to the Developer Tab
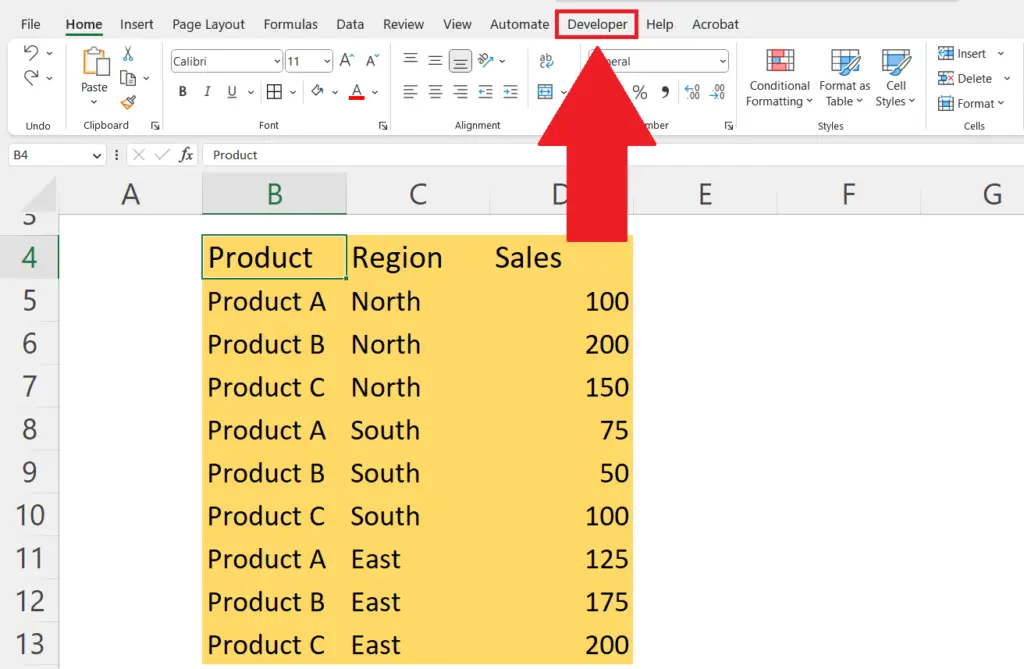
- Go to the Developer tab in the menu bar.
Step 2 – Click on the “Visual Basic” Button
- Click on the “Visual Basic” button on the right of the ribbon.
Step 3 – Insert a New Module
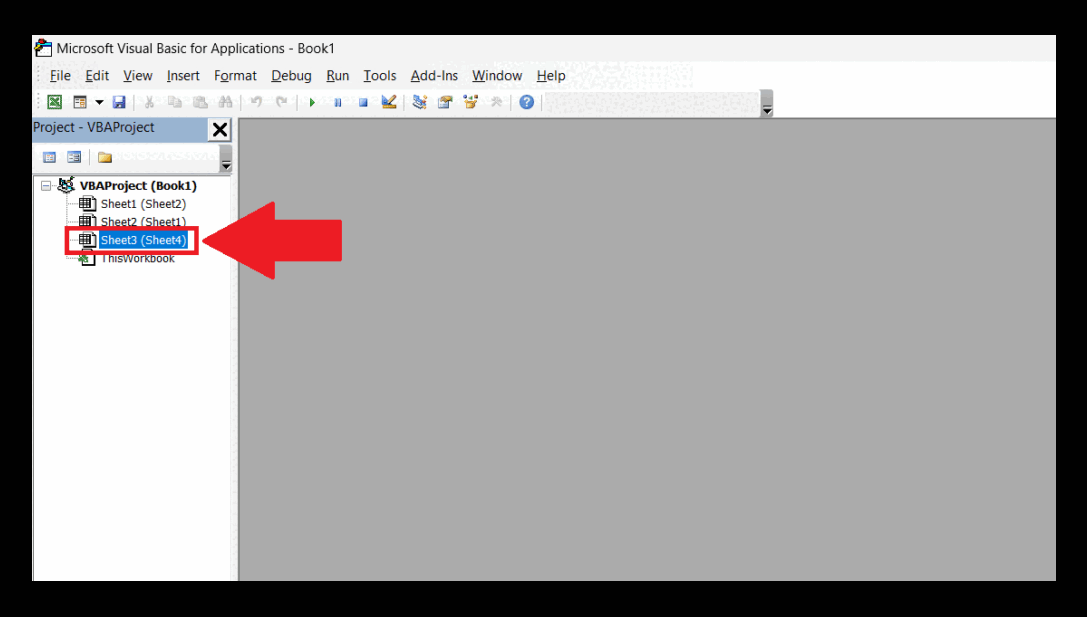
- Right-click on the sheet name in the Project-VBA Project menu at the left of the window.
- Click on Insert.
- Click on Module.
Step 4 – Enter the VBA Code
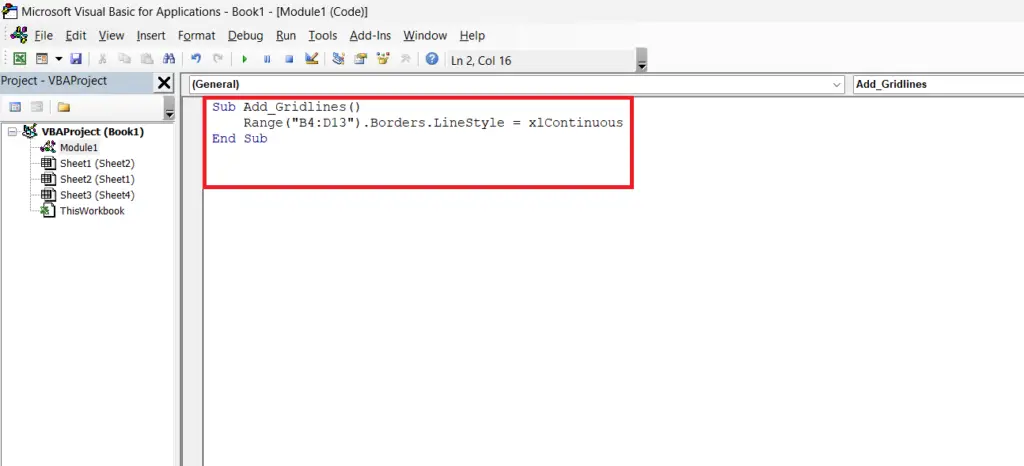
- Enter the VBA code.
| Sub Add_Gridlines() Range(“B4:D13”).Borders.LineStyle = xlContinuous End Sub |
- Where B4:D13 is a range of the cells to which the gridlines are to be added.
Step 5 – Run the Code
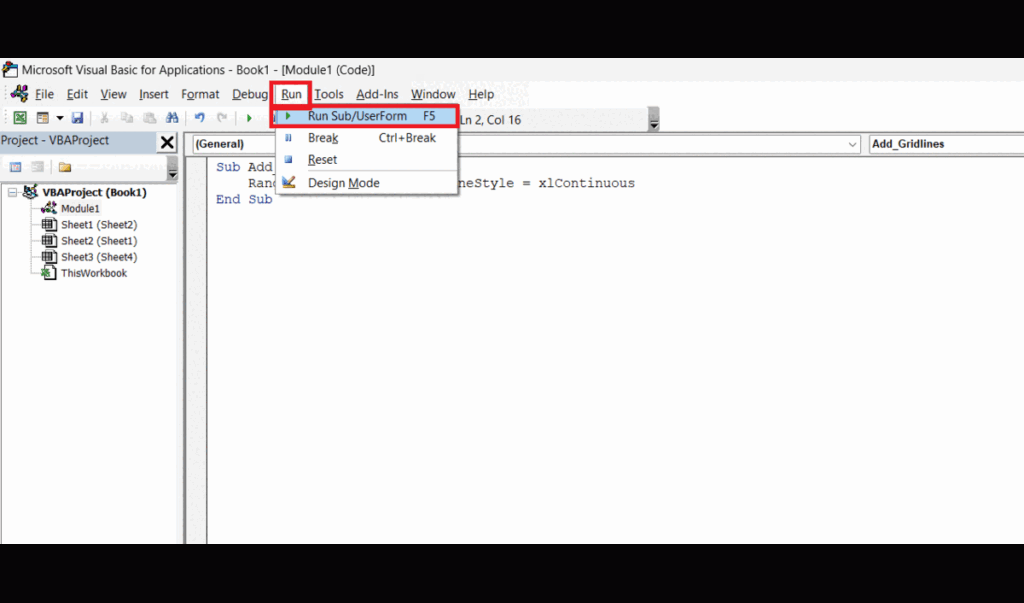
- Run the code by clicking on the Run button in the menu bar.
- Click on the “Run/Sub user form” option.


