
How to add duplicates in Excel
 By
SpreadCheaters
By
SpreadCheaters
Page last updated:
01/07/2023 |
Next review date:
01/07/2025
In Excel, adding duplicates refers to identifying and/or counting the number of instances where a particular value or set of values appears more than once within a given range of cells. adding duplicates in Excel is a crucial data management task that helps to ensure data accuracy, streamline workflows, and enable informed decision-making.
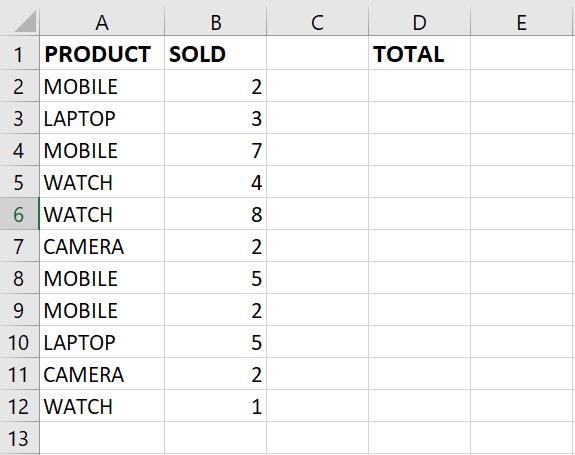
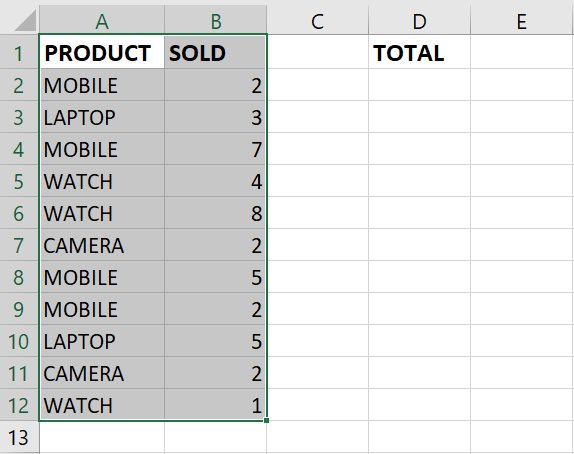
In this tutorial, we will learn how o add duplicates in Excel. Our dataset contains a daily sales report for a store, which includes a list of devices sold to each customer. Now, we need to calculate the total number of each device sold, which requires identifying and adding up the duplicate entries for each device. There are two methods that we can use to accomplish this task.
Method 1: Add Duplicate using the Consolidate option
Step 1 – Select the cell
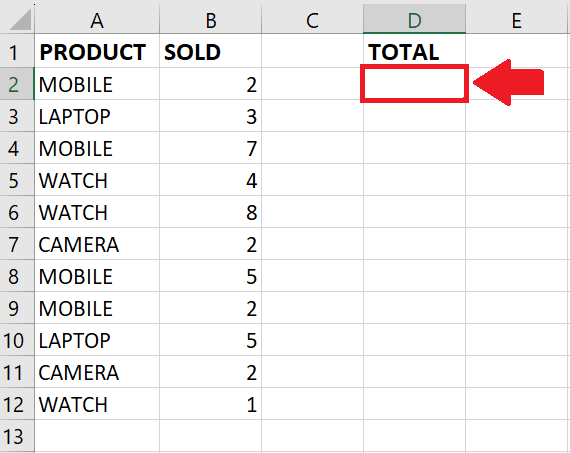
- Click on the cell where you want to show the result
Step 2 – Click on the Consolidate option
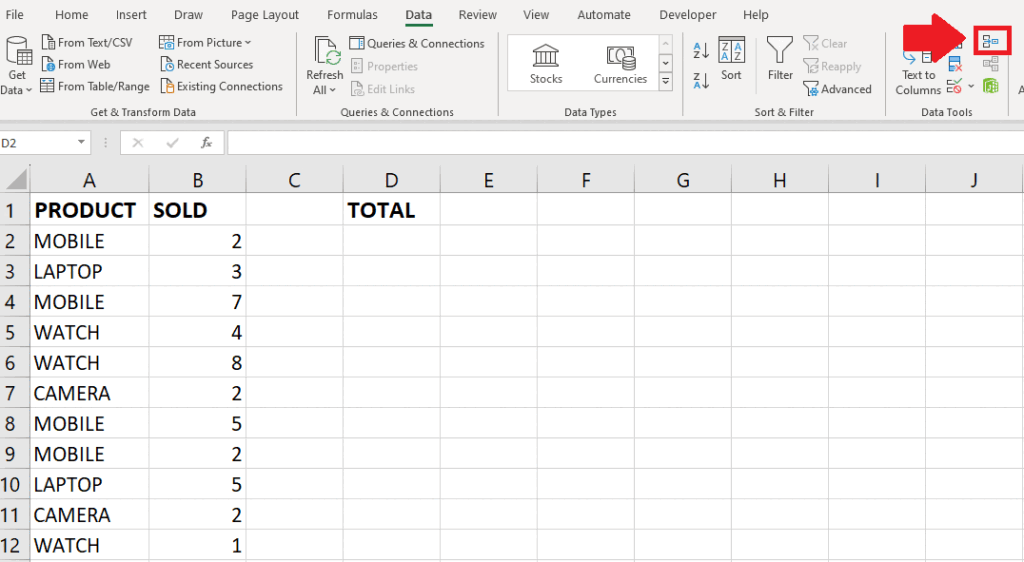
- After selecting the cell, click on the Consolidate option in the Data Tools group of the Data tab, and a dialog box will appear
Step 3 – Select the reference
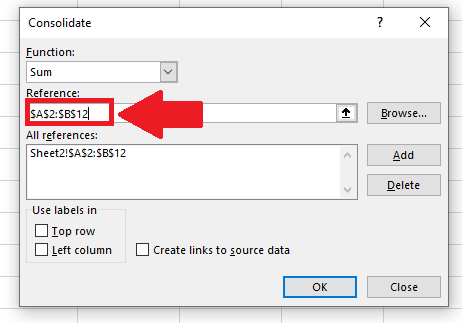
- In the dialog box, select the reference
- To select the reference, click on the box below the reference option and select the range of cells containing the names and the quantity
- In our case it is A2:B12
Step 4 – Click on the Left Column option
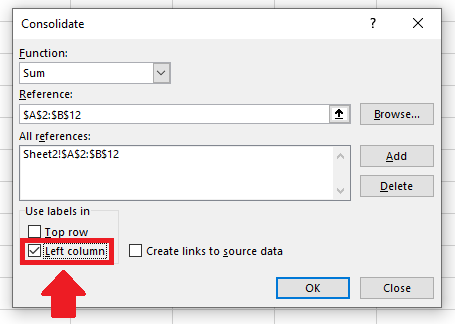
- After selecting the reference, click on the Left Column option
Step 5 – Click on OK
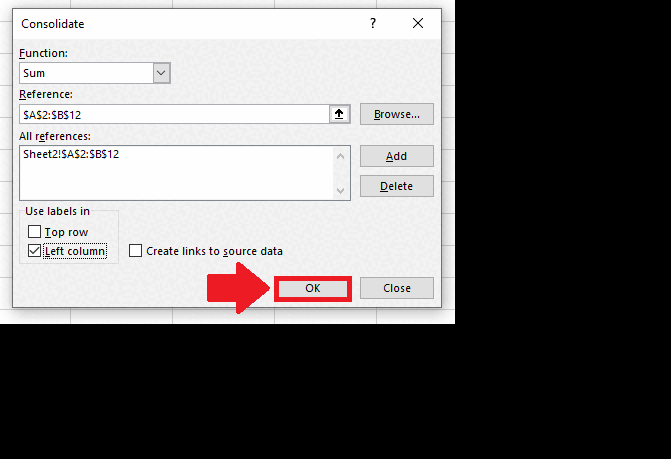
- After selecting the Left Column option, click on OK at the right bottom of the dialog box to get the required result
Method 2: Add Duplicate using the Pivot Table option
Step 1 – Select the range of cells
- Select the range of cells that you want to add
Step 2 – Click on the Pivot table option
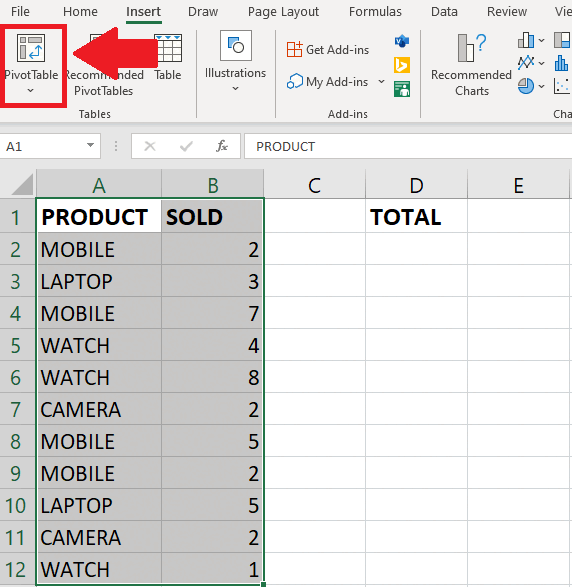
- After selecting the range of cells, click o the Pivot Table option in the tables group of the Insert tab and a dialog box will appear
Step 3 – Click on the Existing Worksheet option
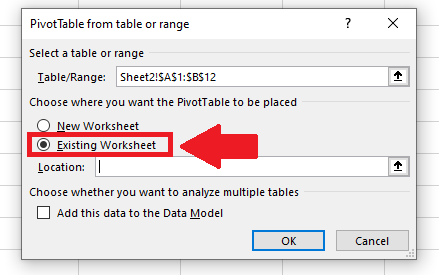
- In the dialog box click on the Existing Worksheet option
Step 4 – Select the Location
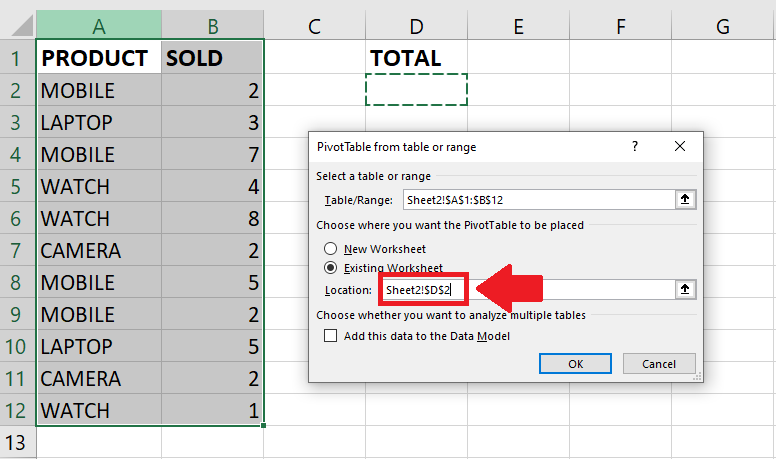
- After selecting the Existing Worksheet option, click on the box next to the Location option
- And then click on the cell where you want to shoes the result
Step 5 – Click on OK
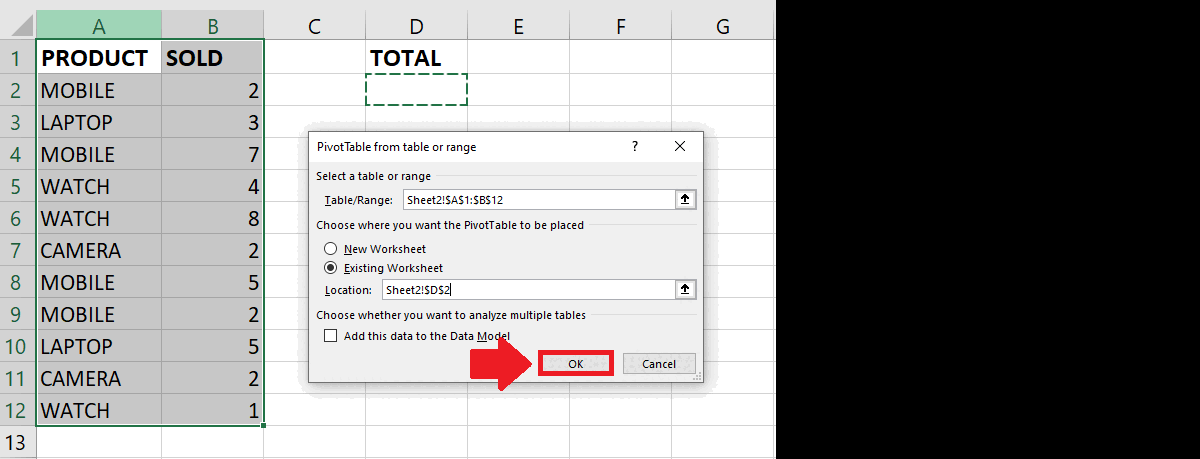
- After selecting the Location, click on the OK in the dialog box and a dialog box will appear on the right side of the sheet
Step 6 – Click on the Fields
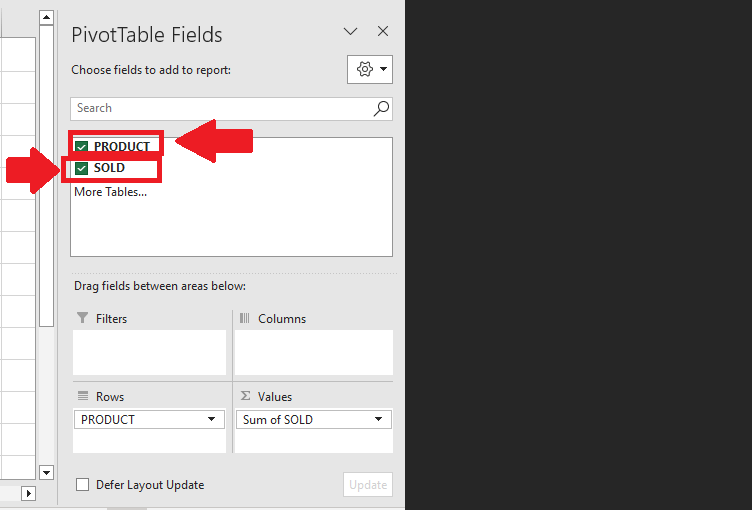
- Click on the checkboxes behind the fields of the table in the dialog box to get the required result


