
How to add a password to an Excel file
 By
SpreadCheaters
By
SpreadCheaters
You can watch a video tutorial here.

To prevent users from making changes to an Excel sheet, the creator of the sheet can protect it by locking the worksheet. This can be done with or without a password. If the sheet is locked with a password, only those who know the password can unlock the sheet for editing. It is a good practice to lock the worksheet with a password, particularly when the sheet contains critical data such as financial calculations. This will prevent other users from accidentally or intentionally changing the data. By sharing the password only with those authorized to make changes, you can ensure that the worksheet is not tampered with. Protecting a sheet prevents others from editing the sheet and from making formatting changes.
Step 1 – Protect the sheet
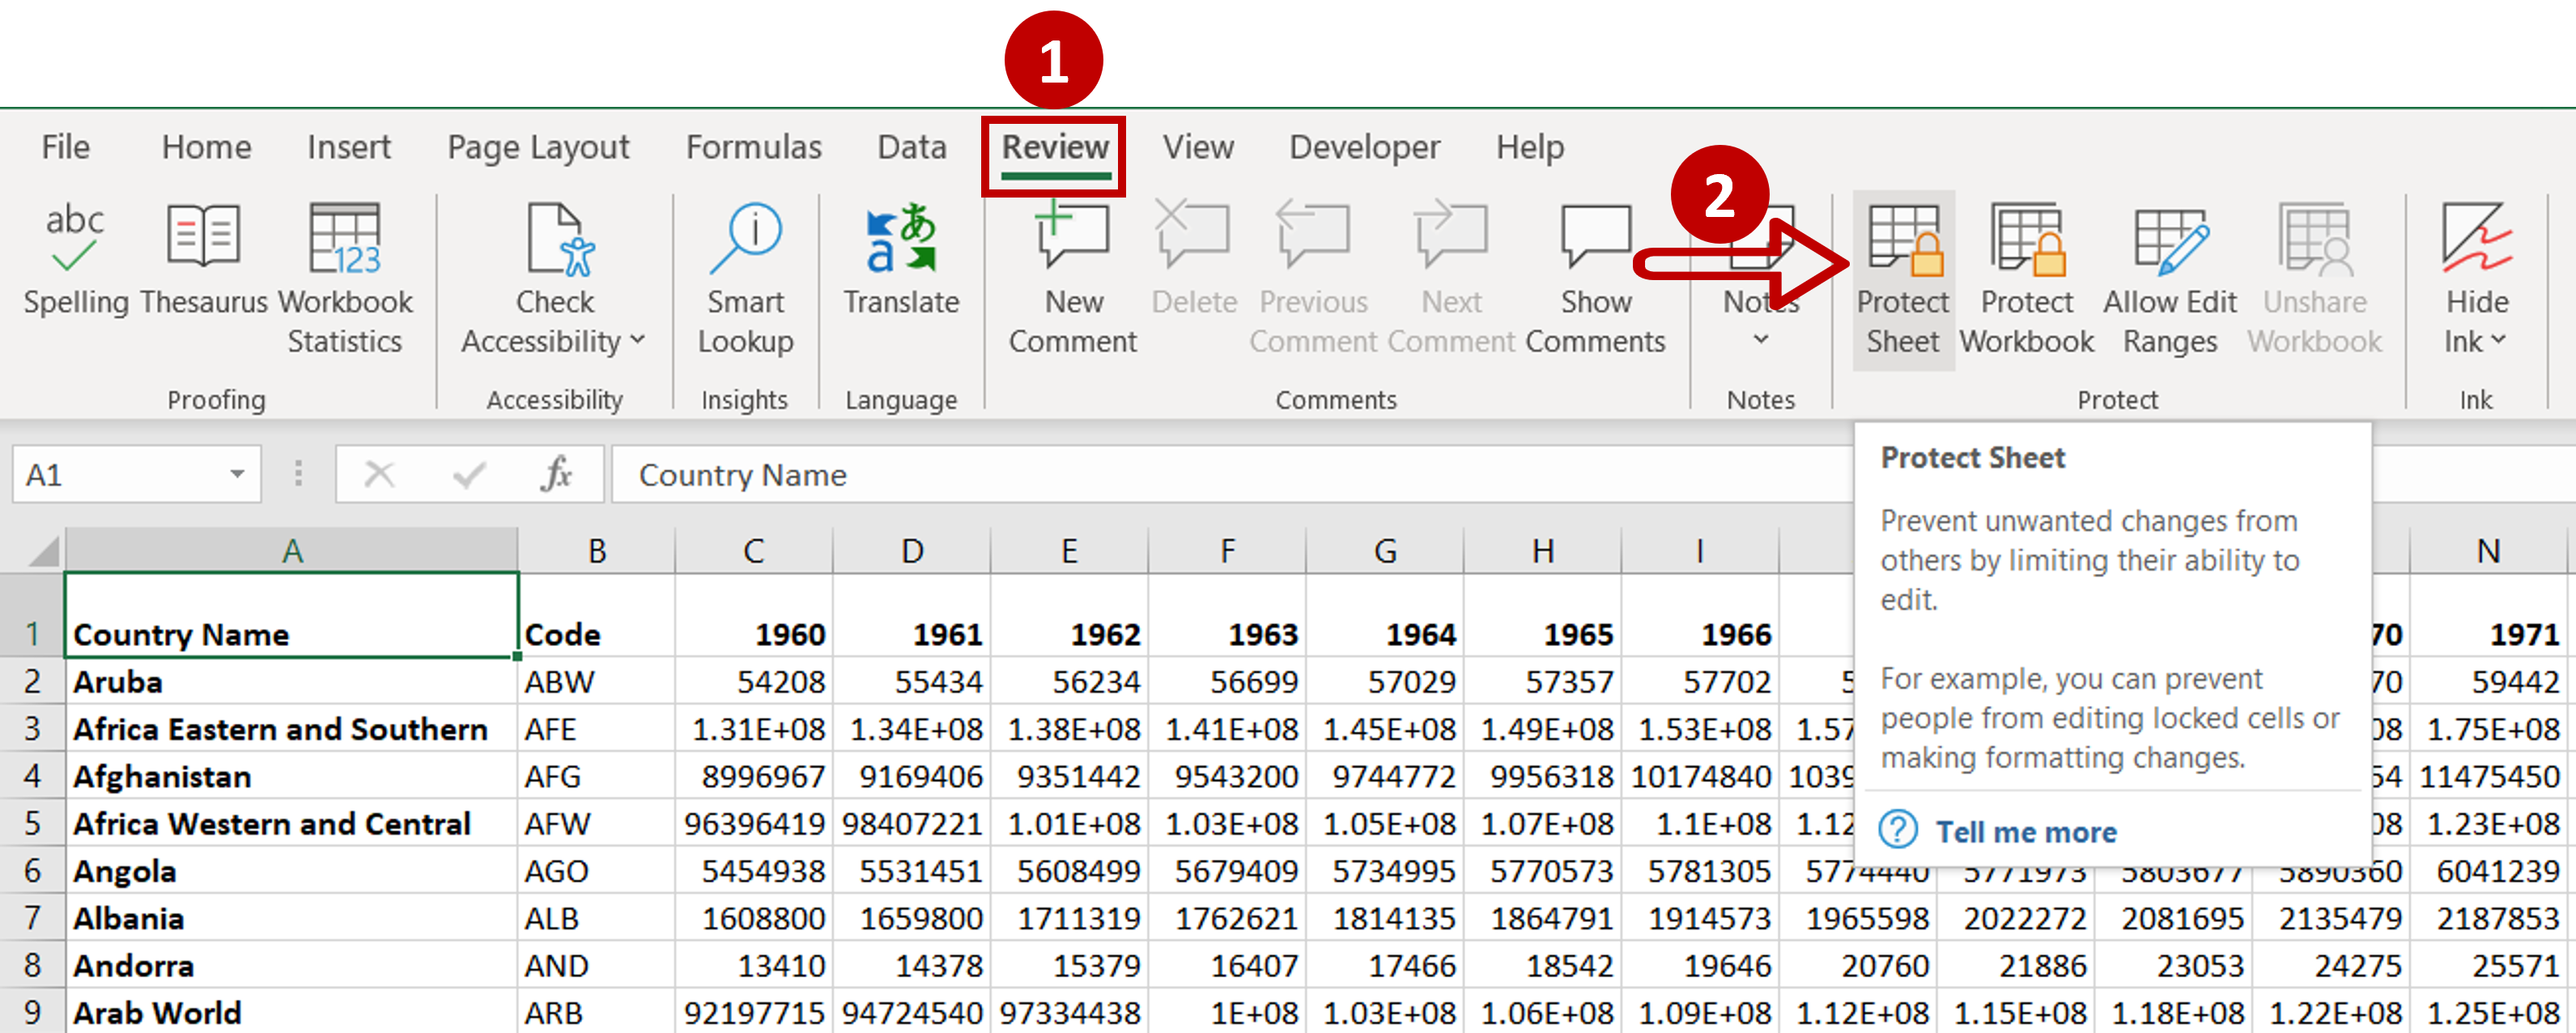
– Go to Review > Protect
– Click the Protect Sheet option
Step 2 – Enter the password
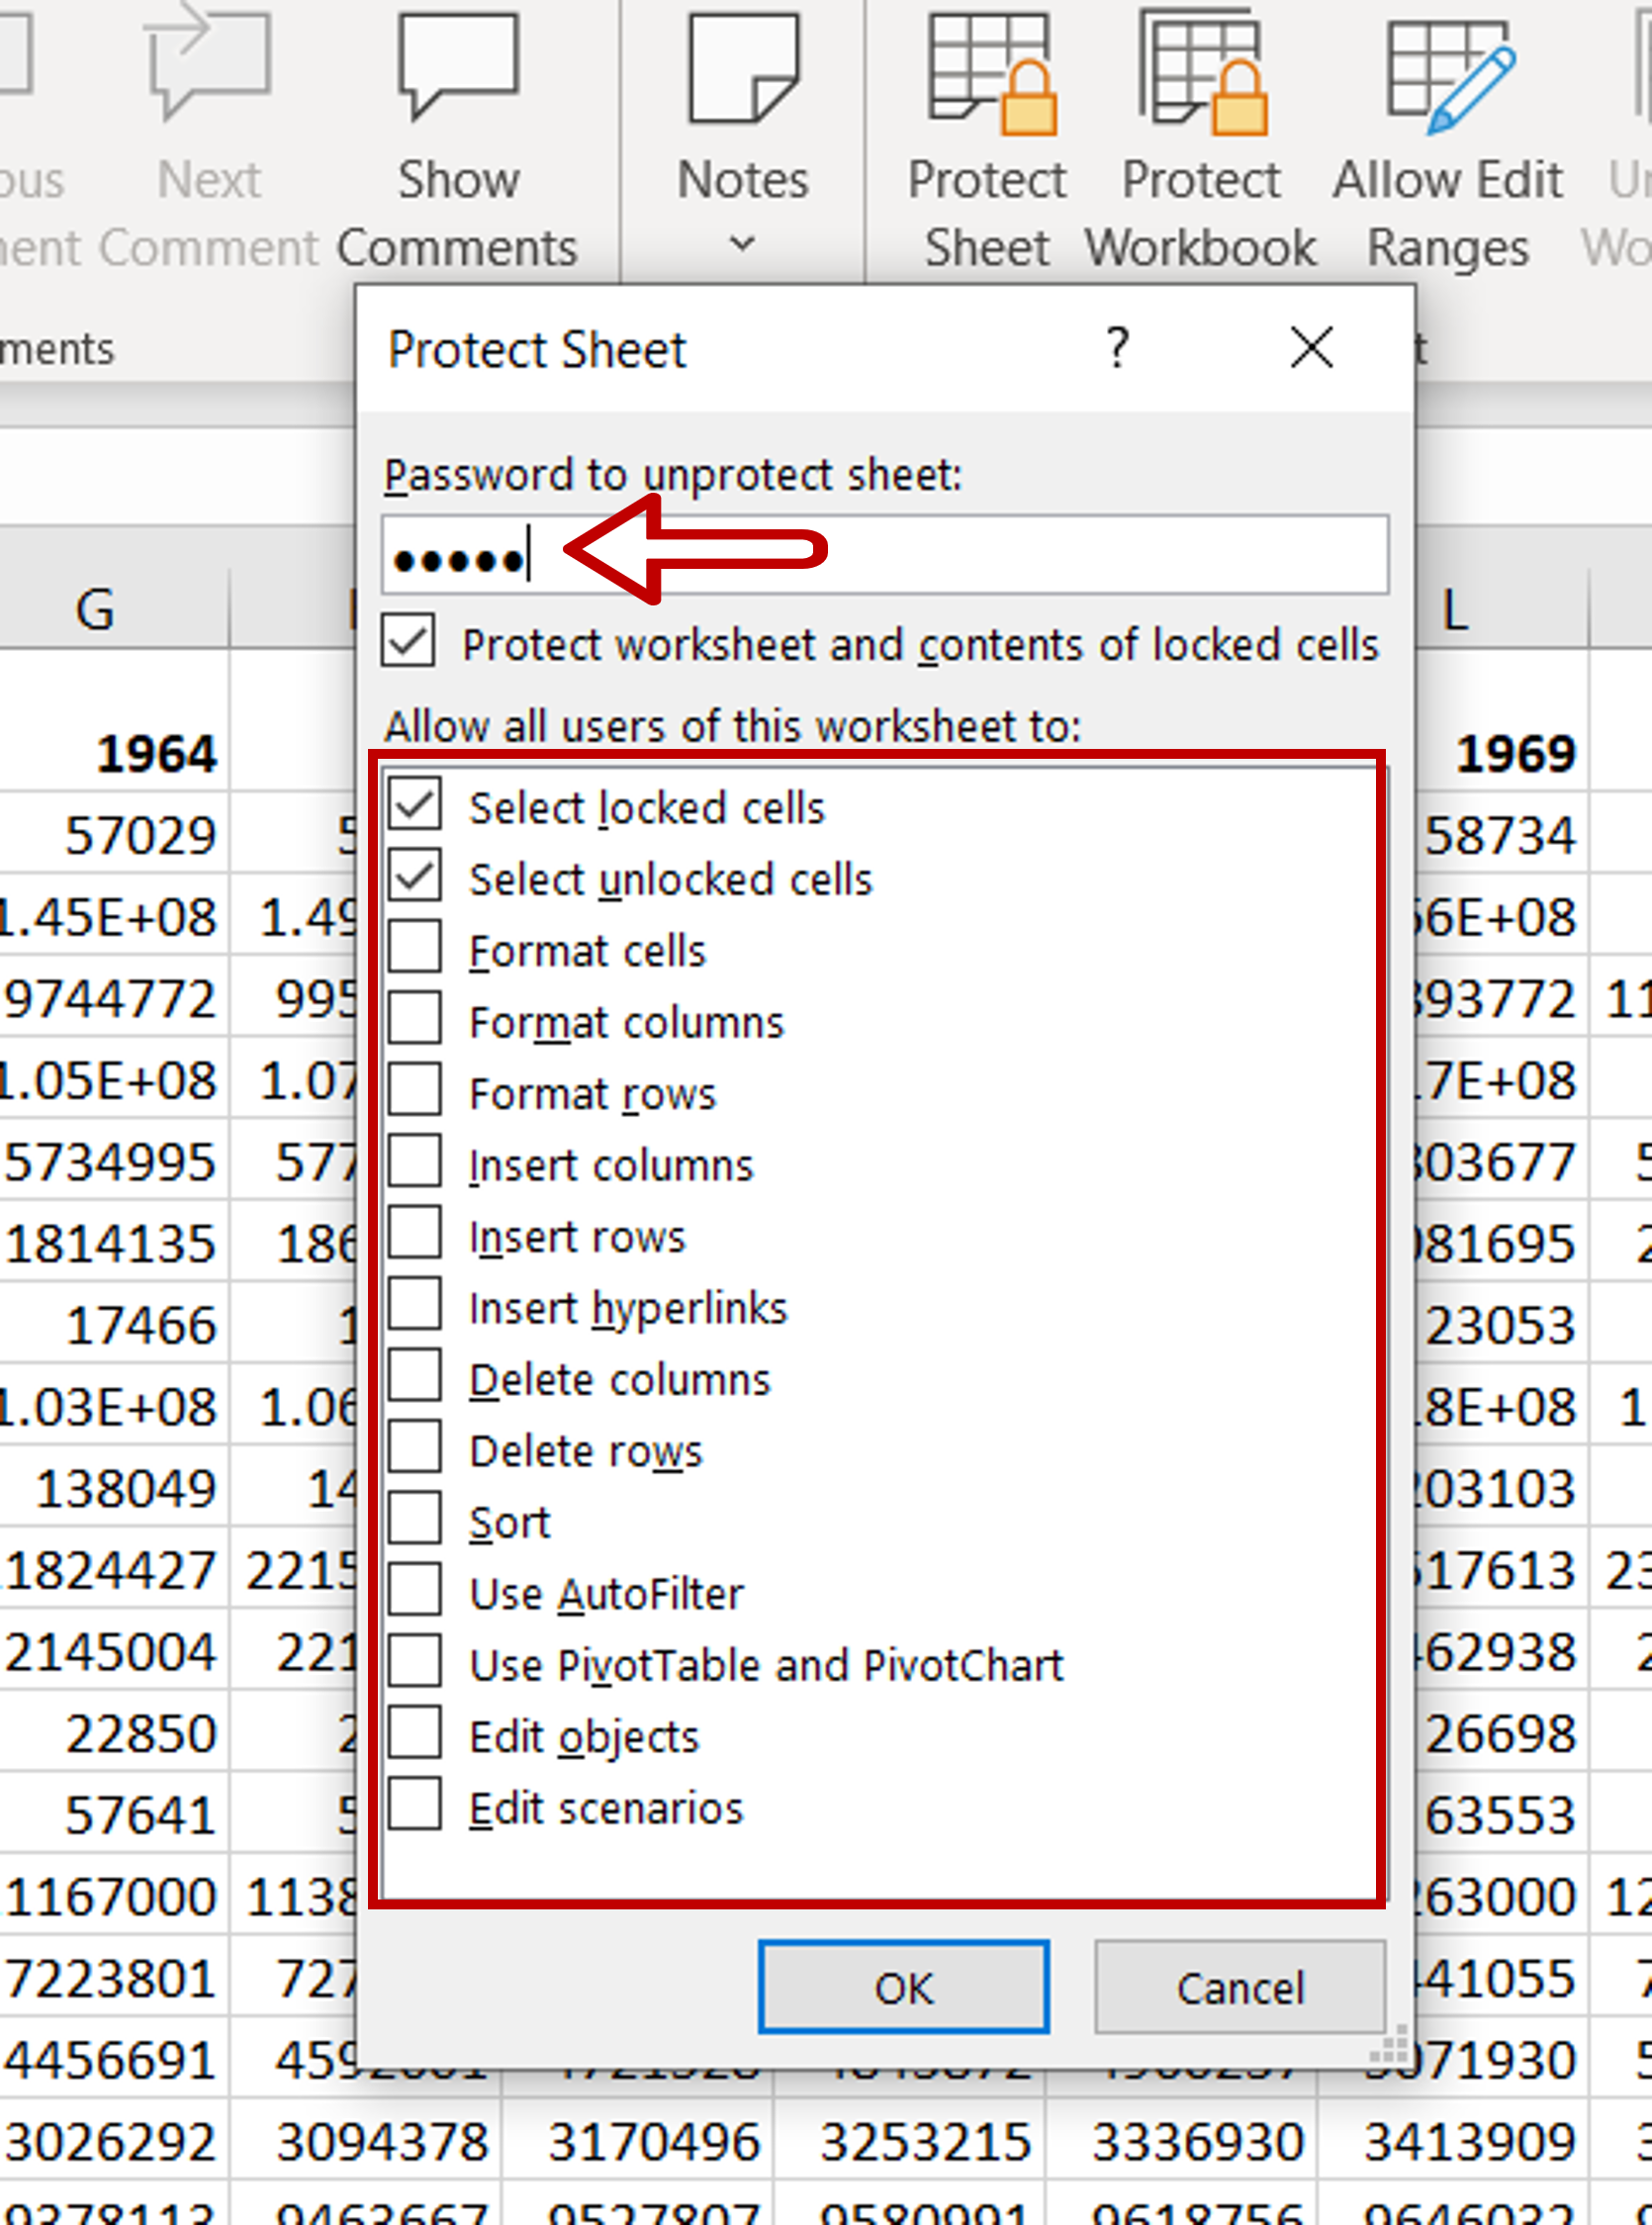
– Add a password for the sheet
– If you want, you can also set the permissions for users of the worksheet or you can keep the default settings
– Click OK
Step 3 – Confirm the password

– Re-enter the password in the Confirm password pop-up
– Click OK
Step 4 – Check that the sheet is locked
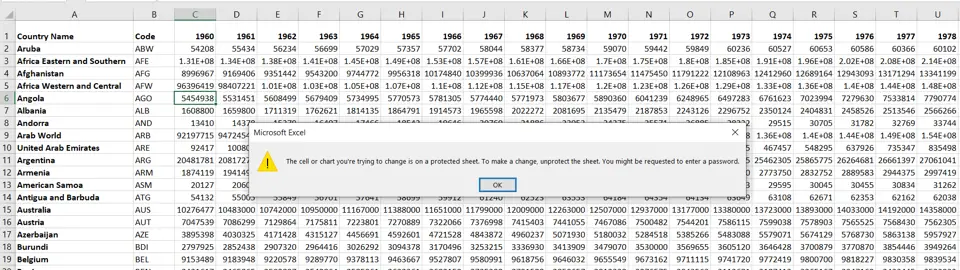
– Attempt to edit one of the cells on the worksheet
– An error message will be displayed


