
How to add a month to a date in Excel
 By
SpreadCheaters
By
SpreadCheaters
You can watch a video tutorial here.
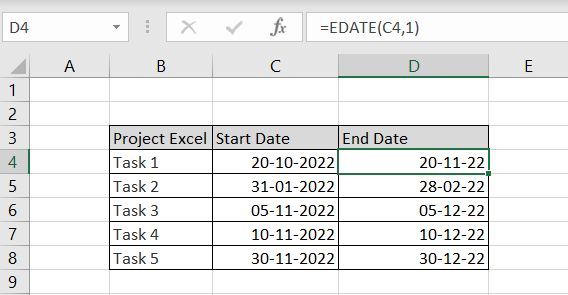
Calendar dates play a crucial role in any time series data. In Excel, dates are treated differently from numerical and text data. There are many ways to format dates as well as to use them in calculations. Suppose you have a plan in which each task will take one month. You can automatically add a month to the start date to give you the end date. In Excel, you can use the EDATE() function for this. The syntax is:
EDATE(start_date,months)
– start-date: the date to which months are to be added
– months: the number of months to be added
Step 1 – Create the formula
– Select the cell in which the result is to appear
– Type the formula using cell references:
= EDATE(Start Date, 1)
– Press Enter
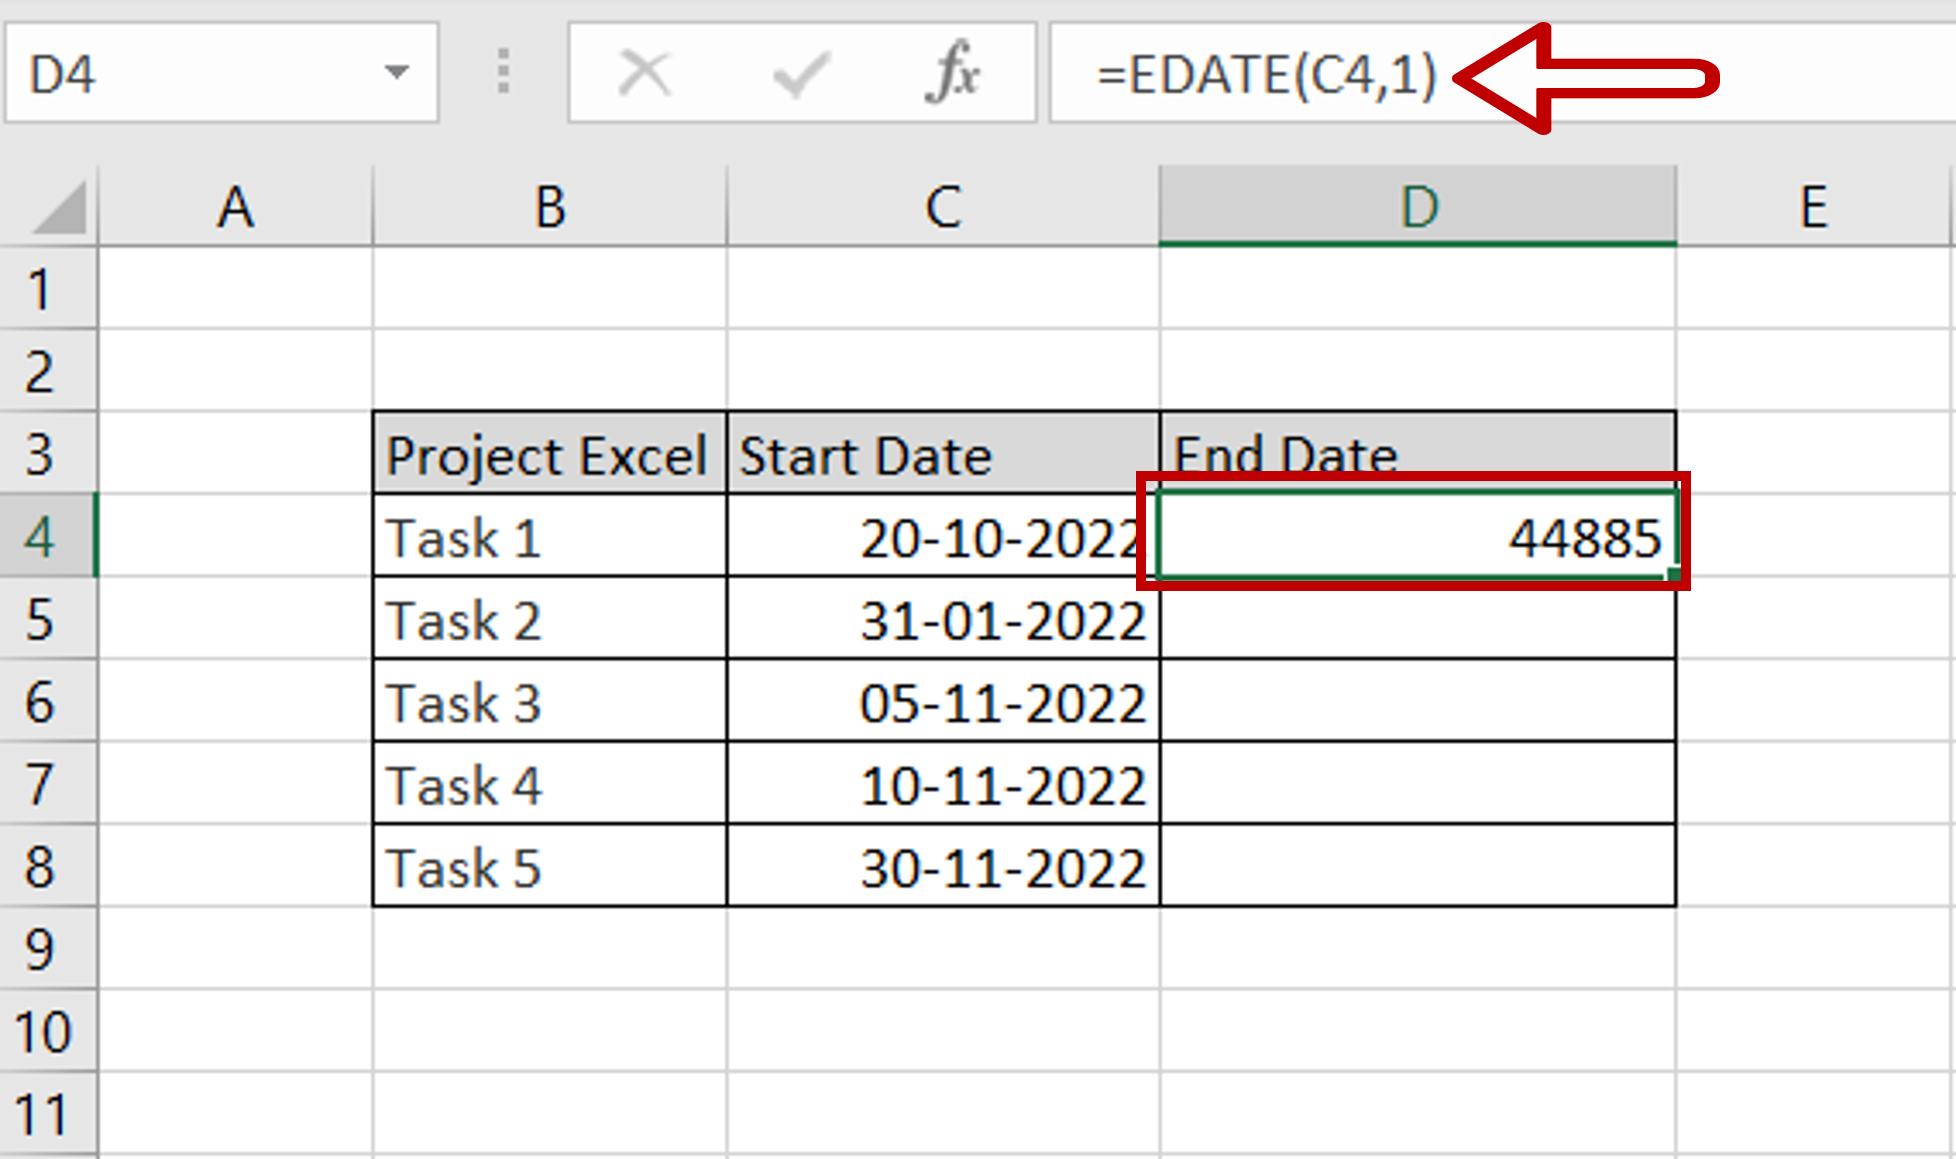
Note: The EDATE() function will return an error if the start_date is formatted as text and not as a date
Step 2 – Format the cell as a date
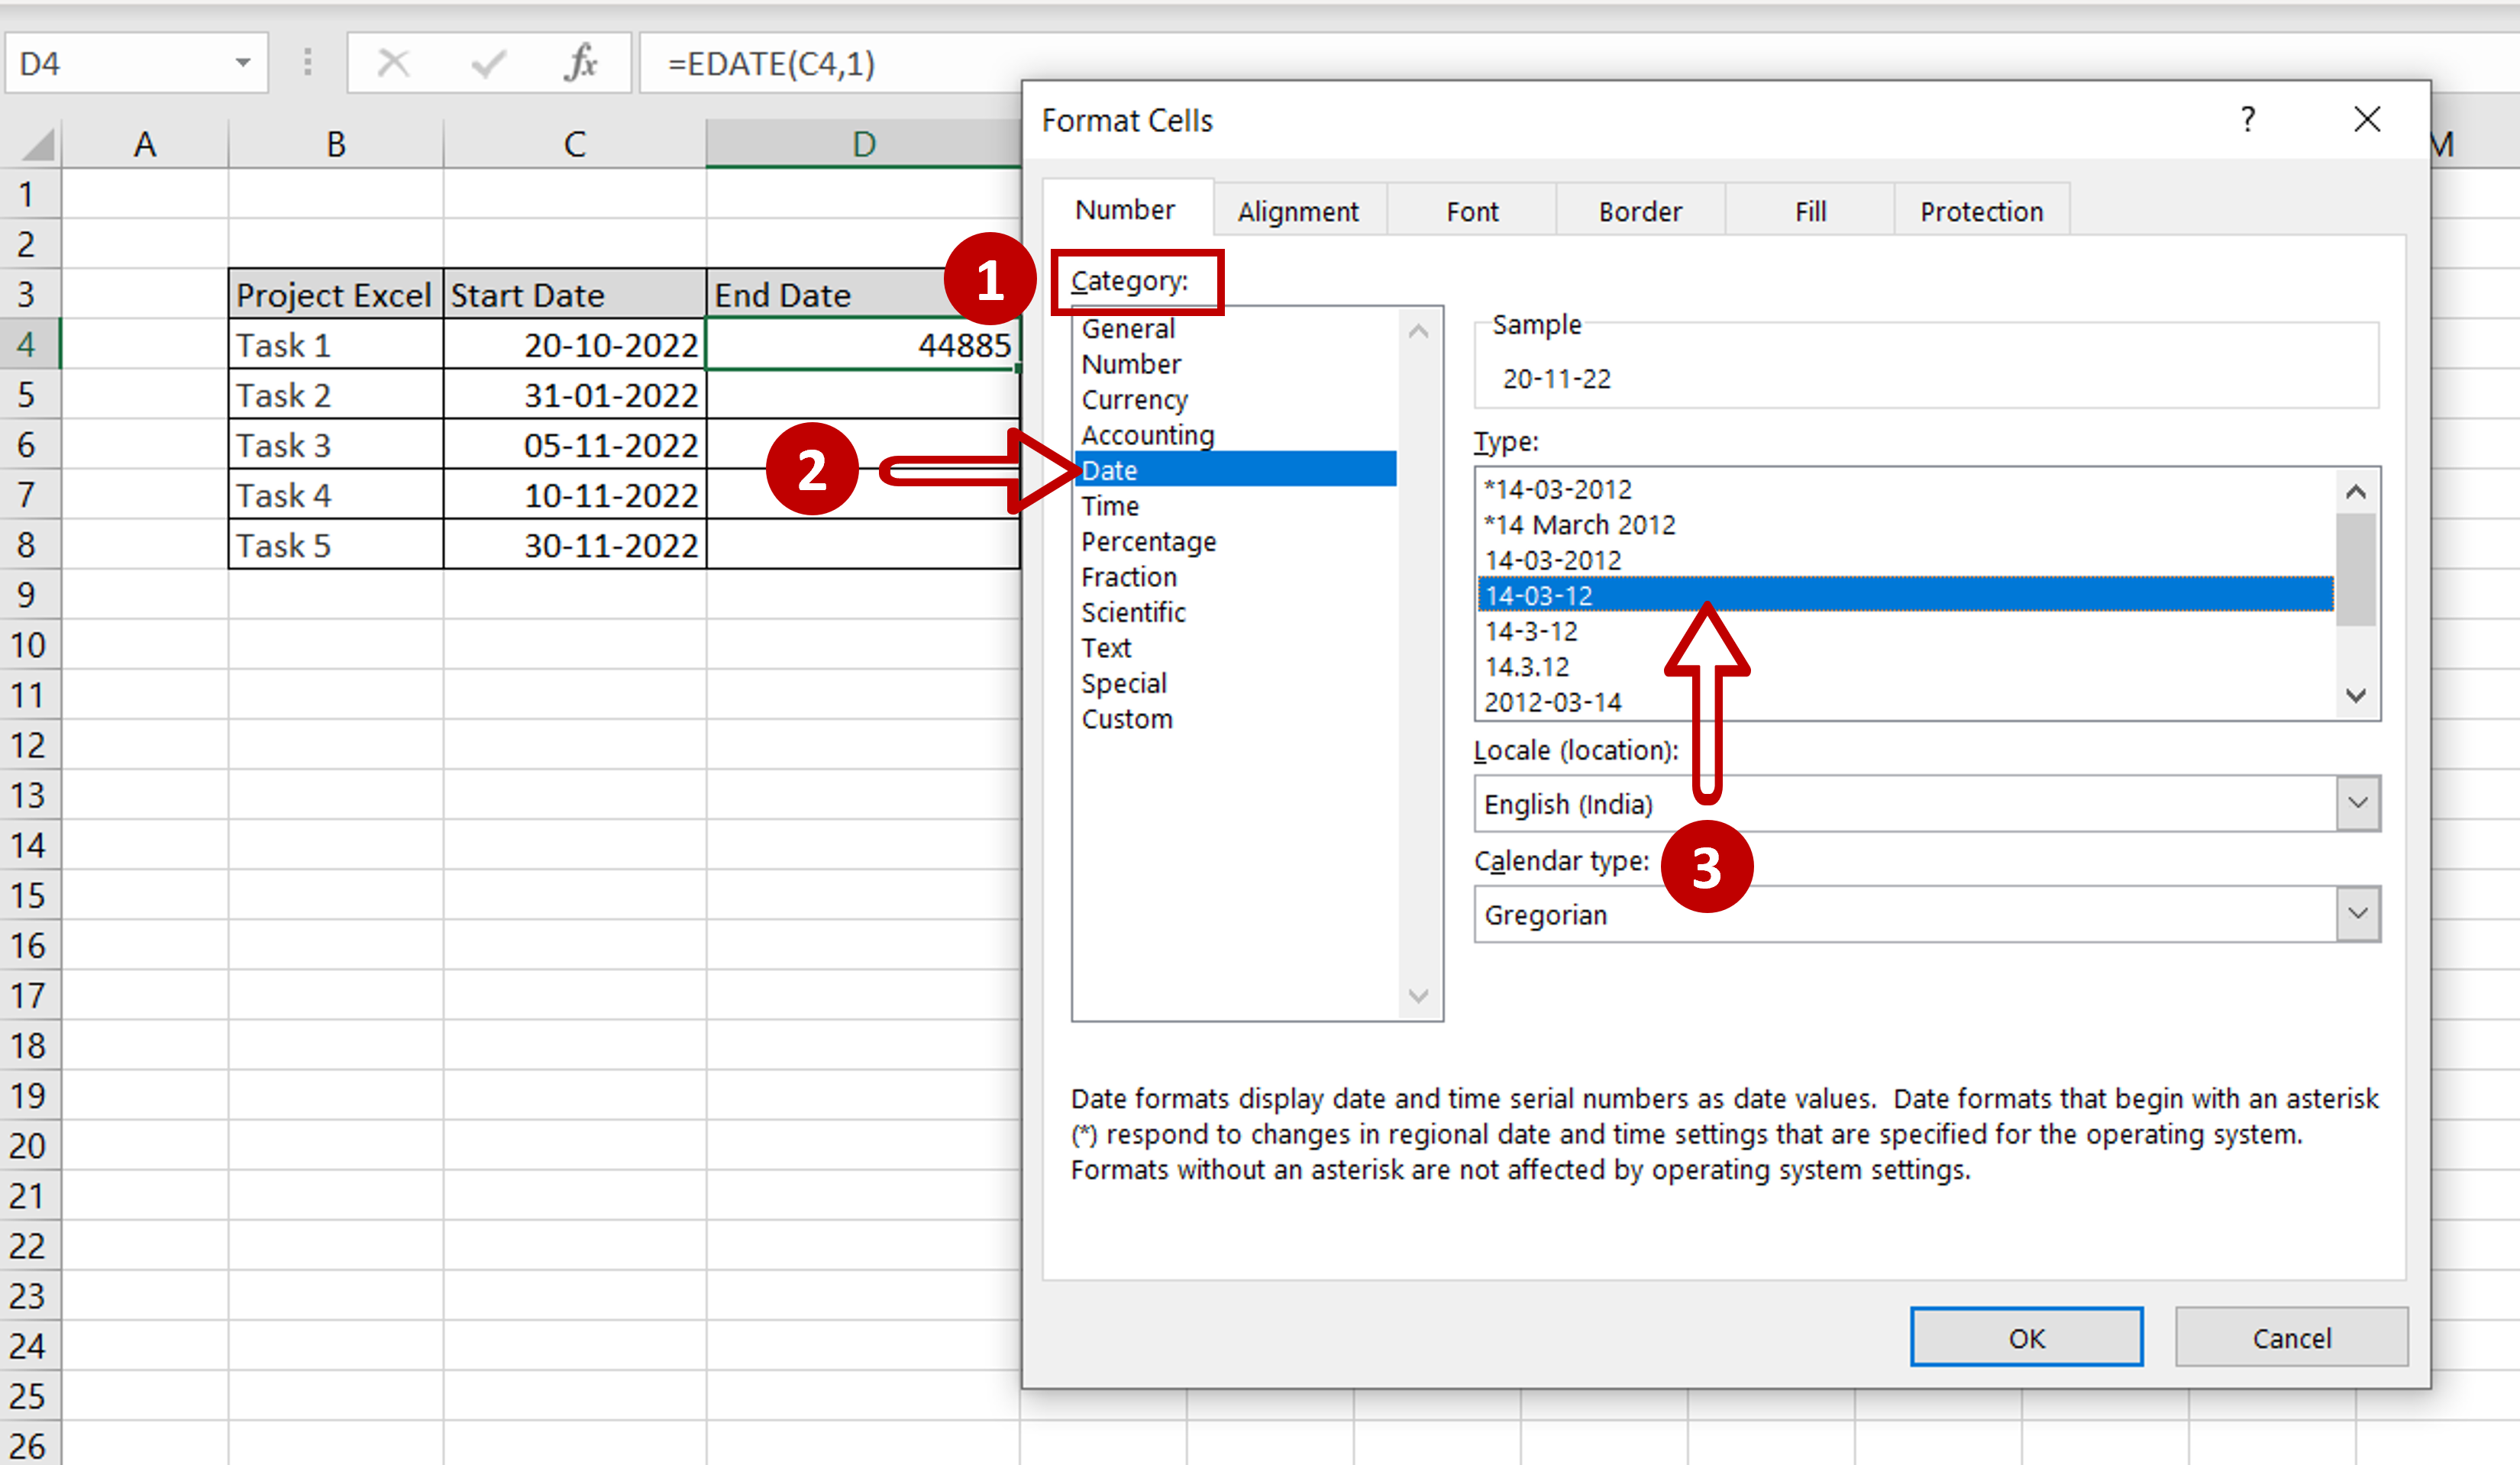
– Select the cell
– Open the Format Cell box: Go to Home > Number and click on the arrow to expand the menu
OR
Right-click and select Format Cells from the context menu
OR
Go to Home > Cells > Format > Format Cells
OR
Press Ctrl+1
– Go to Number > Date
– Select any date format
– Click OK
Step 3 – Copy the formula and check the result
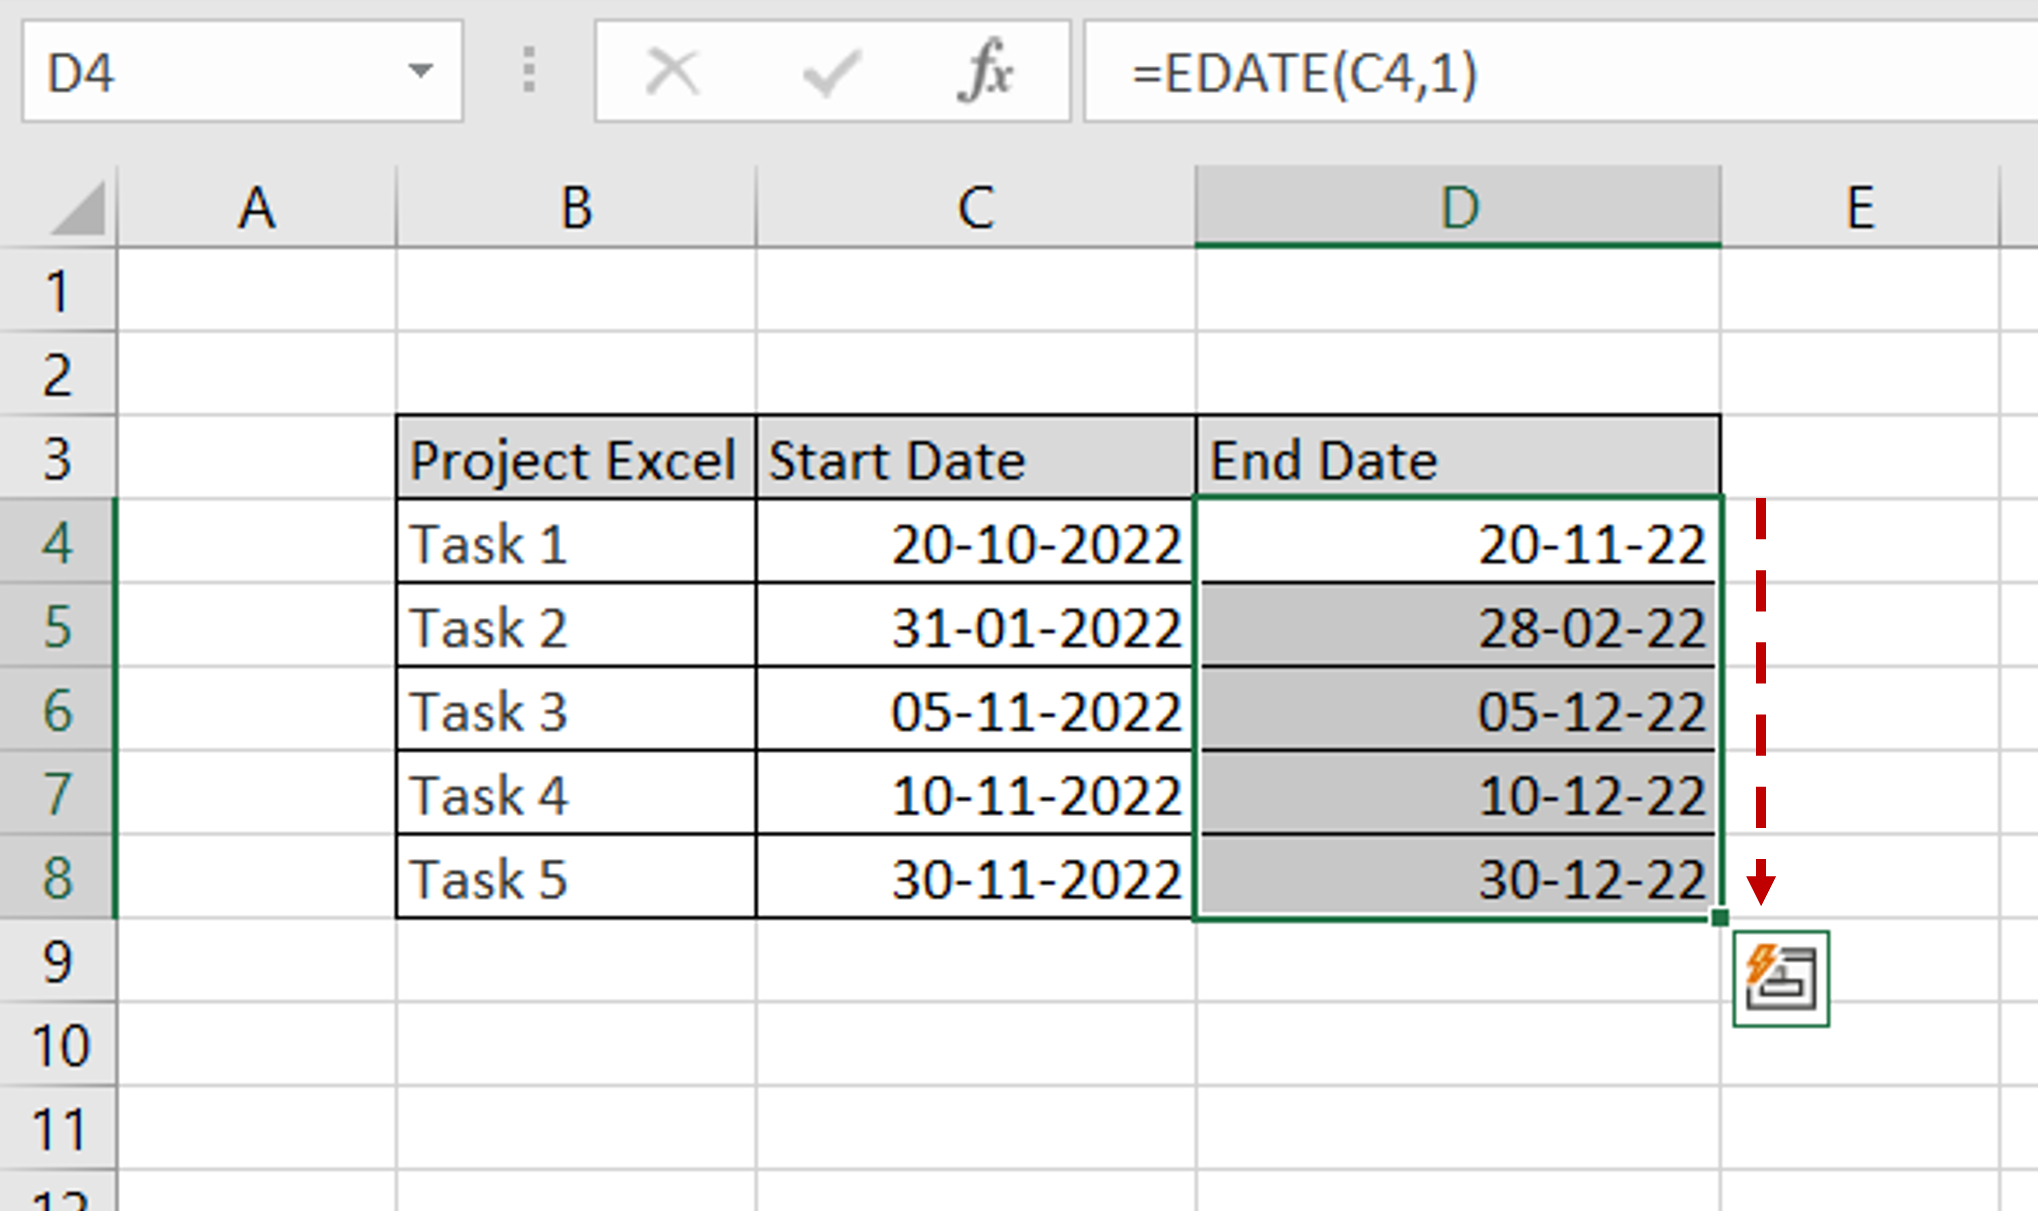
– Using the fill handle from the first cell, drag the formula to the remaining cells
OR
a) Select the cell with the formula and press Ctrl+C or choose Copy from the context menu (right-click)
b) Select the rest of the cells in the column and press Ctrl+V or choose Paste from the context menu (right-click)
– Now you have a list of end dates for each task


