
How to add a calculator to Excel
 By
SpreadCheaters
By
SpreadCheaters
You can watch a video tutorial here.

Excel is widely used for mathematical operations due to the variety of functions and tools it provides. It is very easy to perform basic calculations the same way we would do using a calculator. It is useful to know that it is also possible to add a calculator to the Quick Access Toolbar so that you can use it to make quick calculations or to test out a formula.
Step 1 – Open the Excel Options window
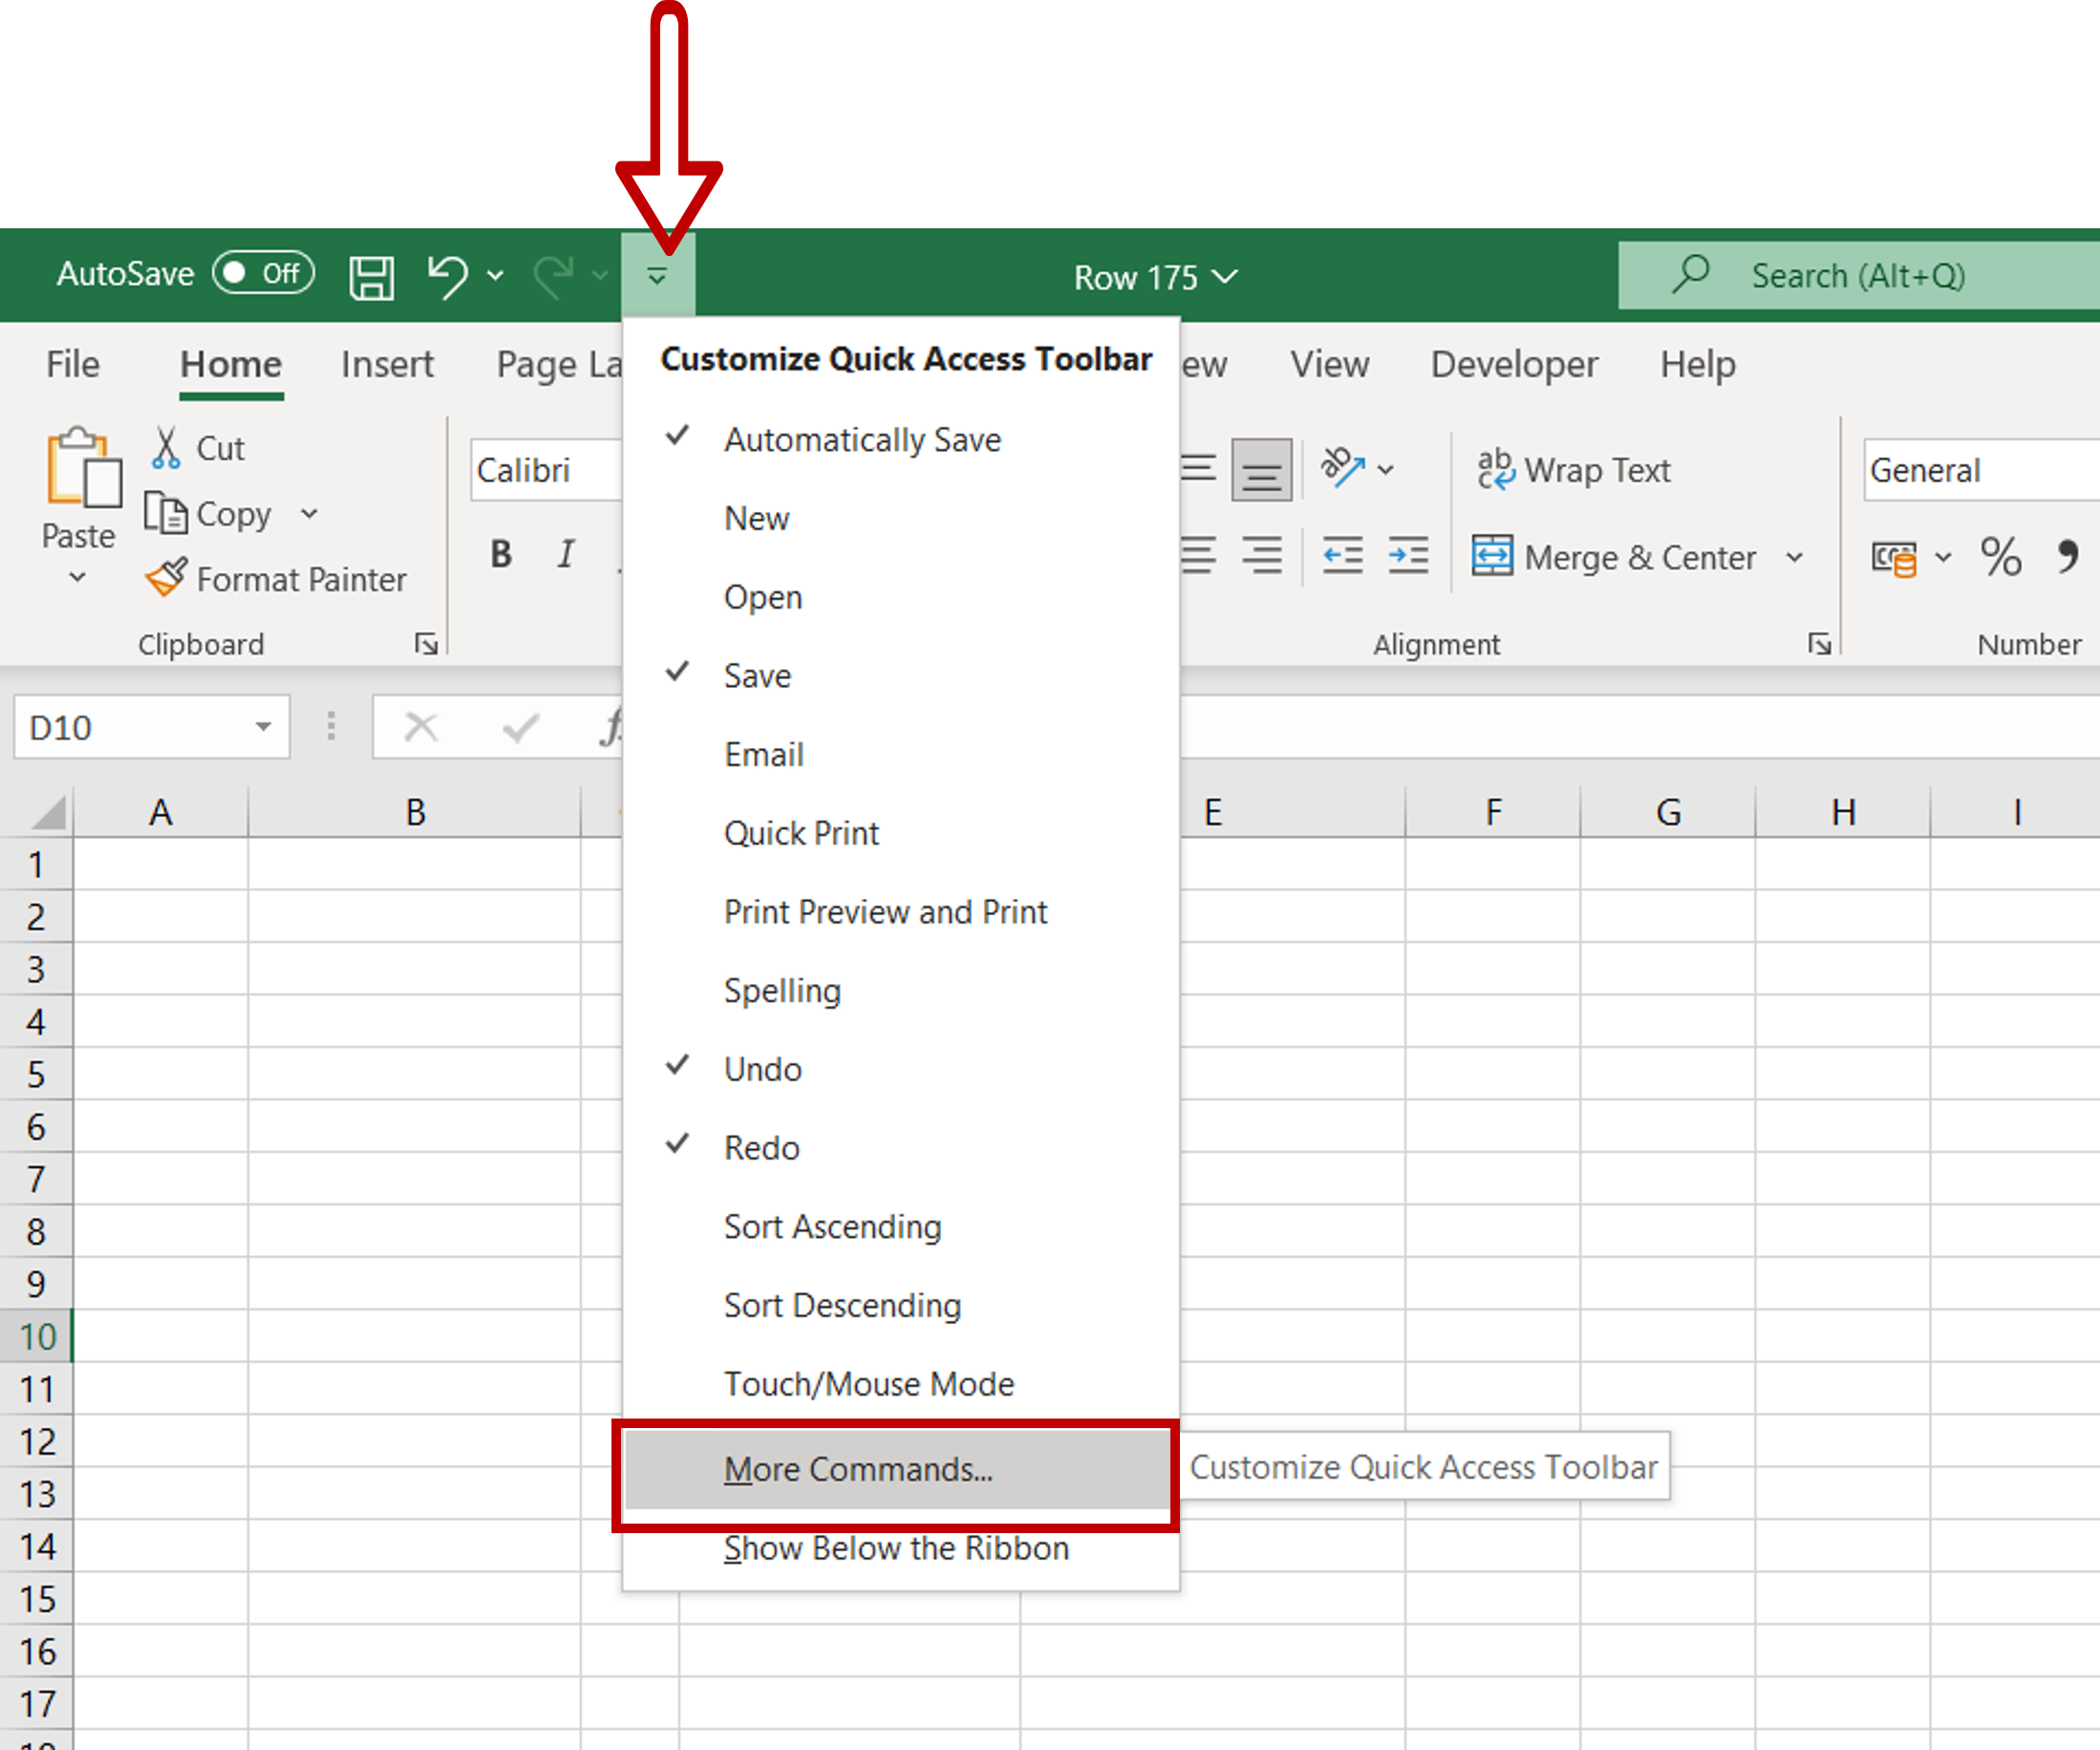
– Go to the toolbar at the top of the screen and click on the down-arrow
– Select More Commands from the drop-down menu
OR
Go to File > Options > Quick Access Toolbar
Step 2 – Add the calculator to the toolbar
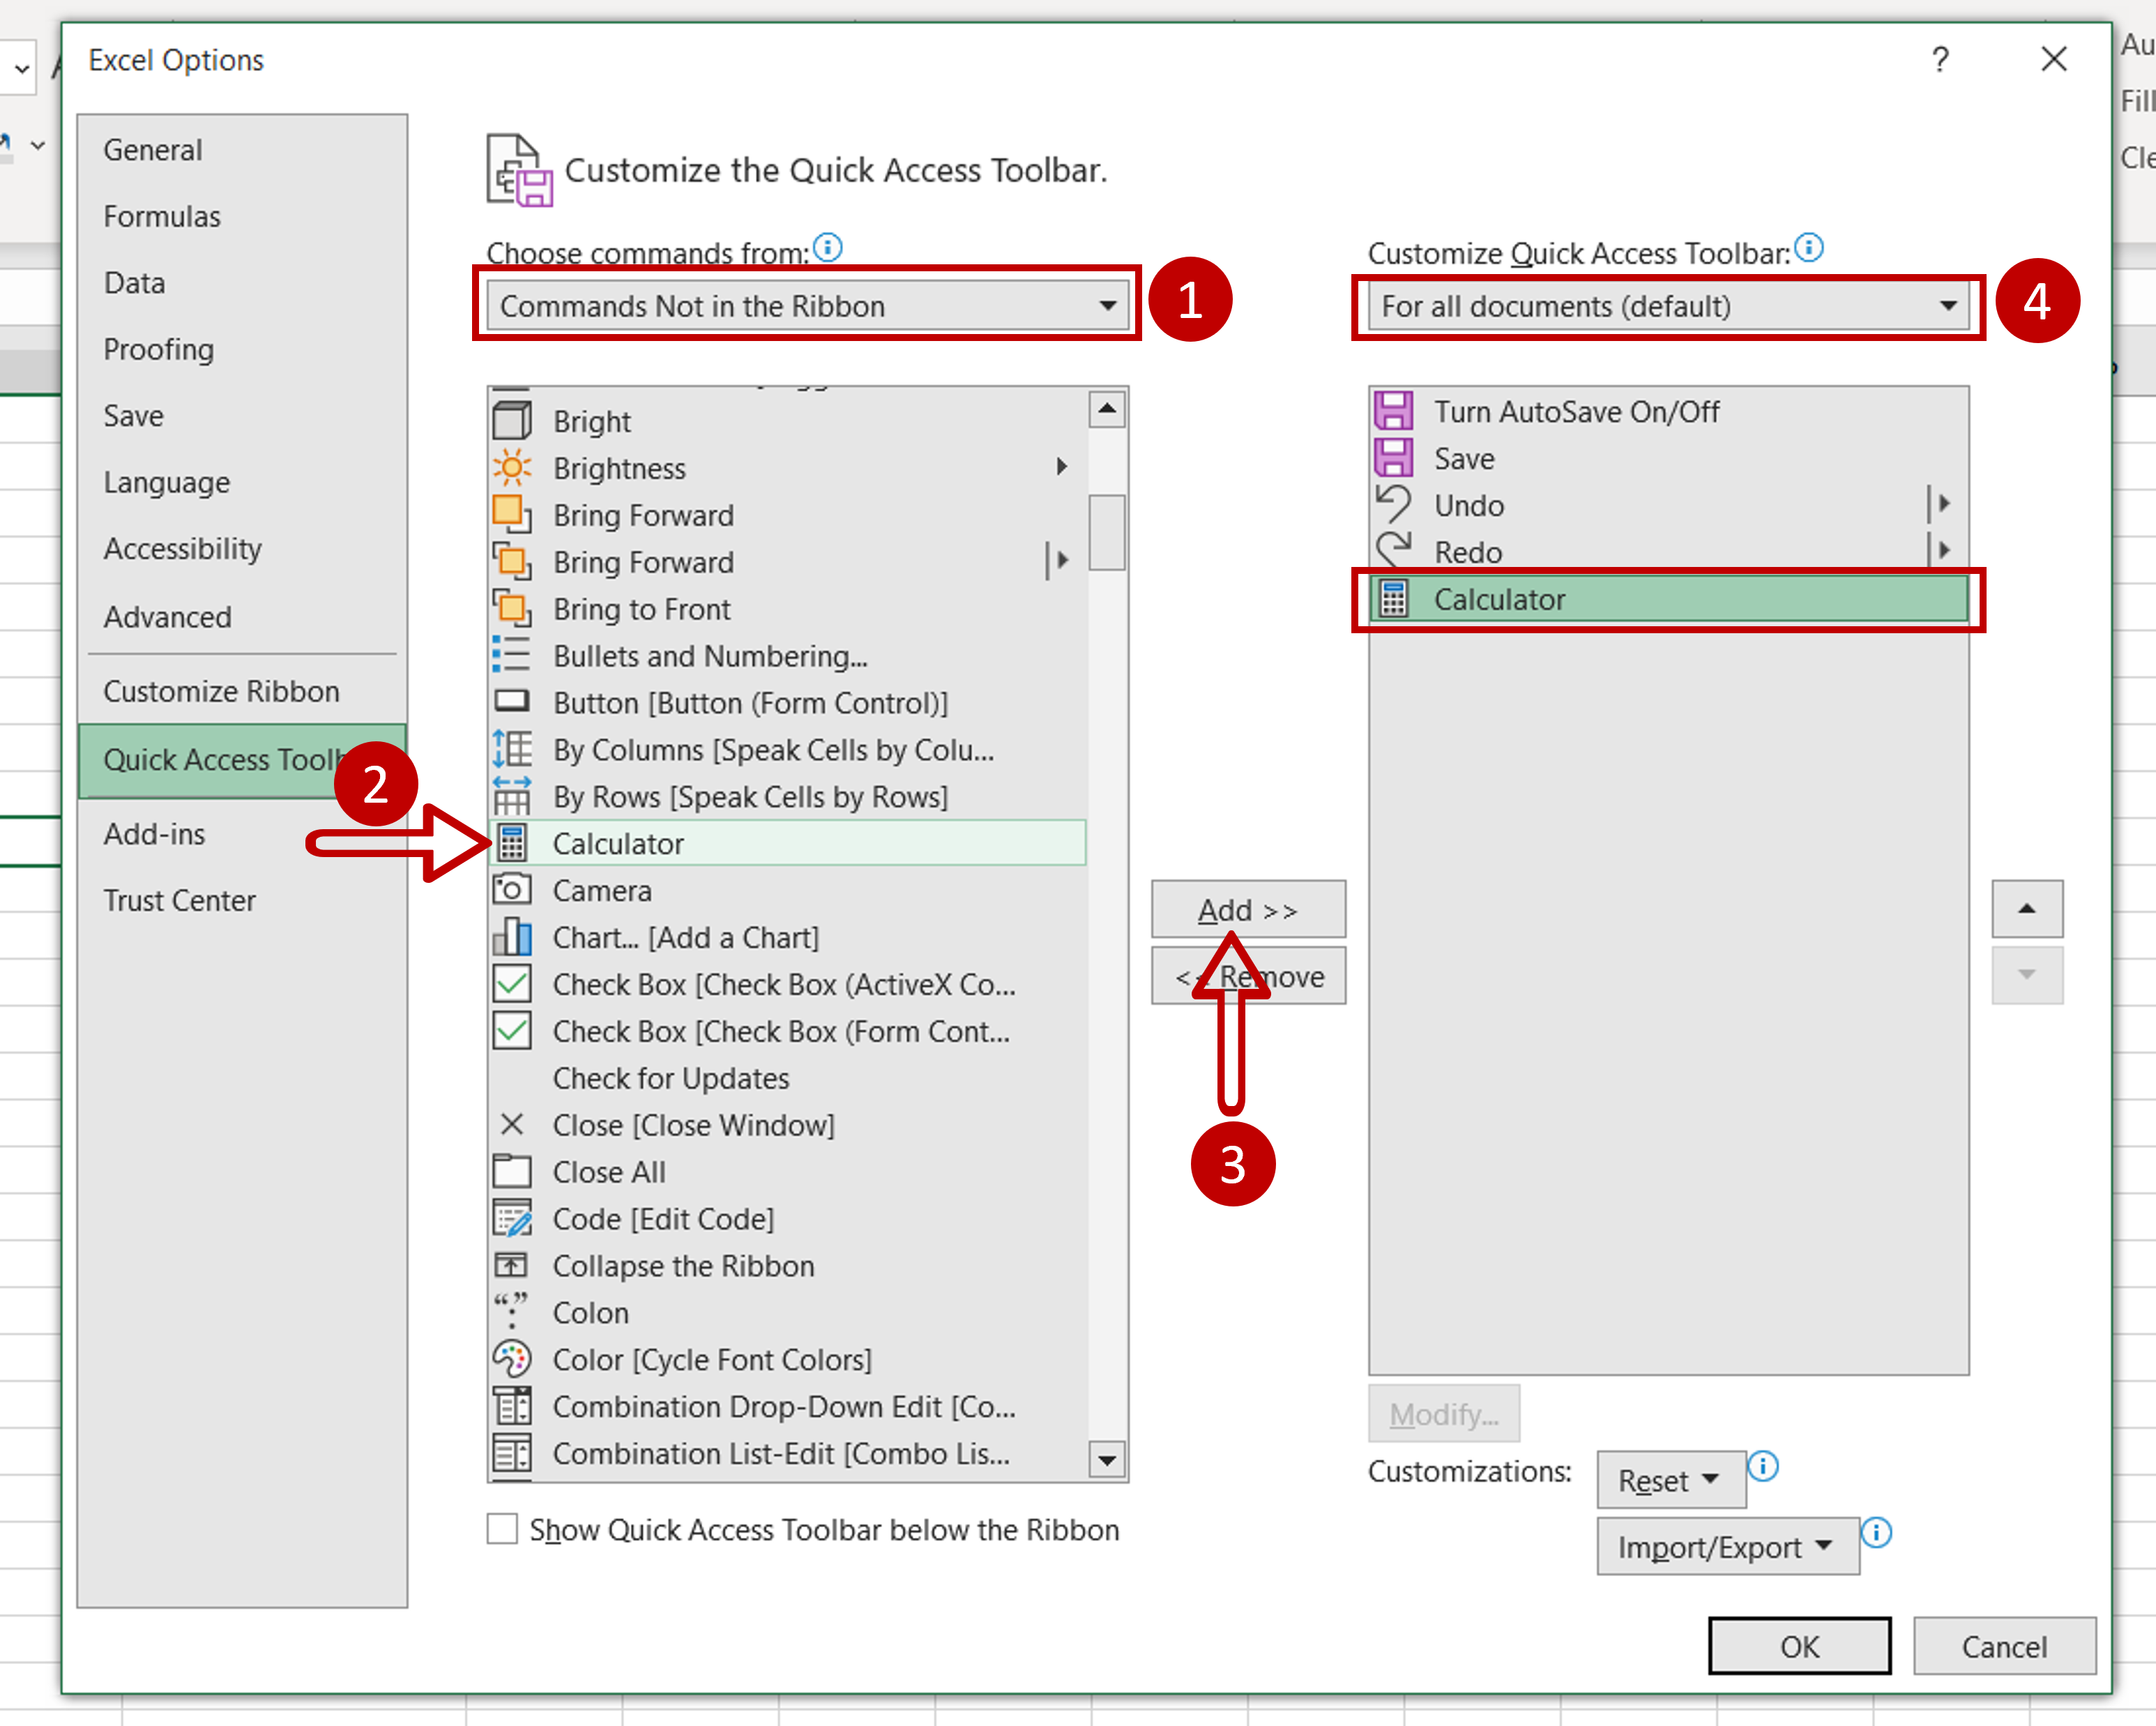
– Under Choose commands from select Commands Not in the Ribbon
– Scroll down to find the Calculator and select it
– Click on Add
– The Calculator will be moved to the toolbar
– Leave the default setting for Customize Quick Access Toolbar that is, For all documents
– Click OK
Step 3 – Open the calculator
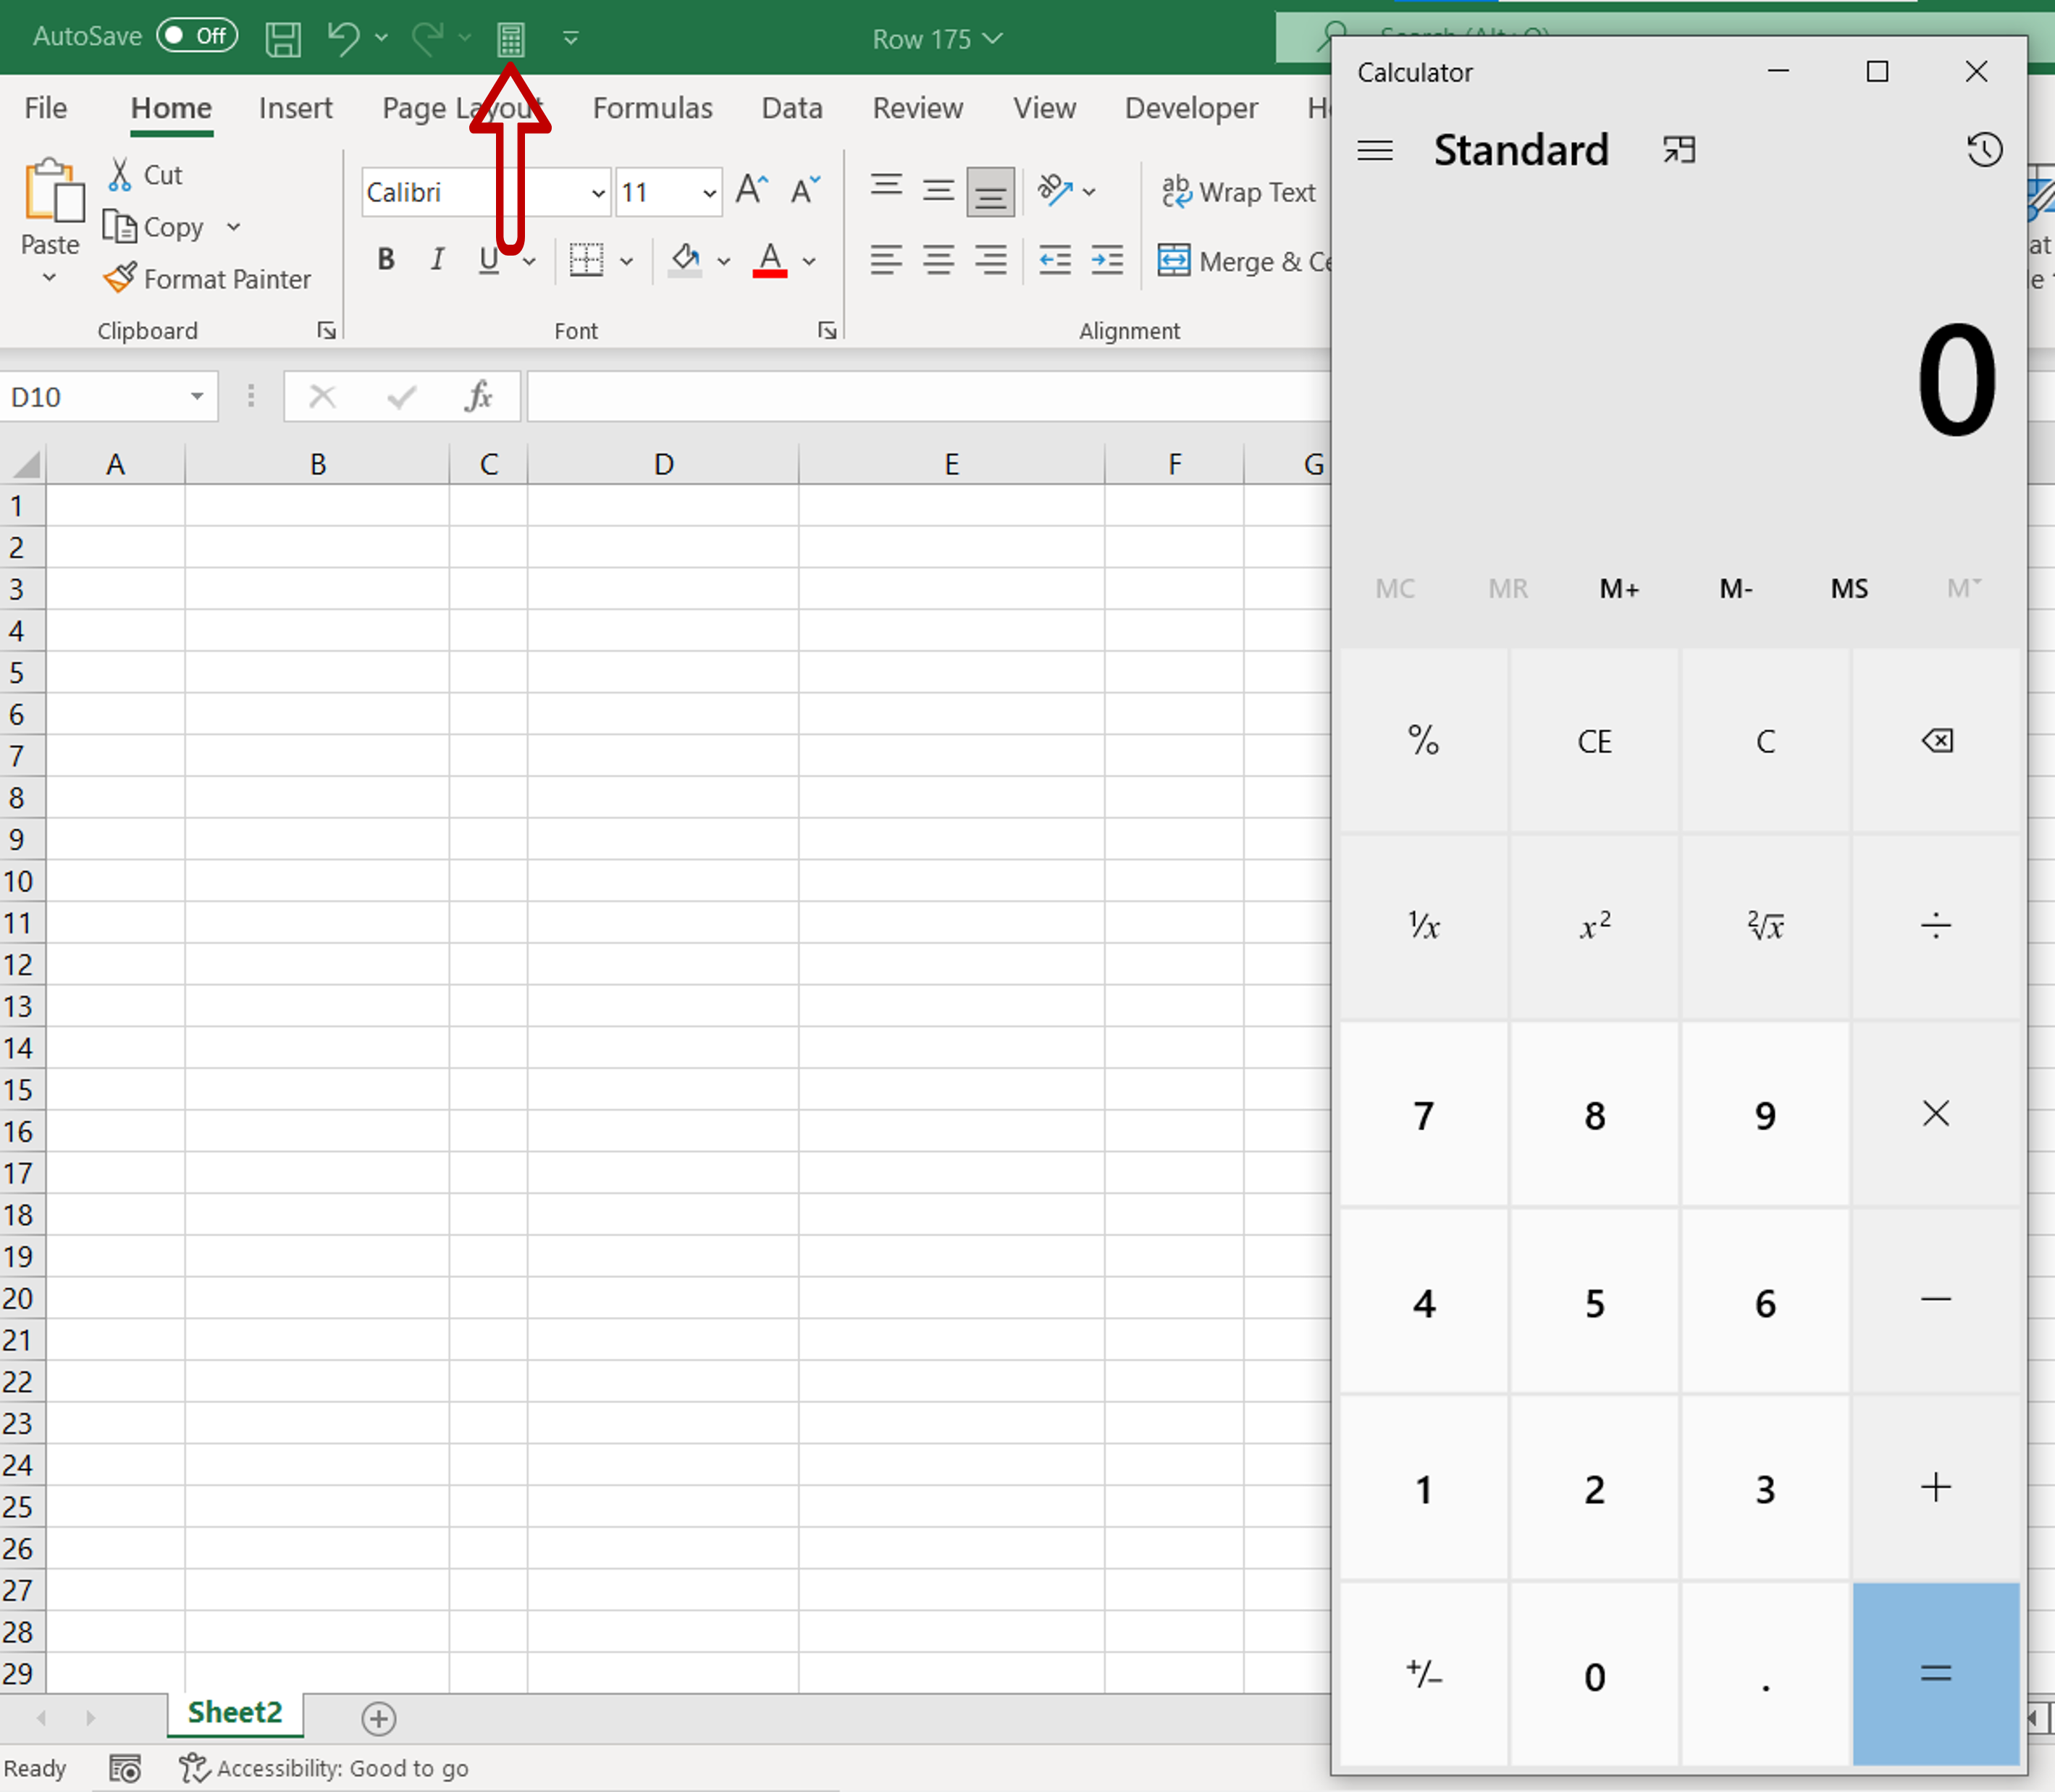
– Go to the toolbar and click on the calculator symbol
– The calculator will open


