
How to add 90 days to a date in Excel
 By
SpreadCheaters
By
SpreadCheaters
While we are working with dates in excel, often we have to add or subtract the dates from each other. Sometimes we want to calculate a specific date (past or future) with reference to another date in our data set. You need to do such calculations when you are managing a project with specific timelines, you may need to add a certain number of days to a start date to determine a deadline or milestone.
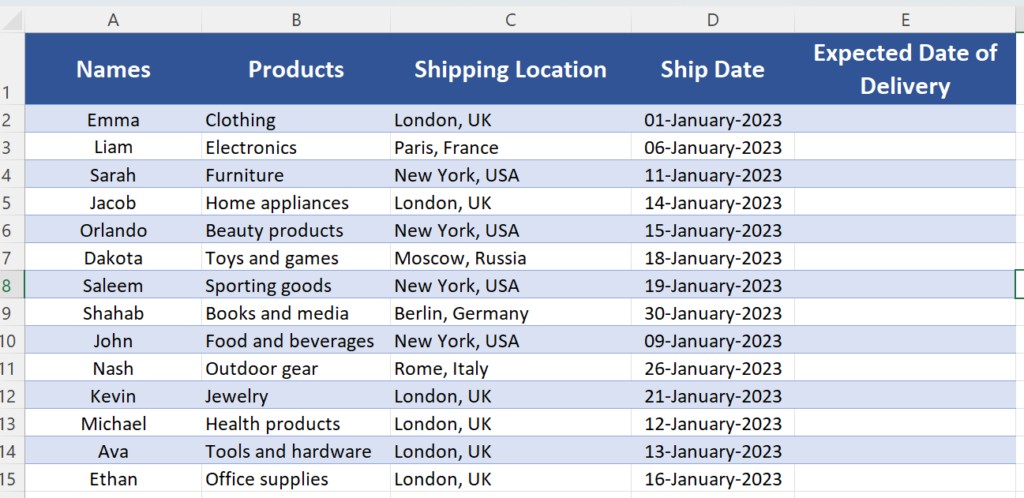
So let’s look at the following dataset above regarding sales of a company consisting of names, product names, shipping locations and shipping dates. We’ll find out the delivery dates from the shipping dates which will be due 90 days after the shipment of goods as per company’s policy. We’ve already formatted the Ship Date column in a friendly format to understand dates easily.
Method 1 – Add days to the dates directly as numbers
Excel treats the dates as serial numbers on the back end so, we can add numbers to the dates directly if we want to add days to the date. However, to add years and months we need to use the formula only, which we’ll discuss later in this tutorial.
Step 1 – Add days like number to the date
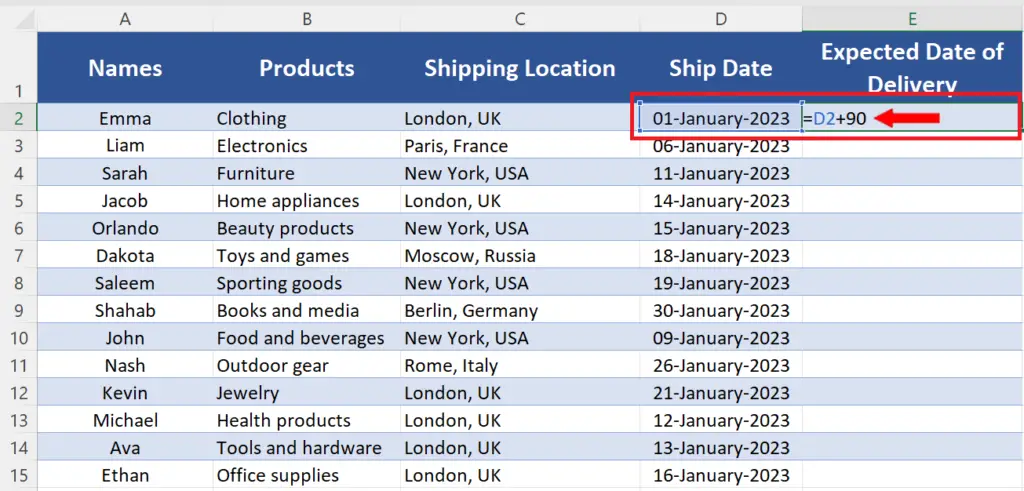
- We have a column D with Expected Dates of Delivery in our dataset and we’ll write the following simple formula in that column
=D2 + 90
Step 2 – Implement the formula to whole data range
- To implement the formula just press enter and the desired results will be available in the first cell.
- To implement the same formula to the whole data range, double click the fill handle and the same formula will be applied to the complete data range as shown above.
Method 2 – Add days to the dates using DATE function
Now let’s add the days to the dates using the DATE function. It has the following simple syntax,
DATE(year, month, day)
Where;
year:
It is a numeric value representing the year. It can be entered as a four-digit value, such as 2023, or a two-digit value, such as 23. If you enter a two-digit year, Excel will interpret it based on the current century (e.g., 23 will be interpreted as 2023 if the current year is 2023, but as 1923 if the current year is 2024 or later).
month:
This parameter is a numeric value representing the month, from 1 (January) to 12 (December).
day:
The last parameter is a numeric value representing the day of the month, from 1 to 31.
For example, to create a date for February 19, 2023, you would use the following formula:
=DATE(2023,2,19)
Step 1 – Create formula using DATE function
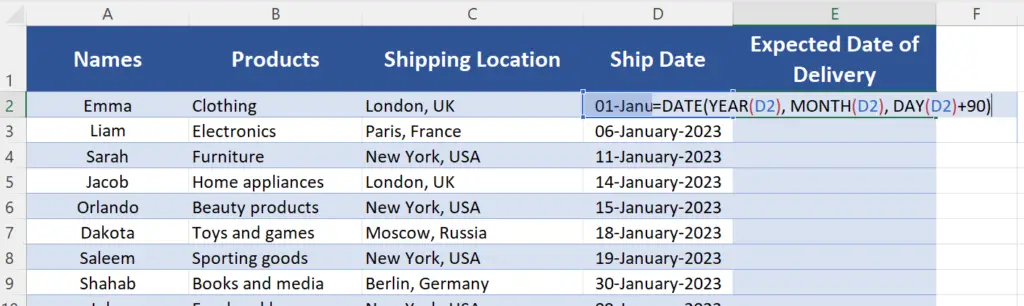
- We have a column D with Expected Dates of Delivery in our dataset and we’ll write the following simple formula in that column,
=DATE(YEAR(D2), MONTH(D2), DAY(D2)+90)
This will add 90 days to the DAY parameter and we’ll get our desired result. The same result can be obtained by adding 3 to the months parameter because 90 days equal 3 months.
Step 2 – Implement the formula to whole data range
- To implement the formula just press enter and the desired results will be available in the first cell.
- To implement the same formula to the whole data range, double click the fill handle and the same formula will be applied to the complete data range as shown above.


