
How do you merge and center cells in Excel
 By
SpreadCheaters
By
SpreadCheaters
You can watch a video tutorial here.

When formatting tables in Excel, you may need to merge cells to properly label the data and to make it look neater. For example, you have a heading that applies to multiple columns and you need it to span the columns so that it correctly conveys the information to the reader. In this case, you need to merge and center the cells.
Step 1 – Merge the cells across columns
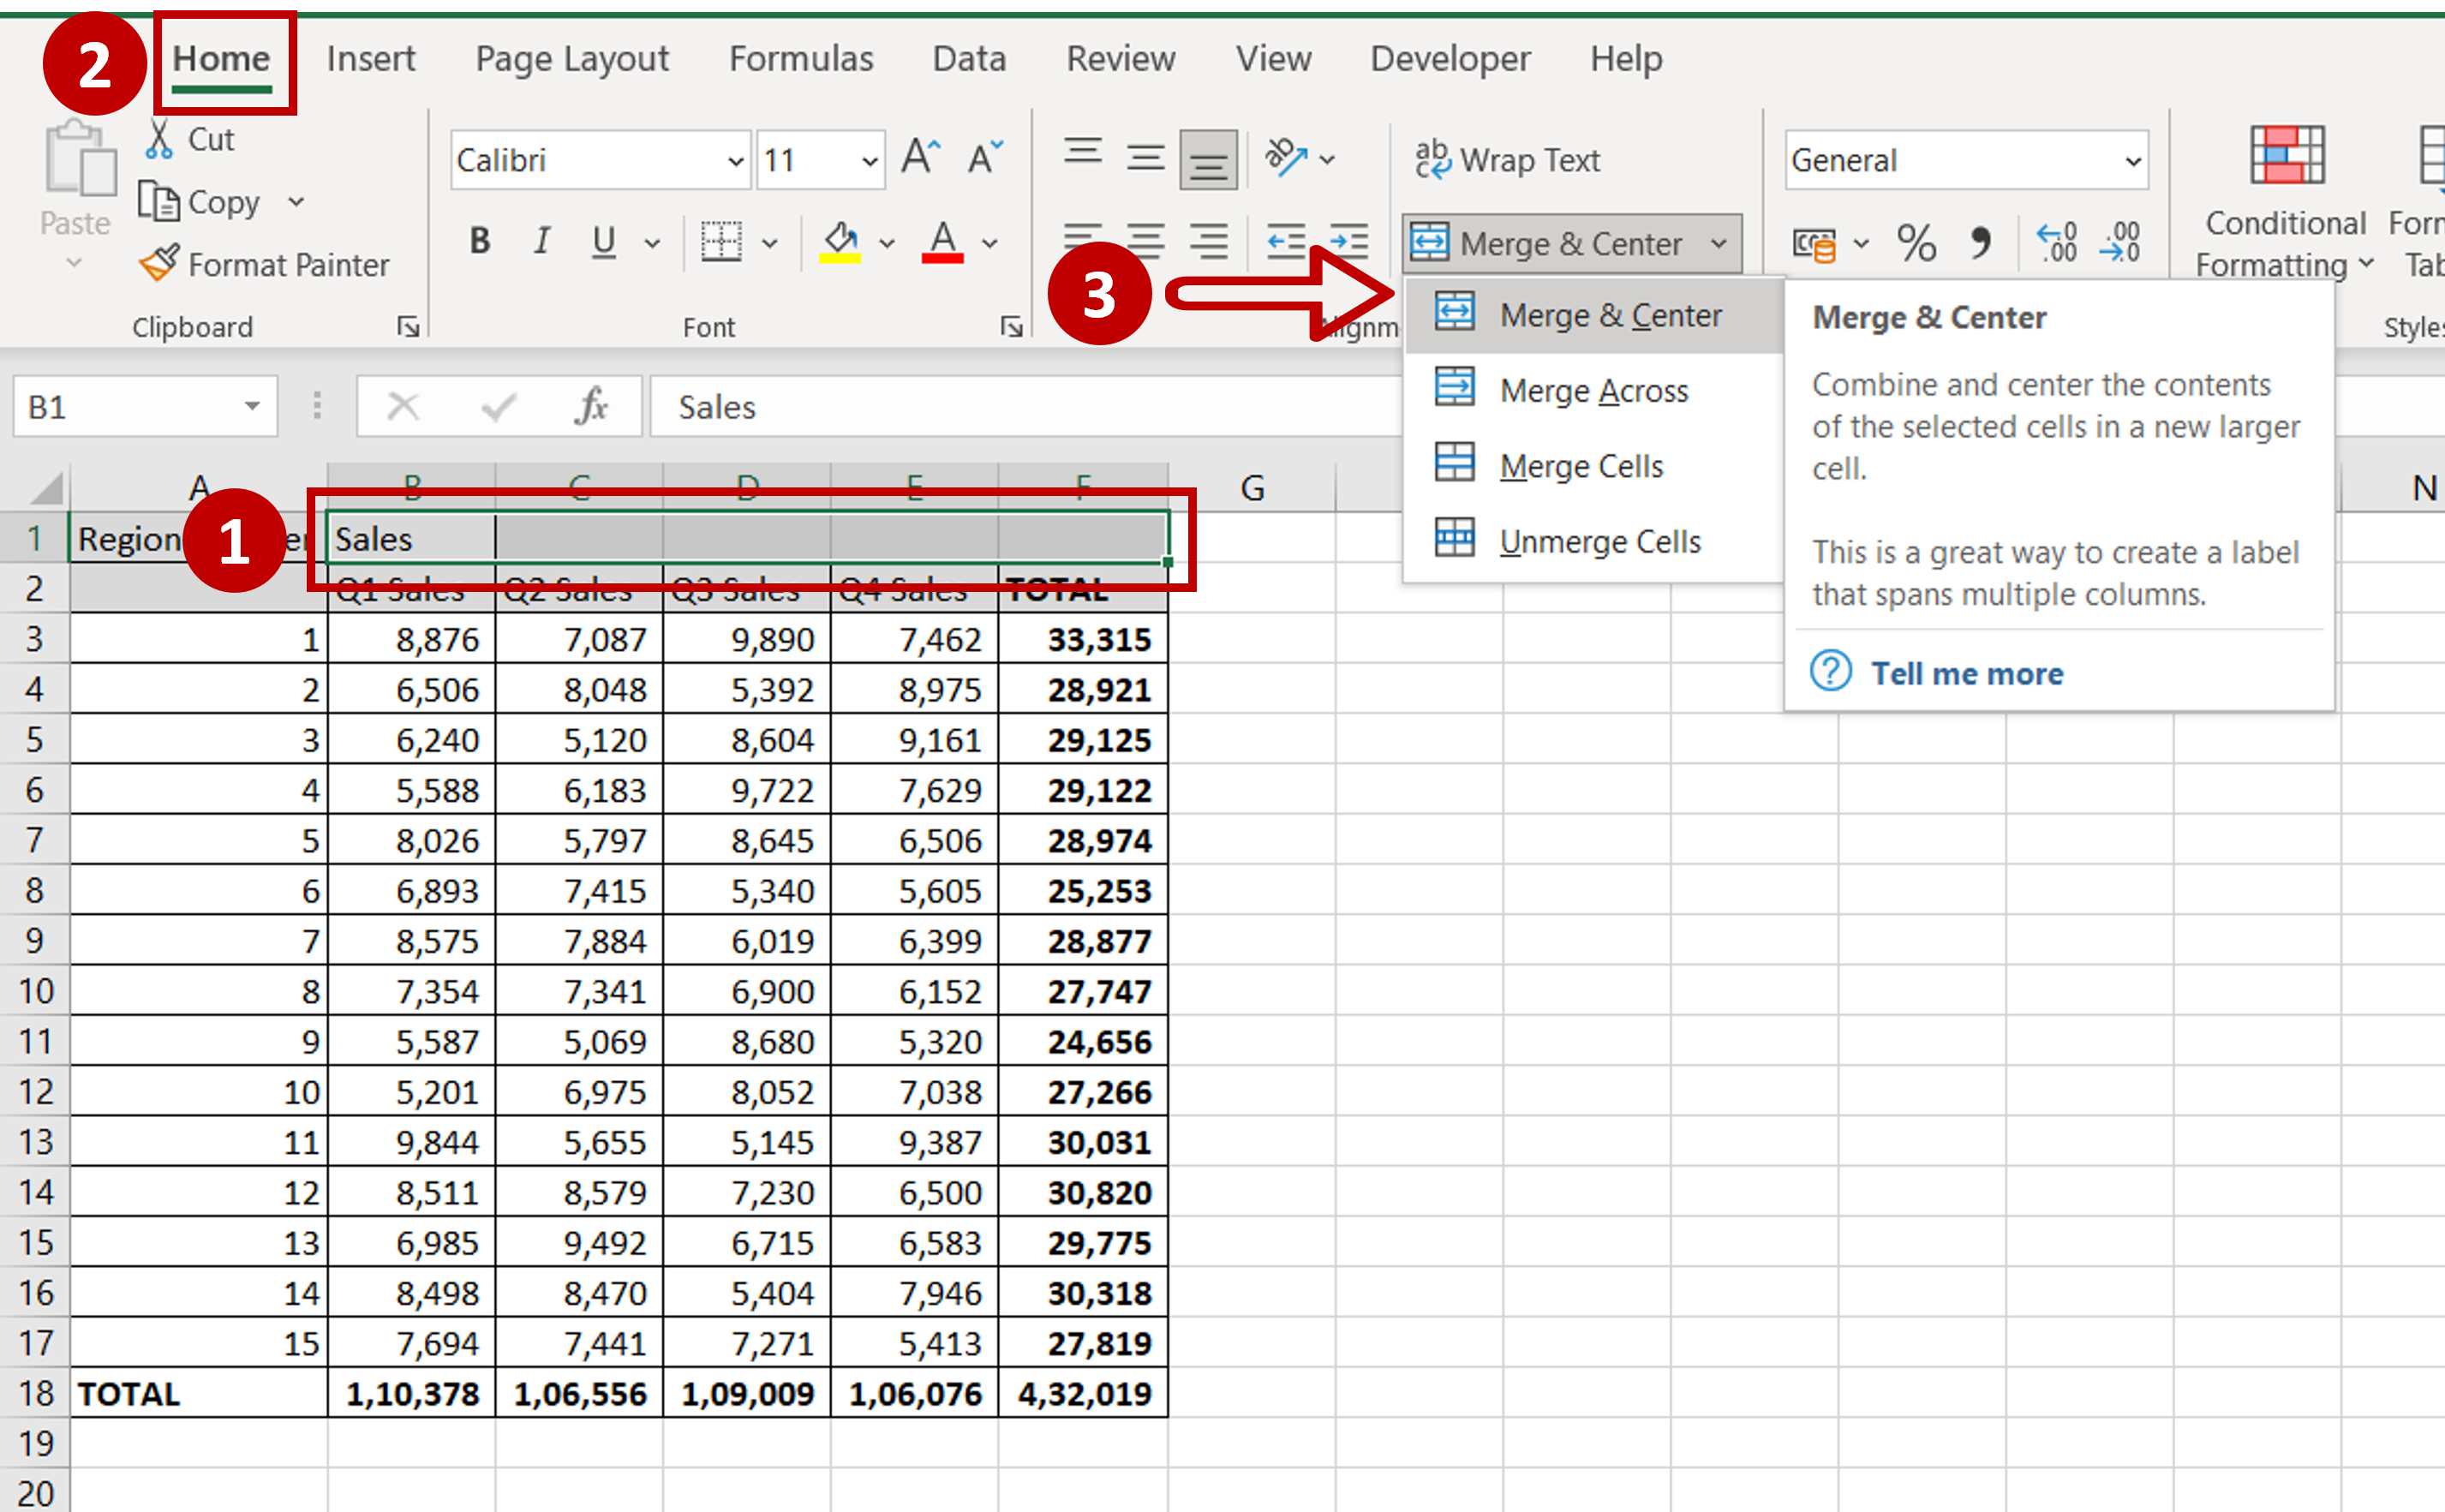
– Ensure that the heading is in the left-most cell
Note: Merging cells retain the data only in the top left corner of the selected range. Data in other cells will be lost
– Select the range of cells
– Go to Home > Alignment
– Under Merge & Center, click Merge & Center
Step 2 – Merge the cells across rows
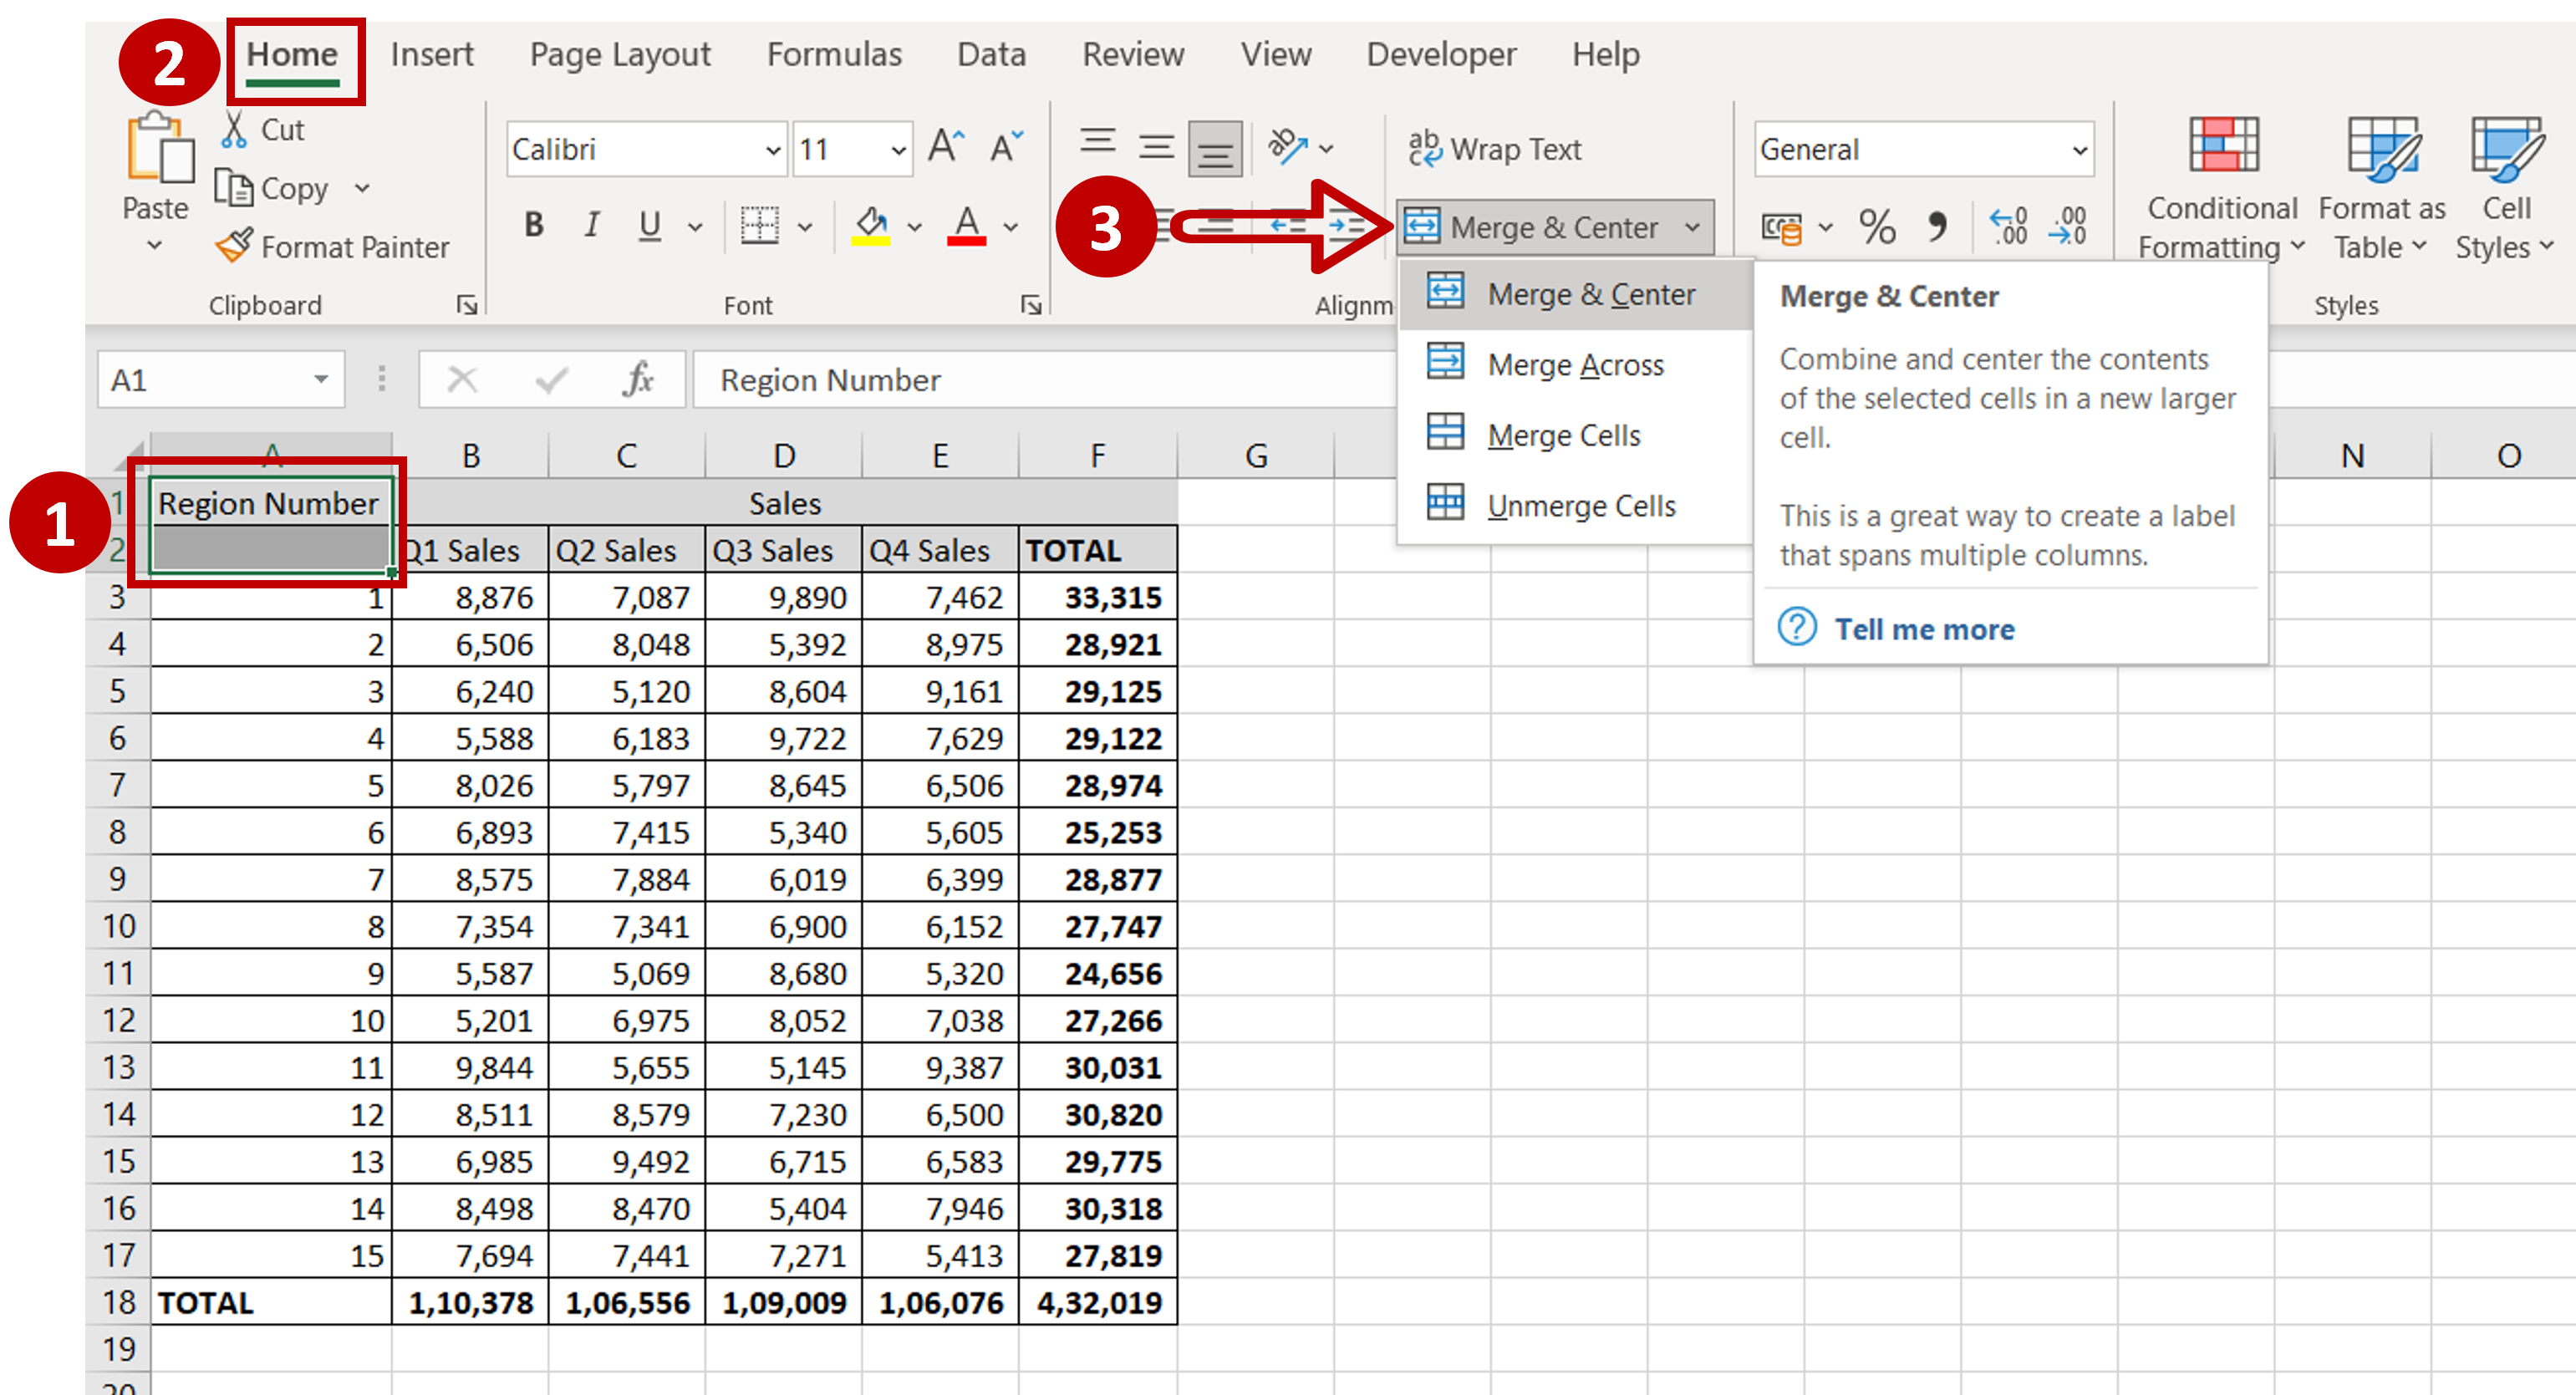
– Ensure that the heading is in the top-most cell
Note: Merging cells retain the data only in the top left corner of the selected range. Data in other cells will be lost
– Select the range of cells
– Go to Home > Alignment
– Under Merge & Center, click Merge & Center
Step 3 – Check that the cells have been merged and centered correctly
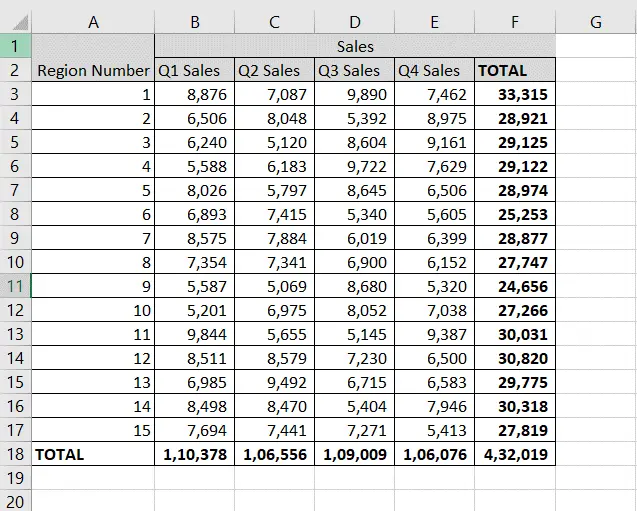
– The column cells for the header are merged and the text is centered
– As there are two rows for the column headings for ‘Sales’, the cells for the ‘Region number’ also are merged so that there is no ambiguity
Note: When you merge and center, the centering is only done horizontally and not vertically. When multiple rows are merged, you will need to use the alignment options to center the text.


