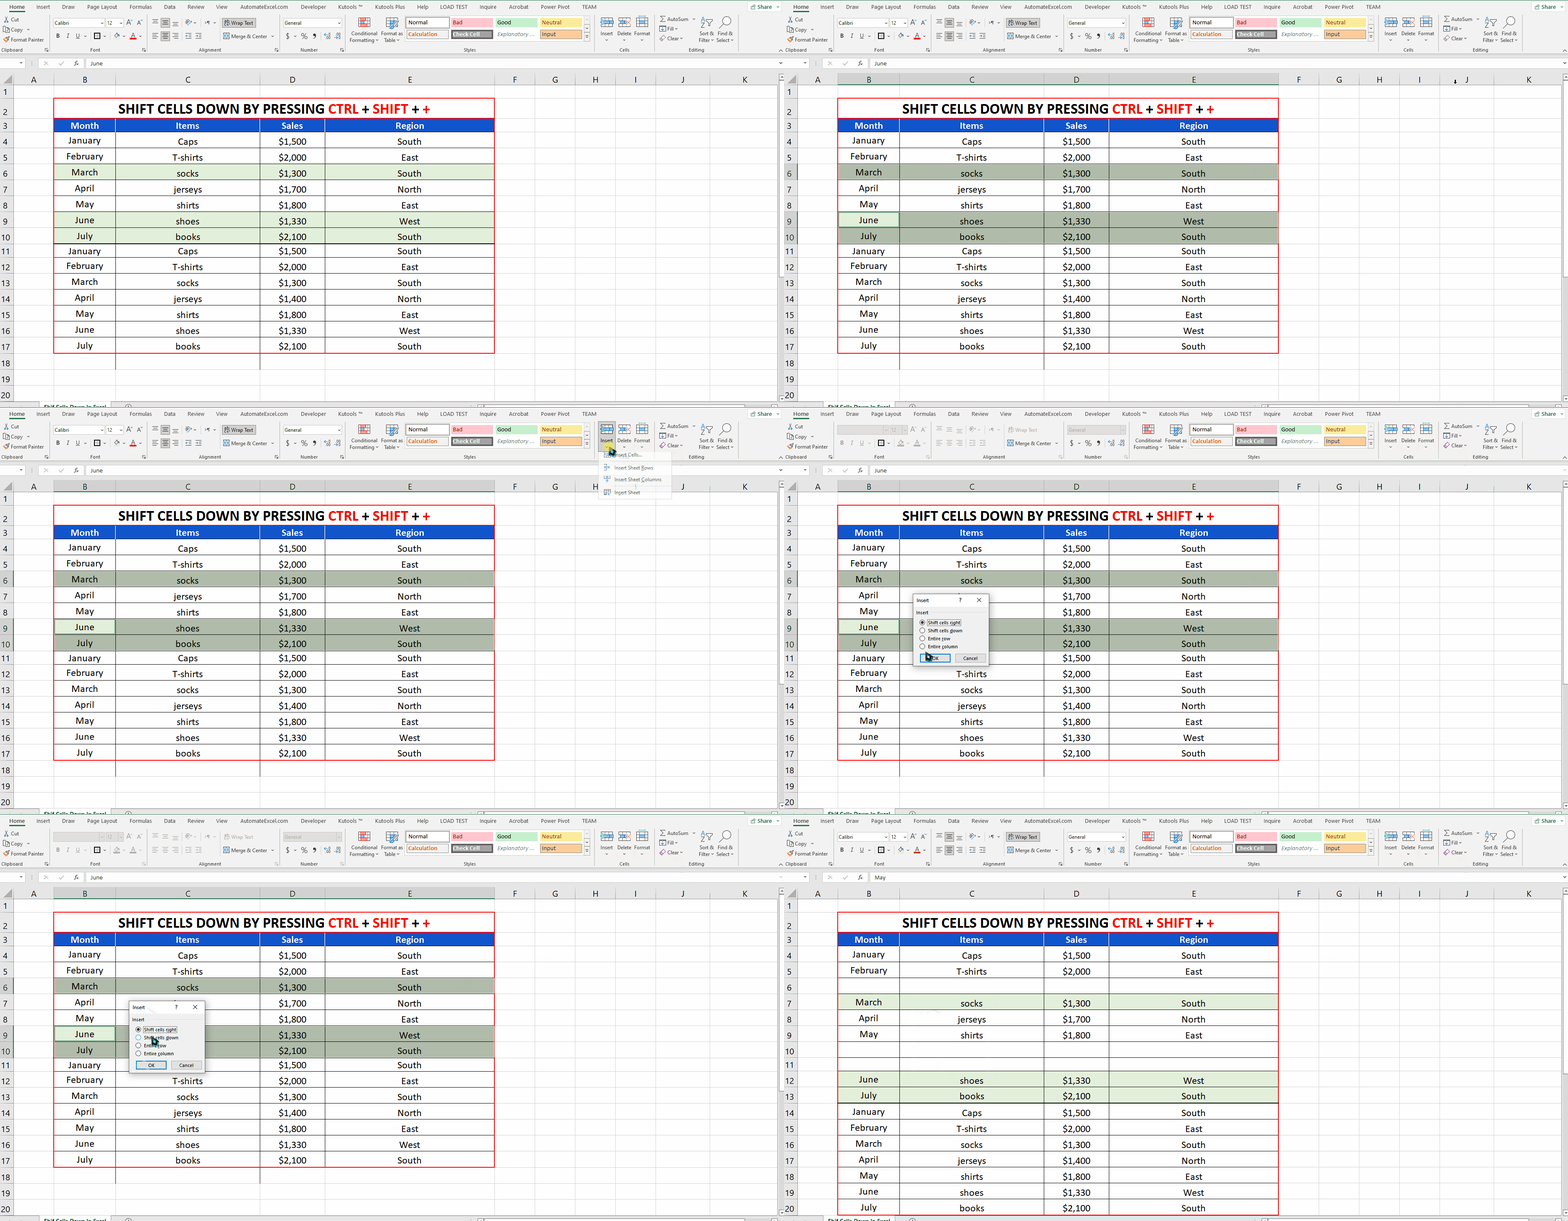
How to shift cells down in Excel
In this tutorial we’ll learn the process to shift cells down in Excel by following these simple steps.

When we use Excel for data entry purposes, often we need to insert data between the already filled rows. This could be a problem if you don’t know how to shift the cells down to make room for the new data.
Step 1 – Shift cells down using shortcut key CTRL + SHIFT + +

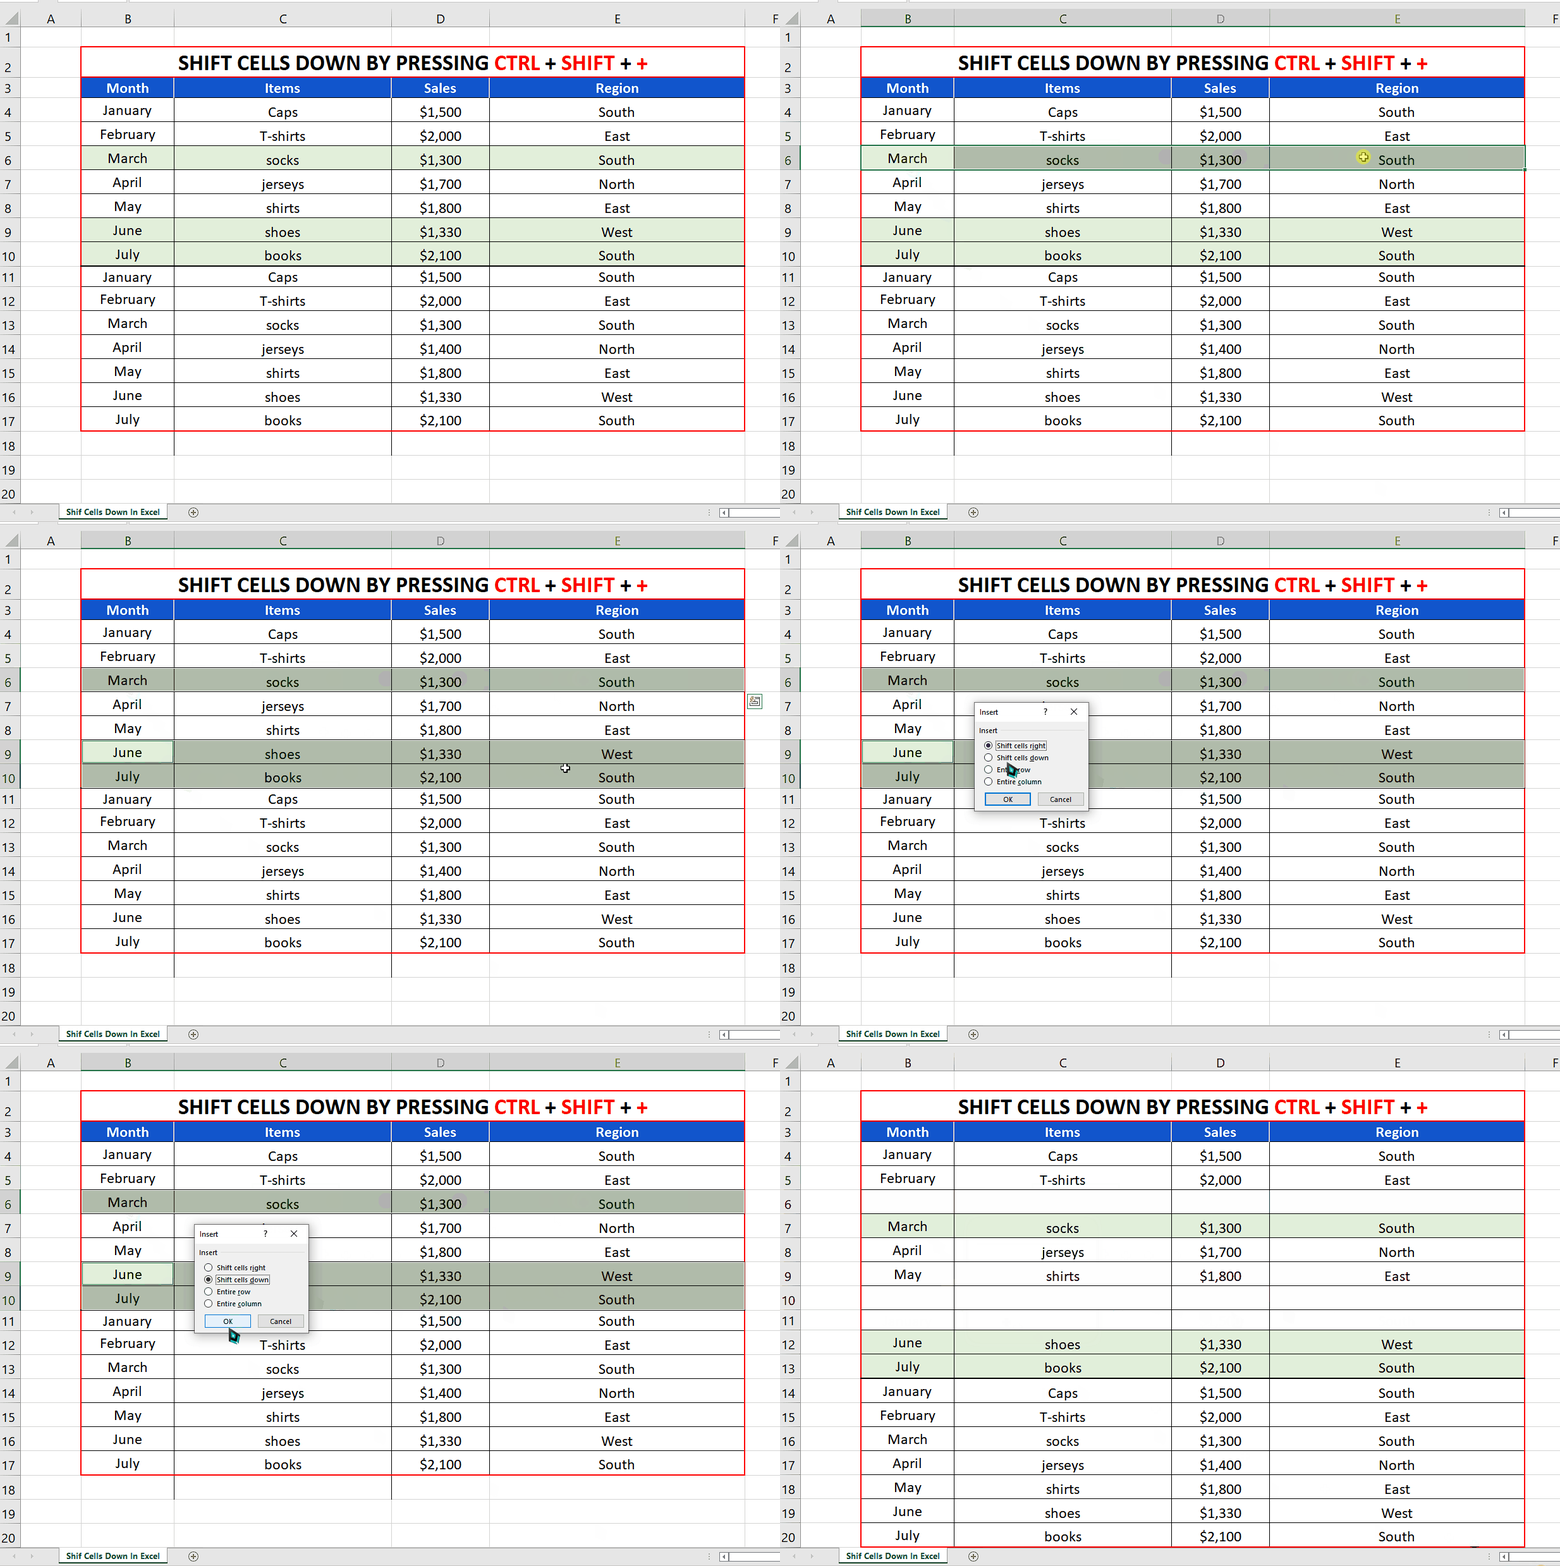
– The simplest of all methods to shift cells (adjacent or nonadjacent) down is to select the cells and then press the shortcut key CTRL + SHIFT + +.
– This will open up the Insert dialog box giving you different options. Choose the “Shift cells down” option. This will shift the cells down by inserting the same number of cells as the selected cells as shown above.
Step 2 – Shift cells down using Context Menu’s Insert Option

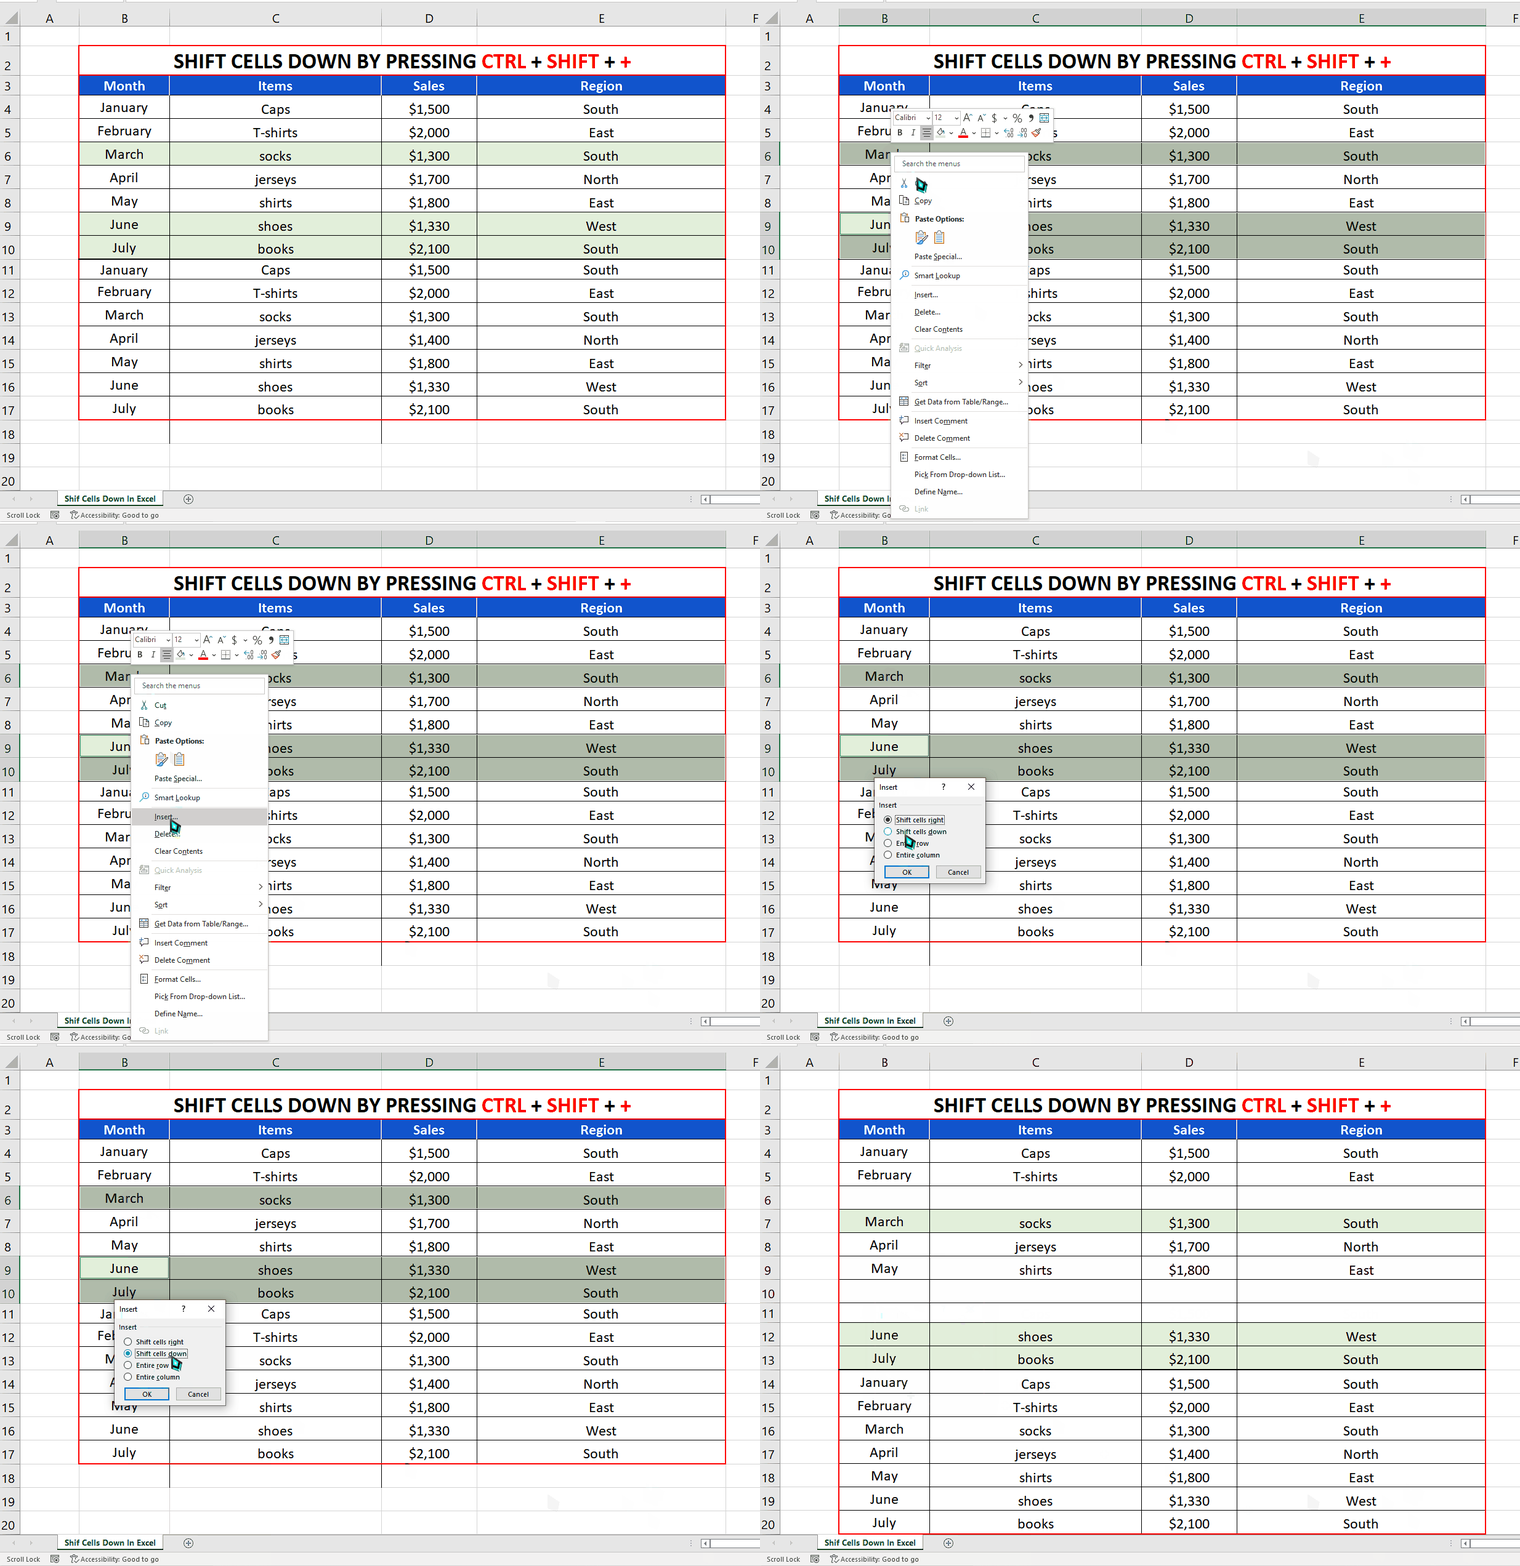
– The second method to shift cells (adjacent or nonadjacent) down is to select the cells and then right click to open up the context menu.
Now click on the Insert option on this menu.
– This will open up the Insert dialog box giving you different options. Choose the “Shift cells down” option. This will shift the cells down by inserting the same number of cells as the selected cells as shown above.
Step 3 – Shift cells down using Home Tab’s Insert Option

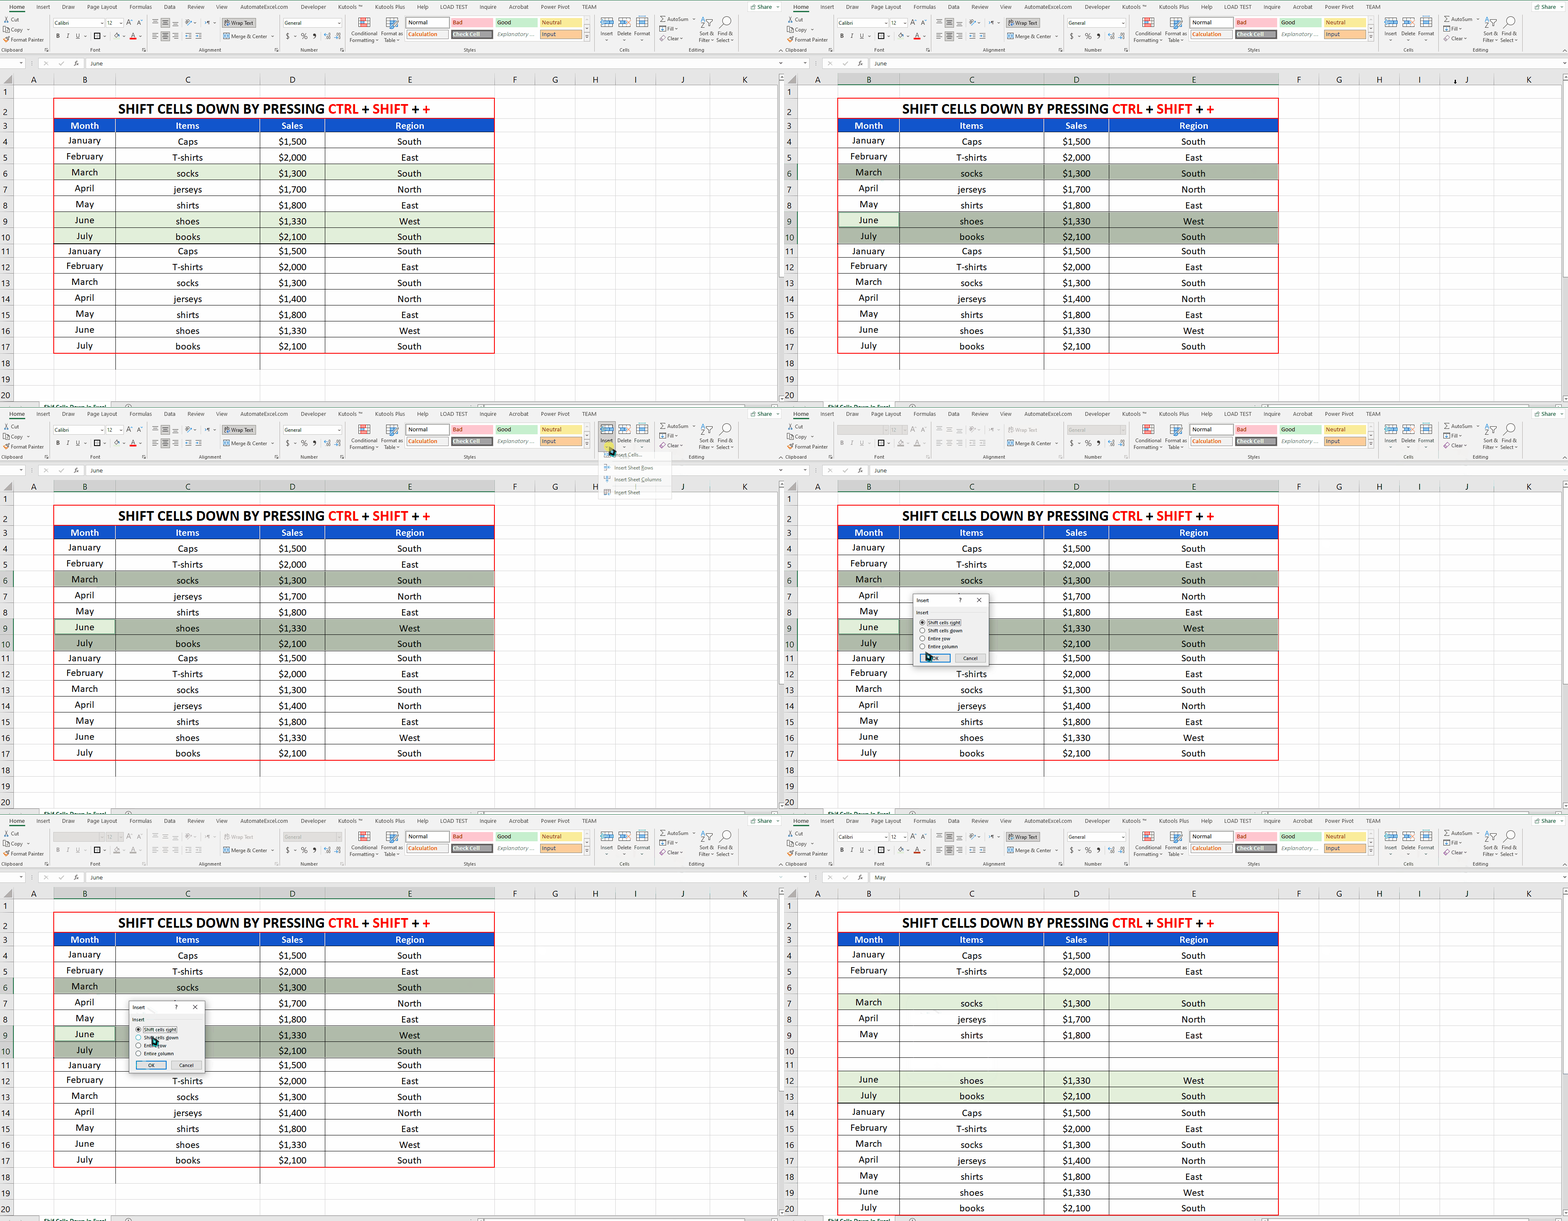
– The third method to shift cells (adjacent or nonadjacent) down is to select the cells and go to the Insert option on the Home Tab. Then click on the Insert Cells option on this menu.
– This will open up the Insert dialog box giving you different options. Choose the “Shift cells down” option. This will shift the cells down by inserting the same number of cells as the selected cells as shown above.


