How to enable dark mode in Google Sheets on Desktop
 By
SpreadCheaters
By
SpreadCheaters
When we are working with Google Sheets at night time, the total white background becomes very stressful for our eyes and creates a lot of strain on our eyesight. Unfortunately, Google Sheets Desktop does not have a built in Dark Mode just like it has in the Android App.
However, Google Sheets Desktop does not stop to create our own dark mode manually or by using third party chrome extensions. So, in this tutorial we will see two methods to create our own dark mode.
Method 1: Create Your Own Customised Dark Mode
Step 1 – Select all Cells in the Sheet:
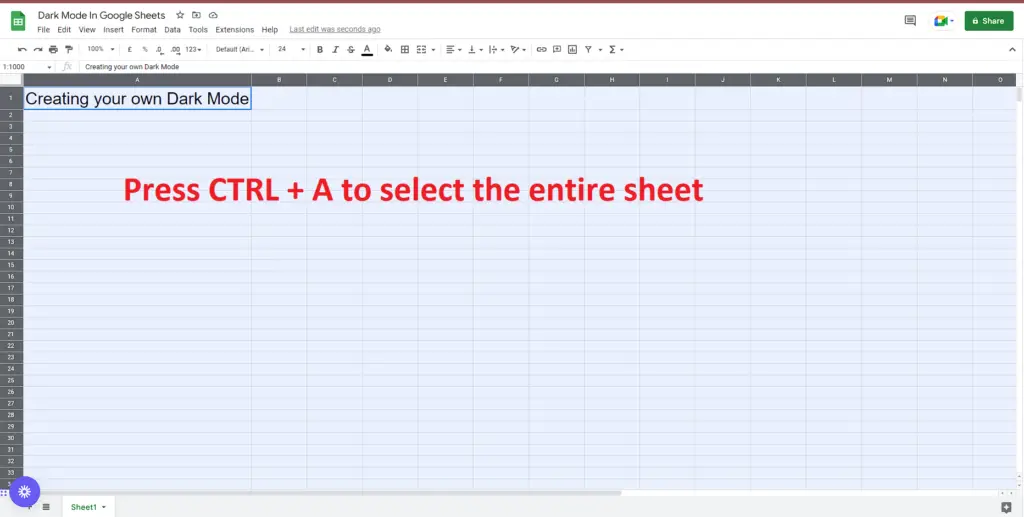
- Open a new blank Google Sheets by clicking here “New Google Sheet”.
- Now select all the cells in the entire sheet by using the “CTRL+A” command.
Step 2 – Change the Background Colour of Entire Sheet:
- The default background fill colour is white and the default colour of the text is black for every new sheet.
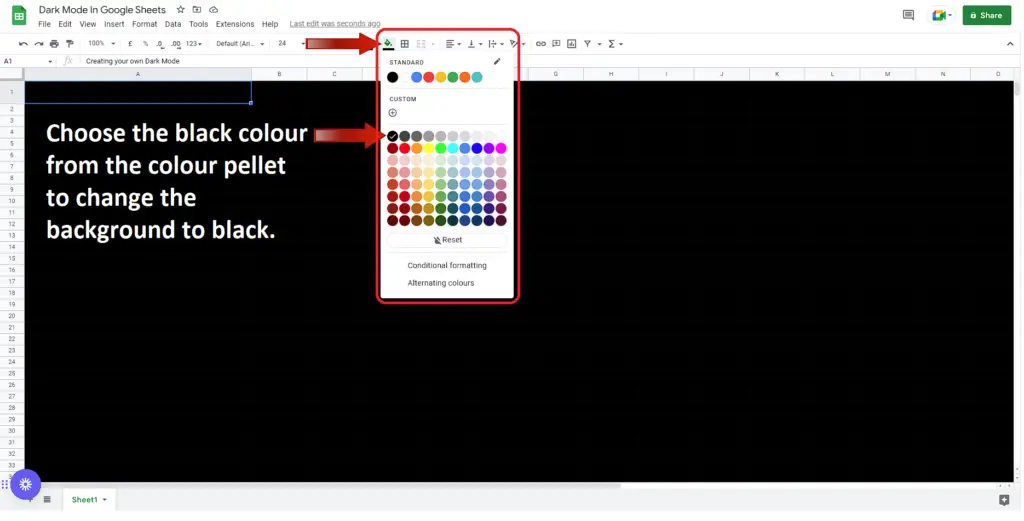
- First we will change the background colour of the sheet to black to create our own customised dark mode.
- To do this, click on the fill colour tool and when the menu appears choose black colour. This will change the background colour of the entire sheet to black because we selected the whole sheet in the previous step.
Step 3 – Change the Text Colour to Grey:
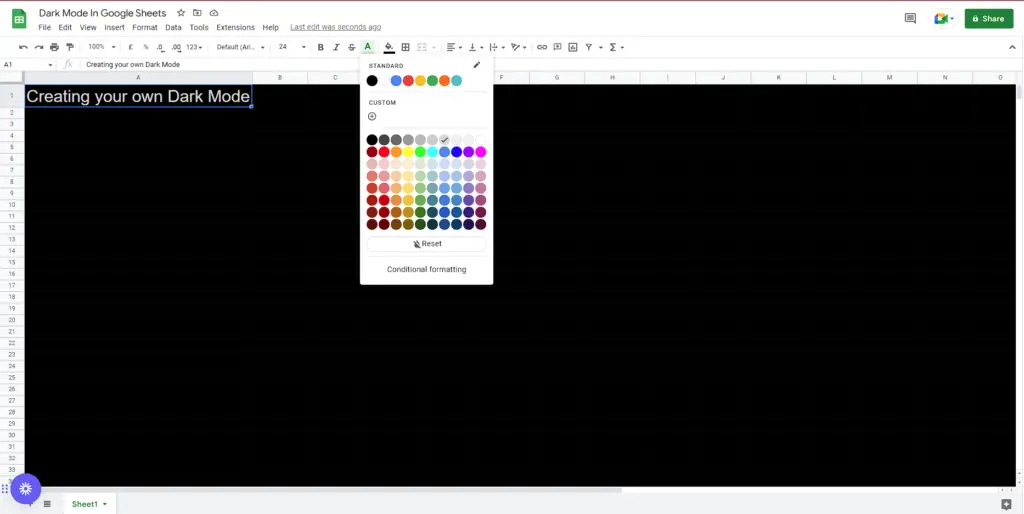
- Now the background colour is changed to black so we won’t be able to see anything that we will write in it right now, because the text colour is also black.
- Therefore, first select the whole sheet again using “CTRL+A”. Then change the text colour to “Light Grey 1” by using the font colour tool as shown above.
Step 4 – Change the Grid Colour to Grey:
- Finally, if you want to get the complete feel of the dark mode, you will need to change the grid colour as well. First select the whole sheet again using “CTRL+A”.
- To do this choose the border tool and when a new menu appears choose the border colour tool.
- Click on the border colour tool and a colour pellet will appear. Choose “Dark Grey 4” as shown above.
The dark mode is in full action now and you will not feel the strain on your eyes any more while working on this sheet during the night.
Method 2: Create Dark Mode through Google Chrome Extension
There is a downside of the first method and that is the dark mode created through it will not be permanent and you will have to repeat the steps all over again. So this might not seem practical.
If you have no problems using the chrome extensions then follow the steps along to use this awesome extension.
Step 1 – Open the Chrome Extension Webstore:
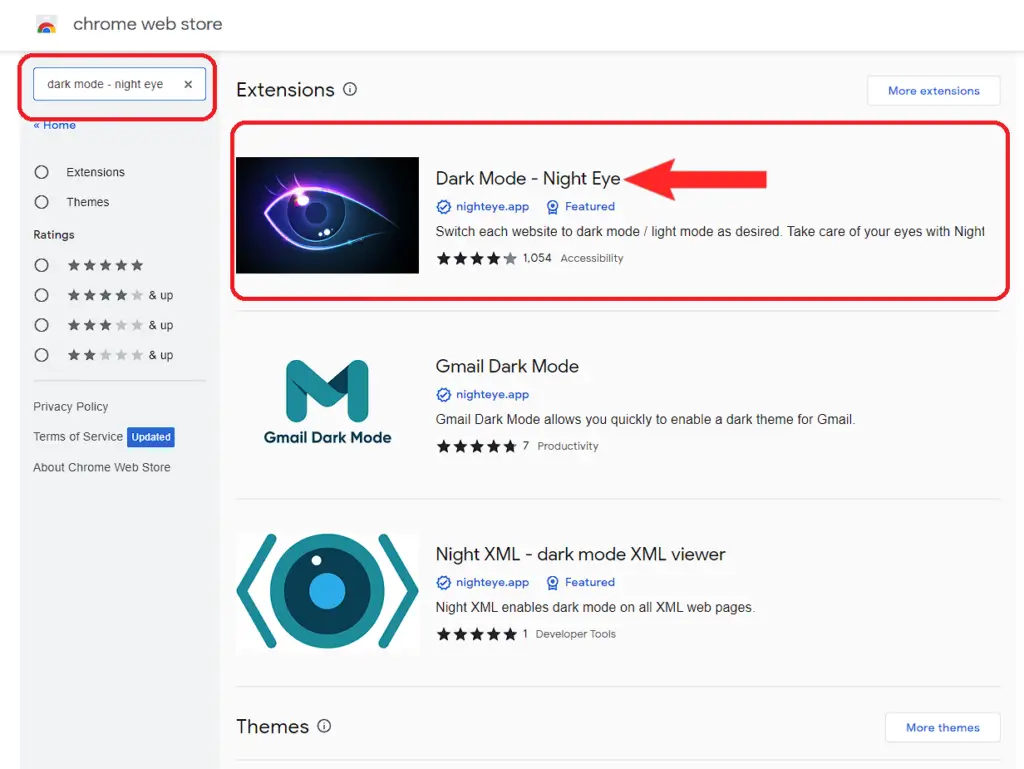
- Open the chrome extension webstore by clicking here; “Chrome Extensions Webstore”.
- Search for “Dark Mode – Night Eye” extension or you can go there directly by clicking here.
Step 2 – Install the Chrome Extension:
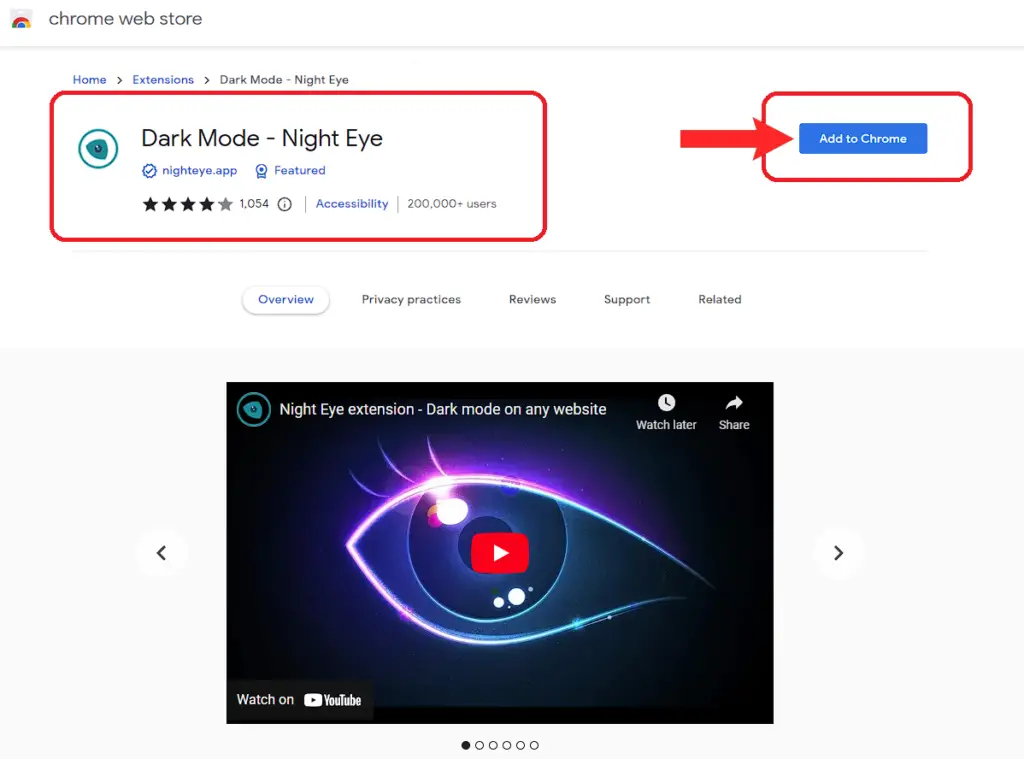
- Now click on the “Add to Chrome” button as shown above.
- When you click on the add to chrome button a pop-up dialog box will appear. Press the “Add Extension” button.
Step 3 – Pin the Chrome Extension:
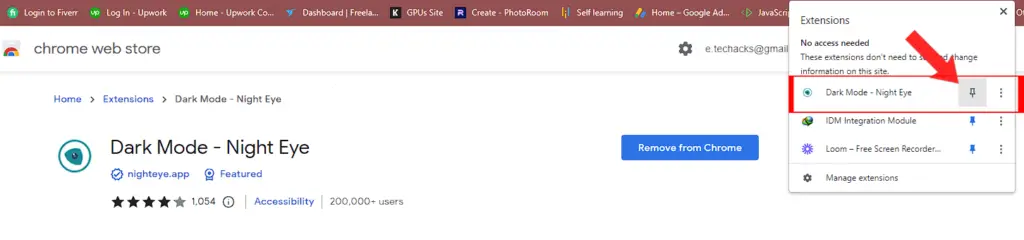
- After installation of this extension. Pin this extension by going to the top right corner of the chrome browser as shown above.
Step 4 – Set up Dark Mode – Night Eye Extension for first use:
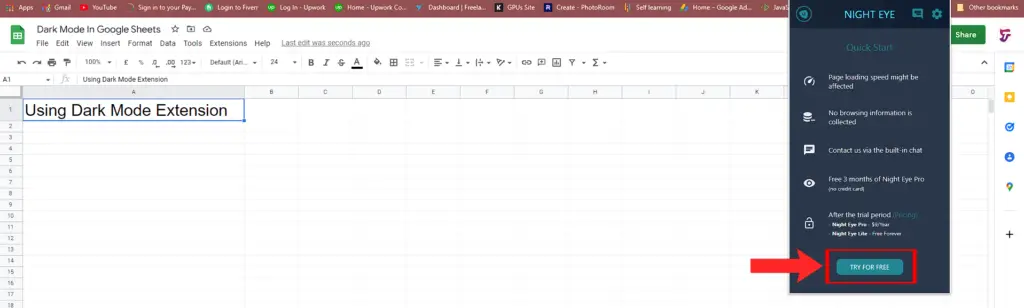
- Now open a new Google Sheet by clicking here.
- Click on the extension’s icon to open it. Then click on “Try For Free” as shown above.
Step 5 – Enable Dark Mode in Google Sheet:
- Now open the Dark Mode Extension.
- You will see three options: “DARK”, “FILTERED” & “NORMAL”.
- Select the “DARK” option by clicking on it as shown above.
- Voila! the dark mode has been enabled and it has been applied permanently to every sheet that you will open after enabling this option.