How to rotate a table in Word from portrait to landscape
In this guide, we’ll walk you through the process of rotating a table in Word from Portrait to Landscape orientation. This can help you create a more polished document and allow for more data to be displayed on a single page. To illustrate this process, we’ll use an example dataset that includes information about Vehicles and their Fuel Types, which is currently presented in Portrait orientation.
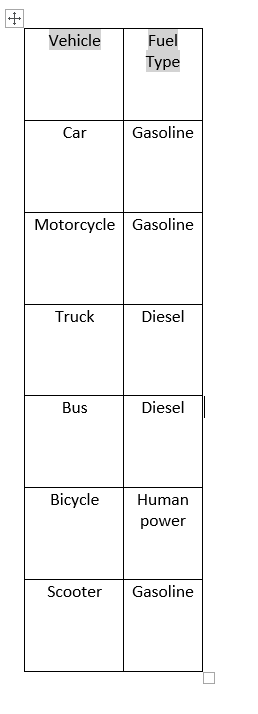
After we examine this dataset, we’ll provide step-by-step instructions on how to rotate the table to Landscape orientation. By following these instructions, you’ll be able to easily adjust the orientation of any table in Word and enhance the overall visual impact of your document.
Method – 1 Changing Text Direction.
Step – 1 Selecting the table.
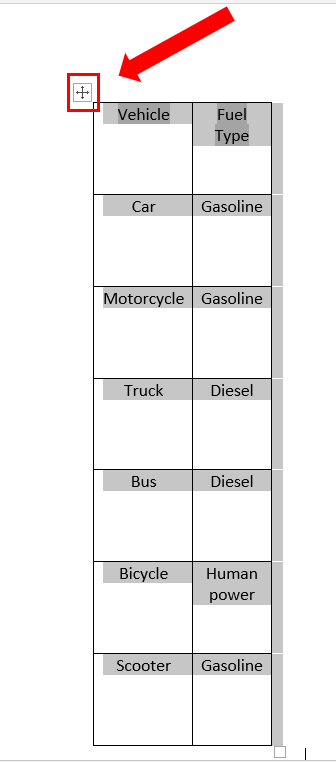
- Click on the four arrows icon on the top left of the table.
- Now your whole table is selected.
Step – 2 Changing the text direction.
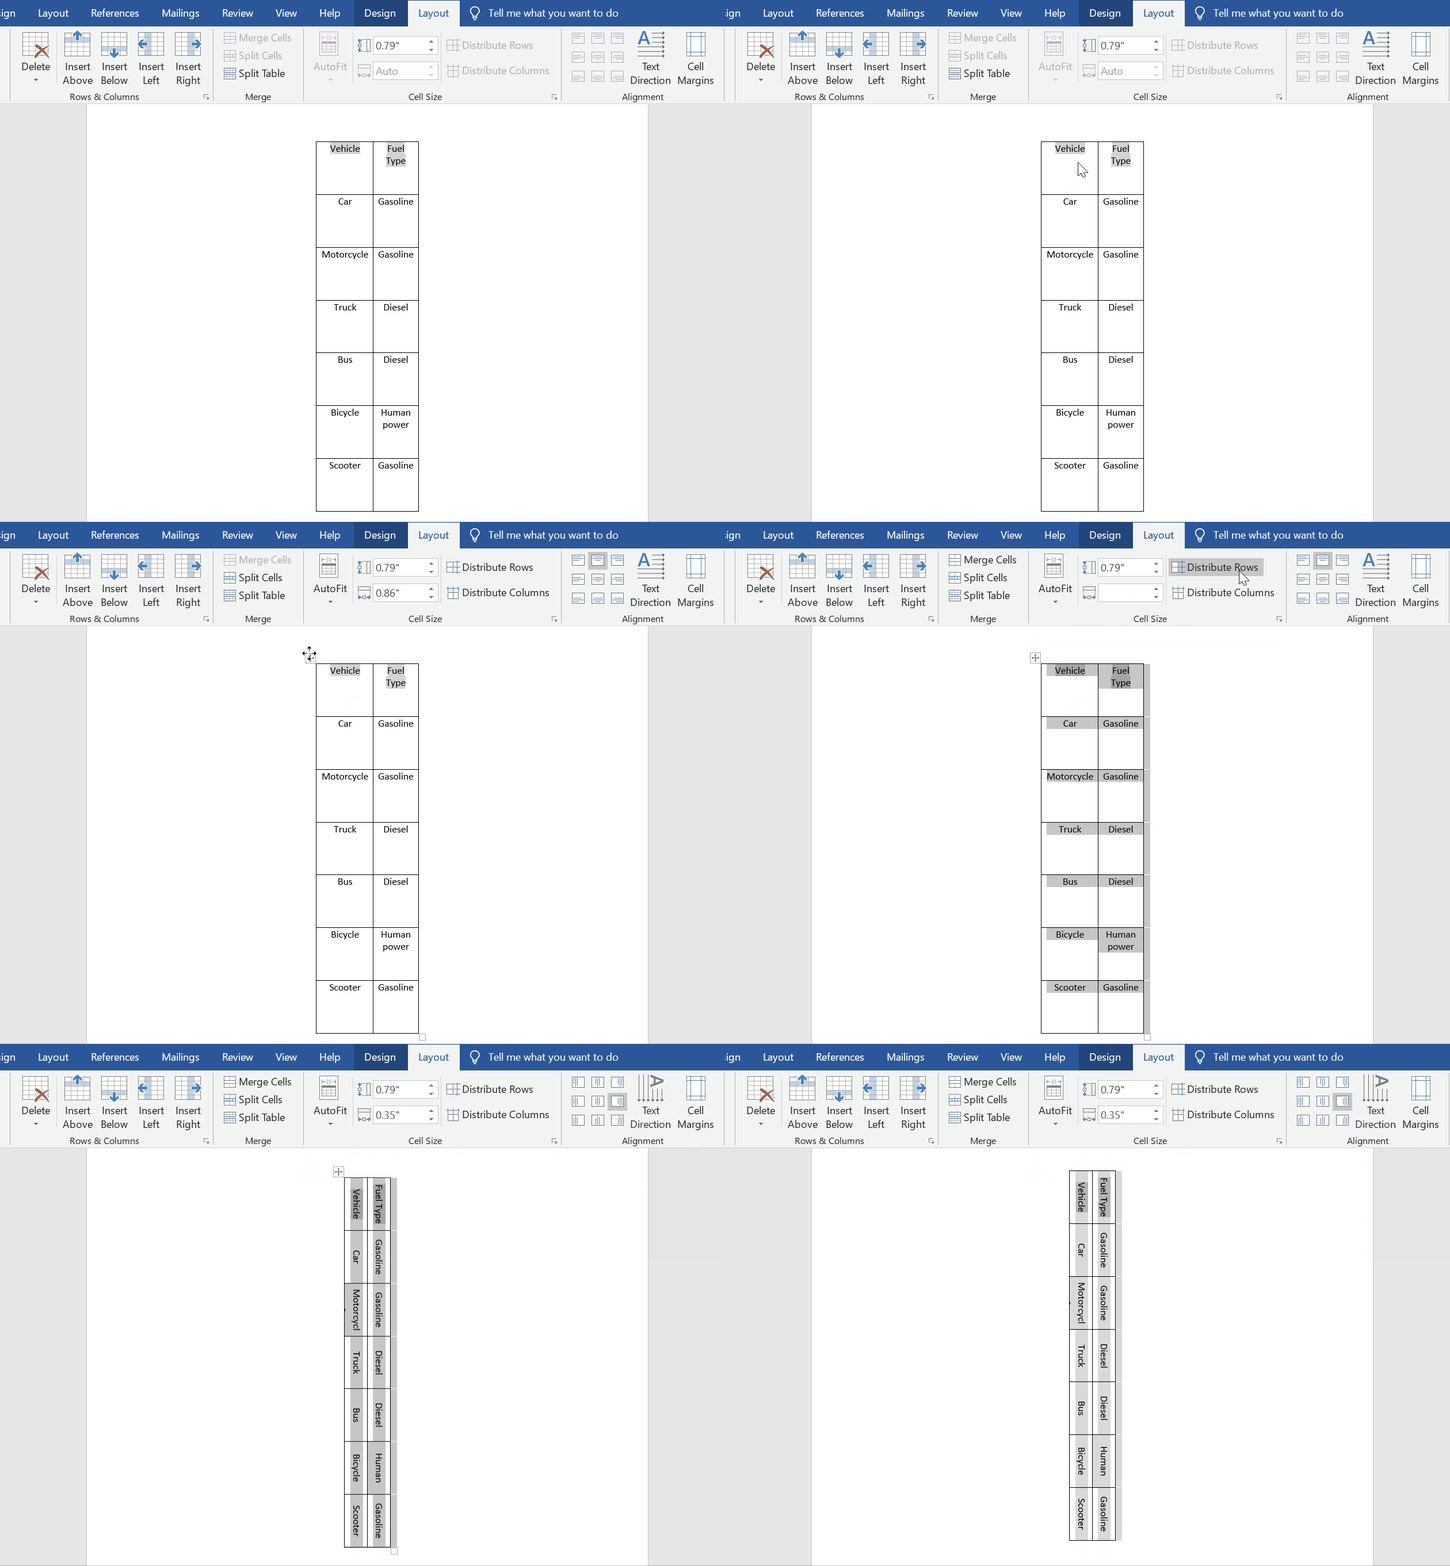
- Click on the Layout tab.
- Click on the Text Direction command in the Alignment group.
Step – 3 Rotating the Table.
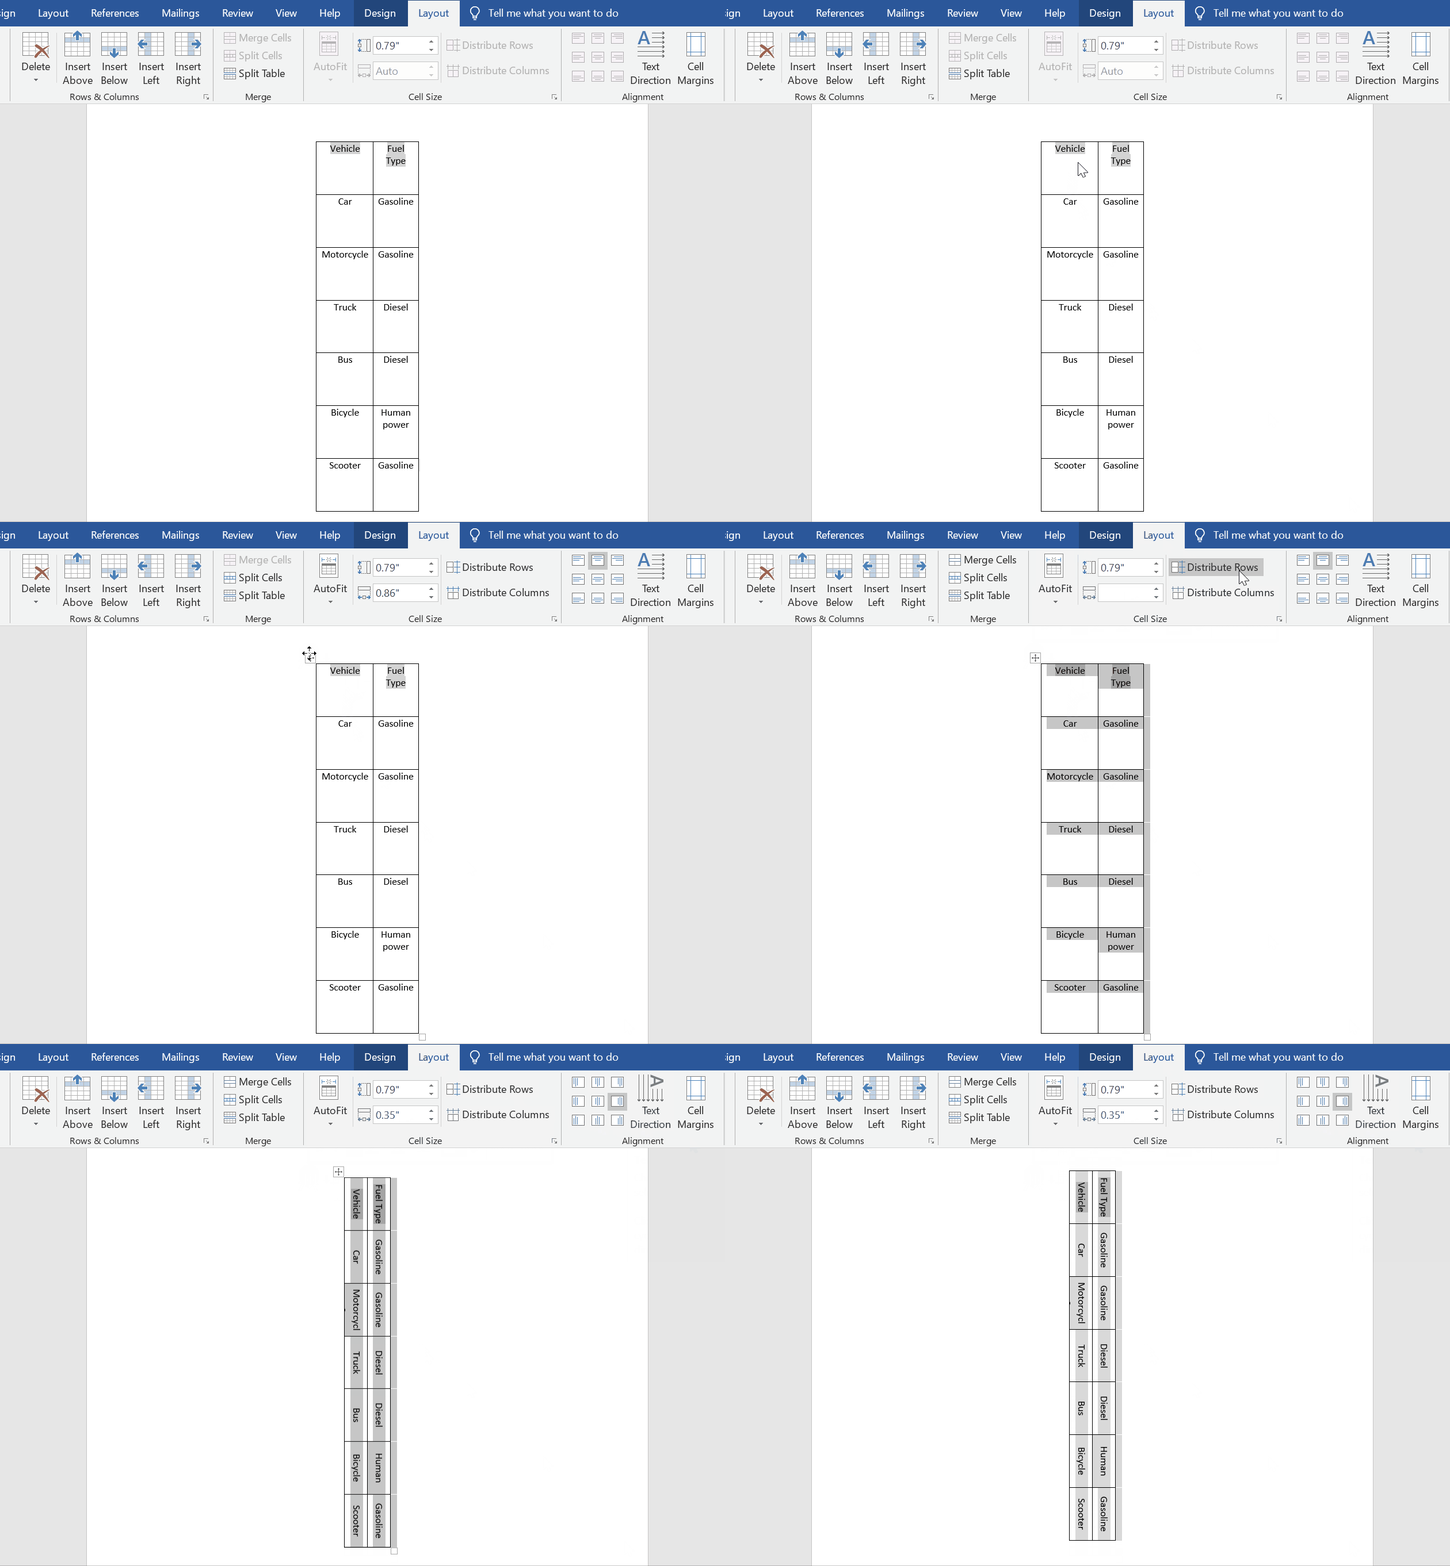
- In the Alignment group click on the Text Direction command.
- This will change the direction of the text to make the table in landscape format.
Method – 2 Using Paste Special.
Step – 1 Copying the table.
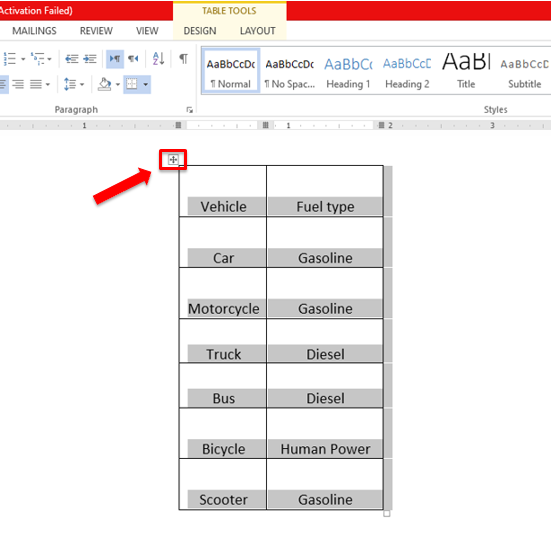
- Move the cursor on the four arrows icon on the table’s top left.
- Clicking on the four arrows icon will select the entire table.
- Press Ctrl + C to copy the table or Ctrl + X to copy and cut it.
Step – 2 Paste Special option
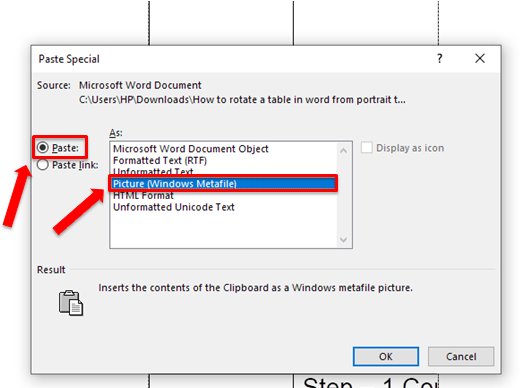
- Click on the Home tab
- Open the dropdown menu of Paste in the clipboard group.
- Then click on Paste Special.
- In the Paste Special dialog box, click on Picture (Windows Metafile) under the ‘As:’ options, and ensure the ‘Paste’ check box is checked.
- Click OK.
Step – 3 Rotate the table.
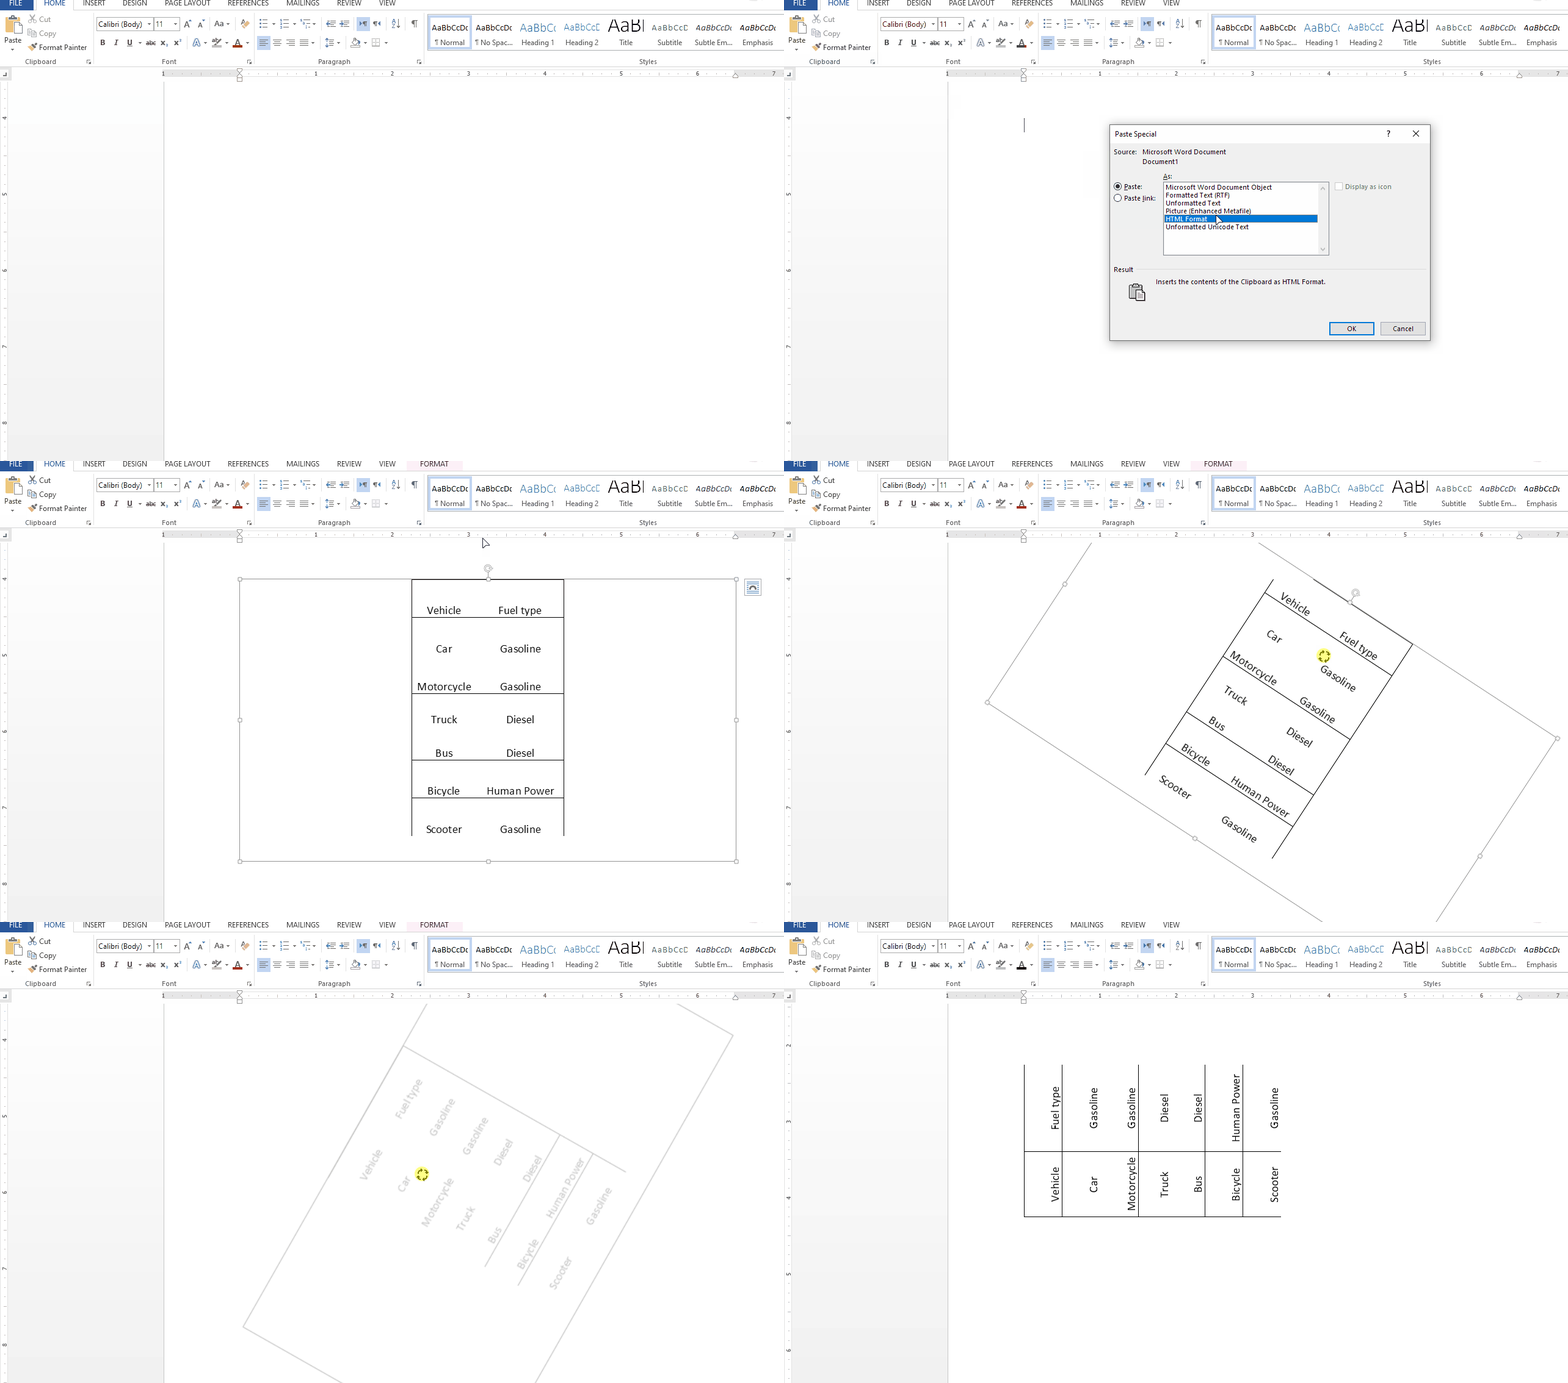
- After pasting it as a picture, select it.
- Rotate the picture by clicking on the circular arrow at the top as shown above.
Method – 3 Using Text Box.
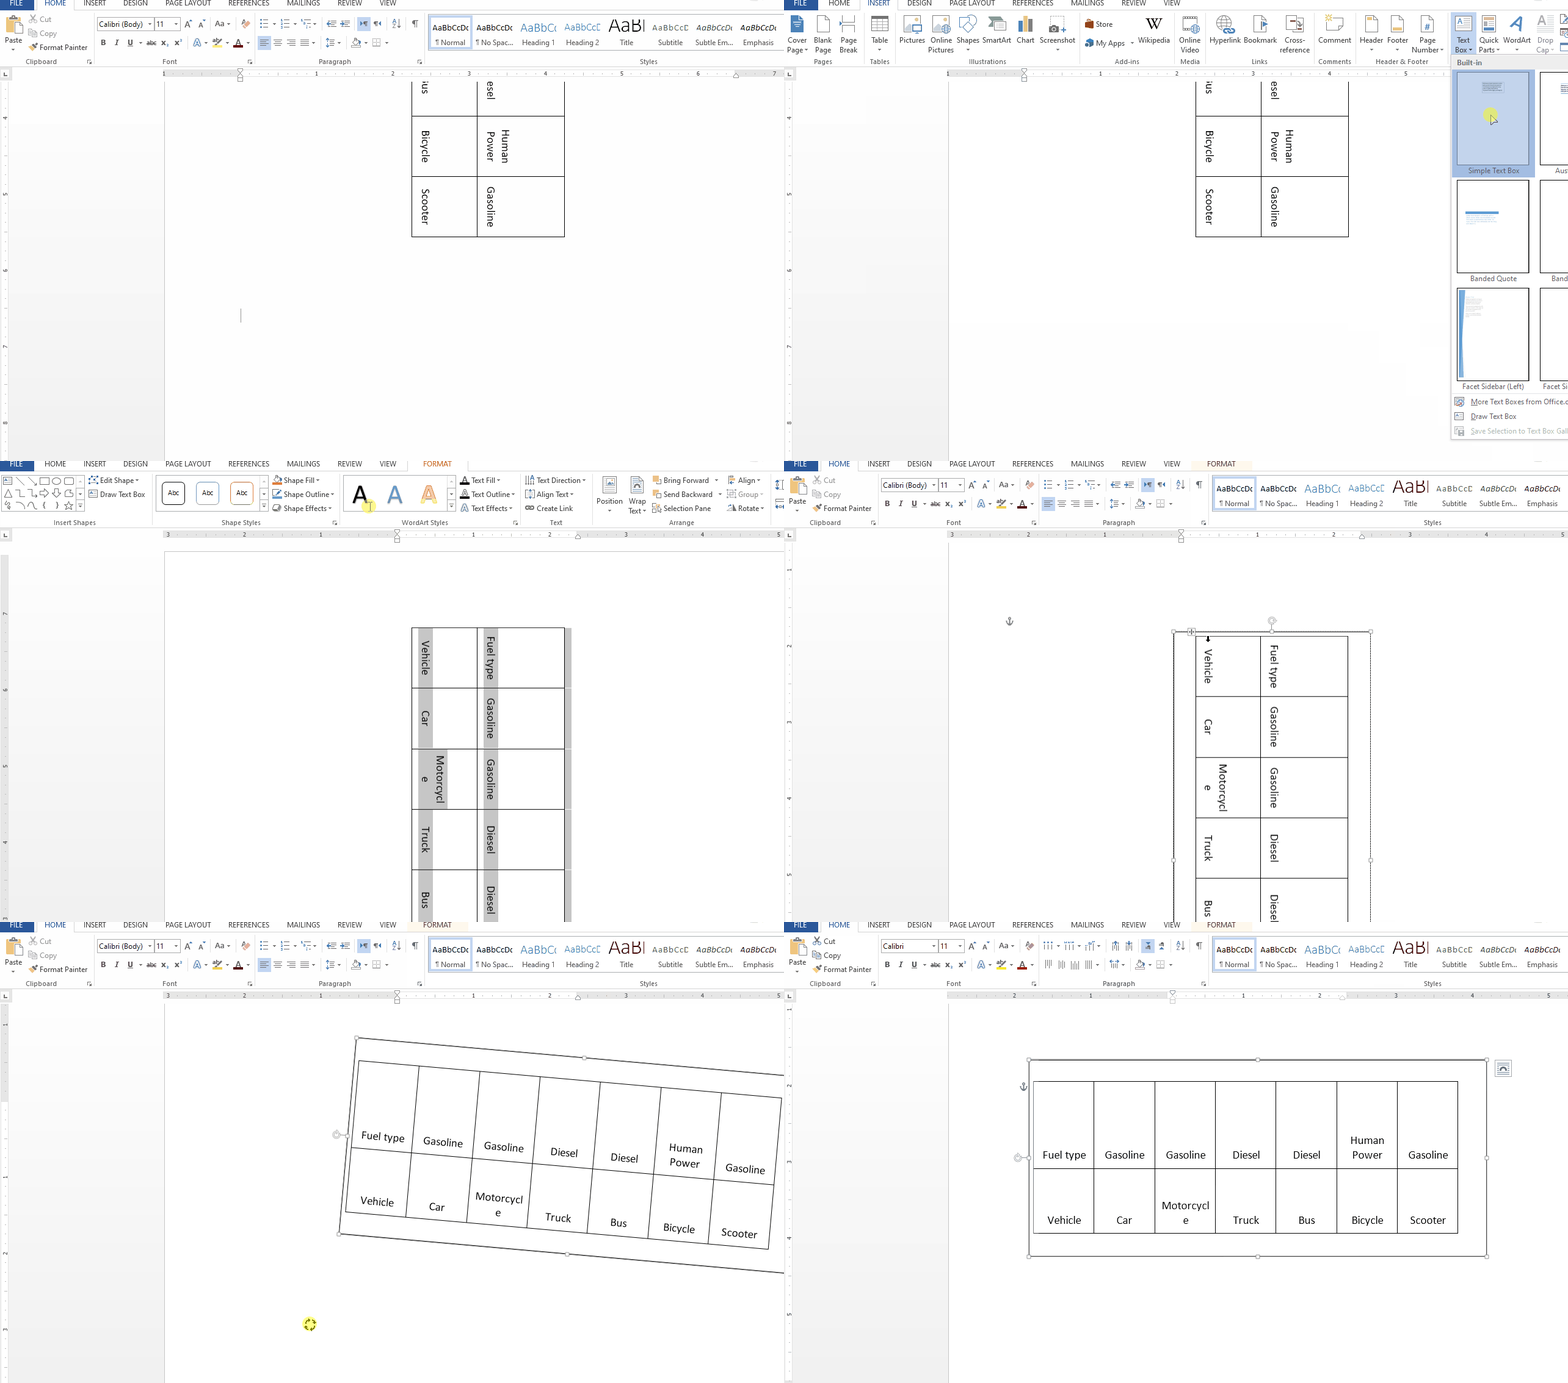
Step – 1 Open Text Box options.
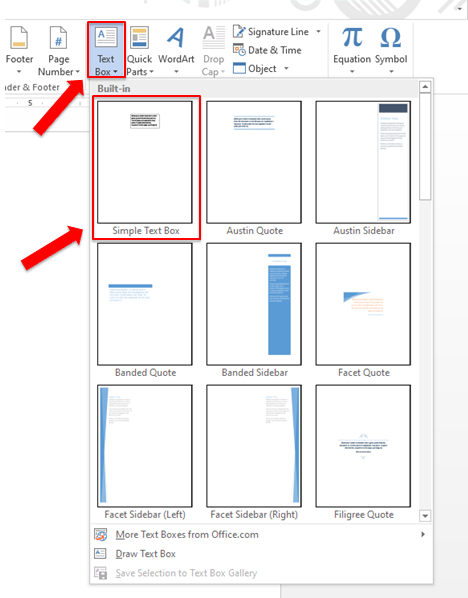
- Click on the Insert tab.
- In the Text group click open the dropdown menu of Text Box.
- Then choose Simple Text Box.
Step – 2 Copy the table.
- Move the cursor on the four-fold arrow on the table’s top left.
- Clicking on the four-fold arrow will select the entire table.
- Press Ctrl + X to cut and copy the table.
- Click inside the Text Box and paste the table in it using Ctrl + V
- Now the content of the table is editable and you can also rotate it from portrait to landscape.
